Wrapping a gift in pretty paper and gorgeous ribbon is half the fun of present giving! Make your own personalised gift wrap on the computer with these super easy instructions – perfect for newborn gifts and anybody, really!
Your toolkit
All you need is access to a computer and a printer that prints in colour and ideally A3, or for really small gifts, A4 is totally fine.
Step 1 – select your symbol
Choose a symbol in Microsoft Word that is fitting for the receiver. You can find a wide range of symbols in Word simply by clicking the 'insert' button and selecting 'symbol' from either the menu or toolbar.
Symbols range from smiley faces and skulls, to ambulances and aeroplanes, to famous landmarks, patterns and more.
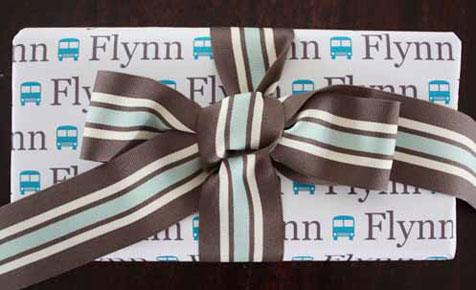
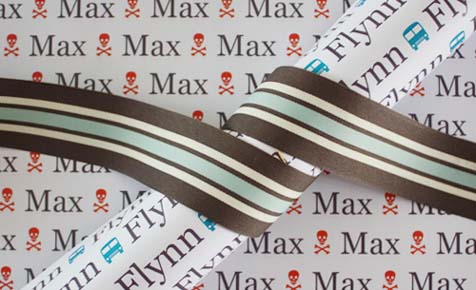
The cute skull and crossbones symbol shown here, and the bus used in the below picture, can be found in Word symbols. There's also a sweet flower which is perfect for baby girls.
Step 2 – add a name
After inserting the symbol, type the name of the recipient.
Highlight the symbol and select the colour you want. Do the same for the text and select a different font style if you wish (Georgia used here).
Next highlight the entire text and select the font size.
Step 3 – copy and paste
Simply copy and paste the text and symbol until it fills the entire page and print your personalised gift paper!
Step 4 – the finishing touches
Now choose a pretty ribbon to match your paper (Martha Stewart used in picture), wrap your gift and tie a sweet bow around it.
A cute idea for girl gifts is to slide a cut flower from the garden under the bow to make it extra pretty and girly!
For boys, coloured string, or raffia are fab alternatives to ribbon.
Browse Kidspot Christmas crafts


Leave A Comment
You must be logged in to post a comment.