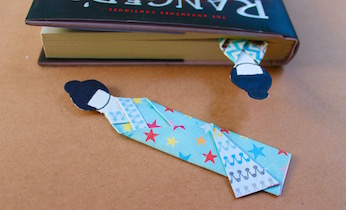
Make a Japanese doll bookmark
This easy origami craft will also yield some cute little bookmarks.
What you need:
- 11cm x 8cm piece of coloured paper (double-sided is best, but not essential)
- 1 x A4 piece of white card
- glue
- finepoint black marker pen
Number of players:
Activity:
On the plain white card, trace out a rectangle, circle and semi-circle, as shown in the video. Cut it out and colour it in with the black marker pen.
Place the piece of coloured paper on the table in front of you, short sides top and bottom, main coloured side face up.
Fold over the top, about 5mm. Turn the paper over, main coloured side should now be face down.
Place the doll's head and body figure in the centre of the top edge, with the head just sitting up out the top.
Fold the top right hand side of the coloured paper across the doll's 'body' diagonally (see video.)
Fold the left hand side the same way.
Now fold the entire right hand side again, so that the two edges along the bottom line up horizontally (see video.)
Do the same on the other side so that the lower horizontal edges line up.
Now fold the top flap back, along the bottom edge, diagonally about 1cm, to create a triangular corner at the bottom of the doll's robe (see video.)
A dab of glue at each fold will hold the doll in place so you can use her as a bookmark.