Promotion for Harvey Norman and Cricut
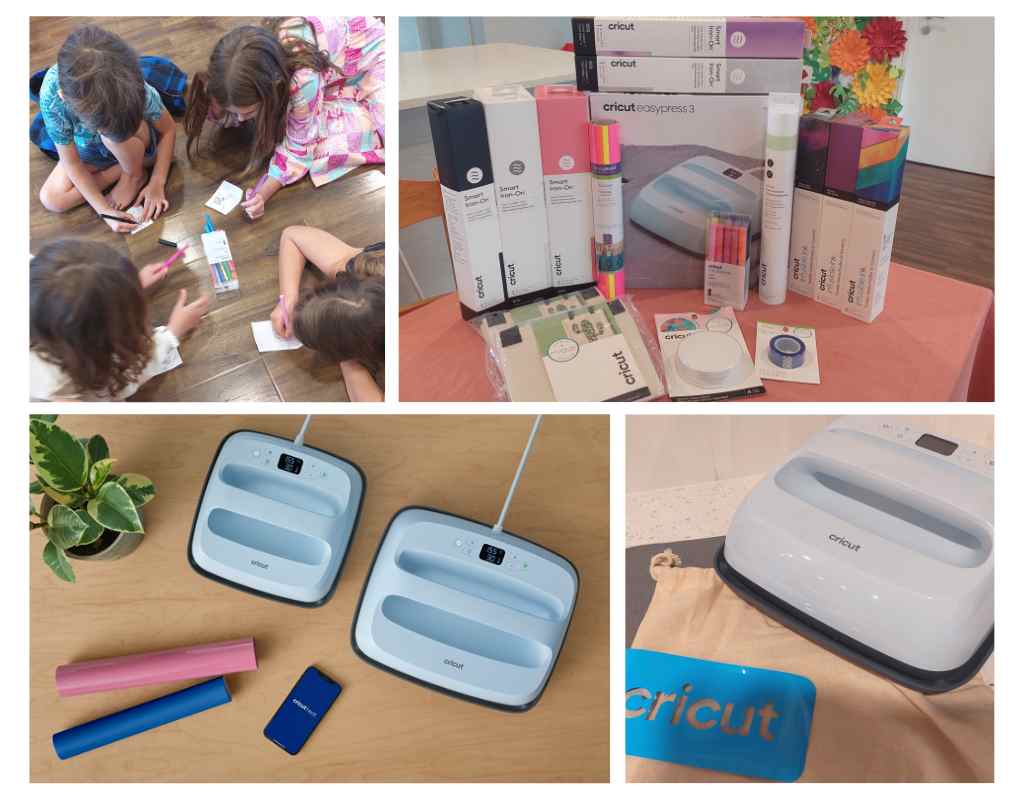
Cricut has just released their new Cricut EasyPress 3® and our resident Cricut fan, Katie, was lucky enough to be one of the first to give it a try.
Cricut and Harvey Norman have a fantastic retail partnership that means an extended range of Cricut products is available to the growing community of New Zealand creators and aspiring makers alike.
Harvey Norman stores across New Zealand provide access to a great range of Cricut smart cutting machines that work with an easy-to-use app to help you design and personalise almost anything – custom cards, unique apparel, everyday items, and so much more!
Cricut EasyPress 3®
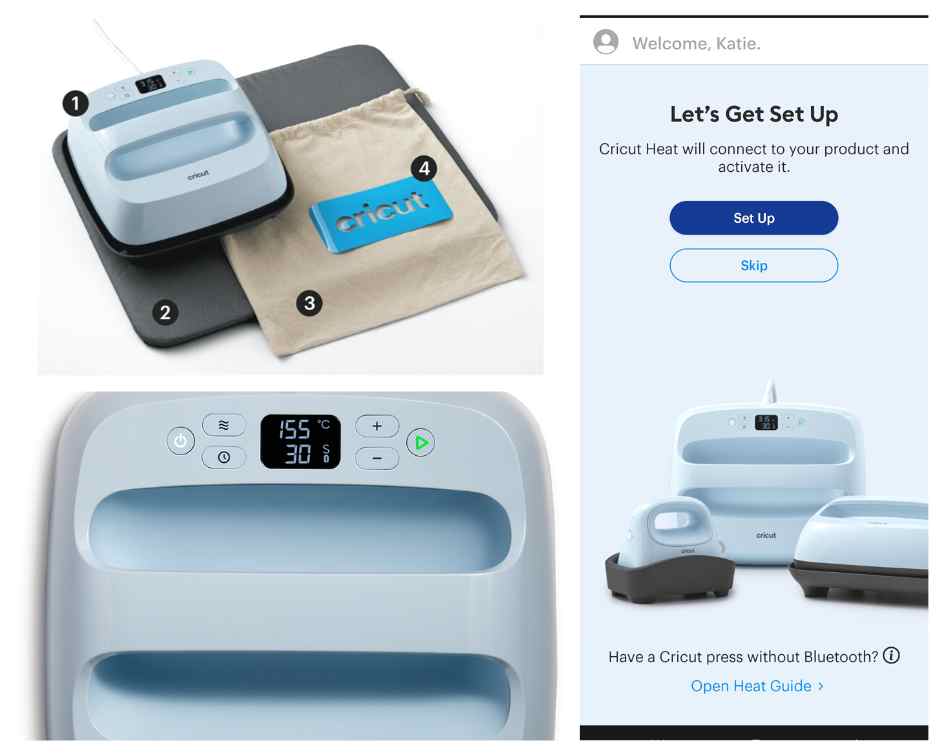
The new Circuit EasyPress 3® can be used with the Cricut Heat™ app, which makes all of your heat transfer projects a breeze. When you first get your EasyPress 3, you will need to set it up using the Cricut Heat™ app, follow the instructions, and connect to the app using Bluetooth® .
When connected, you will be given a step-by-step tutorial for your first project with your EasyPress 3 storage bag and pre-cut iron-on that was included with your new EasyPress 3.
With the Cricut Heat™ app (only compatible with EasyPress 3) all the guesswork of temperature and process is done for you. From here you can either start a new project or select a previously used project.
When starting a new project just follow the steps, select your transfer material, and select what you’re applying it to – you will then get a project overview, which tells you the recommended settings, the steps, and what you need. There is also an option to view detailed instructions and to see a video tutorial.
When you’re ready, you can press, “Send Settings to Easy Press”. While your EasyPress 3 is heating up you will see a little video pop up showing you the process and setup for the heat transfer for your project.
Other ways to use your EasyPress 3 are to set up a customized setting in the Heat app or you can manually change the temperature and time on your EasyPress 3 as well.
The Cricut EasyPress 3® come in two sizes – the 9×9 and the 12×10.
Take a look at the projects Katie did using the Cricut Maker 3®, Cricut Easy Press 3®, and Cricut Design Space.
Cricut Glow In The Dark Iron On
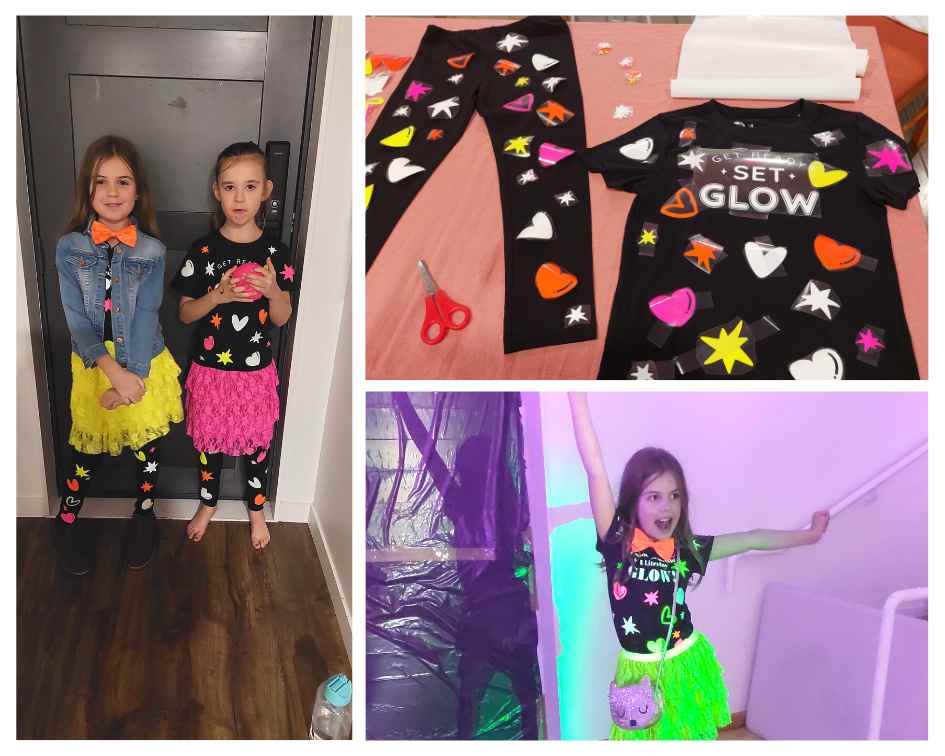
This is a fairly new product to New Zealand so I wasn’t quite sure what to do with it or how well it would work but when I got notified of an upcoming school disco where the theme was Glowchella, I knew exactly what I was going to do.
Off to the shops I went to buy black clothes and Cricut Neon Glowsticks sampler Iron-On. My elder daughter came up with the text she wanted on her top and my younger daughter chose one from Design Space.
I cut the text out using the Glow In the Dark material and a mixture of stars and hearts from the Glow In the Dark and Neon Glowstick sampler then weeded my project, cut up all the hearts and stars, and individually taped each one down to the outfit using Cricut’s heat resistant tape.
I’m not going to lie, this project took me longer than I had anticipated, but it was worth it as the result was amazing! The Glow in the Dark material truly glows brightly, and while at the disco under the black-lights, the Neon Glowstick material also glowed. Everyone loved their outfits and my younger daughter Ruby even won best dressed at the junior disco.
Infusible ink
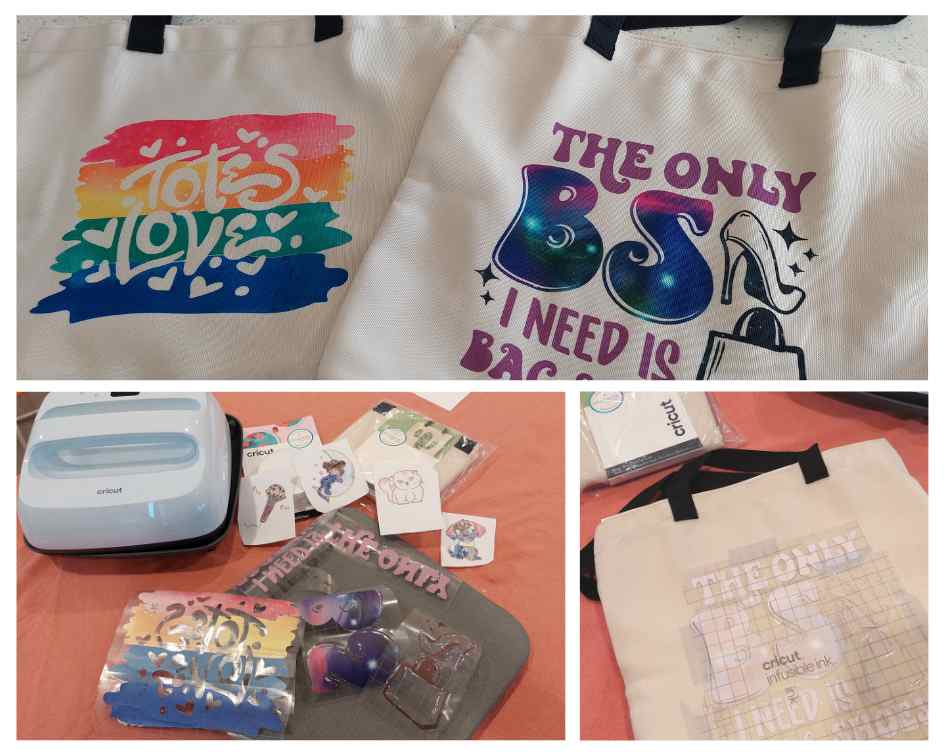
I’ve only worked with Infusible ink a couple of times, but I know if it’s done correctly the finished products can look amazing. Infusible ink generally seems to last longer than Iron-on Vinyl.
Using Design Space images, Cricut’s Infusible Ink Blank Tote Bags, and Infusible Ink sheets, I created two super cute tote bags. It’s important to remember you cannot layer with Infusible Ink, so make sure your design is no bigger than the heating plate of your EasyPress 3. Take this into consideration when deciding what EasyPress 3 size will suit your needs best.
As I was using multiple Infusible Ink sheets, I had to use the Design Space tools, to slice, weld, and contour my images to get the effect that I wanted. If you have not used these tools before you can find helpful videos and guides online to help. It’s also important to remember that Infusible Ink can only be used on 100% polyester or compatible blanks. However, since this review, I have heard that you can transfer Infusible Ink onto Cricut Glitter Iron-on so I will have to give that a try.
Cricut coasters
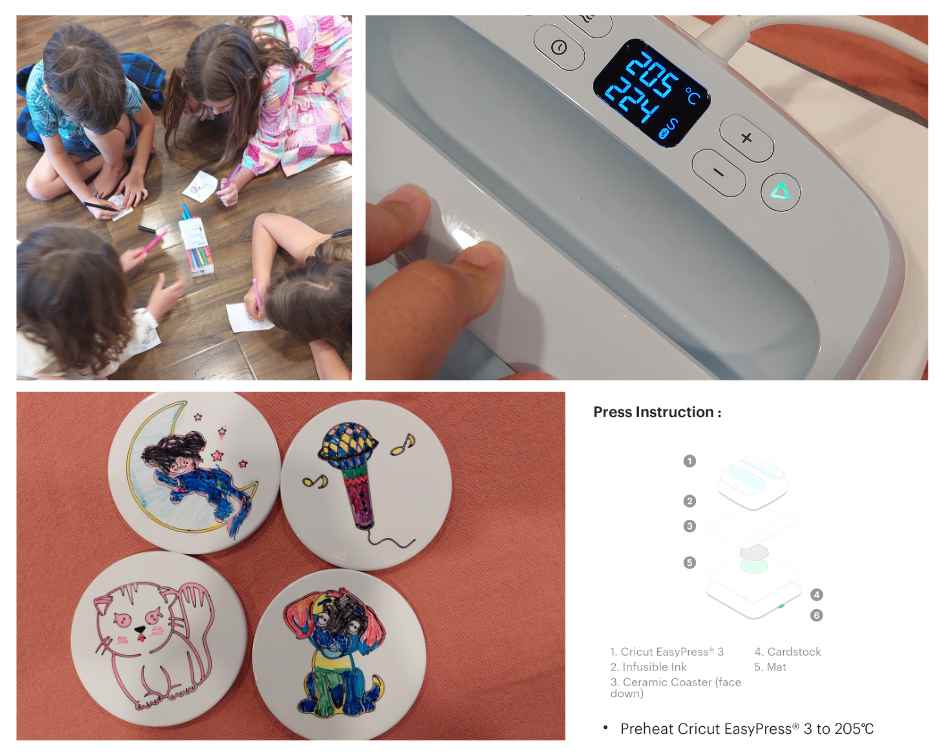
Next, it was time for the kids to have some fun, and for me to keep them quiet and entertained for a while, using Cricut Infusible Ink pens and blank ceramic round coasters, and a sheet of copy paper.
The kids chose a picture they liked on Design Space. Using the black Infusible Ink pen my Maker 3 drew the picture each child had chosen on the copy paper. The kids then coloured in the picture using the other pens. This was a fun activity that all the kids enjoyed doing. They were all super happy and excited with the end result once I transferred their creation onto their own coaster using my EasyPress 3.
So many uses
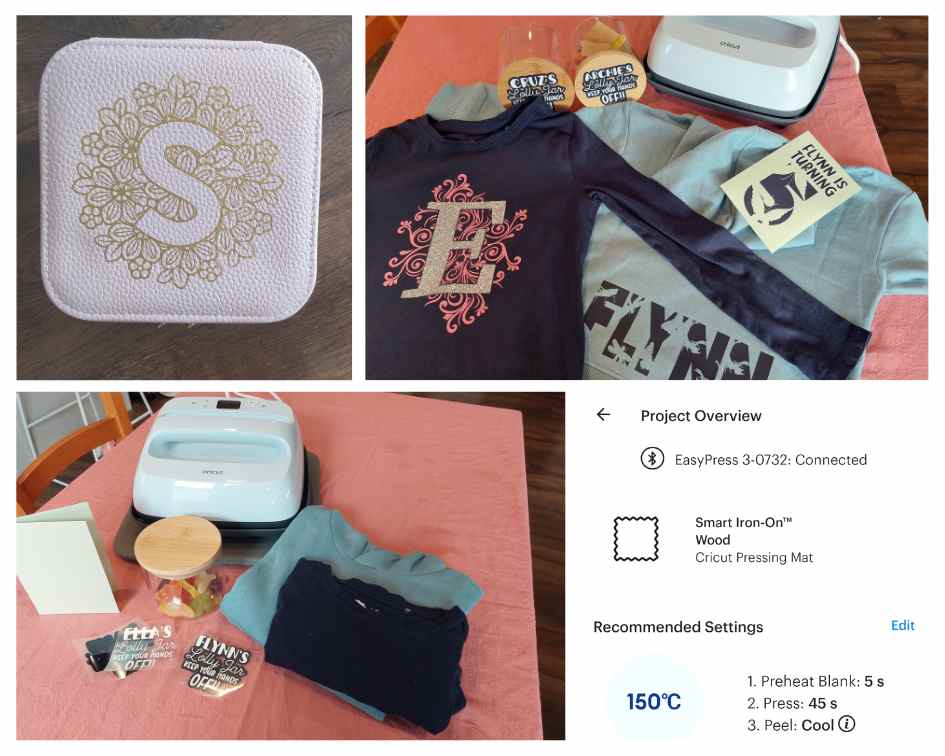
When most people think of Iron-on or Heat Transfer, their minds would probably jump to fabrics as the material to transfer to, but I wanted to show you that there is so much more you can heat transfer to using your EasyPress.
I made these cute little lolly jars with a bamboo lid, a birthday card using Iron-on, and personalised a faux leather jewellery box.
You can also heat transfer to chipboard, felt, mesh wool, and lots of other materials – just check out the Cricut Heat™ app to see what you can transfer to.
If you’re not sure, just ask on one of the Cricut Facebook pages and someone should be able to help you.
Katie’s thoughts
I really enjoyed using the Cricut EasyPress 3® – being able to send the setting straight from my phone, and seeing the step-by-step instructions made the process super easy. If you’re considering purchasing a new EasyPress 3 make sure you have a device to download the app to, as this is needed for the initial setup but not essential to use the product. I also recommend that you have a Cricut pressing mat- this is not essential as you can use a towel but you will get better results using the mat.
The one option the Heat app does not have, but hopefully one day, is an option to be guided through laying Iron-On in a way that reduces shrinkage.
Katie was provided with Cricut products from Harvey Norman for the purpose of this review. All views are those of the reviewer.
See more: