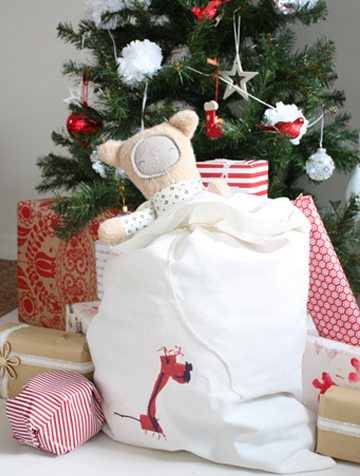
Did you know that you can easily turn your child’s artwork into a T-shirt, cushion or for a little festive flavour a Santa sack? It’s easy peasy and is a nice personal touch under the Christmas tree. Get your child to draw a Christmassy image eg a tree, Santa himself or a reindeer as Zak did here and then transfer it to fabric with this magic paper.
You’ll need
- Inspired White T-Shirt Projects A4 Transfers, from Spotlight
- An image. If you have Photoshop and are able to delete the background, any image is fine. Otherwise try creating a border around the image or drawing on a coloured background so the transfer surround won’t show up.
- Fabric: if you are unable to make a sack yourself, try using a plain pillow case. If you’re making from scratch, Duck cotton has a great thickness and feel to it. (see making sack instructions below)
- String or ribbon to tie around the filled-up sack
Step one
Scan or photograph the image (in natural light, without a flash, straight from above) and open it in a picture editing program on your computer.
Step two
Crop the image until you’re happy with it and play around with the size. Do a print test for size on plain paper.
Step three
Once you’ve got the right size, print onto the transfer paper. Wait for it to dry for 30 minutes.
Step four
Cut around the image (curves are best to avoid peeling). If the picture is on coloured paper, cut it into a square or circle with the image in the centre. If it’s on white, follow the shape of the picture.
Step five
Place the image face down in place on your sack and use a hot iron over it. Follow the instructions carefully on the transfer paper packet as different sizes require different times.
Step six
Peel away, stuff the sack and tie with a bit of string!
To make the sack from scratch
Step one
Cut your fabric into one large rectangle 60cm by 45cm and fold width ways with right sides together so you have the correct size of the sack.
Step two
Use a sewing machine to stitch along two open sides in an L-shape, leaving the one 45cm-side unstitched as the sack’s top.
Step three
Fold the top over twice and stitch all the way around to create a neat seam at the opening.
Step four
Turn inside out and apply the transfer (as above).
Browse Kidspot Christmas crafts
Browse Kidspot Christmas crafts