
A little warning: this gets addictive! Paper snowflakes are fun to make, especially as each one is different! They look fabulous stuck on a wall, strung together in front of a window or placed over contrasting coloured gift wrap as present toppers. You could also glue a small one on a dark-coloured card to make handmade Christmas cards or you could laminate a huge A3-sized snowflake as a placemat – the uses are endless.
To make paper snowflakes you’ll need:
- Paper (plain white A4, coloured or patterned – it’s up to you)
- Scissors
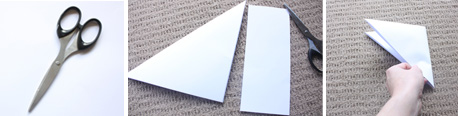
Step one
Cut an A4 size sheet into a square by folding a corner into a triangle and cutting off the excess rectangle. You can use the leftover strip to make smaller snowflakes.
Step two
Fold the triangle in half to make a smaller triangle.
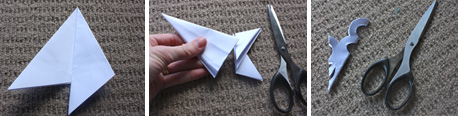
Step three
Keep the ‘open’ end of the triangle to the left and the main fold on your right. Then visually divide the triangle into thirds. Fold the right-hand side down so the bottom right corner is poking down below the bottom of the triangle.
Step four
Fold the left hand side over on top of the other side so it resembles an arrow head.
Step five
Turn over to reveal a straight line across the top of the smaller triangles. Cut along this line to even it off.
Step six
Cut shapes into both sides of the triangle and unfold to reveal your shape!
Note: This cut (with the main fold on the right-hand side and the ‘open’ side on the left) makes the large six-pointed star in the centre of the main image.
So simple and so cool! I’m going to get my 5 year old to help me do some of these for Christmas Day!! She got some paints from her kindy as a Christmas present so she can use these to paint some up, fun! 🙂
This is a great activity to do! I’m going to get the kids to make some snowflakes made tomorrow so we can have the dining room nicely decorated for Christmas Day ❤