The Thaumagician’s Revenge (#2 The Rise of the Remarkables) by Gareth Ward | Kids Book Review

Sponsored content 

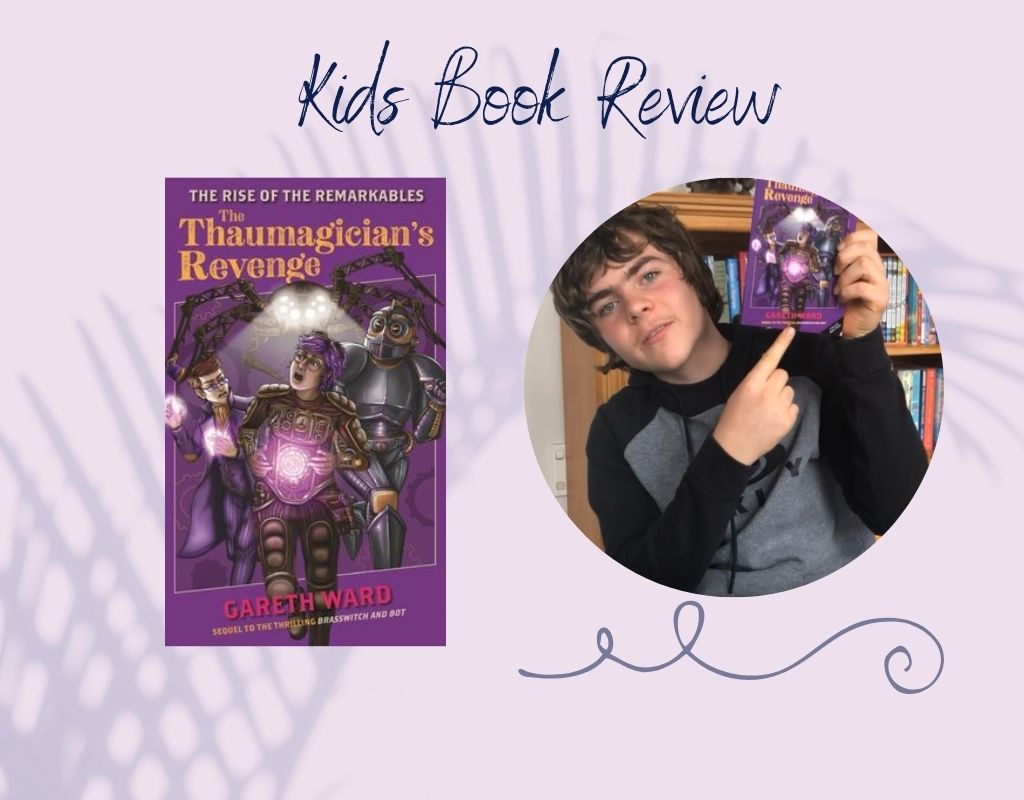
The Thaumagician’s Revenge is the second instalment in this crackingly paced, steampunk thrill ride from award-winning master of the genre, New Zealand author Gareth Ward.

Following on from the dramatic events of the first book in “The Rise of the Remarkables” duology, Brasswitch and Bot, we find Wrench and Bot on the hunt for Plum with the aid of Thirteen. Plum is more dangerous than ever and appears to be recruiting more aberrations – determined to re-open the rupture.

Meanwhile, the events of the Minster Schism have drained Wrench of her magic and she begins lessons with Master Tranter in attempt to re-kindle her powers. It is here that she meets Vexanna, Thirteen’s new apprentice thaumagician. They will all have their roles to play, as Wrench works to discover the truth about her past – and make it to her future alive.

A cracking read in the young adult age group.

Gareth Ward, aka, The Great Wardini is a magician, hypnotist, storyteller, bookseller and author. He has worked as a Royal Marine Commando, Police Officer, Evil Magician and Zombie. He basically likes jobs where you get to wear really cool hats. He currently resides in Hawke’s Bay, New Zealand where he runs two independent bookshops, Wardini Books and Wardini Books Napier, with his wife Louise. He has a goldfish called Luna, a dog called Tonks and is certain his letter from Hogwarts has been lost in the post.

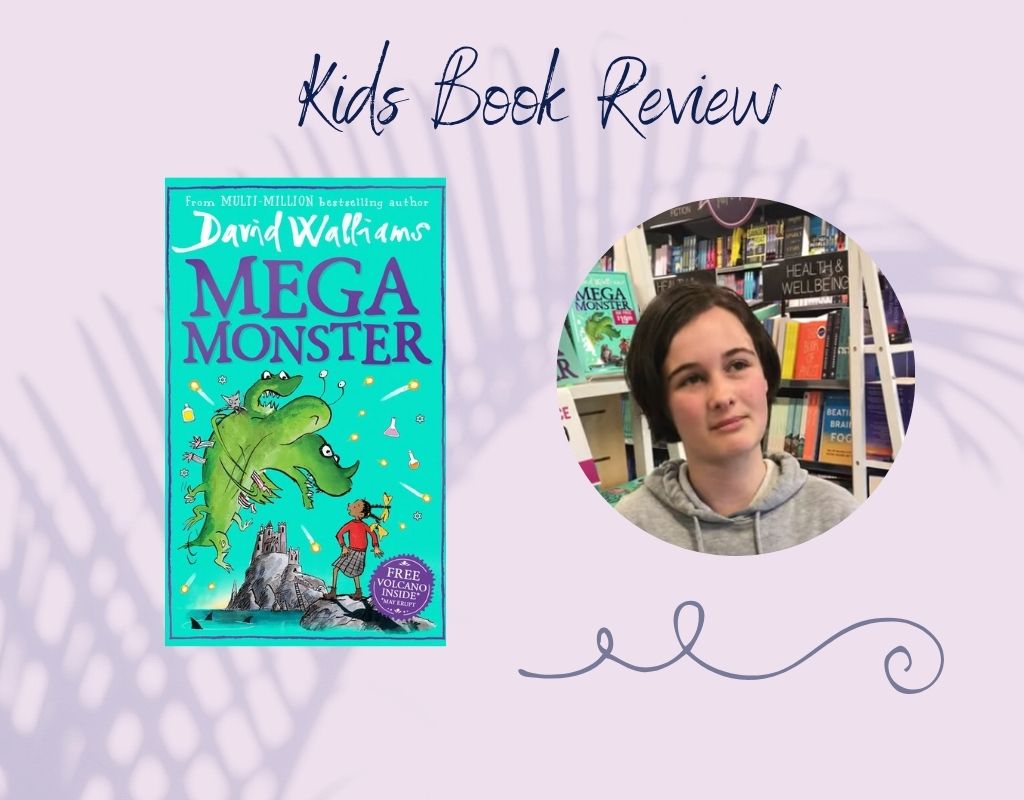
See what our Kid Reviewer, Connor thought about The Thaumagician’s Revenge (#2 The Rise of the Remarkables) below ⬇️

Read what our Kid Reviewer Taya N thought about the book and grab your own copy ⬇️

The Thaumagician’s Revenge is part of The Rise of the Remarkables series and it is written by Gareth Ward. I think this book is very good. It is about a girl called Wrench who loses her powers and with the help of another thaumagician she gains her powers again. Wrench is scared of disappointing ‘Unit 13’.

I think this book is amazing because it is full of adventure and magic. I would recommend this book to year seven and eights.

Grab your copy of The Thaumagician’s Revenge (#2 The Rise of the Remarkables) by Gareth Ward now!

Megamonster by David Walliams | Kids Book Review

Sponsored content 

On a volcanic island, in the middle of shark-infested waters, stands The Cruel School. The lessons are appalling, the school dinners are revolting and the teachers are terrifying – especially the mysterious science teacher Doctor Doktur.

When Larker is sent to the school, she quickly realises something very odd is going on … something involving Doctor Doktur, a pair of strange spectacles, and a ‘Monsterfication Machine’. And ultimately she finds herself face to face with a real life Megamonster.

There seems to be no escape – but for Larker, nothing is impossible …

The new children’s book from No. 1 bestselling author David Walliams, Megamonster is a timeless adventure illustrated by artistic genius, Tony Ross.

See what our Kid Reviewer, April thought about Megamonster below ⬇️

Read what our Kids Reviewer, Sophie S thought about the book and grab your own copy ⬇️

The Megamonster is a book by David Walliams. It is fiction and a real page tuner you won’t want to put the book down. It is about this girl how gets sent to a new school full of kids who have done horrible things to their old teachers and have been sent away. I really liked it. It was creative. I would recommend this book to anyone who loves action and loves books, or those who don’t like books, even!

Grab your copy of Megamonster  by David Walliams now and download a printable colouring in page of the fun cover here!

Make Your Own Colourful Produce Bags

Sponsored content provided by Resene

Personalise your reusable produce bags using actual produce as stamps! This is a fast and fun project that the kids can help with too.

Grab some fruit and vegetables, a few of your favourite Resene testpot colours and some cloth produce bags.

You will need:

  • Reusable produce bags – Sarah purchased these ones from Kmart
  • 1 apple
  • 1 orange
  • 2 carrots
  • A sharp knife
  • Resene testpots in your choice of colours – Sarah used Resene Home RunResene Smitten and Resene Big Bang
  • Resene testpot brushes
  • Small artist brushes

Step 1:

Iron your produce bags to remove creases. Prepare them for painting by inserting a protective sheet of card or plastic so the paint won’t seep through to the other side.

Step 2:

Choose your paint colours. Sarah went for three cheerful choices: Resene Home Run, Resene Smitten and Resene Big Bang.

Step 3:

Cut your fruit and vegetables in half to make the stamps. Look for fruit and vegetables with interesting shapes and textures.

Step 4:

Remove any excess moisture from the cut fruit with a paper towel. Apply your chosen paint colour to the cut face of the fruit using a testpot brush and then stamp it onto the bags.

Step 5:

Reapply paint as needed for subsequent prints. You may even like to add two colours to one stamp. Then, add any extra details using small artist brushes.

Step 6:

Wait for your paint to completely dry before removing your inserts.

It will be difficult to forget these colourful produce bags on your next supermarket trip! You can even colour code them so you know what belongs in each bag.

Clockwise from top left: apple print in Resene Home Run, orange print in Resene Big Bang, carrot print in Resene Smitten, carrot print in Resene Home Run, orange print in Resene Smitten and Resene Big Bang and carrot print in Resene Big Bang and Resene Home Run. The background is painted in Resene Picton Blue.

For more projects and colour inspiration visit Resene.co.nz.

Article provided by Resene.

Read more on Kidspot:

Travel Adventures With Richie & Gemma McCaw

Richie and Gemma McCaw love exploring New Zealand’s fantastic holiday spots and hidden gems. Travelling and exploring are part of their famously active lifestyle and they enjoy showing Charlotte (2) and their new baby, Grace, our beautiful country.

We chat with them to find out their favourite places, their top family holiday memories, and where they would like to explore next.


Special family holiday memories

Richie & Gemma McCaw

A treasured memory for the McCaw family is of a family weekend in Tekapo prior to the birth of their second daughter, Grace.

“It was special as Charlotte experienced the snow for the first time and we were able to do all of the activities together as a family.” Richie & Gemma McCaw

They loved the trip up to the family-friendly Round Hill Ski Area where, if you’re early enough, you can bag a car park right next to the snow, set up your BBQ, and settle in for a day of adventure.

The McCaws also enjoyed some local walks and the stunning scenery. Another favourite family activity while there was a swim in the hot pools at Tekapo Springs.

Top destination

A trip to Fiordland and the Catlins was an amazing experience for Richie and Gemma. The incredible diversity of these areas meant an amazing selection of activities to do and places to see.

“We loved Fiordland and the Catlins as we had not spent much time there and were surprised at the variety of activities and how much there was on offer!” Richie & Gemma McCaw

The untouched landscape and amazing wildlife were particular highlights for them – and a pie was reportedly a culinary highlight for Richie (from a famous Te Anau bakery!).

Although the children didn’t join them on this trip, it was an amazing opportunity for them to do some research and plan a special family trip for the future.

Hankinson Hut Fiordland

Fiordland

Future family trips

Despite getting away exploring regularly, there is still plenty Richie and Gemma would like to do – especially now as a family of four.

The beautiful Abel Tasman National Park is top of their list. This easily accessible paradise featuring stunning beaches and lush native forest can be explored by foot or by sea. While Richie has paddled the area before during an endurance race, a holiday here at a slightly slower pace would be ideal for a family getaway!

Beautiful beaches and forests seem to be a theme, because also on the McCaw’s wishlist is a camping holiday in The Coromandel. With a lush, rugged interior rolling down to pristine beaches and lots of fun activities including fishing, cycling, and hiking – all McCaw favourites – you can see why a holiday here is in the pipeline.

“We would love to experience the Abel Tasman with our kids as well as camping in the Coromandel.” Richie and Gemma McCaw

Where in New Zealand would you like to travel with your family? Tell us in the comments below.

Main photo credit: Tourism New Zealand

See more

Written by Kidspot New Zealand in partnership with Tourism New Zealand.

Kiwi Families Tell Us About Their Favourite NZ Holidays

Thinking about where to go for your next family getaway? We asked parents to share their favourite NZ holiday destinations and the results are in!

These family-endorsed destinations range from the well-known to unexpected gems. For some local inspiration, check out these amazing Aotearoa family holiday spots, as recommended by our readers.

Please note: Venue information was correct at the time of publication. Please check with individual venues for the latest opening dates, times, prices, etc, before making plans.

Nau mai, haere mai Northland!

Northland

With its beautiful beaches and magnificent forests, Northland is a favourite destination for many families.

“We absolutely love going up north! Enjoying the magnificent Cape Reinga, sliding down the giant sand dunes and, of course, walking along Ninety Mile Beach.” Jessica M.

“We loved camping at the African Safari campground at Kawakawa and biking between Kawakawa and Opua. There’s also a little train which the kids enjoyed, local indoor swimming pool and lots of great cafes. Plus the Hundertwasser toilets! Kawakawa is ideally placed for a short trip over to Russell from Opua and an easy drive over to Waitangi and the amazing mountain bike park behind.” Becky T.

“I’d definitely say Paihia [as a family holiday hot spot]. So many tours to go on, parks and beaches, a short ferry ride to Russell and lovely little eateries plus watching the sunset is a huge bonus! We loved it there and did a Hole In The Rock tour and parasailing. So much fun!” Aija L.

Amazing Rotorua

Rotorua

With just a 3 hour drive from Auckland or 1.5 hours from Hamilton, Rotorua is an accessible holiday destination for many families. But this fascinating area also comes highly recommended by families for its variety of fun and interesting family activities.

Rotorua is our go-to with our boys. They love the outdoors and there’s plenty of exploring to do there, mountain biking in the redwoods, walking around the hot mud, swimming at the Blue Lake and plenty of attractions. We usually only do one paid attraction each visit and we go for about three days each time – enough to keep us busy! And it’s also close to Taupō or Mt Maunganui for day trips too!” Laurelle M.

“We absolutely love Rotorua, from the Canopy Tours to the thermal parks to the Luge, it has it all.” Michelle H.

“I can highly recommend the Skyswing at Skyline in Rotorua … scary but amazing! And one must get the video and photos as the facials are hilarious.” Frances T.

“Love Rotorua Skyline. My kids love the Luge, Jelly Bean store and ice-cream there. Love to visit again with them.” Natali M.

Rotorua was amazing, just so much to do, would love to go back – canopy walk, the luge, and Paradise Valley were all amazing.” Sarah G.

3D Trick Art Gallery in Rotorua – full of fun. My daughter and son both enjoyed acting out to take picture with the art. This place also has a farm tour which we missed but I am sure both attractions together make a perfect family day out plus lunch on-site.” Nilofa F

Rotorua and Taupō are our fave holiday spots – soooo much to explore there for all weather types. Paradise Valley Springs in Rotorua is our new fave!” Vicki B.

Fun central

Central North Island

The middle of the motu has some spectacular attractions including off-the-beaten-track treasures and fun family destinations such as Taupō and Hawke’s Bay.

“Our family trip to Taupō was so awesome. Miss 6 caught a rainbow trout on a fly rod [on a day trip over to the Tongariro Trout Centre] in a fly rod.” Miriam B.

“Our daughter still asks when we are going to go back to the Huka Prawn Park two years later. They absolutely loved it.” Harmony D.

“My beautiful daughter and I did an awesome road trip to Hastings for a holiday – sooo many awesome things to do! We visited Splash Planet, an animal farm, Arataki Honey, and The Strawberry Patch. [We] visited Napier on a day trip. Awesome memories to treasure together.” Angie H.

“We love visiting Kiritehere and Marakopa! Fossil hunting is the best.” Claire P. [Editor’s note: On the North Island’s western coast, Kiritehere Beach is hiding lots of treasures to be discovered – 200 million year old fossilised mussels, scallops and other shells.]

Southern destinations

Southern destinations

The South Island is bursting with family holiday recommendations including the beautiful Abel Tasman National Park and Golden Bay at the top of the south, the turquoise waters of Lake Tekapo (home to the iconic Church of the Good Shepherd and dog statue), and onward to Queenstown – the adventure capital of NZ with loads of fun things for families to do.

“Tata Beach, [Golden Bay]. top of the South Island. Even in mid-winter it’s a beautiful spot for some fishing with the kids and they even went in for a swim. (The adults will wait to swim in summer!).” Ciarán B.

Kaiteriteri Beach! Golden sand, amazing campground, bike hire, playground and restaurants right on the beach – and the gateway to the beautiful Abel Tasman.” Tui B.

“We love going to Christchurch and had a great time on the Gondola in the last school holidays! The kids enjoyed the time tunnel at the top too.” Tina M.

Tekapo is a place you can go that [gives you] a good chance to be able slow down a bit and just ‘be’. Lots to do … everything about it was stunning. I came home feeling rejuvenated after a couple of days there and that’s all I really want from a holiday. Lots to do any time of year.” Gem B.

“We love Tekapo Springs especially in winter – ice skating, snow tubing, hot pools, great food and warm fires, and that’s just at the springs complex. Stargazing and walks to round out the activities depending on your budget.” Vicki R.

“We loved our time Lake Ruataniwha camping ground [Twizel]. Such a beautiful spot by the lake. We were also right on the doorstep of Mt Cook and loved hiking in the area, taking in the wonderful views.” Amy E.

Mt Cook and Tasman Glacier! So many good walks to do, and the most stunning scenery.” Heather P.

“Took my 16 year old to the Sensory Maze in Queenstown central, it was a great experience. She loved it. Highly recommended for children or teenagers who like puzzle worlds etc.” Sonia S.

“Taking the TSS Earnslaw across to Walter Peak Farm tours in Queenstown! Well worth the money, hand feed the animals, learn about the farm and a delicious afternoon tea! My kids, 14, 11 and 7, loved it.” Sarah W.

What’s your favourite holiday destination? Tell us in the comments below.

Make A Balloon Target Game

Sponsored content provided by Resene

It’s easy to create this colourful target game with a little bit of help from Resene.

You will need:

How to play:

Each player must throw a small ball through each hole in the coloured balloon. The first player to get their ball through all the colours wins.

32-balloon-target-game-step-1

Step one

Carefully drill five large holes in one of the pieces of plywood, as shown. Smooth any rough edges with sandpaper.

32-balloon-target-game-step-2

Step two

Apply one coat of Resene Quick Dry to the pieces of plywood and allow to dry.

32-balloon-target-game-step-3

Step three

Apply two coats of Resene Snap to the pieces of plywood, allowing two hours for each coat to dry.

32-balloon-target-game-step-4

Step four

Join the pieces of plywood along the top edge using the hinges, spaced 50mm from each end.

32-balloon-target-game-step-5

Step five

Paint one balloon with two coats of Resene Chaos and a second balloon with two coats of Resene Orang-atan, allowing two hours for each coat to dry.

32-balloon-target-game-step-6

Step six

Paint a third balloon with two coats of Resene Fizz, allowing two hours for each coat to dry.

32-balloon-target-game-step-7

Step seven

Paint a fourth balloon with two coats of Resene Kermit, allowing two hours for each coat to dry.

Paint a fifth balloon with two coats of Resene Splish Splash, allowing two hours for each coat to dry.

32-balloon-target

Step eight

Set up your target and play!

Download a PDF of this project

For more projects and colour inspiration visit Resene.co.nz.

Resene Toys and Games with Mark Rayner – Project 32

Read more on Kidspot:

Make A Rain Stick

Sponsored content provided by Resene

Kids will love to hear the sound of rain indoors with this easy-to-make rain stick.

You will need:

31-rain-stick-step-1

Step one

Remove the plastic ends from the cardboard tube or if your tube doesn’t have plastic ends you can cut pieces out of an icecream container lid and tape back on later.

31-rain-stick-step-2

Step two

Apply one coat of Resene Quick Dry to the outside of the tube and allow to dry.

31-rain-stick-step-3

Step three

Apply two coats of Resene Malibu to the outside of the tube, allowing two hours for each coat to dry.

31-rain-stick-step-4

Step four

Paint umbrella canopies on the outside of the tube with two coats of Resene Bright Red. Allow two hours for each coat to dry.

31-rain-stick-step-5

Step five

Paint umbrella tops and handles on the outside of the tube with two coats of Resene Brown Pod. Allow two hours for each coat to dry.

31-rain-stick-step-6

Step six

Fix one of the plastic ends into the base of the tube using PVA glue. Allow glue to dry. If your tube doesn’t have plastic ends you can cut pieces out of an icecream container lid and tape on.

31-rain-stick-step-7

Step seven

Take a piece of baking foil and loosely curl it into a tubular shape, as shown. Slide this into the tube.

31-rain-stick

Step eight

Place half a cup of dried rice into the tube and fix the remaining plastic end into the top of the tube using PVA glue. Allow glue to dry.

Download a PDF of this project

For more projects and colour inspiration visit Resene.co.nz.

Resene Toys and Games with Mark Rayner – Project 31

Read more on Kidspot:

Create A Personalised Measuring Stick

Sponsored content provided by Resene

Create a personalised measuring stick to track your growth.

Measure the children up against their own personal measuring stick so they can see how much they are growing. You can personalise each stick with their name, and a colour scheme of their choice.

You will need:

  • Pencil and ruler
  • Alphabet stencil set (75mm high)
  • Paint brushes in various sizes
  • Low tack masking tape
  • Resene KidzColour range testpots in Resene Splat (blue), Resene Sing Song (yellow), Resene Fairylight (lavender), Resene Tutti Frutti (green) and Resene Flower Power (pink), and Resene Art Action Quick Dry undercoat. (On the second stick, we used Resene Splat for the background, Resene Tutti Frutti for the numbers and markings, and Resene Smiles for the name.)
  • One 1.6m length of untreated, dressed pine (150mm x 19mm) per measuring stick
  • 150-grit sandpaper.

Top tips…

  • Use a different brush for each colour so you don’t have to keep washing the brushes.
  • Wrap each brush in cling film between coats if you find the paint is drying out.
  • When painting the segments, brush away from the masking tape to avoid any seepage under the tape.

22-measuring-stick-step-1

Step one

Take the length of pine and lightly sand the edges and ends to get rid of any roughness, then use Resene Art Action Quick Dry undercoat on the side you will be painting and the edges. Leave the undercoat to dry thoroughly, then measure up from the end and mark at 10cm intervals. Rule across the timber so you have a guideline for the masking tape.

22-measuring-stick-step-2

Step two

Carefully place the low tack masking tape along the edges of every second 10cm block so that some will look narrow and some wide, you will painting the wider segments first. Put a dab of each colour on the segments so you know which colour to paint. Paint the wider segments on the measuring stick first, making sure you paint the edges as well as the top. Allow to touch-dry, then remove the masking tape. Mask the remaining unpainted sections, and paint them in the marked colours. Remove the masking tape.

22-measuring-stick-step-3

Step three

Take the stencils and place the letters evenly along the measuring stick, draw the letters on with pencil.

22-measuring-stick-step-4

Step four

Paint the letters in contrasting colours to the backgound colour, or paint the name on freehand if you prefer.

For more projects and colour inspiration visit Resene.co.nz.

Styling and writing: Helena Dunn, pictures: Mark Heaslip, props: Pink leather pouffe, papier mache dog, birdcage, rabbit candles all from Republic Home (www.republichome.com)

Read more on Kidspot:

Make A Kid’s Day Tent

Sponsored content provided by Resene

Kids love somewhere to hide and seek. This day tent is a perfect fort for indoors or a place to retreat from the sun when playing outside. Here are the easy steps.

You will need:

  • 4x 1.5m battens (drilled holes in each, one top and one bottom, to insert dowels
  • 3x 1.2m dowels
  • Resene roller and tray
  • 2x potatoes, knife
  • calico (1.5m length; 1m width)
  • sewing kit
  • Resene testpots in your choice of colours: we used Resene GoldmineResene Frozen and Resene Smiles.

Top tip…

  • Apply white paint stars and once dry apply two prints of Resene FX Nightlight glow in the dark over the top. This will give soft glowing stars that will slowly wane in brightness once the lights go out. Make sure you get a good amount of the white basecoat and the Resene FX Nightlight on the surface for the best glow effect.

Step by step instructions

38-step-1-tent

Step one

Paint the battens and dowels using Resene Goldmine. Leave to dry.

38-step-2-tent

Step two

Use the knife to cut the potatoes in half and fashion a star shape from each. We used a felt tip pen to sketch out the shape before cutting.

38-step-3-tent

Step three

Lay out the calico, with cardboard or something sturdy underneath (that you don’t mind getting paint on).

38-step-4-tent

Step four

Dip the potatoes into Resene paint and print the stars onto the fabric. It doesn’t need to look perfect, and yes it will get messy.

38-step-5-tent

Step five

While that dries, make an A frame with the dowels and pine boards. Get it to the width and height you’d like it.

38-step-6-tent

Step six

Place the (dried) calico on top of the tent, and make each side taut. Sew the bottom of the tent to secure. Ask someone to hold the frame while you do it.

38-step-7-tent

Step seven

If you made bunting, lace through each side of the frame and use it to secure in place. Use sturdy rope as an alternative. We painted our bunting in Resene Frozen and Resene Smiles.

38-step-8

Step eight

Fill with fun cushions and a rug and leave the kids to enjoy their new hiding spot.

For more projects and colour inspiration visit Resene.co.nz.

Styling by Leigh Stockton, photography by Melanie Jenkins

Read more on Kidspot:

Create A Hopstar Game

Sponsored content provided by Resene

Design and create a fun game for the children, based on hopscotch

How to play

Number of players: 2 or more.

Additional equipment: Small flat stone for each player.

How to play: The first player throws the stone onto triangle #1 and hops over this into triangle #2, hopping around the star into each numbered triangle until they reach the centre of the star (position #10). They then turn and hop back, reversing the numbers until they reach triangle #2, where they bend down, retrieve their stone, and hop back over triangle #1, returning to the start position. The player then throws the stone into triangle #2 and repeats the process. If a player misses, they return their stone to the previous triangle where it stays while the next player has a turn. Each player has to make it all the way to position #10 and back to the start, reversing the numbers, to finish the game – and the first one to do this is the Hopstar!

You will need:

Top tips…

  • Always use duct tape for masking unpainted concrete as it sticks better, and use masking tape to mask painted surfaces
  • Experiment with different shapes such as crosses or triangles to create other hopscotch-inspired games
  • Click here to download a printable pdf with all the instructions

Step 1

Step one

Use the string line and chalk to draw a circle with a radius of 1.2m.

Step 2

Step two

Marking with chalk, divide the circle into five equal parts. (Note: Each mark is approx 1.4m from the previous one when measured in a straight line).

Step 3

Step three

Using the five chalk marks as a guide, mask off a pentagonal shape with duct tape and then wipe off the chalk marks with a damp cloth. Apply one coat of Resene Concrete Primer to the masked area. Once dry, apply two coats of Resene Christalle, allowing two hours for each coat to dry.

Step 4

Step four

Carefully remove the duct tape and use masking tape to mask off a star shape, as shown, removing the inner lines of the tape with a craft knife.

Step 5

Step five

Apply one coat of Resene Porsche to the masked off area and allow to dry for two hours. Use the small roller and tray to apply two coats of Resene Bullion to the masked off area. Once dry, carefully remove the masking tape.

Step 6

Step six

Mask off the central pentagonal area of the star with masking tape and apply two coats of Resene Jalapeno. Once dry, remove the masking tape.

Step 7

Step eight

Apply one coat of Resene Multishield+ (Gloss) to the entire painted surface. Leave for 48 hours before playing.

Step 8

Step seven

Use the artist brush and Resene All Black to paint in the numbers, allowing two hours to dry.

For more projects and colour inspiration visit Resene.co.nz.

A Resene Ground Game with Mark Rayner – Project 02

Read more on Kidspot:

Decorating A Shared Children’s Room

Sponsored content provided by Resene

Decorating a shared children’s room can be tricky as those sharing the room are bound to have different ideas about how it should look.

Search for some common ground between the two – a theme, colour or object that both kids love – and use this as your starting point. It might be something as simple as doughnuts, used in the room on the left in the bedlinen and accessories.

How to achieve harmony

  • Give each child a separate area of the room to decorate, so they both get a say in how the room will look.
  • For a cohesive feel, consider getting two of the same item for key furniture pieces, such as beds, desks and chests of drawers.
  • Reversible duvet covers can be flipped to a different side on each bed so that each has a different pattern but the overall colour palette of the room stays the same.
  • Add cushions and patterned pillowcases to mix up the bedding.
  • Use toy boxes to keep a shared room tidy and paint them in a pattern that echoes the theme of the room.
  • Use a paint effect to give each child their own ‘zone’, like this diagonal device, or just straight up and down between the beds.

Yellow, blue and green room

Yellow and blue room

Yellow and blue room:

Divide up the space with a wall painted in Resene Frozen and Resene Sunkissed (try Resene Tulip Tree). The side wall is in Resene Foundry and the floor is in Resene Quarter Alabaster. A diamond pattern was created on the door to echo the bedlinen by painting the whole surface in Resene Quarter Alabaster and then masking it before painting sections in Resene Sunkissed and Resene Tussock. The toy box is painted Resene Quarter Alabaster with diamonds in Resene Frozen, Resene Tussock and Resene Sunkissed.

Learn more about this look

Resene Bookshelf

Grey room:

If your kids will be sharing a colour scheme, look for other ways to create individuality between their personal spaces. Perhaps one would prefer a daybed over a traditional single or a patterned curtain to define their bed rather than a headboard? Even with these differences, a strong colour palette will make the space feel unified. Upper wall in Resene Half Athens Grey, lower wall in Resene Rakaia, timber floor in Resene Colorwood Mid Greywash, arch headboard and vase in Resene Cinnamon, skirting board and curtain pattern in Resene Eighth Masala, curtain rail, hook rack and stool top in Resene Ebony Clay and small plant pot in Resene Crail.

Fair is fair

Just because your children share a bedroom doesn’t mean they necessarily need to share a colour scheme. And using colour to clearly – and fairly – divide the space could serve as a way of keeping the peace between older children. The wall and floor on the left side of this room are painted in Resene Finch while the right side is in Resene Thor. To make the scheme feel cohesive, paint all the furniture in the same colour, such as Resene All Black, and choose artwork that shares a similar vibe or colours in common.

Note: Use a stencil to trace shapes on to paintable wallpaper from the Resene Wallpaper Collection, available at your local Resene ColorShop. Paint them with Resene testpots, cut them out and tack them up to take your wall mural from two to three dimensions.

Top tip: For wipeable walls opt for Resene SpaceCote Low Sheen waterborne enamel.

Learn more about this look

Resene Bookshelf

Green and blue room:

Divide a space harmoniously with two complementary greens. The wall to the left is Resene Finch and the right wall is Resene Thor. Beds and bedside table in Resene All Black.

Resene Bookshelf

Creme room:

It’s hard to argue over what belongs to who if each child has their own. The walls and floor of this twin room are painted in Resene Island Spice, the bedheads are in Resene Scandal, the cabinet is in Resene Wax Flower, the lightshade and basket are in Resene Splash and the plant pot is in Resene Scandal. You don’t have to spend a lot to create a stunning room. These bedheads and cabinet were bought secondhand and revived with paint.

Shared interests

One child is crazy for dinosaurs, the other is obsessed with butterflies. When decorating a kids’ bedroom or play space, there is no need to play favourites if you use a cohesive colour palette to tie together two or more seemingly conflicting ideas. Shades of dusty pink and silvery sage blend beautifully on walls. Use fun stencils so you can make sure both kids’ interests are enjoyed in a shared space.

In the room pictured above, the left back wall painted in Resene Pewter, right back wall in Resene Otter with dinosaur mural in Resene Gecko, butterflies in Resene SereneResene Half Washed GreenResene Paris White and Resene Double Sea Fog, floor in Resene Double Sea Fog, door in Resene Middle Earth, table in Resene Sante Fe, stools in Resene Half Washed Green and Resene Middle Earth, bowl in Resene Otter and toy dinosaurs in (from left to right) Resene Permanent GreenResene Pale Leaf, Resene Half Washed Green and Resene Alabaster.

For more projects and colour inspiration visit Resene.co.nz.

Resene Ground Games with Mark Rayner – Project 02

Read more on Kidspot:

Richie & Gemma McCaw’s Top Tips For Family Travel

Published in 2021

Sporting legends Richie and Gemma McCaw are well known for their active lifestyle. Like all parents, the arrival of their first child meant making a few changes, especially when heading away on family holidays in New Zealand. We chatted with Richie and Gemma to get their best tips for travelling with kids.

In their role as ambassadors for Tourism New Zealand, Richie, Gemma, and Charlotte (born in December 2018) have been out and about, exploring Aotearoa’s wonderful backyard. And in the future they will be joined on their travels by Grace, who was born in June 2021.

They were happy to share with us some of what they’ve learnt to help make family travel as stress-free as possible.

The McCaw family

Rugby legend Richie, and hockey legend Gemma, along with daughters Charlotte (2) and recent arrival Grace, make a great team. Along with fatherhood, Richie finds time to train for and complete endurance races, fly helicopters, and complete numerous speaking engagements, while Gemma combines motherhood with promoting wellness and maternal mental health.

Their busy lives, active lifestyle, and passion for exploring New Zealand makes them the perfect ambassadors for Tourism New Zealand.

The McCaws, like all families, are keen for everyone to have a great time when travelling and holidaying – especially Charlotte and Grace. After all, it’s not a happy holiday for anyone if the kids are unhappy! With this in mind, they’ve shared some tips for planning travel and holidaying.

Richie & Gemma McCaw

We spoke with them to find out their top tips for family travel.

Planning the perfect trip

The first McCaw tip is to plan travel around naps. If they’re flying with their toddler, they book a flight for the morning so Charlotte can still have her afternoon sleep at their destination. Likewise, they’re happy to travel by car in the afternoon so she can doze off in the back.

“Always allow more time than you need when travelling. Having extra time up your sleeve saves the extra stress when you are running late or get held up somewhere.” Richie & Gemma McCaw

Because they love to get outdoors when they’re travelling, they opt for child-friendly accommodation that’s close to parks, playgrounds or the beach.

Richie and Gemma also like to check that their accommodation has what they need for the kids (like a cot, trundler bed, or highchair) and put in a request for it to be set up. This means that you can transfer a sleepy child straight to bed (if you’re very lucky) for a little wind-down time.

Another thing they check in advance is what food is available at their destination, nearby, or to order in.

“Make your toddler’s favourite meal (Charlotte’s is mac & cheese) and travel with it so you can stick to eating at their usual time. If you’ve got a baby on solids, travel with their utensils so you can heat up their meal wherever you are.” Richie & Gemma McCaw

Holiday packing

View this post on Instagram

A post shared by Gemma McCaw (@gemflynn)

It’s a juggle to take exactly what you need on a holiday. While you don’t want to be dragging around too much, the fact is travelling with children means lots of gear. One thing the McCaws make sure they never forget is Charlotte’s special sleep toy, “Monkey”. They also pack a couple of good books for themselves, plus some favourite children’s books, and plenty of snacks.

Richie and Gemma always travel with a front pack or collapsible stroller too as it means baby or toddler naps can be taken at the usual time, even when they’re on the go. Plus, it enables the family to be active!

Travel time

While on holiday, Gemma and Richie try to stick to their usual routines as much as possible. They try to keep meals and naps around the same time (as much as possible) and exploring is done during usual wake times.

“Follow your usual bedtime routines – for example, bath, brush teeth, book, cuddle and say good night.” Richie & Gemma McCaw

If they’re out exploring, they plan a fun stop at a playground or picnic spot along the way to break up the journey. And they always take lots of snacks to avoid hangry meltdowns!

“Be prepared and relax – travelling can be stressful with kids and it may not always go to plan but if you are prepared it makes the experience a lot more enjoyable. Most people with kids will understand a meltdown or a crying baby so try not to stress too much, but don’t pack too much in on travel days!” Richie & Gemma McCaw

Finally, Gemma and Richie recommend that you try to not sweat the small stuff and when things don’t go to plan, try to focus on what you can control and don’t worry about what you can’t.

Happy holidays from the McCaws!

Richie & Gemma McCaw

Made To Share Aotearoa New Zealand Stories

New Zealand’s location, dramatic and varied landscape, unique native wildlife, and history all combine to make the special place we live today.

From the amazing geographic features and the spectacular night sky, through to early and modern explorers, all across the country there are experiences that are designed to share, delight, and educate you and your family about our special place in the world. Inspire curiosity and celebrate culture with our nation’s stories.

Please note: Venue information was correct at the time of publication. Please check with individual venues for the latest opening dates, times, prices, etc, before making plans. Regions and venues may have travel and access restrictions due to the Covid-19 Protection Framework.

In the beginning …

The Dark Sky Project

Billions of years ago, according to modern science and Māori legend, our world and universe were formed. To tell the story, The Dark Sky Project in Tekapo has created a thought-provoking and educational venue dedicated to taking you on a 13.8 billion year journey of our creation. See in exciting detail our night sky and the wonders of the universe in an indoor multimedia installation.

Visit The Dark Sky Project

Geothermal wonderland

Te Puia

At the centre of our earth it’s very hot and when the water seeping down through the earth meets the heat, it rises and creates geothermal activity on Earth’s surface. This comes to life in various spots around New Zealand but none as spectacular as the largest geyser in the Southern Hemisphere – the Pōhutu geyser at Te Puia in Rotorua. This volcanic area also features boiling springs, mud pools and fumaroles (steam or gas vents) and makes for a spectacular sight during the day, or at night.

Visit Te Puia

Unique flora and fauna

Zealandia

New Zealand broke away from another land mass about 80 million years ago. In that time our flora and fauna developed in their own unique way and many of our native plants and animals are found nowhere else in the world. Since the arrival of people in Aotearoa, sadly many natives have become extinct.

Wellington’s ZEALANDIA is a native wildlife sanctuary dedicated to returning the area to how it was before the arrival of people. Set in fully-fenced native bush, you can spot prehistoric tuatara, rare birds, reptiles, invertebrates and plants. At night, you can also spot the glowworms and maybe one of more than 150 kiwi roaming free.

Visit Zealandia

The adventures of Kupe

Manea

According to local Māori legend, Kupe was the first Polynesian to arrive in Aotearoa. He later departed from Hokianga to return home to Hawaiki in the eastern Pacific. Generations later, Kupe’s grandson Nukutāwhiti, traced his voyage from Hawaiki to reside on the shores of the Hokianga with his people, and today many iwi trace their ancestry back to this legendary explorer. The descendants of Kupe welcome you to Manea – Footprints of Kupe Experience in Hokianga to proudly share the stories and traditions of their ancestor.

Visit Manea – Footprints of Kupe Experience

The first settlers

Ko Tane

Go on a Māori cultural experience at Ko Tāne – be entertained with a kapahaka performance which includes action songs, poi dances, haka, stick games and weapons display. Enjoy some kai (food), and learn about ancient traditions.

Visit Ko Tane

The birth of a nation

Waitangi Treaty Grounds

Waitangi Treaty Grounds in the Bay of Islands welcomes you on a journey of discovery through Aotearoa New Zealand’s most important historic site. Explore the two new contemporary museums, Te Rau Aroha, Te Kōngahu Museum of Waitangi, the carving studio, the Treaty House, Te Whare Rūnanga (Carved Meeting House), traditional Māori waka taua (war canoes) and enjoy a full programme of tours and cultural performances. You can also learn about New Zealand’s founding document, what it contained, the important differences between the English and Māori versions, and how this document defines Aotearoa today.

Visit Waitangi Treaty Grounds

Colonial settlers

Howick Historical Village

By the mid to late 1800s, European settlers were arriving in greater numbers, building homes, developing farms, and looking for gold. Public infrastructure was beginning to be built and towns were springing up.

At Howick Historical Village in Auckland, you can explore wooden heritage buildings, raupō huts and a sod cottage, complete with authentic furnishings and contents, all surrounded by beautiful heritage gardens. There are regular family-friendly events held where you can all perform some of the daily chores and activities of early settlers and get an understanding of what life was like for these new arrivals.

Visit Howick Historical Village

Modern explorers

International Antarctic Centre

Although there was likely some New Zealanders heading to Antarctica in the 1800s as part of other countries’ trips south, it was in the mid 20th century that New Zealanders began exploring on their own expeditions.

There has been an almost continuous New Zealand presence on the ice since then. The International Antarctic Centre in Christchurch tells this story. You can “visit” Scott Base, where New Zealanders base themselves, experience an Antarctic storm, test out how cold the water is down there, ride a Hägglund (one of the main transport options on the ice), and explore some of the early explorers’ historic huts. You can also see rescued Little Blue Penguins and meet a husky dog!

Visit the International Antarctic Centre

Fossils from Lost Worlds by Hélène Rajcak and Damien Laverdunt | Kids Book Review

Sponsored content 

Walk in the footsteps of the first fossil researchers to discover the earliest animal life on Earth with this large format book written and illustrated by Hélène Rajcak and Damien Laverdunt.

Explore the story of a spiny sea worm without a tail or head, a walking fish, a peaceful sea dragon, and many other incredible creatures.

Told through comics, illustrations and data, Fossils from Lost Worlds is also a fascinating insight into paleontology itself. It shows how science is a process of thinking and rethinking, questioning and learning. Through a timeline of animal reconstructions and major discoveries, we can track the beliefs and theories that have brought our knowledge to where it is today.

See what our Kid Reviewer Ollie thought about Fossils from Lost Worlds below ⬇️

Read what our Kids Reviewer Aryan K thought about the book and grab your own copy ⬇️

“Fossils from Lost Worlds is a non- fiction book by Hélène Rajcak and Damien Laverdunt. It explains about how the prehistoric creatures lived, from the first creature, the Dickinsonia, to the ever so famous T.Rex. It pulls you in with the picture and provides a good chunk of information without you even thinking about getting bored.

I would recommend this to people who like prehistoric creatures and dinosaurs because I’m sure they will learn something new.”

Grab your copy of Fossils from Lost Worlds by Hélène Rajcak and Damien Laverdunt now!

Truly Tyler by Terri Libenson | Kids Book Review

Sponsored content

A story about being your truest self and trusting your truest friends, Truly Tyler is fifth in the Emmie and Friends series from author Terri Libenson.

Cliques. Crushes. Comics. Middle school …

Ever since Tyler started getting into art and hanging out with Emmie, his friends and teammates have been giving him a hard time. He wonders why he can’t nerd out on drawing and play ball. Emmie is psyched that she gets to work on a comics project with her crush, Tyler.

But she gets the feeling that his friends don’t think she’s cool enough. Maybe it’s time for a total reinvention …

See what our Kid Reviewer Talia thought about Truly Tyler  below ⬇️

Read what our Kids Reviewer Sophie B thought about the book and grab your own copy ⬇️

“Truly Tyler is a fiction book by Terri Libenson it is very intriguing, and you don’t want to put down the page. It is about a boy called Tyler and a girl called Emmie – they have a project together, but things keep getting in the way.

My favourite part was the comic part at the end of each chapter. It is an amazing book I never had a dull moment reading it. I would recommend it to anyone who loves reading about drama or just reading or comics.”

Grab your copy of Truly Tyler by Terri Libenson now!

The Last Kids on Earth by Max Brallier | Kids Book Review

Sponsored content

Soon to be a Netflix series, The Last Kids On Earth by Max Brallier is ideal for children 8 years and older including reluctant readers!

Meet Jack Sullivan, self-described as a late-blooming, slow-developing 13-year-old who has so far survived the zombie apocalypse by hiding out in his treehouse.

Overnight Jack’s life has become like the plot of a video game and he has come up with his own ULTIMATE FEATS OF APOCALYPTIC SUCCESS: Locate Quint Baker, best friend and inventor. Find and rescue June Del Toro, his secret love interest. Defeat Blarg, the biggest, baddest monster in town. Become a zombie-fighting, monster-bashing tornado of cool!

See what our Kid Reviewer Lachlan thought about The Last Kids On Earth by Max Brallier ⬇️

Read what our Kids Reviewer Hamish B thought about the book and grab your own copy ⬇️

“Jack Sullivan was an ordinary 13-year-old going to an ordinary school until the zombie apocalypse happened. Now he’s a hardened warrior living in a fortified treehouse looking for his lost friends and hoping for survival. Locating one of his lost friends, Quint, he attempts to finish the ultimate feat of apocalyptic success: find and save lost crush June Del Toro. This is a really funny and exciting book, and I would rate it 4.5 out of 5 stars.

I think would be good for 8–10 year-olds because I think that it is aimed more towards them than 11–13-year-olds.”

Grab your copy of The Last Kids On Earth by Max Brallier now!

6 Ideas For Your Teen’s Bedroom Wall Colour That Aren’t Black

Sponsored content provided by Resene

At some point, almost every teenager thinks they want a black bedroom. If that feels like a step too far, there are plenty of ways to come up with cool compromises.

Try a moody dark in charcoal, aubergine or green, such as Resene Mine ShaftResene Plum or Resene Deep Teal, or go for bold and unexpected colour combinations like Resene Avant Garde with Resene DynamiteResene Elephant with Resene Moroccan Spice or Resene Surfie Green and Resene Bright Spark.

Just like when they were younger, your teens will still very much want a space that is defined as theirs and separate from the rest of the house. Work with them to figure out what they need as well as what they want – space for sports gear, a quiet study area, a corkboard for posting memorabilia, a comfy spot for gaming.

Top tip: The trick with teens is to find a style they’re going to like from the ages of 13 to 18 to work with as a base that you can then make subtle, easy changes to as they mature.

dreamy bedroom

Feminine and sophisticated

In a dreamy bedroom like this one, a combination of deep red and soft pink feels both feminine and sophisticated. The walls in Resene Pohutukawa feature a partial circle painted ‘headboard’ in Resene Dust Storm to give the look of a setting sun or a rising moon. An antique white floor in Resene Double Rice Cake balances the richness of the wall colours while the circular motif of the headboard is echoed through the artwork, the Edison-bulb pendant light and velvet cushion. The bedside table is painted Resene Sakura.

desert dreams

Desert dreams

This soft and arid look is right on trend and is perfectly suited to a bedroom for a maturing teen with a sense of whimsy. Parched shades like Resene Sand on the walls and floor have been given an eye-catching addition with a painted zig-zag design in Resene Florentine Pink and Resene Eskimo. The colours repeat on the bench and painted basket teamed with the sunset shade of Resene Just Right. The natural textured rug and wicker chair add to the desert chic effect.

High energy

High energy

Blurred lines and smudged edges give this room a messy, lived in look without the clutter. Mixed grey walls in darker Resene Quarter Foundry (for a current alternative try Resene Shuttle Grey), which has been continued onto the floor, and lighter Resene Jumbo give a moodiness while the burnt orange in Resene Smoke Tree adds edginess. Re-purposed wooden crates in Resene Smoke Tree provide cheap, practical and cool storage. Painting up geometric canvas art in Resene Smoke Tree and Resene Licorice finishes the look.

strike a chord

Strike a chord

A simple painted shape can add fun and a subtle theme to a teen’s room without having to go overboard. This guitar silhouette echoes a teen’s musical passion and extends out from a part wall painted in zingy teal Resene St Kilda. The rest of the walls and floor are painted Resene Half Raven as a cooler contrast to create a strong graphic look. A bedside table and shelf painted in inky blue Resene Licorice breaks things up. A colour scheme like this one is also very age-neutral, so it will stay relevant as your child grows.

Hang loose

Hang loose

For a surfer teen, colours of the beach and sea are a natural choice. Pops of bright blue Resene Optimist give the impression of the summer sky against crisp Resene White walls. The soft grey bedding, the door in Resene High Tide, the Resene Aquaclear finished headboard and the Resene Colorwood Bleached Cedar floor all add to the relaxed vibe.

The Skys The Limit

The sky’s the limit

To create the starry effect from this space-themed room, first paint the walls in Resene Alabaster followed by Resene FX Nightlight glow-in-the-dark paint. Firmly adhere star-shaped decals to the wall before painting the full wall in Resene Dark Side (for a current alternative try Resene High Tide). Once dry, remove the decals to reveal the photosensitive glow-in-the-dark paint underneath. In the day, the stars appear pale yellow and when the lights are out, they’ll shine like the night sky. The floor has been painted with Resene Longitude, the nightstand is in Resene Panorama and Resene Dark Side, while the chair and bookends have been coated in Resene Iron.

Moonlight makeover

Go a step further than a typical starry sky and create glow-in-the-dark moons for the walls or ceiling of your budding astronaut’s bedroom. Resene FX Nightlight is a glow-in-the-dark paint designed to keep shining after the lights have gone out. Pale yellow by day, it’s perfect for creating cosmic details in kids’ rooms like glowing stars or these otherworldly moons. 2-3 coats over a white circular base will give off the best effect and leave your brushstrokes visible for an extra lunar-like landscape. Add details in Resene SunshadeResene Juniper and Resene Blue Lagoon.

Moonlight makeover

For more projects and colour inspiration visit Resene.co.nz.

Article provided by Resene.

Read more on Kidspot:

How To Transform A Teenager’s Bookshelf

Sponsored content provided by Resene

Using just paint and wallpaper, transform boring shelves into something even your teen will love.

Even many tech savvy teens still like to doodle. Enable your teen to doodle on the sides of their bookshelf without wrecking it, using Resene Write-on Wall Paint to create a coloured whiteboard. Simply wipe off as needed and they can start all over again. Also handy for younger children as you can use it to name the shelf to remind them what goes where.

You will need:

  • Wooden cabinet with shelves
  • Roller and tray
  • Ruler and scalpel/scissors
  • Liquid glue
  • 1L of Resene paint in your chosen colour. We used Resene Apache and Resene FX Metallic Solid Gold. You could choose a single solid colour if you preferred.
  • Wallpaper from the Resene Wallpaper collection available from Resene ColorShops. We used wallpaper from the Boys & Girls collection.

Resene Bookshelf

Step one

Paint your shelves in your chosen colour. We used Solid Gold, with an undercoat of Resene Apache. Leave to dry.

Resene Bookshelf

Step two

Measure out the back sections of the shelves and cut the Resene wallpaper to fit.

Resene Bookshelf

Step three

Apply the Resene wallpaper with the glue and leave to dry.

Resene Bookshelf

Step four

Introduce the shelves to your teenager’s room and cross your fingers that it helps to keeps things off the floor and nicely organised.

For more projects and colour inspiration visit Resene.co.nz.

Styling by LeeAnn Yare, photography by Melanie Jenkins

Read more on Kidspot:

How To Paint Your Own Serving Tray

Sponsored content provided by Resene

Wooden serving trays can tend to look a little old and uninspiring over time. Why not add a little colour to yours to lift your next meal?

Choose Resene colours to complement the food you most like to serve.

Serving Tray

You will need:

Resene Tray Step 2

1. Wipe your wooden serving tray to ensure it is clean and allow to dry.

2. Use the low tack masking tape to mark the areas you’d like your stripes to go.

3. Paint in your stripes using your chosen Resene colours.

Resene Tray Step 3

4. For stripes that are side by side, paint one stripe, allow to dry and then apply more masking tape to allow you to paint the other stripe. Or paint the whole area in one colour, then one dry mask and paint the contrasting stripes on top.

5. Wooden serving trays are not designed to go into dishwashers. Instead wipe clean and allow to dry.

For more projects and colour inspiration visit Resene.co.nz.

Article provided by Resene. Project by Nikki Astwood, 2020.

Read more on Kidspot:

Disney+ Destinations: The Great Barrier Reef Fun Activities

The Great Barrier Reef is home to a range of beautiful plants and animals – in fact it is one of the seven natural wonders of the world!

It is home to fish like Regal Blue Tangs (Dory), Clownfish (Nemo and Marlin), green sea turtles and so much more!

Print your passport and get ready to explore the cool, calm waters and coral gardens of the reef with Nemo and Dory. Create your own jellyfish obstacle course and bring the movie scene to life at home.

Click the images below to print these fun activities ⬇️

Disney Destinations Great Barrier Reef

Disney Destinations Great Barrier Reef

Disney Destinations Great Barrier Reef

Disney+ Destinations: Mushroomton Fun Activities

Mushroomton is the fantasy city home to many fantasy magical creatures including elves, trolls, centaurs, satyrs, dragons, unicorns, mermaids, and fairies.

Come and join in the fun at Mushroomton and make a Pegacorn Milkshake, colour in some fun residents and help Barley and Ian find Guinevere.

Click the images below to print these fun activities ⬇️

Destination Mushroomton

Destination Mushroomton

Destination Mushroomton

Destination Mushroomton

Disney+ Destinations: Fun Activities In New York

Explore New York with Disney+ and Soul.

Make Disney+ your destination of choice for the school holidays with fun staycation activities based on your family’s favourite Disney stories.

Print your boarding passes, get a hangar for your door, and help Joe find his way.

Click the images below to print these fun activities ⬇️

Destination New York

Destination New York

Destination New York

Destination New York

Disney+ Destinations: Monstropolis Fun Activities

Welcome to Monstropolis, a city inhabited by monsters of every imagination.

It’s a diverse city where every monster is trying to get a table at Harryhausen’s restaurant! It’s also the setting for Monsters At Work, a new animated Disney+ TV series where eager new Monsters University recruit, Tylor Tuskmon, hopes to fulfil his dream of working on the scare floor at Monsters Inc, only to find that Monstropolis is now powered by the laughter of children.

Share some giggle-inducing jokes and fill the city with monster belly laughs!

Click the images below to print these fun activities ⬇️

Monstropolis

Monstropolis

Monstropolis

Monstropolis

Disney+ Destinations: Zootopia Fun Activities

Enter the modern metropolis of Zootopia where animals from all over live together.

Officer Judy Hopps jumps at the chance to crack a case. even if it means having to work with fast talking Nick Wilde.

Enjoy some fun activities with Judy, Nick and others – and don’t forget to print your very own boarding passes to Zootopia.

Click the images below to print these fun activities ⬇️

Explore Zootopia

Match animals to their tracks

Destination Zootopia

Destination: Zootopia

Swoop To The Rescue With The PAW Patrol True Metal Mighty Meteor Track Set! | Kids Review

The PAW Patrol True Metal Mighty Meteor Track Set is a great toy for children who have watched and loved PAW Patrol and even those new to it.

Our Junior Toy Analyst, Ruby, was delighted to be able to help her favourites, PAW Patrol’s Ryder and the Pups, save the day.

Check out what Ruby and her mum thought below ⬇️ 

Meet Ruby, a  Junior Toy Analyst

Age: 5 years old 

Favourite colour: Rainbow

Favourite food: Pineapple

Favourite toy: Fluffy toys

Ruby has a love for fluffy toys and animals. When out and about Ruby loves to stop and talk to all the puppies – one day she would love to have a kitten or a puppy of her own. When she is older her dream is to own her very own zoo! Ruby also enjoys spending time playing with her Barbies and princess or animal sets. Every night you will see Ruby snuggled up in bed with one of her fluffy friends.

Paw Patrol Mighty Meteor Trackset

PAW Patrol True Metal Mighty Meteor Track Set

Ruby was so excited when she saw the big box and even more excited to see that it was PAW Patrol – she could not wait to get into it. Once we opened the box Ruby was quickly handing me the pieces to build the PAW Patrol Mighty Meteor Track Set. With the great picture instructions, the track set was easy to build within a couple of minutes.

The set comes with a metal Chase and vehicle. Ruby who has just started to learn to read excitedly said, “It’s a real metal car Mum.” You can buy the other Pups die-cast vehicles to add to the track set so your child can include their favourite pup.

Ruby has grown-up watching PAW Patrol and has always enjoyed role playing being part of Ryder and the pups’ team to save the day. Now Ruby can use her new Meteor Track Set and her imagination to help Ryder save the day – “No job too big, no pup too small.”

It was quick for Ruby to learn on her own with no help from mum how to use the Meteor Track Set. She put Chase in the track and set him off to beat the robot. She then started to include her other dolls in her game who all needed saving from the meteor.

This set is great for little hands, big hands and any PAW Patrol lover –  there is hours of entertainment to be had. This would make a great Christmas present for any little pup hero.

The toys in this review were provided to Kidspot by The Warehouse.

Has your child recently discovered a new favourite toy?

See more:

If you have a child aged 8 – 15 who would like to be one of our resident toy, book and movie reviewers, fill out the form below and we’ll be in touch next time we need a kid reviewer.

Get Ready For A Hilarious New Game – Pull My Finger | Kids Review

Pull My Finger is a hilarious game that combines two of kids’ favourite things – monkeys and farts!

It also includes inflating bottoms and pulling the monkey’s finger – how much toilet humour can our Junior Toy Reviewers handle?!

Ella and Ruby, and their mum, gave this new family game a spin ⬇️ 

Meet Ella!

Meet Ruby!

Age: 7 years old
Favourite colours: Green and blue
Favourite food: Fish & Chips
Favourite toy: Science Kits

Age – 5 years old
Favourite colour – Rainbow
Favourite Food – Pineapple
Favourite Toy –  Fluffy Toys

“Pull my finger!”

Ella and sister Ruby received the Pull My Finger game to review. Ruby (5) is very in to potty humour at the moment so she couldn’t wait to get in to this game! The box looked exciting with the bright purple cheeky looking monkey with a big smile on its face. The game does require some adult assembling, but that is very quick and easy. It comes with a spare bottom and a bright, colourful banana spinner and instead of just having your normal 1-6 numbers there is a reverse, skip, and choose game action, which makes for a bit more excitement.

The object of the game is to pull the monkey’s finger and watch its bottom inflate until it blows. If the bottom blows on your turn you are then out of the game and the remaining players will continue until there is one person left (they are the winner).

Pull My Finger

You get to a point in the game when you are sure the bum is going to deflate and the girls got all giggly thinking, “this is it, it’s going to blow”, and then there is a sigh of relief when it doesn’t and you’re safe (for now!). Once the game is finished you can display your monkey on a shelf in your bedroom or playroom as a cute colourful ornament.

This is a great family game, children from age four and upwards would be able to play this game without adult help, and I think two and three-year-olds would also love this game, although they may just require an adult to hold the monkey down while they pull the finger.

The toys in this review were provided to Kidspot by The Warehouse.

Has your child recently discovered a new favourite toy?

See more:

If you have a child aged 8 – 15 who would like to be one of our resident toy, book and movie reviewers, fill out the form below and we’ll be in touch next time we need a kid reviewer.

Toys For Active and Imaginative Play | Kids Review

Encourage your child’s active and imaginative play with some great new toys that they will love. Our Junior Toy Analyst Jaxon worked hard testing out toys featuring some of his favourite things.

Check out what Jaxon and his mum thought below ⬇️ 

Meet Jaxon, our Junior Toy Analyst

jaxon junior toy reviewer

Age: 8

Favourite colour: Green

Favourite food: Mashed potato

Favourite toy: LEGO and Nerf

Jaxon loves being busy and he’s always on the move – whether it’s Nerf battles with his friends or attempting jumps on his bike around the local pump track, he never sits still for long. He’s great at building and creating and he’s really into imaginative play – he comes up with fantastic narratives while he’s playing with army men or LEGO and he’s always looking for friends, or even his little sister, to join in. He’s started showing an interest in video games lately but we like to keep him engaged with real life toys and games as much as possible!

Fisher-Price Imaginext® Mega Bite Shark

For a kid with a shark obsession who had just been to Kelly Tartlon’s the week prior to see them live, this Fisher-Price Imaginext Mega Bite Shark came at just the right time.

Fisher-Price Imaginext Mega Bite Shark

Jax ripped into it straight away and thought it was really cool how realistic the swimming motion looked when he rolled it along, but even better that it can “swallow” the scuba diver (who can then be retrieved from the door at the back). This made for great imaginative play as he set up underwater scenes with the shark cage, the attacking shark, and the clever scuba driver with all his tricks to get away safely. The shark is quite big so he could incorporate other toys into his play, like his LEGO men (the shark became a Megalodon once they were involved) and even his little sister and her Barbies became part of the scene. When you press the Power Pad the shark starts chomping like crazy which made both kids squeal!

He was very keen to see what it did in the water but good thing we checked the box, because Mega Bite is not supposed to be submerged – he’s a land lubber only! So keep in mind that this is not a bath or pool toy, though it actually doesn’t matter as it’s probably more fun for kids to create the underwater world in their imaginations instead.

From a mum’s point of view, I liked that the shark can move without needing batteries and it also doesn’t make any noises (which, we all know as parents, grow tiresome quite quickly). I loved watching Jaxon come up with all these new action-packed storylines and how he involved his sister and other toys.  The box says for kids aged 3-8 but I think any kid of any age with an interest in sharks would find joy with the Mega Bite. It’s well worth buying and keeping in the cupboard if you want to start stocking up for Christmas!

NERF Alpha Strike Cobra RC-6 Targeting Set

NERF Alpha Strike Cobra RC-6 Targeting Set

As an avid NERF enthusiast – it was even the theme of his birthday party last year – Jaxon was super excited to try out the Alpha Strike Cobra RC-6 Targeting Set. The single blaster pack comes with 12 darts and four half-bottle plastic targets (which don’t fully connect and can be blasted apart). He has a few NERF blasters already but none that have targets for him to shoot at, so the first thing he did was put the bottle halves together and line them up on the table.

What’s cool about these bottle halves is that you can actually set them up as targets in a number of different ways – either as two full targets or as four half targets.

He loaded the foam darts and found a good position for himself before having a go. He was really impressed with the power performance of the darts (“Whoa these shoot so far!”). There’s actually a very cool feature on this NERF blaster which allows you to load, prime and fire each blaster in three quick steps to unleash six darts in a row!

The boys next door popped over and quickly joined the game with some of the other NERF blasters we have. There were lots of excited cheers when the targets were smashed over and great to see them positioning themselves and aiming to hit the targets – great for their coordination skills.

I can’t get over how good the price is on this blaster set! Another great toy to stock up on for birthday presents or even as a stocking stuffer for Christmas.

NERF Alpha Strike Cobra RC-6 Targeting Set

Jaxon has already had hours of fun with this blaster and I know it will remain a firm favourite – it’s a great addition to his NERF collection.

Mega Construx Hot Wheels® Rodger Dodger & Hot Wheels® Racing

This is something new from Hot Wheels and something we’d never tried before – constructing your own Hot Wheels monster truck out of building blocks! For kids who are into construction blocks as well as the Hot Wheels franchise, this is a really fun combo.

Jaxon couldn’t wait to get started, and opened the box to find all the building blocks neatly packaged and the instruction booklet which was very clear and easy to follow. He needed a bit of help from dad to get started, but once they had the initial base built he was quite happy to carry on without help. He was very proud of himself once Rodger Dodger was built as it looked really impressive – the wheels are massive! He then went on to build the smaller racing car, without any help at all this time, and he put it together in record time – easy peasy!

The box says it’s for ages 5+ so for an 8 year old the construction was really achievable. The set features authentic Hot Wheels details such as Rodger Dodger’s exposed chrome engine and the iconic red, white and blue paint job and giant wheels of Hot Wheels Racing.

Mega Construx Hot Wheels Rodger Dodger & Hot Wheels Racing

The set also comes with two poseable micro action figures dressed as race car drivers. So once the vehicle construction was complete, Jaxon launched straight into some imaginative play with the full set. Both vehicles drive along at good speed on flat surfaces and there was a lot of car-crushing with the monster truck on the smaller vehicle as well as some of Jaxon’s other Hot Wheels cars which were incorporated into the game.

There are 249 bricks and pieces in the set which can be combined with any Mega Construx building set, to build your own custom cars. The bricks are also compatible with other name brands which makes for even more building options – ideal for developing creativity and problem-solving skills.

This would make a great birthday gift for kids between ages 5 and 10 who love to construct and who also love cars. It’s such a good price that I am going to stock up on a few to have in the cupboard for all the birthday parties Jaxon gets invited to. The fact that he has this set means he can help his friends build them and they can play with their monster trucks together. It also makes a great Christmas present if you are getting organised early this year!

The toys in this review were provided to Kidspot by The Warehouse.

Has your child recently discovered a new favourite toy?

See more:

If you have a child aged 8 – 15 who would like to be one of our resident toy, book and movie reviewers, fill out the form below and we’ll be in touch next time we need a kid reviewer.

Discover The Cutest, Cuddliest Puppies With Zuru Rainbocorns Puppycorn Surprise | Kids Review

 There are 7 Puppycorns to collect in the RainbocornsPuppycorn Surprise Series 1, including Posh the Poodlecorn, Missy the Huskycorn, and even Dotty the Rare Best-in-Show Bulldogcorn in 7 layers of surprise!

Our Junior Toy Analyst Ella enjoyed the mystery unboxing, quirky surprises and cuddly plush Puppycorns.

Check out what Ella and her mum thought below ⬇️ 

Meet Ella, Junior Toy Analyst

Age: 7 years old 

Favourite colours: Green and blue

Favourite food: Fish & Chips

Favourite toy: Science Kits

Ella is an entertainer – she loves to perform – no matter where she goes Ella is always putting on a show. Another passion of Ella’s is science – she loves to get hands on in a science experiment. Most important to Ella is family – she truly values family time more than anything whether it’s a weekend away, a walk into the forest, or beating mum at Uno.

Zuru Rainbocorns Puppycorn Surprise!

Zuru Rainbocorns Puppycorn Surprise

Ella loves the Zuru Rainbocorns and between Ella and her sister they have collected a few Rainbocorns, so she was so excited to see that she now had a Puppycorn to add to her collection.

I think what excites her the most is the fact that you do not know what you are getting and the excitement that leads up to find out what your surprise is going to be.

Ella gave her Puppycorn a big squeeze to crack the egg and was super stoked to see she had Penny the Pug along with some scented stickers, putty, and her mini Boo Boocorn.

Ella enjoyed the scratch-to-reveal heart on Penny, which revealed Penny loves tacos just as much as Ella.

The toys in this review were provided to Kidspot by The Warehouse.

Has your child recently discovered a new favourite toy?

See more:

If you have a child aged 8 – 15 who would like to be one of our resident toy, book and movie reviewers, fill out the form below and we’ll be in touch next time we need a kid reviewer.

Disney+ Destinations: Kumandra Fun Activities

Come on an adventure to the mystical land of Kumandra.

View the stunning sights, from a bustling floating market city of lights or a hot and dusty desert, to lush tropical jungle and a vast palace island. Like Disney’s newest heroine in Raya and the Last Dragon, keep an eye out for the magical gems that are scattered all over the kingdom of Kumandra, and hold the power of the dragon, Sisu.

If you can take your eyes off the scenery, help Sisu on her quest by solving some puzzles.

Click the images below to print these fun activities ⬇️

Destination: Kumandra

Destination: Kumandra

Destination: Kumandra

Destination: Kumandra

Disney+ Destinations: Portorosso Fun Activities

Come and explore the colourful streets, turquoise waters, and sun-drenched countryside of the beautiful Italian Riviera.

The fishing village of Portorosso is the setting for Luca, a Disney and Pixar movie about one young boy and an unforgettable summer of discovery. Luca and his new friend share an amazing adventure, but they hide a secret – they’re really sea creatures from below the waves of the Mediterranean.

Serve up saucy pasta and pastel-coloured gelato to complete your Italian dream holiday.

Click the images below to print these fun activities ⬇️

Print and cut out your Portorosso boarding passes

Destination: Portorosso

Destination: Portorosso

Destination: Portorosso

Destination: Portorosso

Join the Catch Up

Join our community of parents and let the Kidspot Catchup be your guide to creating unforgetable family moments.