Once kids get a taste or a hint that there is something far more interesting (aka junk), up for grabs they can be very stubborn when offered anything even remotely healthy. So just know that when you start offering only healthy choices, they will probably refuse them. Don’t let this dissuade you into giving in, though. They will soon get the message that junk food is off the agenda after a few missed snacks and surprise you with the choices they make.
They say it takes up to 20 tastes of a certain food before our kids take to it, so keep this in mind when offering that fruit, vegetables or dinners they have previously refused… keep offering and it will click one day.
Processed snacks are something quick that we can throw into our bags and have on call when hunger strikes, but do you know what is really in these snacks? I personally try to keep away from the over-processed, prepackaged type, not only because they usually don’t have many nutrients, but also because of the excess packaging that just gets thrown away at the end.
The most important tool you can use is learning how to read labels on the side of packets. This is your best guide.
I’ve created these tables to act as a good guide for what to look for in kids’ snack items; remember you are looking at ‘per 100 grams’ here, so don’t get caught out by looking at the ‘per serve’ count on your food items.
As you can see, anything under 3 grams of fat, 5 grams of sugar and 120 grams of sodium, is considered the best option.
For drinks, water is always the best choice, but if you can’t break the juice habit, remember to water it down at least 50:50. Soft drinks are completely unnecessary for anybody and particularly nasty for kids, so keep these for ‘parties only’.
Fibre is a must for kids to help with bowel function and stop constipation and the ‘sore tummy’ feeling they may complain of. Looking at the table above, anything over 6 grams is excellent (but sometimes hard to find) so aim for between 3-6 grams.
Have you ever wondered how the snacks you buy for your children stack up? I found this excellent chart on the Choice website that rates most of the packaged snack foods.
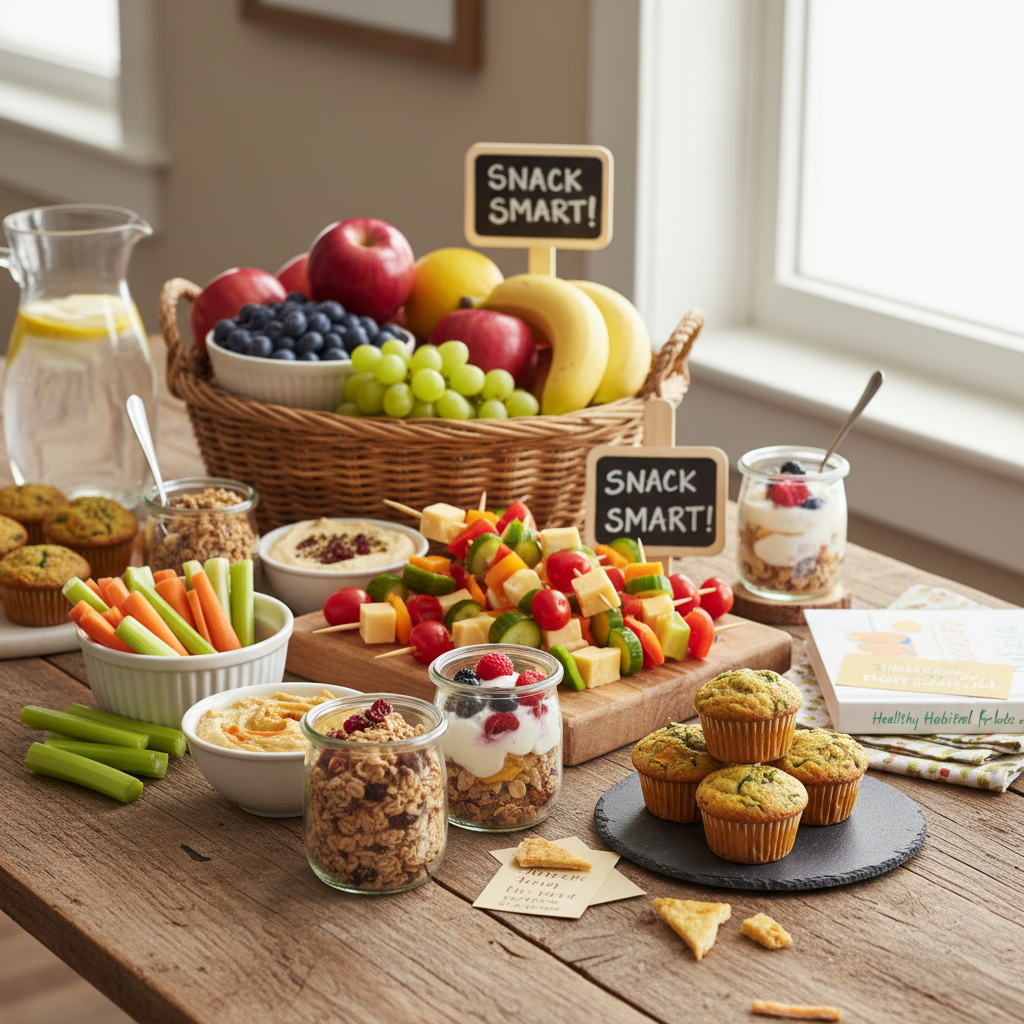
So what are the best choices to offer as snacks? Try some of these ideas.
Rice cakes lightly spread with ricotta or “light” cream cheese
Toasted muffin with a scrape of honey
Microwaved pappadums.
Crispbreads with a low fat topping or plain biscuits.
Wholewheat breakfast cereal and reduced fat milk.
Scoop low fat ice cream with 1/2 cup canned unsweetened fruit.
Frozen banana (spear peeled banana with icy-pole stick and freeze) or other frozen fruit such as grapes, peeled orange or mandarin segments.
Fruit kebabs (skewer cubes of fruits on to bamboo skewers)
200gm tub of frozen yoghurt or low fat fruit yoghurt
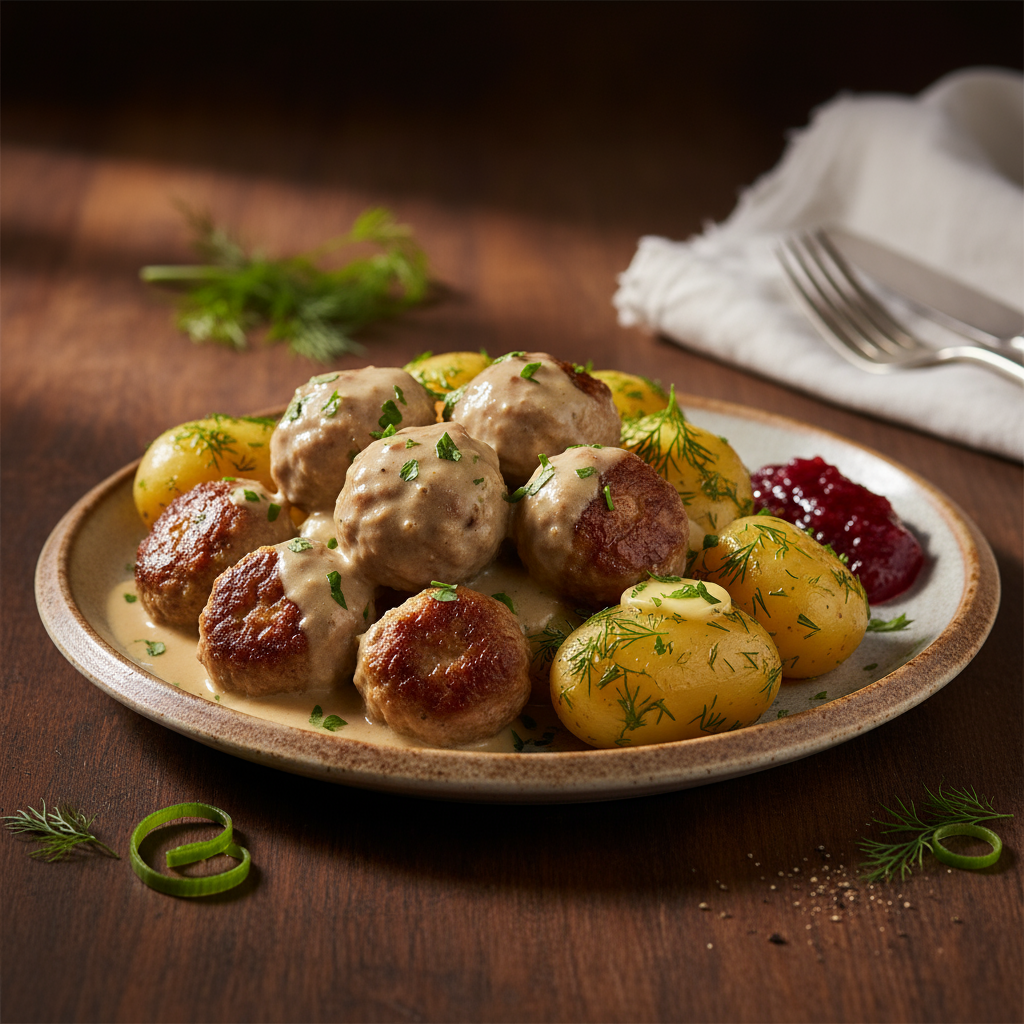
To make the meatballs, combine the shallots, pork, egg and dill together in a large bowl. Season well and form into small, golf-ball-sized meatballs. Set aside in the fridge for at least half an hour.
Bring a saucepan of cold water to the boil and add the baby potatoes, cook until tender. Drain and toss with the extra butter (I used 20g for 6 potatoes), dill and lemon zest.
Meanwhile, cook the meatballs in a saucepan with a little olive oil. Turn regularly until cooked through, about 10 minutes. Set aside on a warm plate while you make the sauce.
Pour off excess oil and add the butter. Melt this then whisk in the flour. Keep whisking for about five minutes then add the boiling water. Whisk for a few more minutes or until the sauce has thickened. Mix in the sour cream, cranberry sauce and lemon and whisk again until the sauce is nice and smooth.
Serve the meatballs with the sauce and potatoes.
Notes:
It is much easier to roll meatballs if your hands are wet.
You could make these meatballs and freeze them for later. This is a great way to stock your freezer so you have less work to do the next time you want Swedish meatballs.
If you don’t have time to make the sauce (though it only takes five minutes), just plop a little bowl of sour cream and another of cranberry sauce on the table.
This dish is also great with steamed green beans.
This recipe was created by Sophie Hansen for Kidspot, New Zealand’s best recipe finder.
1 small orange sweet potato, peeled, coarsely chopped
1 small carrot, peeled, finely chopped
1 desiree potato, peeled, finely chopped
half a cup frozen peas
125g can corn, rinsed, drained
half a cup coarsely grated cheddar
2 eggs, lightly whisked
3 sheets ready-rolled frozen shortcrust pastry, just thawed
2 tsp sesame seeds
Method
Preheat oven to 240C. Line an oven tray with baking paper.
Cook sweet potato in a medium saucepan of boiling water for 10 minutes or until tender. Drain well. Transfer to a heatproof bowl. Use a fork to mash until smooth. Set aside to cool in bowl.
Cook carrot and potato in a medium saucepan of boiling water for 5 minutes or until tender. Drain well. Set aside for 5 minutes to cool slightly.
Add carrot mixture, peas, corn, cheese and 1 egg to sweet potato and stir to combine. Season with salt and pepper.
Use a 12cm-diameter pastry cutter to cut 12 discs from pastry sheets. Spoon vegetable mixture evenly among pastry discs. Brush edges of pastry lightly with remaining egg. Fold pastries in half to enclose filling. Use fingertips to gently press together to seal.
Place on the lined tray and lightly brush with remaining egg. Sprinkle with sesame seeds.
Bake in oven for 15 minutes or until golden brown and cooked through. Remove from oven and set aside to cool.
Once completely cooled, wrap in baking paper, and store in the fridge ready for the lunchbox.
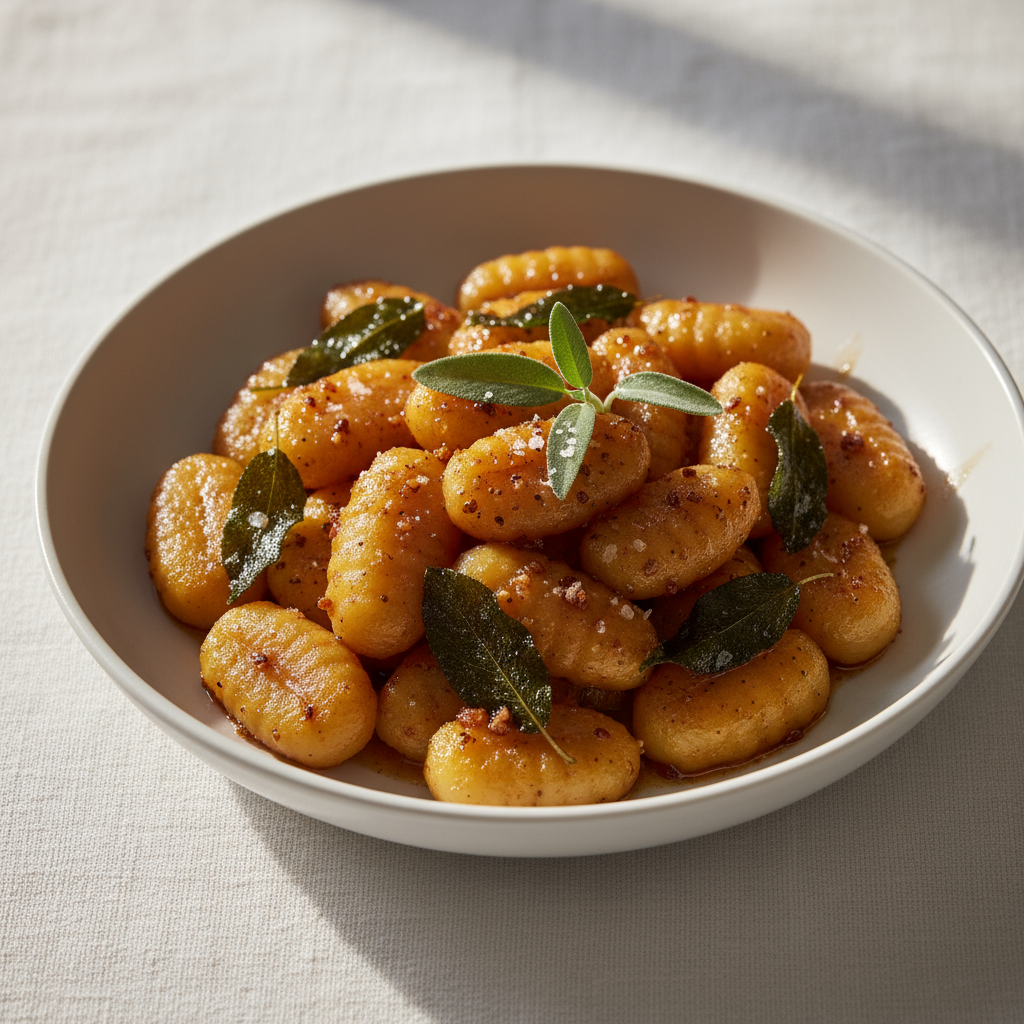
Cook the gnocchi to the packet directions and set aside in a warm place.
In a fry pan melt the butter and add the sage leaves. The butter will start to foam and this is when to add the sage leaves.
Toss the gnocchi to coat in the butter and turn the heat OFF! It keeps cooking after you remove the heat so serve it immediately before the butter goes from golden brown to burn’t.
Notes
I like to serve this in tiny bowls as a starter for winter dinner parties. It cooks ultra-fast and makes a very sophisticated little dish with a minimum of effort. Make sure you have everyone seated before the butter hits the pan.
When making gnocchi I place the whole quantity into boiling water and stand by and remove all them as they float to the surface. If you cook them anymore they resemble rubber bullets.
The crispy sage leaves I use as a little garnish, so it’s a minimum effort dish.
This recipe was created by Jennifer Cheung for Kidspot, New Zealand’s best recipe finder.
Sprinkle with some flaked almonds for decoration if you want to make it look extra fancy.
This cake is extra good if you can be bothered to make the almond meal yourself from natural almonds. To do this just process up a cup or so in your food processor until nice and fine. It makes all the difference to the end result.
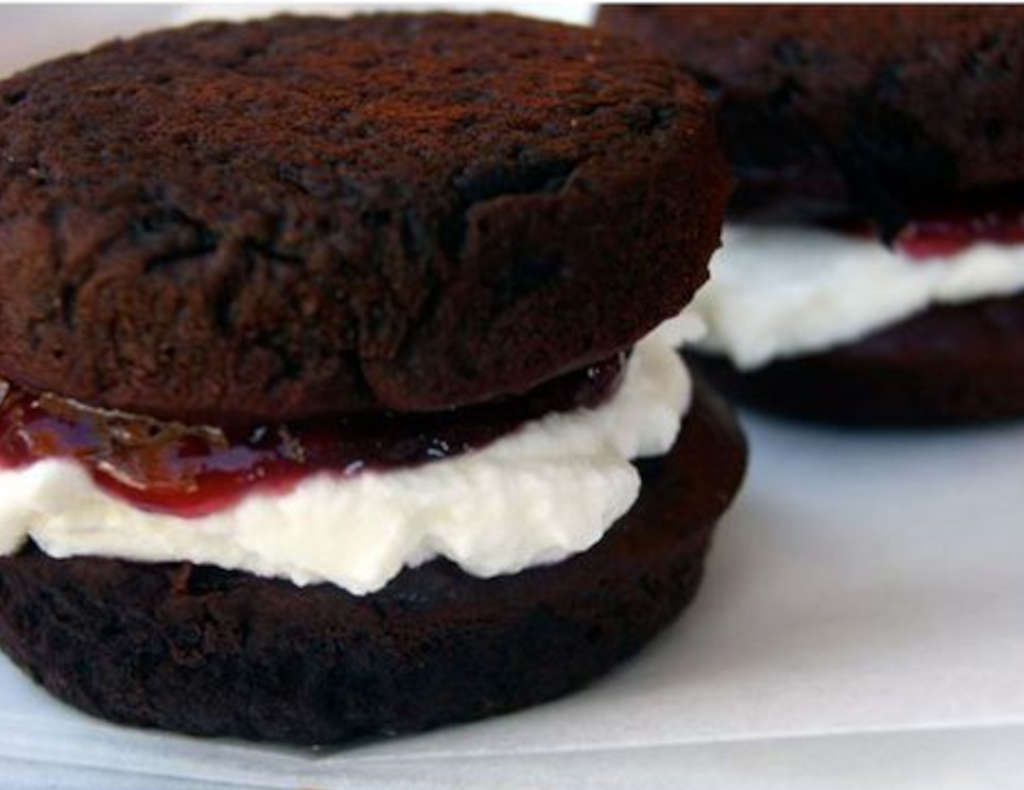
Whoopie pies are small, flat sponge cakes sandwiched between cream – or in this case yoghurt. These sweet little cakes are just delicious, mostly healthy and look fantastic.
Ingredients
2 large fresh beetroot
1/3 cup walnuts, roughly chopped
1/3 cup dates, roughly chopped
2 cups wholemeal flour
1 cup brown sugar
1/4 cup raw cocoa powder (or regular cocoa powder)
1/2 cup honey
2 tsp baking powder
1/4 cup vegetable oil
4 eggs, lightly beaten
1 cup Greek yoghurt
1/2 cup raspberry jam
Method
Preheat the oven to 180°C or 160°C fan-forced.
Wrap the beetroot in foil and roast for an hour or until soft.
Meanwhile, grease and line a 12 hole whoopie pie tin.
Peel and place the beetroot in the bowl of your food processor and blitz for a couple of minutes. Then place all remaining ingredients in the bowl of your food processor and blitz until you have a smooth batter.
Spoon this into prepared tins, about 3/4 full and bake for 10 minutes if using the whoopie pie tins or 25 mins if making one large cake.
Remove from oven and let cool on a wire rack. To serve, sandwich whoopie pies between a little natural yoghurt and jam.
Serving Suggestions
Note
I bought my whoopie pie tin at a homewares shop recently and so we have been making lots of whoopie (pies).
You could just as easily use a muffin tin for this recipe – in this case I would fill each muffin hole 3/4 full and then once cooled slice them in half with a serrated knife and fill with the yoghurt or jam.
Alternatively make one large cake – a 24cm springform cake tin would be ideal. In this case bake for 35 minutes or until a skewer comes out clean and the cake is pulling away from the sides.
This recipe was created by Sophie Hansen for Kidspot.
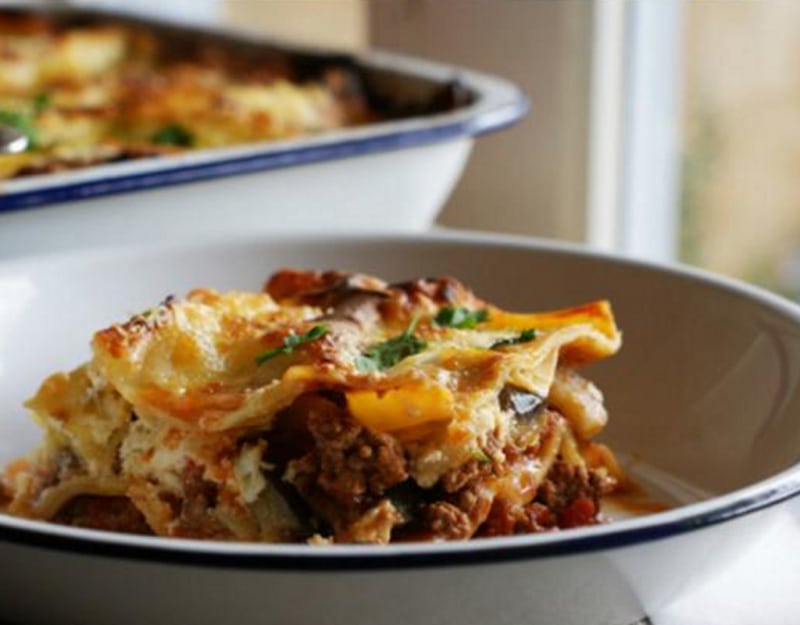
Soak the eggplant in cold water and set aside. Preheat oven to 180°C (160°C fan-forced). Heat 2 tbsp of olive oil in a heavy-based pan over medium heat and cook the onion for 5 minutes, or until softened. Add the mince and garlic and cook for a further 5 minutes, stirring often to brown the meat as much as possible. Stir through the wine, then add the tomato paste, tinned tomatoes, herbs and cinnamon. Bring to the boil, then reduce heat and simmer for 30 minutes.
Meanwhile, for the eggplant. Remove from the water and pat dry. Cut into cubes. Heat 1 tbsp of olive oil in a frying pan and toss the eggplant until golden on all sides. Set aside (on a layer of paper towel). For the ricotta sauce; combine cheeses in a bowl and whisk in the egg. Season to taste.
To assemble, start by spooning 1/2 of the meat mixture in the base of a large baking tray (mine is 35 x 25cm and 5cm deep). Top with half of the eggplant and a layer of the lasagne sheets. Add half of the cheese sauce, then a layer of lasagne sheets, the remaining meat, then eggplant. Place a final layer of lasagne sheets on top of the eggplant, spoon over remaining cheese sauce, scatter with the parmesan and bake in the preheated oven for 45 minutes or until golden and bubbling.
Moisture is the key – always make and use more sauce than you think you’ll need. You will need it! And if you think the lasagne is drying out at all during cooking, there’s no shame in adding a few sloshes of water around the edges. This is usually picked up by the rest of the cooking sauce and will prevent any hard pasta pieces.
This recipe was created by Sophie Hansen for Kidspot, New Zealand’s best recipe finder. You can follow Sophie on Local is Lovely, Facebook, Twitter or Pinterest.
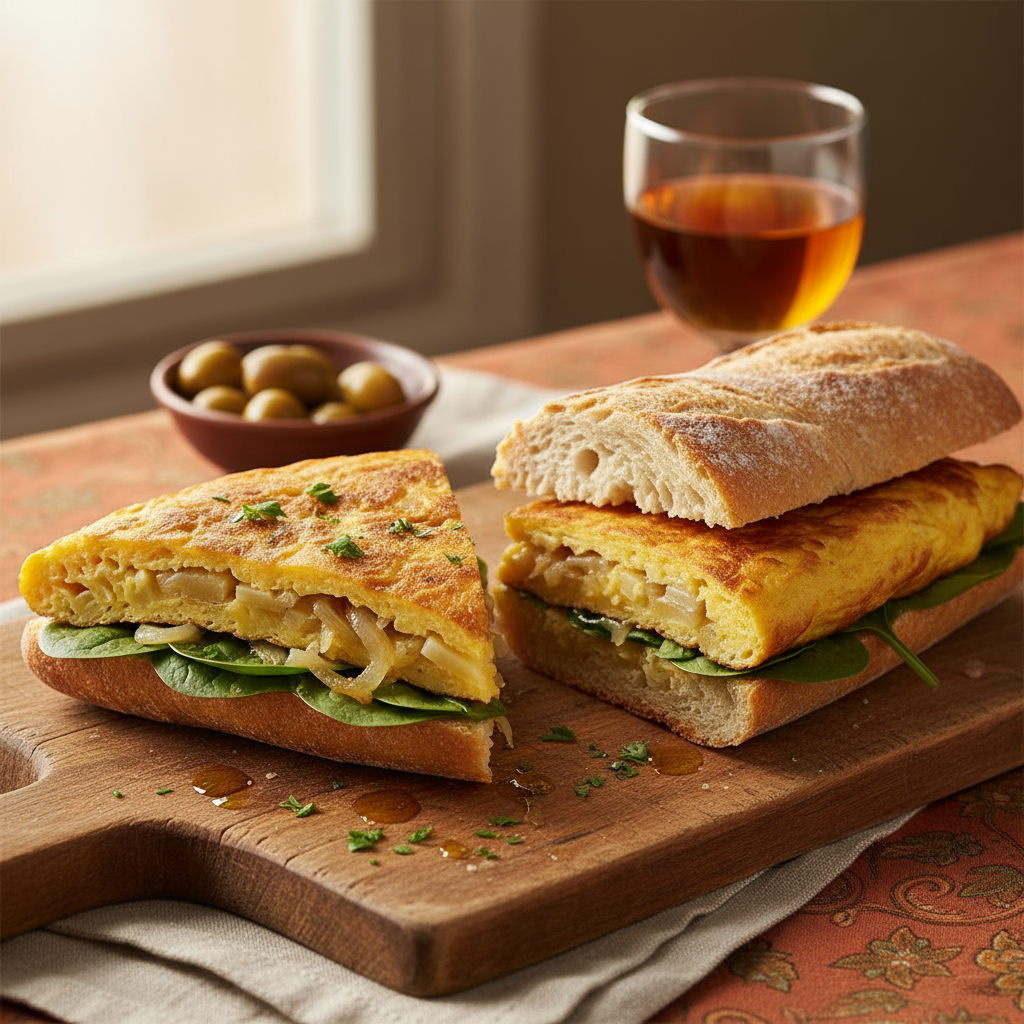
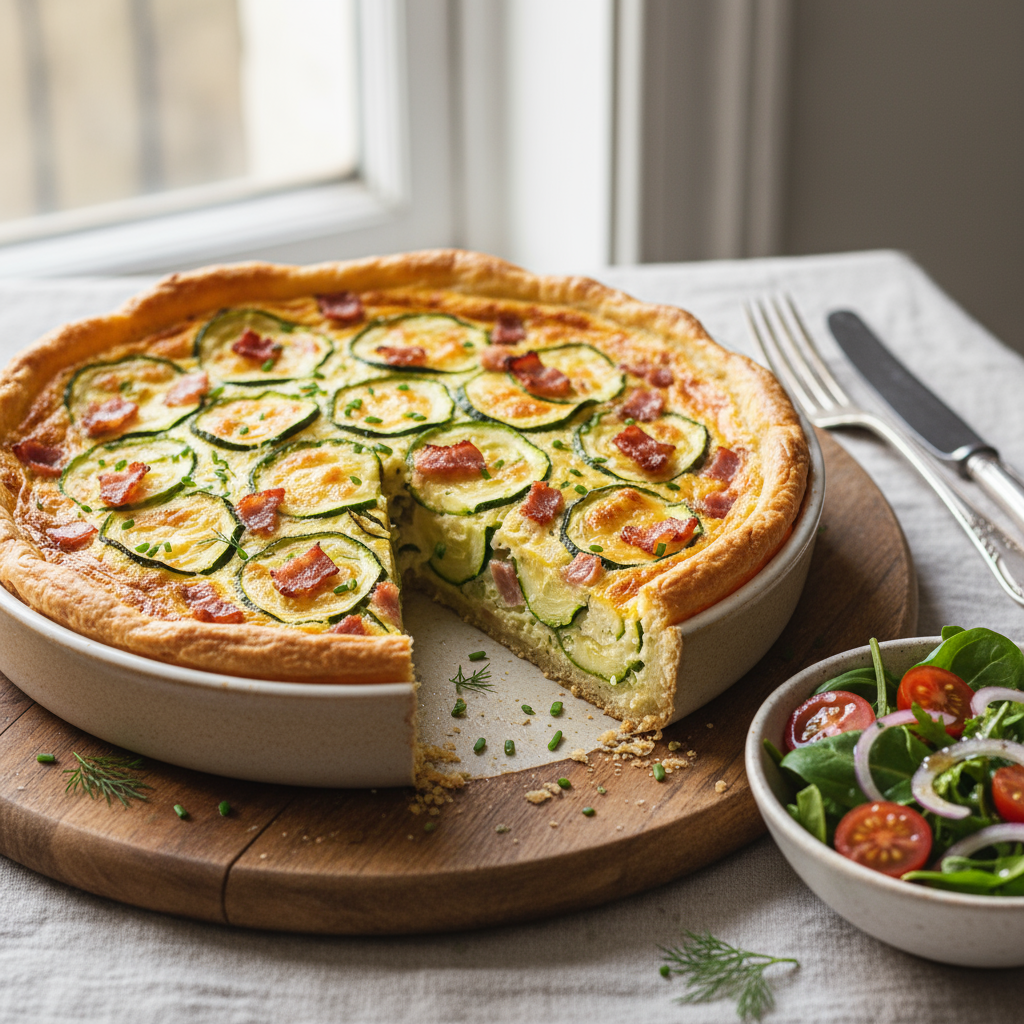
Cut potatoes into 1.5cm cubes and boil for 10-12 minutes until tender. Drain and set aside.
Heat olive oil and butter in a medium frypan over gentle heat and cook onion for five minutes, being careful not to overly brown. Add potatoes and toss to combine.
In a bowl, beat eggs together with parsley and cheese. Season well.
Pour egg mixture over potatoes and onion in the frypan. Turn up heat to medium and cook for 3-4 minutes until eggs have set. You can finish it off under a grill if necessary to set the top (and if your frypan is ovensafe).
Turn omelette out onto a chopping board and cut into four wedges. Cut baguettes in half lengthwise and fill with a wedge of omelette and a handful of spinach.
Serving Suggestions
Note
Of course you can add whatever you like to the omelette – bacon would be delicious!
If making ahead for a lunch box, allow the omelette to cool before you fill the baguettes.
Recipe by Greer Worsley, who blogs at Typically Red.
Preheat oven to 200°C (180°C fan-forced). Peel pumpkin and remove seeds, then cut into 1.5cm cubes. Toss in 20ml (1 tbsp) olive oil. Spread in a single layer in a baking dish and bake for 20 minutes.
Heat remaining oil in a fry pan. Saute onion and garlic over low heat for five minutes. Add frozen spinach and cook for 10 minutes, stirring often, until completely thawed and well combined. Stir through the baked pumpkin and crumbled feta. Season well with salt and pepper.
Increase oven to 220°C (200°C fan-forced).
Cut each pastry sheet in half to create six strips. Place 1/6 of the pumpkin mixture along the length of each strip. Brush one long edge with beaten egg. Starting with the unbrushed side, roll and seal. Repeat with all the pastry. Transfer the rolls, seam-side down, to a tray lined with baking paper. Slash each into quarters. Brush with egg and sprinkle with sesame seeds.
Serve with sweet chilli sauce for adults, and good old tomato sauce for the kids.
Grated cheddar cheese is fine as an alternative to feta.
Recipe by Greer Worsley, a working mum whose desire to make and bake things has grown in inverse proportion to the amount of spare time she has since her three gorgeous girls came along. Her blog is typically red.
These dessert tortillas are made from sugared and spiced tortilla cones stuffed with fruit and served with ice cream. An unusual fruity idea that will be a hit with the kids.
Serves:
Ingredients – serves 4
2 plain tortillas
1 egg white, lightly beaten
Caster sugar, to sprinkle
2 teaspoons extra cinnamon, ground
250 grams strawberries, hulled and chopped
2 fresh mangoes, flesh chopped
2 kiwi fruits, peeled and chopped
(Alternatively use fruit of your choosing)
Pulp of passionfruit
Ice cream to serve
Method
Preheat oven to 180C (350F).
Heat tortillas in microwave on HIGH for 30-60 seconds or until warm and flexible, then brush one side of each with egg white and sprinkle with sugar and cinnamon. Cut in half.
Fold each half into a cone shape, sprinkled-side folded inwards.
Stand in a muffin pan, wide-side down, and bake in the oven for 7-10 minutes or until brown. Leave to cool in pan.
Meanwhile, combine strawberries, mangoes, kiwifruit and half the passionfruit pulp in a bowl to make a fruit salsa. Sprinkle with a little cinnamon.
Combine remaining passionfruit pulp with a little water and extra 2 teaspoons of sugar. (If using passionfruit in syrup, use straight from the can and do not add water and sugar.)
Spoon salsa into cones and lay on a plate. Pour passionfruit mixture over the top and serve with ice cream.
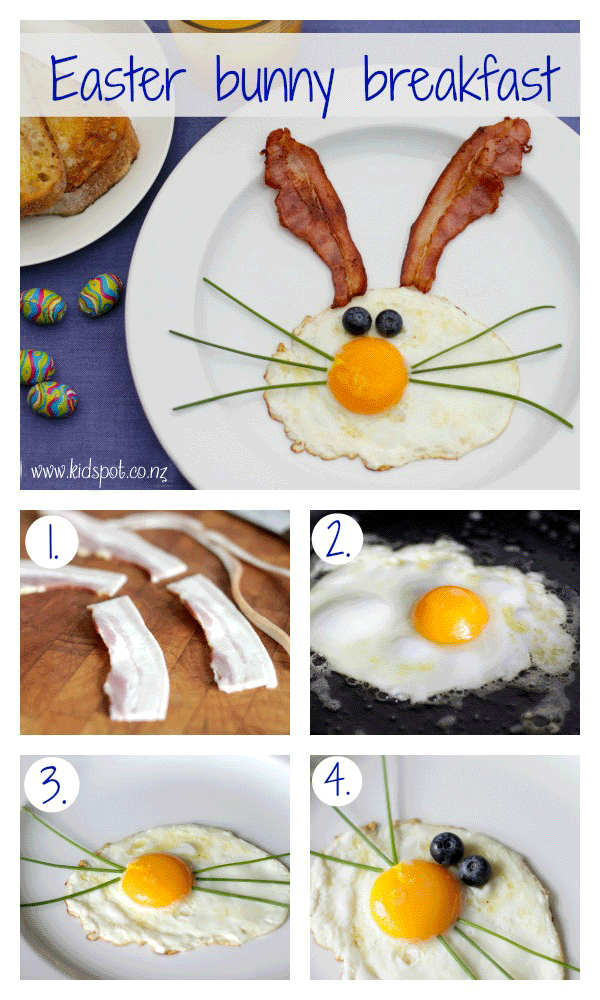
Make Easter morning extra fun by turning fried eggs and bacon into this cute and simple Easter Bunny breakfast. The kids will be hopping to the table for this one!
Ingredients (to serve 1)
1 rasher streaky bacon
1 egg
3 chives
2 blueberries
Method
Step 1. Cut bacon rasher in half. In a nonstick pan, fry for 2 minutes each side. Remove to a plate lined with absorbent paper.
Step 2. Fry egg over gentle heat for 2-4 minutes until cooked to your liking.
Step 3. Place egg on a plate. Cut chives in half and arrange on egg as whiskers.
Step 4. Position blueberries as the eyes and fried bacon as the ears.
Notes
Serving Suggestions
Note
Serve with toast on the side for a complete breakfast.
Choose free-range eggs where possible.
On the day you have your Easter egg hunt you could make these cute bunny butt pancakes. They are just like those bunnies in the garden.
If you love hot cross buns you will love these hot cross cookies. They are the perfect compromise and much faster to make than their traditional cousins.
These coconut cream eggs are perfect for when you need to know exactly what is in your Easter treats. The kids will also love making these with you.
This cream egg cheesecake is worthy of being the centrepiece for your special Easter dinner. It is easy to make ahead and will please the whole family.
These carrot-topped cupcakes are topped with sweet marzipan but don’t be fooled into thinking they are all sweet. The cupcakes under the carrots have a zingy lime flavour.
This recipe was created for Kidspot by Greer Worsley, who blogs at Typically Red
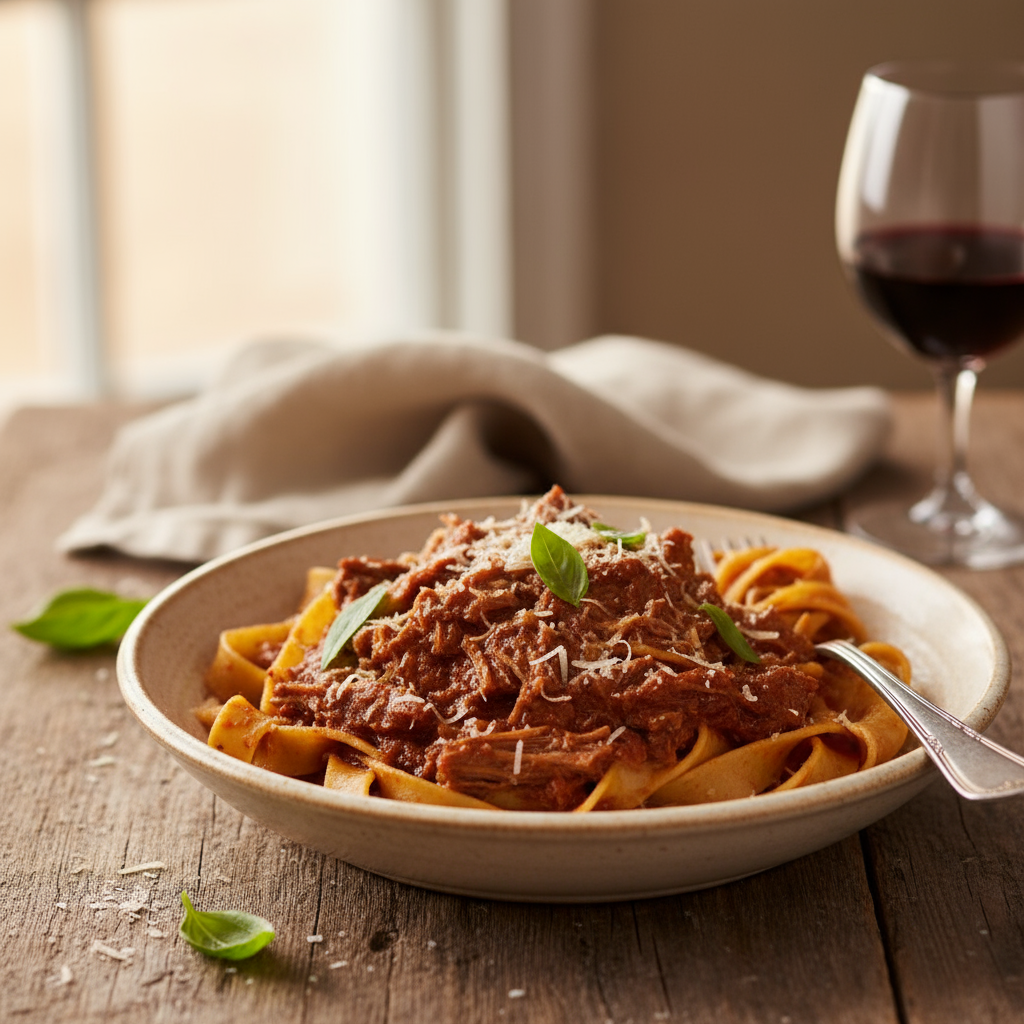
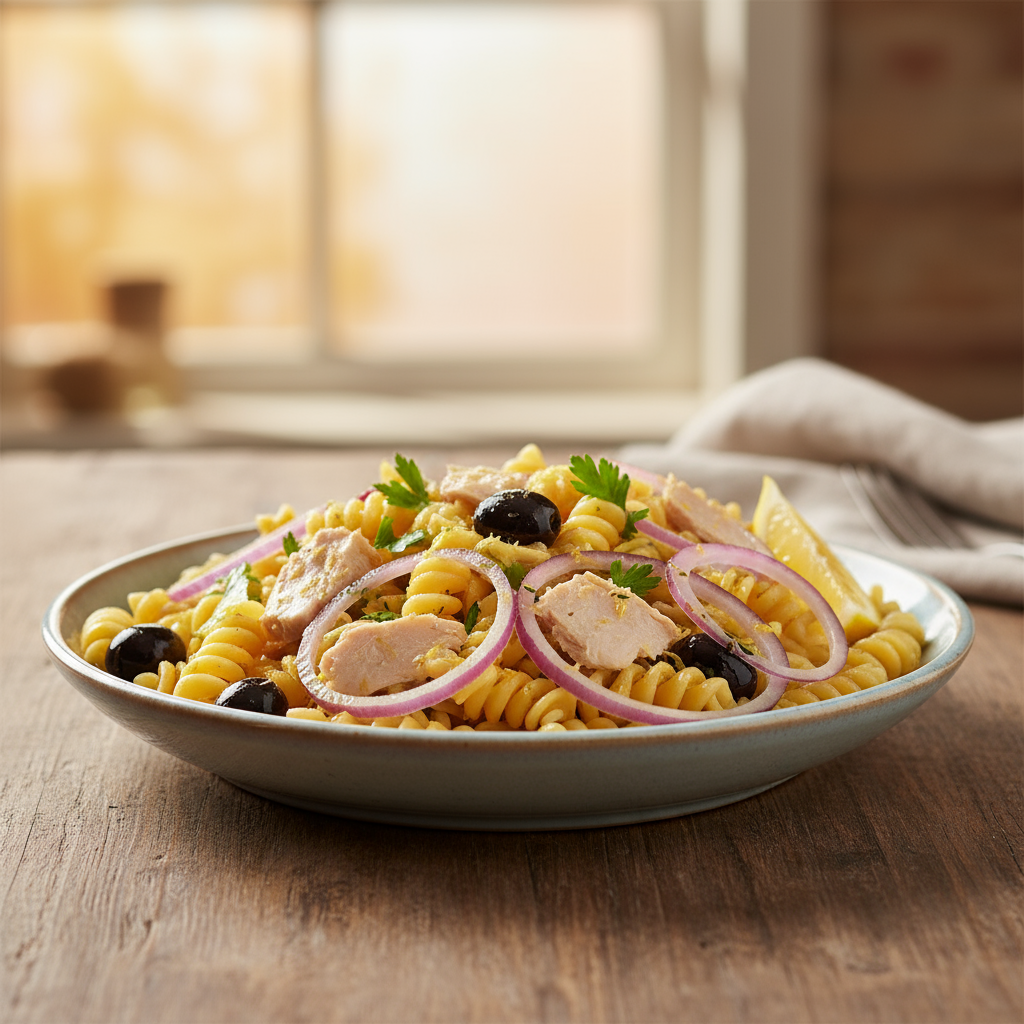
This pastabake recipe is designed so you can make a large batch of the bolognaise sauce and use it as a bedrock for a few different dishes.
It cuts cooking time and helps you get a meal on the table fast. I am yet to find a child that doesn’t eventually like this recipe. They all come around…eventually.
This recipe was created by Jennifer Cheung for Kidspot, New Zealand’s best recipe finder.
1 small orange sweet potato, peeled, coarsely chopped
1 small carrot, peeled, finely chopped
1 desiree potato, peeled, finely chopped
½ cup frozen peas
125g can corn, rinsed, drained
½ cup coarsely grated cheddar
2 eggs, lightly whisked
3 sheets ready-rolled frozen shortcrust pastry, just thawed
2 tsp sesame seeds
Method
Preheat oven to 240°C. Line an oven tray with baking paper.
Cook sweet potato in a medium saucepan of boiling water for 10 minutes or until tender. Drain well. Transfer to a heatproof bowl. Use a fork to mash until smooth. Set aside to cool in bowl.
Cook carrot and potato in a medium saucepan of boiling water for 5 minutes or until tender. Drain well. Set aside for 5 minutes to cool slightly.
Add carrot mixture, peas, corn, cheese and 1 egg to sweet potato and stir to combine. Season with salt and pepper.
Use a 12cm-diameter pastry cutter to cut 12 discs from pastry sheets. Spoon vegetable mixture evenly among pastry discs. Brush edges of pastry lightly with remaining egg.
Fold pastries in half to enclose filling. Use fingertips to gently press together to seal. Place on the lined tray and lightly brush with remaining egg.
Sprinkle with sesame seeds.
Bake in oven for 15 minutes or until golden brown and cooked through. Remove from oven and set aside to cool. Once completely cooled, wrap in baking paper, and store in the fridge ready for the lunchbox.
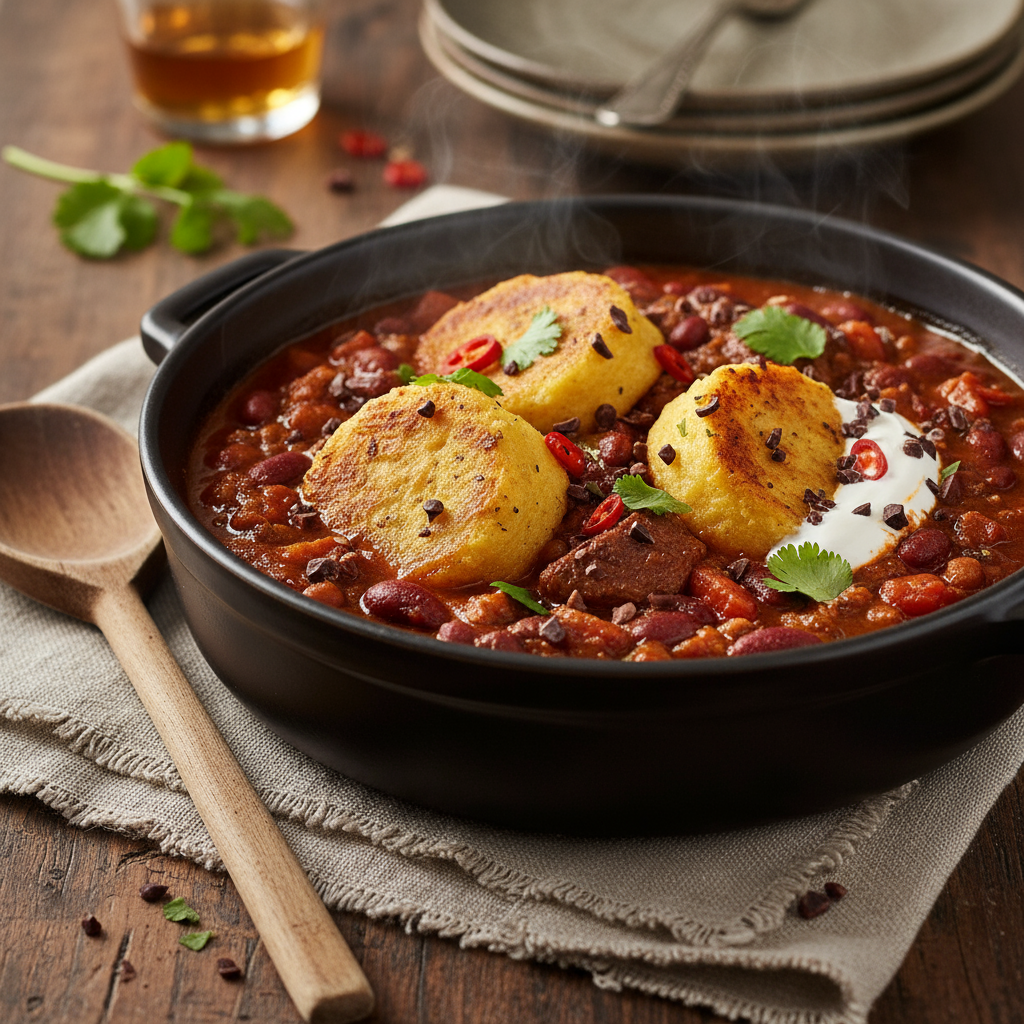
Heat the oil in a very large casserole dish (with a lid), add the onion and garlic, then cook over a low-medium heat, stirring, until the onion has softened.
Add the cumin, coriander, cardoman and dried chilli. Cook, stirring, for a couple more minutes. Increase the heat and add the mince, stirring to break it up and brown the meat. Season well, add the capsicum and cook for another minute. Add the tomatoes and water and bring to the boil.
Sprinkle over the cocoa powder and stir through the beans. Cover with a lid and place the casserole in the oven for 45 minutes.
Meanwhile make the polenta topping mix by mixing all ingredients together in a large bowl with a fork.
Once the 45 minutes is up you can remove the dish from the oven and, if you like, transfer the chilli to a baking dish or leave it in the casserole. Increase the ovenÛªs heat to 180å¡C or 160å¡C fan-forced. Dampen your hands a little and roll the polenta mixture into small balls, about the size of a golf ball.
Place these on top of the meat mixture, about 2cm apart, and return the dish to the oven for 10-15 minutes or until the topping is golden and crunchy.
Note
You can also use beef mince or pork and veal mince for this recipe.
If you have room in your dish, you can add in other vegetables you have on hand.
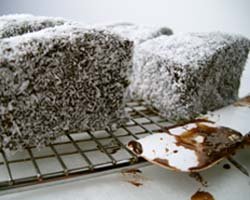
Cut each half of the sponge cake in half horizontally. Spread jam on two of the halves and top with the remaining halves. Cut each sponge into 8 pieces.
Sift the icing sugar and cocoa powder into a bowl. Add enough warm water to form a runny icing. Spread the coconut onto a large sheet of baking paper.
Dip each cake portion in the icing to coat each side. This is a very messy business, call in the kids and keep your hands nice and clean!
Roll each piece of cake in the coconut and place on a wire rack for 30 minutes to dry. Store in airtight containers.
Notes:
If you can’t find a Victoria sponge (two circles), a slab sponge would be fine to make rectangles or squares.
It is much easier to coat the lamingtons if the icing is quite runny. If you like a thicker icing you will have to spread the icing on with a knife, which is a bit more time consuming… and messy.
1 and half cups plain flour * see notes below for gluten free
1 teaspoon bicarbonate of soda
1 cup rolled oats
half a cup raisins
half a cup currants
half a cup sultanas
half a cup coconut
1 teaspoon cinnamon
Method
Preheat oven to 160C. Line two baking trays with baking paper.
Cream butter and sugars in an electric mixer until smooth, add egg and beat to combine. Add flour, bicarb, rolled oats, fruit, coconut and cinnamon and mix until combined.
Roll 2 tablespoons of mixture into balls and press onto prepared trays to flatten the tops. Space about 3cm apart. Bake for 20 minutes or until golden.
Cool on trays for 5 minutes then transfer to wire racks to cool completely.
Notes:
These smell (and taste) wonderful just after coming out of the oven. A great healthy-ish biscuit alternative for lunchboxes.
Vary the fruit and coconut to suit your tastes, just make sure you use 1 cup total.
Make these gluten-free with gluten-free flour and replace rolled oats with gluten-free rice bubbles or cornflakes.
Dress each croissant with your selected toppings ranging from:
-Chicken, avocado
-Ham and cheese
-Feta cheese, cucumber and cherry tomato
-Nutella
Replace tops of croissants and serve.
Serving Suggestions
Note
You can buy a container of 10 mini croissants at the supermarket in the bread section. I freeze them and pull them out when needed.
When I packed Max a ham and cheese croissant and a nutella one for his lunch he thought that was incredibly cool. It took two minutes and it wasn’t his regular roll.
These look and taste good enough for kids and adult parties, just warm slightly and put your favourite topping in.
These croissants are a great budget buy if you’re entertaining a group of people for breakfast, brunch or lunch.
Recipe created by Camilla Baker for Kidspot, New Zealand’s best recipe finder.
Pour buttermilk, eggs and oil into another bowl and whisk with a fork until just combined.
Pour wet ingredients into dry ingredients and stir until just combined.
Add berries and stir.
Spoon into paper cases and bake for 20 minutes or until golden.
Notes
Keep an eye out for cheap berries when you’re at the grocer or supermarket. When I spot a bargain, I buy two punnets and freeze the second for later use.
The key to lovely light muffins is to keep the stirring to a minimum. Stir the ingredients until they are just combined to avoid heavy doorstop muffins.
This recipe was created by Alana House for Kidspot, New Zealand’s best recipe finder.
These cupcakes are super quick and have a light, fluffy texture.
Do not overfill the cases otherwise you won’t get 18 cupcakes out of this recipe.
If you want a thicker dollop of icing on top then you’lll need to increase the amounts in the buttercream recipe.
Thanks to our sister company Kidspot Australia for creating the instructional video.
This is a great basic recipe. Also try this everyday chocolate cake if you prefer more butter in your cake mix. It also comes with a simple but delish icing.
Beat egg whites until they form stiff peaks. Set aside.
Melt chocolate by breaking up, putting in a microwave-proof bowl and use a low power setting (40%) for 1 minute, stir, then heat again on same power setting for another 40 seconds, stir. Repeat another 40 seconds if you need to.
Once it’s melted, add the egg yolks, combine thoroughly and allow to cool for about 15 minutes.
Meanwhile whip cream until it sticks to beaters, pour in the chocolate and egg mixture and mix with a spatula until well combined.
Finally, add the egg white and fold through again with the spatula gently until all combined, pour into serving glasses or bowl and refrigerate until served.
Notes:
This Chocolate mousse recipe is super-easy and only takes about 20 minutes.
There’s a lot of room for giving this recipe an imaginative – add mint essence, Kahlua, Tia Maria, orange juice, chilli, amaretto, cherry brandy, honey – anything you think goes well with chocolate to give it a bit of individuality, I just like it chocolate but loads of other people love the variations above… just choose your poison!
This recipe was created by Melissa Klemke for Kidspot, New Zealand’s best recipe finder.
Serving Suggestions
Note
close
Join the Catch Up
Join our community of parents and let the Kidspot Catchup be your guide to creating unforgetable family moments.