Sponsored content provided by Resene
Be inspired to decorate your child’s room with Resene’s weather inspired colour palette and get creative with two DIY accessories perfect for nursery decor.
Use weather colours as your inspiration to decorate the room and create an adorable ‘Rain or Shine’ bookends and a raindrop mobile – we show you how.
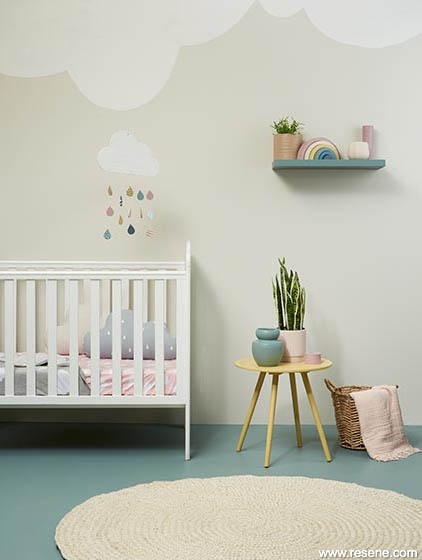
Nursery
A palette of Resene Thorndon Cream on the wall with a mini mural (at ceiling) in Resene Eighth Thorndon Cream is restful with a cost in Resene Alabaster. Bringing in deeper hues of Resene Thor on the floor and shelf and Resene Safehaven on the picture frame adds depth, with the warmth of the table in Resene Laser.

Weather mood board
Background in Resene Thor with A4 drawdown paint swatches (from bottom to top) in Resene Eighth Thorndon Cream, Resene Safehaven, Resene Thorndon Cream, Resene Emerge, Resene Sandal, Resene Laser, Resene Just Right and Resene Vintage with stackable rainbow wooden toy in Resene Vintage, Resene Just Right, Resene Laser, Resene Thor, Resene Undercurrent and Resene Safehaven, vases (from left to right) in Resene Undercurrent, Resene Sandal and Resene Lazer and tea light holder in Resene Vintage.
Rain or shine bookends
Rain or shine, you and your kids will never get tired of looking at these cheerful bookends.
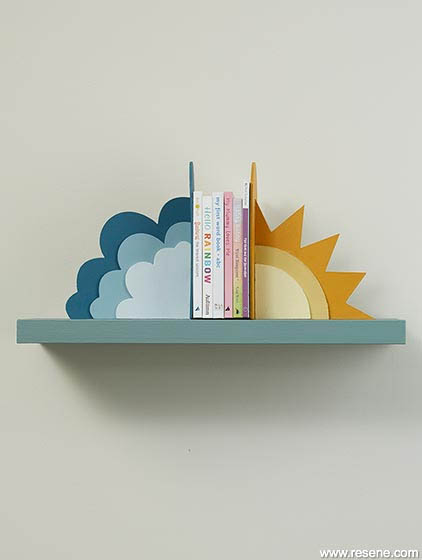
Download the templates from the habitat by Resene website and trace the shapes onto plywood with a pencil (or draw your own) before cutting them out. We also cut arched shapes to cover up the vertical side of the metal bookends. We used Resene Quarter Frozen, Resene Bali Hai and Resene Undercurrent for the clouds, Resene Mellow Yellow, Resene Laser and Resene Pirate Gold for the sun and Resene Undercurrent and Resene Pirate Gold for the arches. For the arches, we used Resene Undercurrent and Resene Pirate Gold.
Once your paint has dried, use a hot glue gun to glue the smallest cloud on top of the medium cloud, aligning the corners, then glue the medium cloud on top of the largest cloud. Do the same with the sun, stacking and gluing the smaller quarter-circle onto the larger one, then on to the rays.
Using quick bond glue, adhere your arches on to the front face of the bookends, then apply glue to the vertical edge of the stacked clouds and stick it to the centre of the arch painted in Resene Undercurrent. Do the same for the sun, adhering it to the centre of the arch that is painted in Resene Pirate Gold. Allow your bookends to dry overnight to ensure the glue has set completely before using them.
Make your own mobile
A popular nursery accessory of the 1950s, we think it’s high time for mobiles to make a comeback.
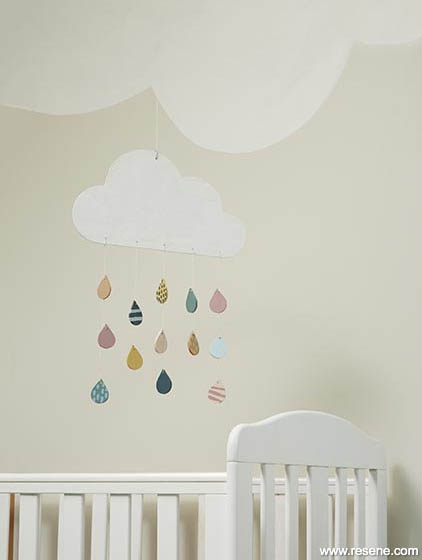
Start by cutting a classic scalloped cloud and a dozen or so raindrop shapes out of your sheet of plywood. Then, using a power drill, make holes in the tops of each of your raindrops, the top of your cloud and a line of holes across the bottom of your cloud – we made five holes along the bottom.
Paint your cloud and raindrops using Resene testpots in your favourite colours – we used Resene Eighth Thorndon Cream for our cloud and Resene Vintage, Resene Just Right, Resene Quarter Frozen, Resene Thor, Resene Safehaven, Resene Laser and Resene Sandal for our raindrops.
You can even paint patterns onto some of your raindrops, if you wish. We gave some of ours stripes and others ticks.
Using sparkly silver string – though twine, thread, wool or ribbon will do the trick too – thread through the holes of your raindrops, knotting them on at even intervals before knotting the end to one of the holes in the bottom of the cloud. Then, thread a long length of string through the top hole in your cloud, knotting it securely. Hang your mobile from your ceiling using the appropriate hardware and high enough that it will be safely out of reach of little hands.
For more information on this activity, colour inspiration and accessories, visit Resene.co.nz
Article provided by Resene. Styling by Laura Lynn Johnston. Photography by Bryce Carleton. 2020
Read more on Kidspot:



Leave A Comment
You must be logged in to post a comment.