
Learning how to make pom poms is a childhood rite of passage. And you can turn them into lots of fun things too! These cute bunnies are made out of two pom poms plus some basic craft supplies.
What you need:
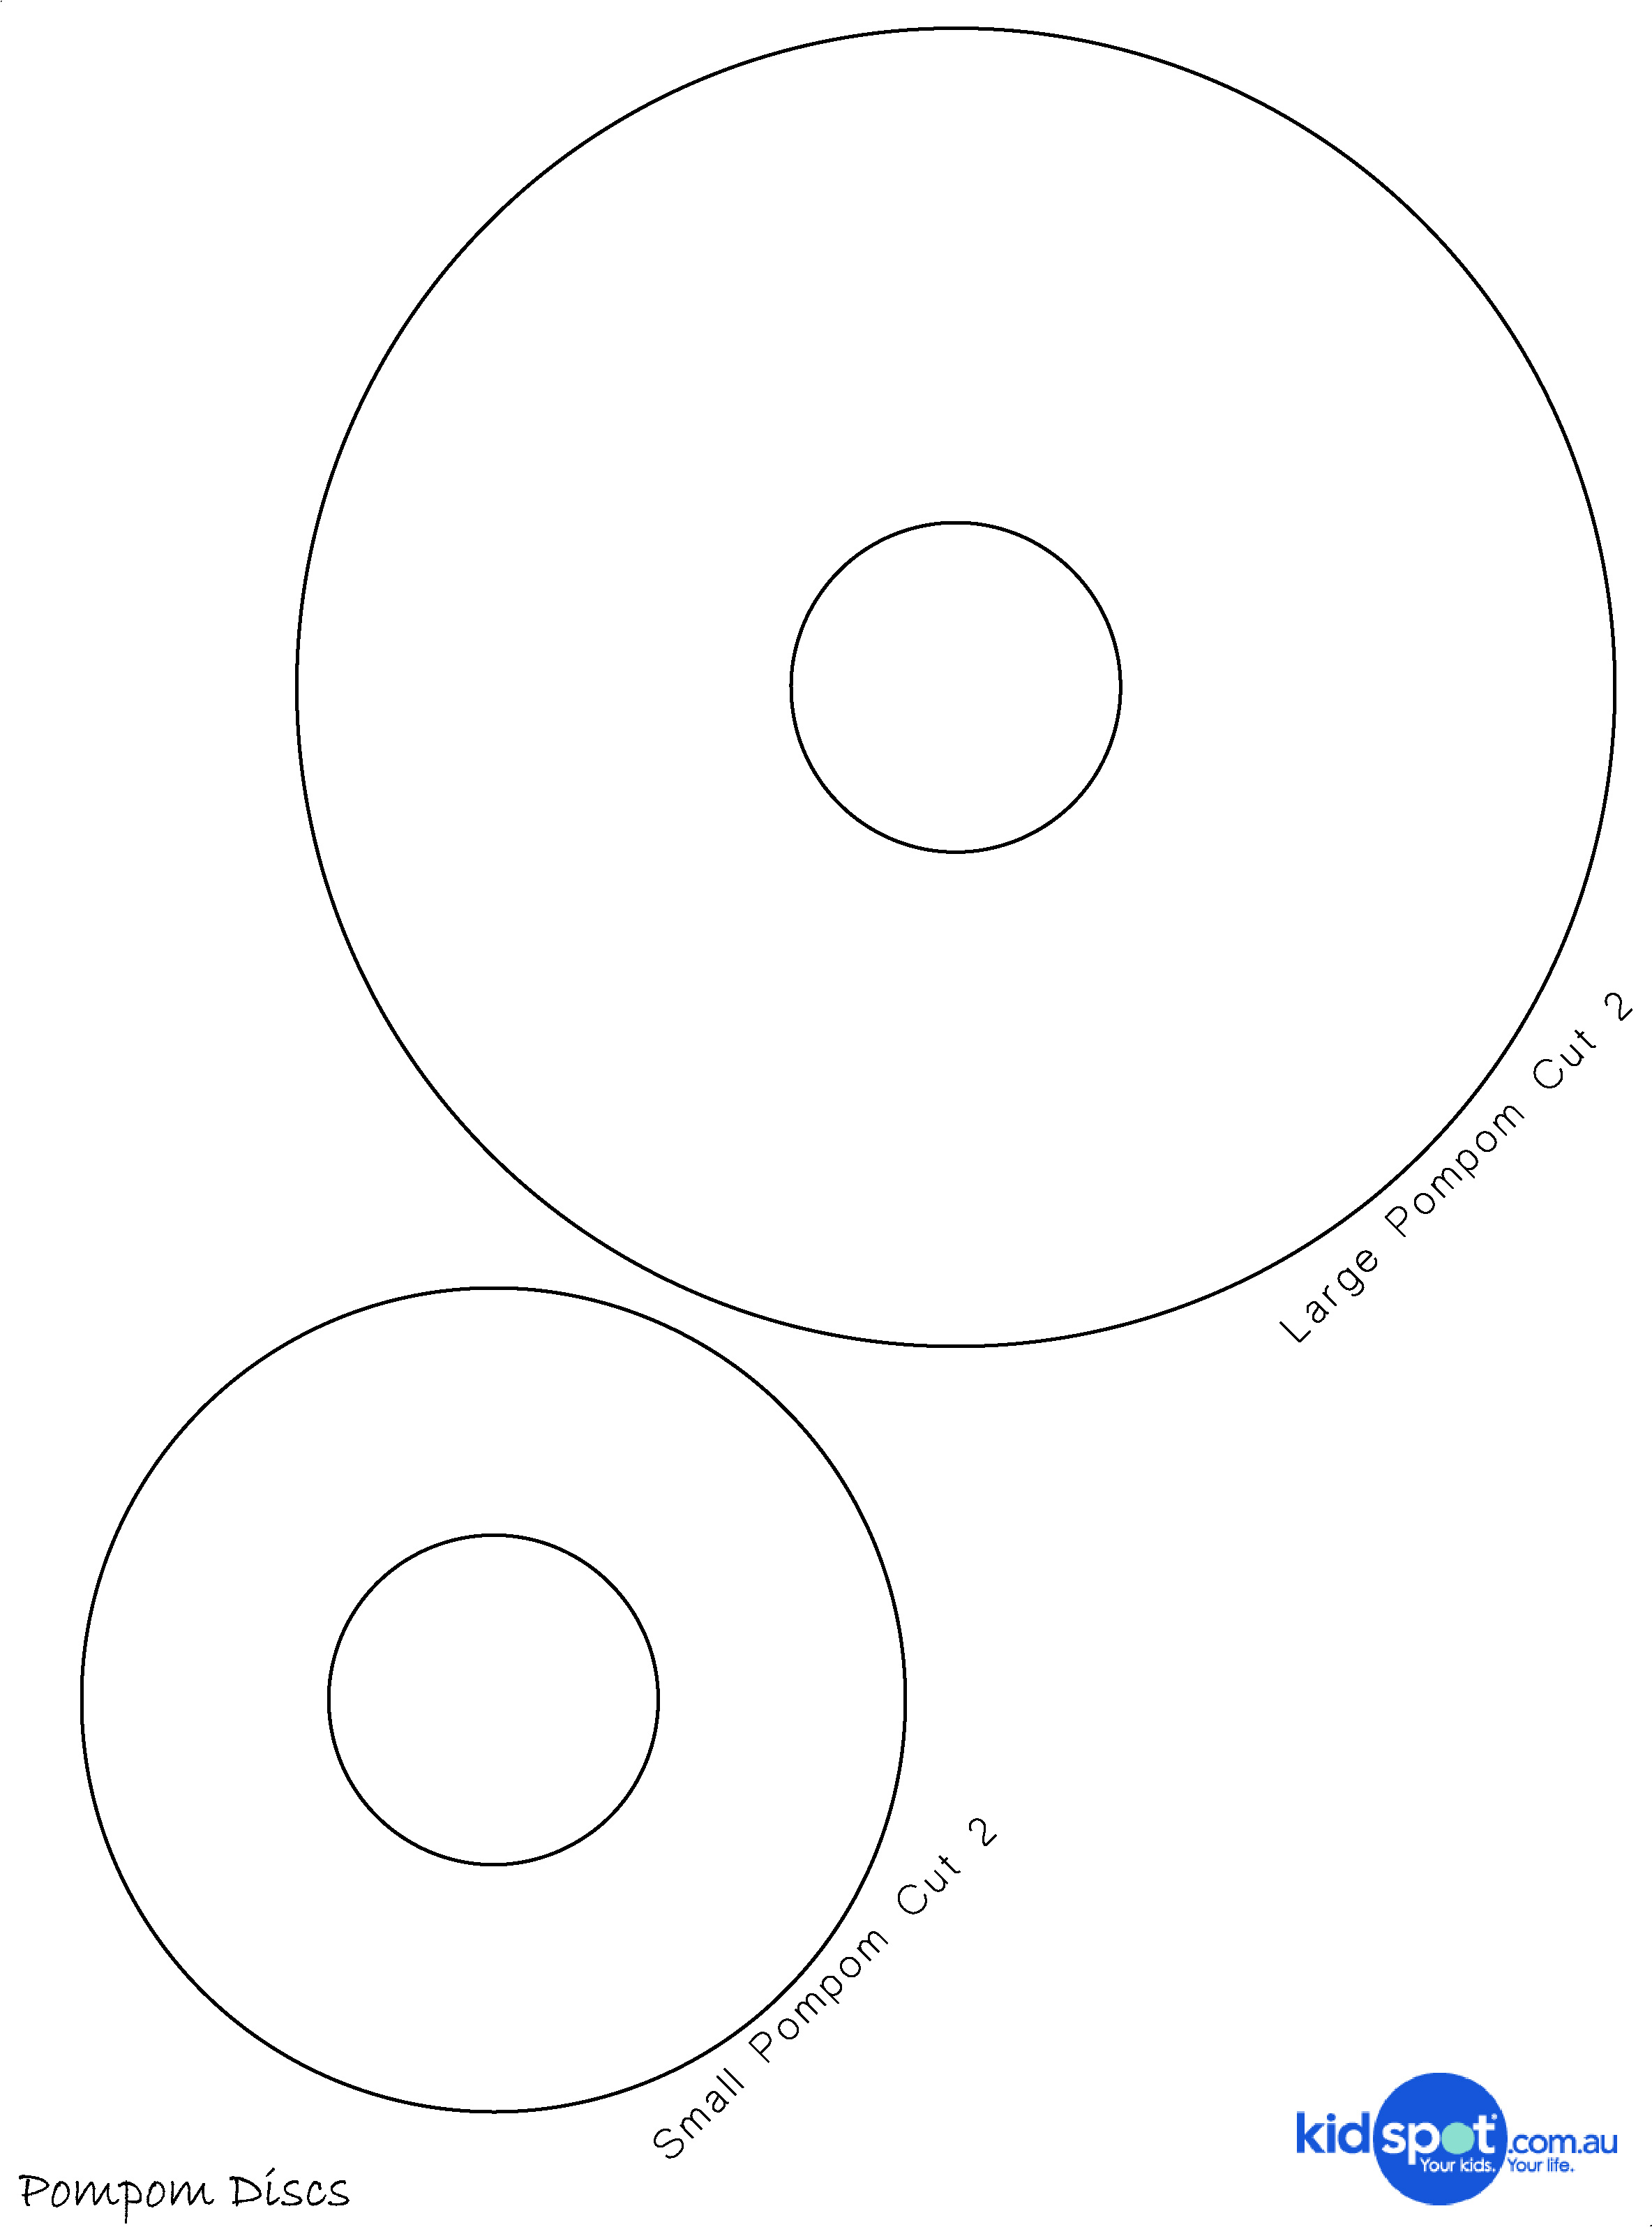
- 1 x pom pom disc template
- 1 x A4 piece of thick box card
- 1 x ball of wool (thicker wool will make things a bit easier)
- sharp scissors
- hot glue gun
- A small piece of white felt
- 1 x cotton bud (bunny tail)
- 2 x googly craft eyes
- 1 x small pink store-bought pom pom (bunny nose)
Number of players:
Activity:
To make the bunny you will need two pom poms. Print out the template and trace one of each pom pom discs (one large and one small) onto your box card. You will need two cardboard discs of each size, to make each pom pom.
Cut out two large discs and two small discs from the boxcard. It also helps to cut a section out of the disc circle to make winding the wool around the template a bit simpler.
To make each pom pom, place two discs together and wind wool around the discs until it’s well-covered.
Now get your scissors and cut the wool around the edge of the circle, in the space between the two cardboard discs.
Pull one of the discs loose so you can access the middle of the pom pom, tie a piece of wool around the middle and pull it tight.
Gently slide both discs away and your pom pom should hold together. Trim it up into a circle if it’s a bit wonky.
When you have two pom poms, one large and one small, glue them together as the bunny’s body.
Now cut ears from the white felt and glue them to the bunny’s head.
Add eyes, a pink pom pom nose and a cotton bud for a tail.
Here comes Peter Cottontail!