Make A Magnetic Lunch Chart
Get some help with school lunches by making this magnetic lunch chart with your kids. The theory is: if they get to choose what goes in their lunch box, they might actually eat it!
What you need:
- 2 x magnetic sheets (available at Spotlight)
- 2 x sheets plain A4 paper
- pencil
- ruler
- paints/coloured pencils or crayons
- marker pen
- scissors
- magazines or a computer and printer to find images
Number of players:
Activity:
Decide on your categories.
For example:
- Sandwich
- Fruit
- Savoury snack
- Sweet snack
Now go through magazines or just use Google Images to find an "icon" to represent each category. Cut them out.
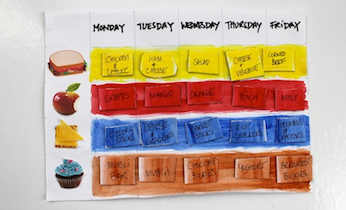
Now draw up a chart (see video):
- 5 x columns for each weekday.
- 4 x rows for each category.
Put your icons down the far left column, on each row.
Colour code each category.
Once your chart is all done, peel the sticky backing off one magnetic sheet and stick your chart to the magnetic backing. (It should be more or less A4 in size, but you may need to trim edges.)
Now make individual component magnets for each category. Colour code them to match the chart. Stick them to a magnetic sheet and cut them out.
Now get your child to use the chart each week to organise what goes into their lunch box.


Leave A Comment
You must be logged in to post a comment.