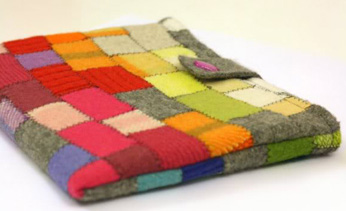
Make a felt iPad cover
This activity shows you, step-by-step with images, how to make a funky felted-patchwork iPad cover with a lining. Your kids will love helping you cut felt squares and rectangles to make the iPad cover. Great for teaching kids not only sewing craft but how to take care of valuable things.
What you need:
- wool felt scraps – like blanket and felted sweater scraps
- 30cm x 45cm cotton or bamboo batting (low loft)
- 30cm x 45cm cotton fabric (for the lining)
- sewing machine
- scissors
- thread
- 1 button
Number of players:
1
Activity:
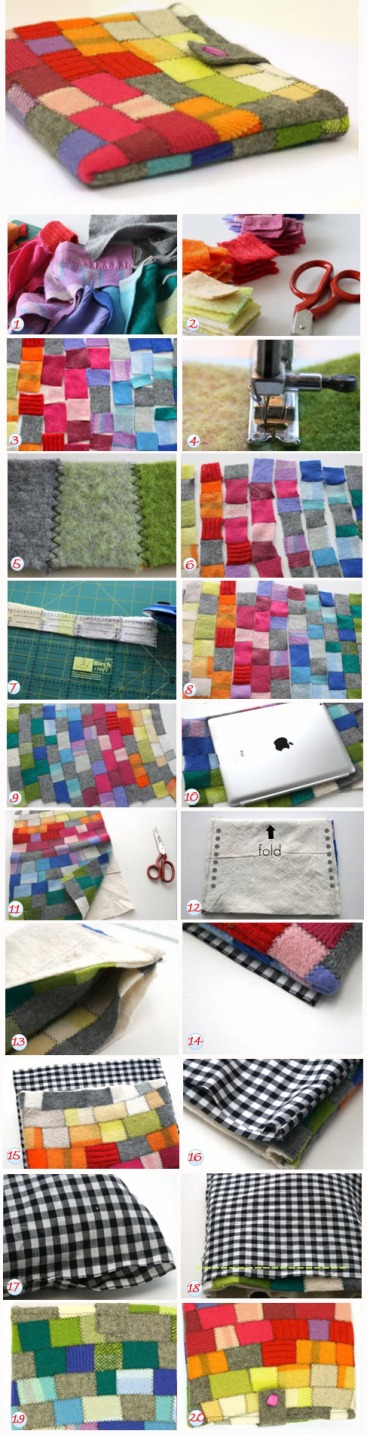
Step 1. Gather the felt scraps and get your kids to pick some in their favourite colours.
Step 2. Next, get the kids to cut the felt into rectangles and squares; they don't have to be perfect and the size will depend on your scraps. They can be different lengths, as long as the width is about the same. For little crafters, cut out scraps they've chosen so they can 'oversee' your work.
Step 3. Get them to arrange the squares in a pleasing pattern. Check the size – ideally the patched layer should be at least 30 x 43cm when finished. Now your little helpers can arrange the rows so you can start piecing the iPad cover together.
Step 4. Set up the sewing machine with a black, grey or white depending on the collective colour of the scraps (or go wild and use red or green thread!). Join the felt squares with your widest zig-zag stitch.
Step 5. Then join together the pieces of scrap material in each row.
Step 6. Continue sewing rows of squares!
Step 7. With a rotary cutter or scissors, neaten the edges of the felt rows to make them straight.
Step 8. Line up all the strips for your iPad cover and see if you have enough rows to measure about 30cm x 43cm; zig zag them together.
Step 9. You should have a large patched piece after you press all your scraps together.
Step 10. Fold the patched felt in half and lay your iPad on top to make sure you have made it big enough. We left about 1.5cm on each side and 2cm at the top end for the opening
Step 11. Get your kids to help cut the batting and lining to match the size of the cover (each should be about 30 x 43cm). Lay patchworked top over batting.
Step 12. Fold in half with the batting side out, then sew the batting and the patchwork together with about a 1cm seam allowance on the sides.
Step 13. Turn inside out and sew along the sides again.
Step 14. Turn it inside out again; the image is what it should look like now.
Step 15. Fold the fabric for the lining in half and sew along sides.
Step 16. Measure the lining against the patchwork; also make sure the iPad fits into it.
Step 17. Turn the lining inside out and sew along the sides again, but leave an opening of about 10cm on one side seam.
Step 18. Slide outer cover (right side out) into lining (seams out) the right side of the lining and the outer should be facing. Sew the lining to the outer cover all the way around the edge of opening with a 1cm seam allowance. It may help to pin before sewing. Turn it all the right way round through the opening in the lining and sew hole in lining closed.
Step 19. Press and top stitch the seam. Cut a tab out of leftover felt and sew on to the back of the cover.
Step 20. Make a button hole in the tab. Get the kids to help you pick a cute button before sewing it on. We found a cute apple one (perfect for an iPad, eh?).
This craft was created by Cintia, who blogs at my poppet.


Leave A Comment
You must be logged in to post a comment.