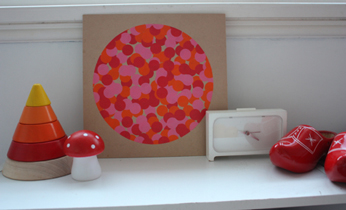
Circle sticker art
If it sticks, kids will stick it somewhere, so why not give them a dedicated space to stick, stick, stick to their heart’s content? It’ll keep them quiet for a while and create some art for the wall as well.
What you need:
- a square of thin MDF or thick cardboard
- a roll of contact paper
- coloured circle stickers in colours of your choice
- a round plate smaller than the size of your MDF or cardboard
- a scalpel
- a marker
- scissors
Number of players:
Activity:
Step 1. Gather your supplies
Step 2. Unroll the contact paper and draw around the plate with your marker.
Step 3. Use the scalpel to cut a little around the line until the gap is big enough to insert scissors. Cut around the drawn line.
Step 4. Peel the backing off the contact paper.
Step 5. Stick the contact paper onto your backdrop so the circle is in the centre.
Step 6. Let the kids loose with the dot stickers – tell them to go over the edges of the circle until it’s as covered as you’re all happy with. (The more stickers on the edge of the circle, the better as it will give the art work a better shape when you remove the contact paper.)
Step 7. Gently cut around the circle with your scalpel cutting through the stickers.
Step 8. Carefully remove the contact paper, leaving your circle artwork behind!
TIP: As you remove the contact paper, don’t take it off completely until you’ve decided you’re happy with the look of the stickers. If there are some holes in the edge, re-stick the contact paper in place and add a few more stickers to the edges, re-cut around the circle and remove the contact paper again.

This craft was created by Belinda Graham, who blogs at The Happy Home Blog.


Leave A Comment
You must be logged in to post a comment.