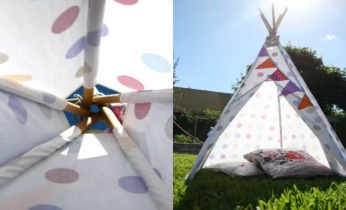
Make your own tee pee
Every kid (or mum) loves a good cubby house and this beautiful tee pee and cover can be sewn at home by an experienced crafter.
What you need:
- 5x 18mm diam wooden dowels 180cm long (about 71″)
- power drill
- 5mm drill bit
- 5mm thick cotton rope bundle, min length 1m
- measuring tape
- pencil
- sticky tape
- sandpaper (optional)
- 1x queen size bed sheet (flat)
- Sewing machine and general sewing supplies
- 3m bias tape for trims and ties
- measuring tape (with inches)
- soluble fabric marker or tailors chalk
- long ruler or piece of dowel
Number of players:
Activity:
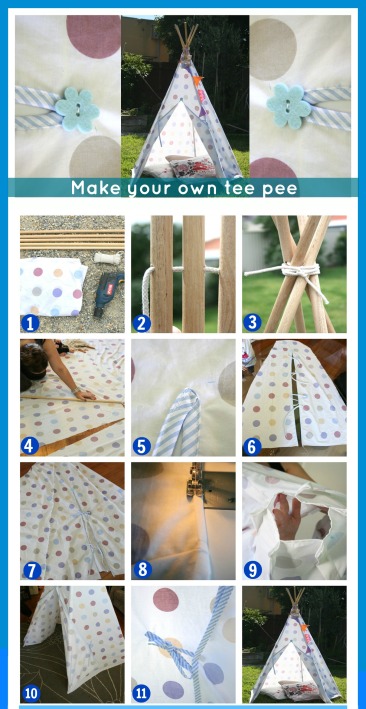
Step 1. Gather your supplies and clear a suitable work area for using your power drill.
Step 2. Mark the hole positions by measuring 26cm down from the top of the dowels with an X then carefully drill one hole in each dowel. Thread the rope through the holes that you have created.
Step 3. Pull a good length through to leave a couple of long ends. Tie a knot firmly then wrap the rope around a few times and knot firmly again. Frame is done, now we are half way there.
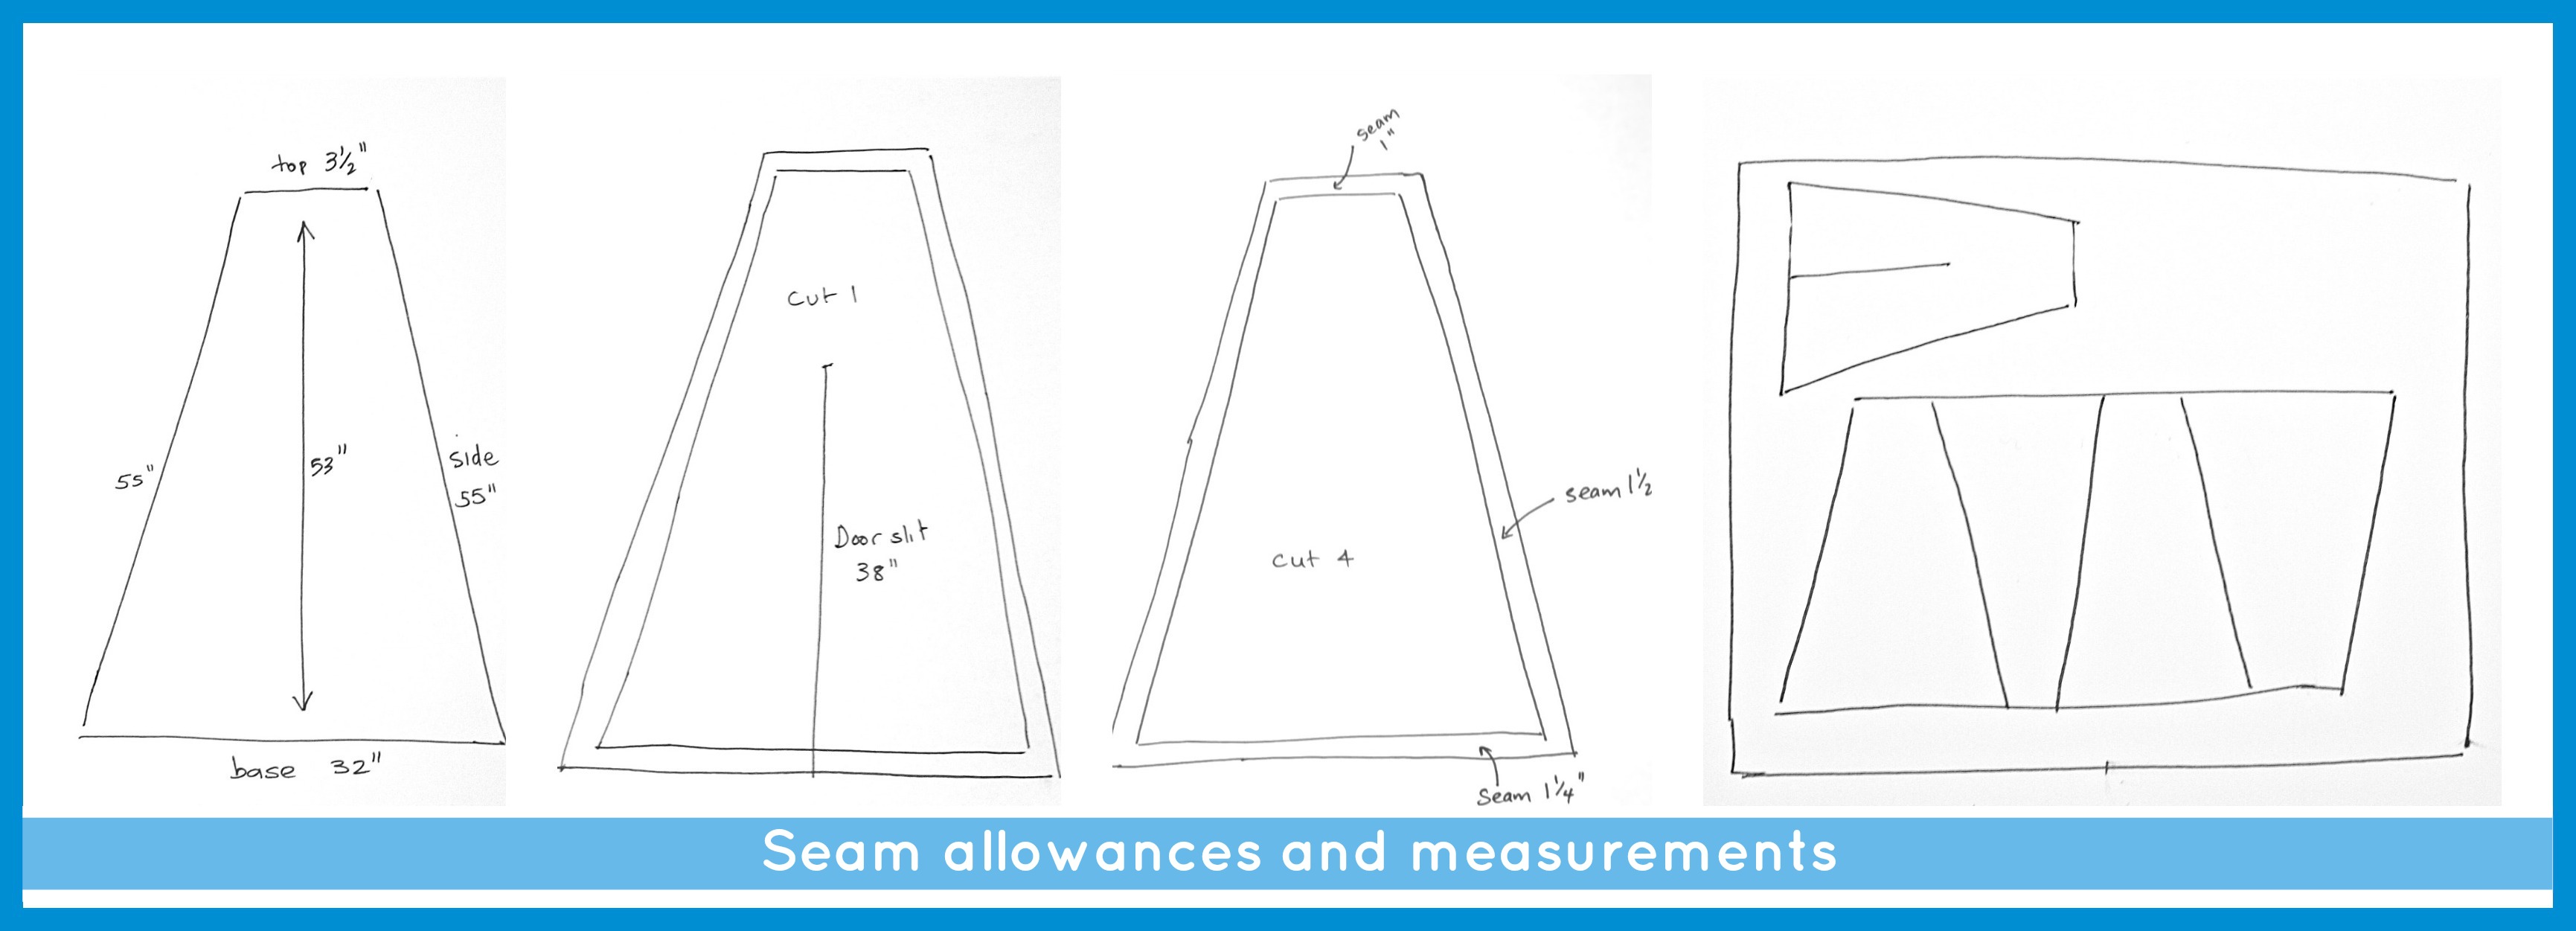
Step 4. Lay your fabric out and using the measurements provided on the layout images (below main image), mark out the layout on your fabric with a ruler and fabric marker. Don’t forget your seam allowances! See images in our notes section for the layout. Cut out your fabric pieces remembering to cut out the slit in the door.
Step 5. Add bias tape/binding around the door opening.
Step 6. Make 6 x 30.5cm bias tape tie cords by sewing your bias in half. Pin and sew 4 ties to the door panel about 30cms apart so they are equally spaced from the top and the bottom. Reserve the 2 remaining ties for later.
Step 7. With WRONG sides of fabric together, sew together the long edges of the 5 panels. The seams should be on the outside of the cover at this stage (as pictured)
Step 8. Now we will hem the top opening edge. Roll a small edge over twice so there are no raw edges exposed towards what will be the inside of the tent and sew hem 1.25cm seam.
Step 9. To make the tubes that the poles will feed through to keep everything together, sew a seam down the long sides of each long panel with the correct sides of the fabric facing each other. The seam width should be about 2.5cm but depending on your dowel or your first seam you may have to make it just slightly wider or narrower. Try testing if the dowel fits snugly though one tube before you sew the rest. The photo shows you what the top of the cover should look like inside out.
Step 10. Before feeding your frame through the cover, the bottom seam needs finishing. Poles shouldn't stick out the bottom. Feed frame in to guide tubes through top opening. Two people may be required for this step.
Step 11. Using the two remaining ties that we reserved earlier, pin them in your desired position. These tie onto the bottom door ties to hold the door open. Sew into position.
Notes:
- Try adding on small loops for tent pegs at the base of each pole. By pegging the Tee Pee in place when outdoors, it prevents gusts of wind blowing it over.
- Try this measurement converter if you are used to working with imperial measurements.
Seam allowances and measurements.
Crafted by Cintia Gonzalez of My Poppet. Follow Cintia on Twitter, Facebook, or Pinterest.