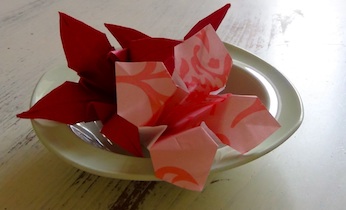
Origami iris table decoration
While you're doing the last-minute touches for your dinner party, get the kids in on the act making origami table decorations. This origami iris is a fun activity to keep little hands busy.
What you need:
- 1 square of two-sided origami paper (15cm x 15cm)
Number of players:
1
Activity:
Watch and follow the origami how-to video to make your origami iris.
The first few folds serve as a guide for the rest of the figure. So make sure they're nice and exact.
Fold your square on the diagonal. Open it out and fold it across the other diagonal.
Now open it out and fold it in half one way, then the other way. You should now have a criss-cross pattern of folds going lengthways, sideways, and across both diagonals.
Place it on the table in front of you, so that it is the shape of a diamond. Now do the ‘waterbomb fold’ – bring three corners down to meet the bottom corner. You should end up with a smaller diamond shape, squash folded in the centre.
There will be four folded ‘wings’ on each side. Pull each one out and then squash fold it. You will need to do this four times, on each wing.
Now you will have a kite-shaped figure. You need it to have the all-white surface facing up – you should be able to turn the top and back layers over to get the all-white kite-shape facing up.
Now fold the top layer edges to meet the middle. Do this step on the remaining three sides.
You will have a thinner kite shape now.
To make the petals, fold the top pointed edge down. Do that on all four sides.
Once you've done that, you should have an origami iris.
To decorate the table make several irises and put them in a bowl as a centrepiece, or make one per guest and place them on each plate around the table.
- Thanks to our sister company Kidspot Australia for creating the instructional video.


Leave A Comment
You must be logged in to post a comment.