Sponsored content provided by Resene
Take an old children’s table and turn it into a fun and tactile sensory board!
Sensory boards can be made with all sorts of textures and themes for young children, and are great learning tools. We always recommend that they are only used with careful adult supervision.
Sarah Herring created this sensory table for Resene – upcycling for good. If you don’t have an old childrens table, you could cut down the legs on an old coffee table.
You will need:
- Testpot brushes
- detail brushes
- sandpaper
- Resene Quick Dry primer sealer undercoat
- ruler and pencil
- painter’s masking tape
- assorted hardware and sensory objects (Dollar stores are a great place to look)
- super strong glue
- a drill with small screws
- Resene testpots in your choice of colours. Sarah used Resene Black White, Resene All Black, Resene Hopbush, Resene ASAP and Resene She’ll Be Right.
Step 1:
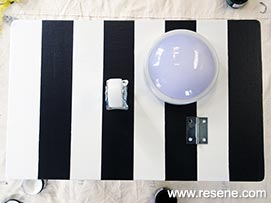
Always check your item for repairs and give it a clean before starting. Lightly hand-sand the coloured laminate on the table top and apply a coat of Resene Quick Dry primer sealer undercoat. If the surface is very smooth, use Resene Waterborne Smooth Surface Sealer instead of the primer. Sarah left the plastic legs of this table black because they were in reasonably good condition, but you might like to paint your table base too.
Step 2:
Apply two coats of Resene Black White all over the table top, waiting for each coat to dry completely in between. Once this colour was completely dried, measure and mask out a simple striped pattern.
Step 3:
With your darkest colour (Fleur used Resene Black), paint an oval shape at the front. This will be the ladybird’s face.
Step 4:
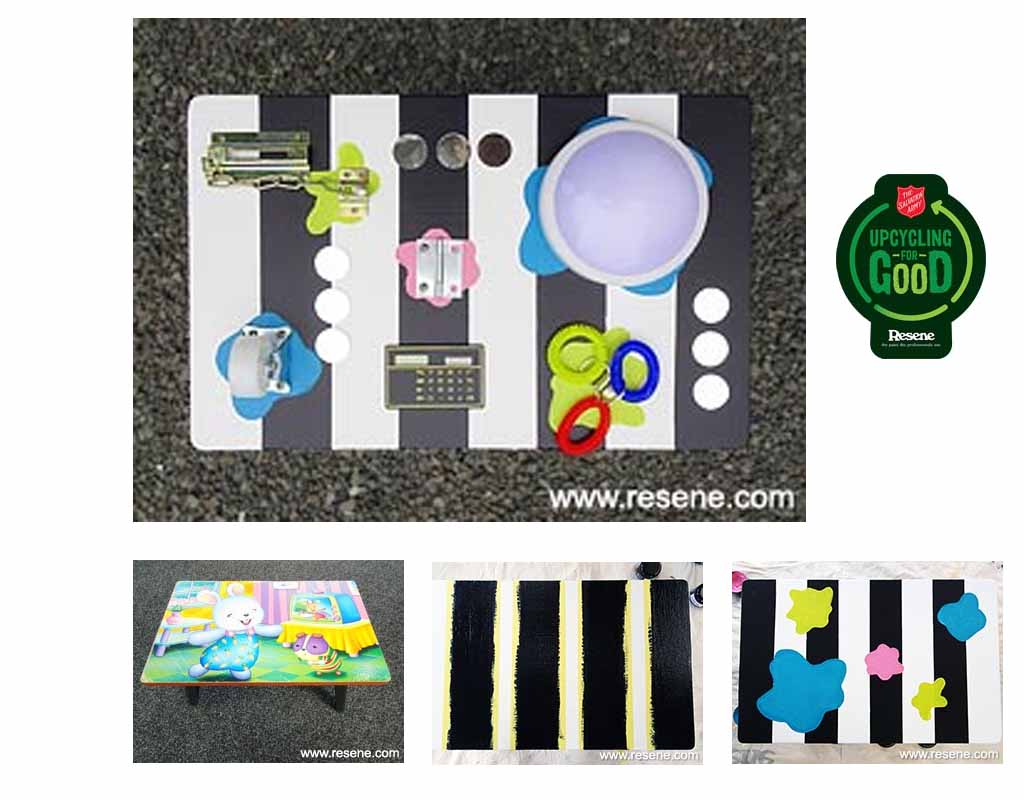
Sarah wanted to make a sensory board with lots of fun ‘working’ objects for young children to enjoy playing with.
Use a mix of push-button lights, sliding locks with chains, stretchy plastic bands, stick on mirror shapes, a solar calculator, a spinning castor etc. It’s very important to ensure that all the items you select can be securely fastened to the table and are SAFE for a child to play with. Map out with a pencil where each item will go.
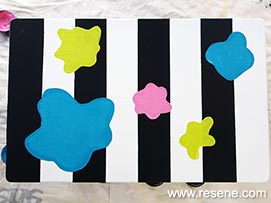
Step 5:
To make the table fun and colourful, paint a splat shape under where some of the objects will be fixed. Sarah used detail brushes to apply Resene Hopbush, Resene ASAP and Resene She’ll Be Right. It took at least two coats of each colour to hide the black and white underneath.

Step 6:
Once all the splat shapes are dry, affix all the play objects with a drill and screws, or with extra strong glue. All that’s left to add to the finished table is a toddler!
For more projects and colour inspiration visit Resene.co.nz.
Images and project by Sarah Herring for Resene upcycling for good.
Read more on Kidspot: