Sponsored content provided by Resene
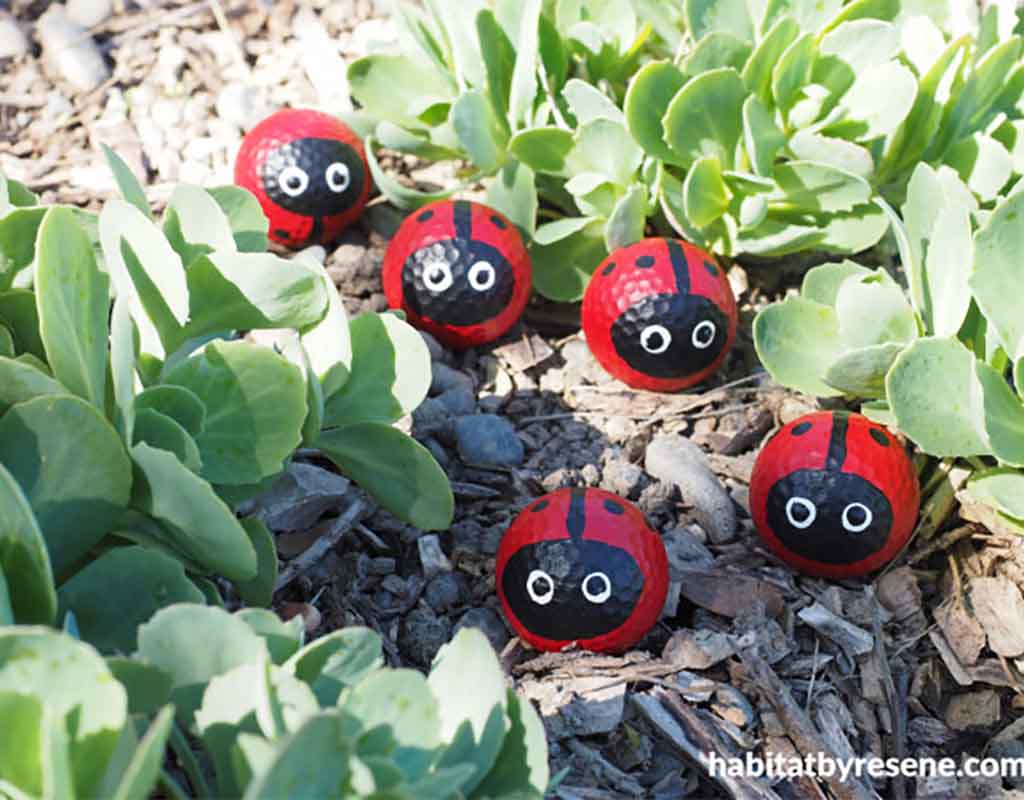
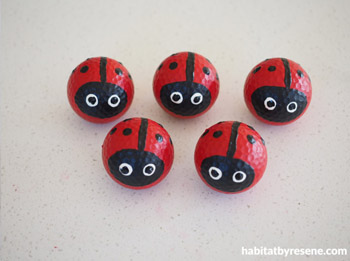
Repurpose old golf balls and create some adorable ladybirds in this cute craft idea from Fleur Thorpe.
Suitable for children and adults, paint traditional red and black ladybirds or make your own ladybird characters with a medley of fun colours.
You will need:
- Old golf balls
- Medium-grit sandpaper
- Resene Waterborne Smooth Surface Sealer
- Testpots in your choice of ladybird colours – Fleur used Resene Jalapeno, Resene Quarter Dutch White and Resene Black
Medium, small and thin craft paintbrushes
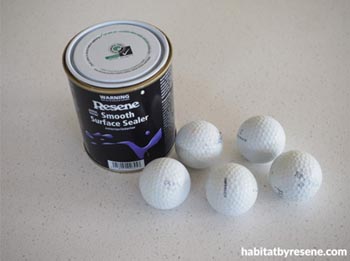
Step 1:
Use medium-grit sandpaper to sand the surface of the golf balls. Golf balls are tough little things, so do your best at roughing up the surface to create a key for the sealer to adhere to. If your kids are going to do this project, we recommend an adult complete this step.

Step 2:
Prime the golf balls with Resene Waterborne Smooth Surface Sealer. Once the primer is dry, paint the balls completely with your red base – Fleur used Resene Jalapeno. Do two coats, allowing for the first coat to fully dry before applying the second coat.
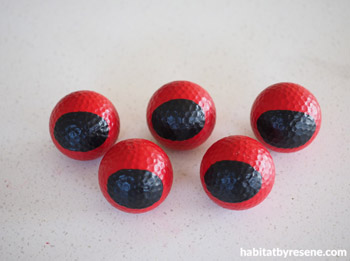
Step 3:
With your darkest colour (Fleur used Resene Black), paint an oval shape at the front. This will be the ladybird’s face.
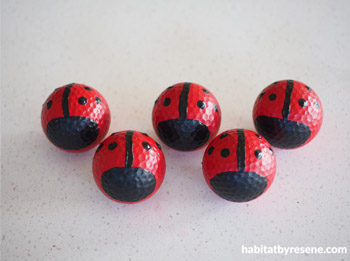
Step 4:
Use a thin paint brush to paint a black line from the top of the face to the back – this will give the impression of ladybird wings. Then, using the end of the paintbrush, make dots on the wings.
Step 5:
For the eyes, do a larger dot with white paint (Fleur used Resene Quarter Dutch White). A cotton tip can be a handy way to get a slightly larger dot. Once this is dry, do another dot on top of the white dot with your darkest colour (Fleur used Resene Black).
Step 6:
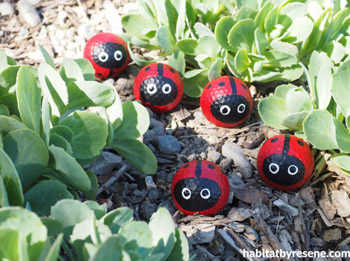
Once dry, dot them around the garden for a creative splash of colour.
For more projects and colour inspiration visit Resene.co.nz.
Images and project by Fleur Thorpe for Resene.
Read more on Kidspot: