Sponsored content provided by Resene
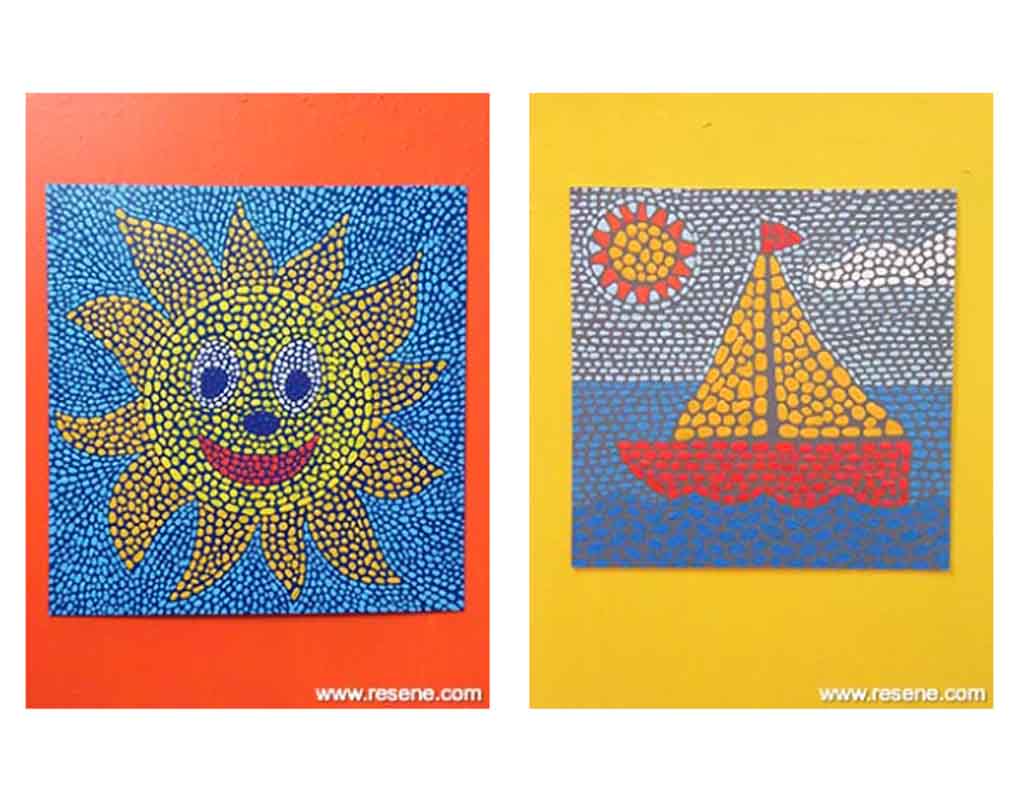
Create your own mosaic masterpiece with this fun project using Resene testpots.
A great project for all ages, you can copy these picture ideas or make your own!
To create the mosaic look, make sure you leave a gap between each blob of paint.
You will need:
- Paintbrushes (including a small artists’ brush)
- Pencil
- Piece of heavy cardboard
- Plate
- Resene Art Action Quick Dry, Resene Testpots in the following colours: Resene Alabaster, Resene Clowning Around, Resene Fizz, Resene Frenzee, Resene Get Reddy, Resene Snap and Resene Splish Splash
Check out the step by step instructions for the sun below or try your hand at the boat picture too. It was made using

Step 1:
Apply one coat of Resene Art Action Quick Dry to the cardboard and allow two hours to dry.

Step 2:
Apply two coats of Resene Splish Splash to the cardboard, allowing two hours for each coat to dry.

Step 3:
Draw a circle on the cardboard, tracing around the plate as shown. Draw in a face and sun rays around the edge of the circle.

Step 4:
Fill in the face with small blobs of Resene Fizz, as shown, and paint in the mouth using blobs of Resene Get Reddy.

Step 5:
Using the same paint technique, paint the nose and eyes using Resene Alabaster and Resene Clowning Around. Paint in the sun rays using Resene Frenzee.

Step 6:
Fill in the background using blobs of Resene Snap. Allow 2 hours to dry. How neat is that?
For more projects and colour inspiration visit Resene.co.nz.
Article provided by Resene. Resene kids art with Mark Rayner – Project 84
Read more on Kidspot:


Leave A Comment
You must be logged in to post a comment.