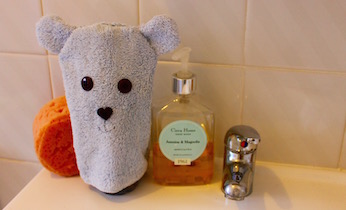
Turn an old towel into an upcycled bath puppet with this easy sewing craft. Your little bathtime friend will make bathtime that much easier.
What you need:
- an old towel
- 1 x printable bath puppet template
- pencil
- scissors
- sewing machine
- needle and thread
- 3 x buttons
Number of players:
Activity:
Print out the template and use it as a guide to create your pieces.
You will need 2 x main pieces and 4 x circles for the ears (2 per ear)
First create the ears. Take two pieces, place them together (with right sides facing inwards) and sew around the edge. Leave a 2cm gap at the end so you can turn it right side out once its sewn.
Do this step with the other two circle pieces.
Turn the ears right side out.
Now take one piece of the two main body pieces and create a face for your bath puppet. Sew on two buttons for eyes and one button for a nose.
Use the needle and black thread to running stitch a mouth onto your puppet’s face.
Now you are going to sew it all together.
Place the face side up on the table. Now put the ears facing inwards and overlapped onto the top of the face (see video).
Place the second main body piece over the top. Pin it all in place around the edges.
Sew around the curved perimeter of the puppet, leave the bottom edge open (for a hand)
Turn your puppet right side out, the ears should be sewn into place and your puppet is ready for bathtime!
- Thanks to our sister company Kidspot Australia for creating the instructional video.