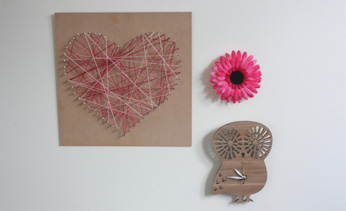
Love heart string art
Try this string art project if you're willing to tackle a complex idea to engage older kids. We've used a heart shape but you can use whatever simple shape you like, including the initial of your child's first name.
What you need:
- A piece of plywood or MDF (this 3mm ply will do, but something thicker would be even better)
- Small nails
- Hammer
- Paper
- Pencil
- String (we used embroidery string in three colours)
- Scissors
Number of players:
1
Activity:
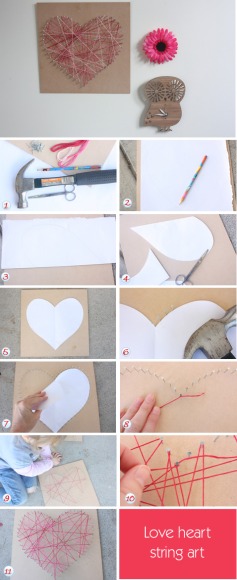
Step 1. Gather what you need to make your love heart string art.
Step 2. Draw or trace the shape or letter onto paper with a pencil.
Step 3. If it's something symmetrical, fold the image in half along the centre before you cut it out.
Step 4. Cut around the best-looking side for perfect symmetry.
Step 5. Lay the paper shape in the centre of your plywood to create the shape for your string art.
Step 6. Begin to gently tap the nails around the edge of the paper shape, leaving around one to two centimetres between the nails. The bigger the gap, the easier it will be for little hands to wind the string around.
Step 7. Once the whole shape for your string art is nailed in, remove the paper gently.
Step 8. Tie a piece of coloured string to one of the nails using a double knot.
Step 9. Have your child wrap the string randomly around the shape going nail to nail. They might need some guidance to keep within the shape.
Step 10. When you've used up that whole piece of string, go back to the start and tie it off into a knot again, using the excess string from the first tie. Cut the ends short.
Step 11. Repeat steps 8-10 as many times as you like with different coloured string.
This craft was created by Belinda Graham, who blogs at The Happy Home Blog.