1 large clove garlic, bruised (see instructions below)
250g fresh mozzarella cheese, chopped or grated
450g pasta shells
Method
Quarter the tomatoes, removing and discarding the cores and all the seeds.
Chop the quarters into smaller pieces and place into a large bowl along with oil, salt, basil and pepper.
To bruise the garlic clove, peel the clove and smash with the pestle from a mortar and pestle or something equally as heavy, but ensure the clove stays in one piece.
Add the garlic to the tomatoes and stir. Using a fork, press down on the tomatoes and basil until they are slightly crushed.
Add the mozzarella and leave to infuse while the pasta is cooking.
Bring a large saucepan of salted water to boil. Add the pasta to the boiling water and cook according to the packet directions.
Once the pasta is cooked, drain and toss the tomato sauce through, removing the garlic clove, and serve immediately.
Notes:
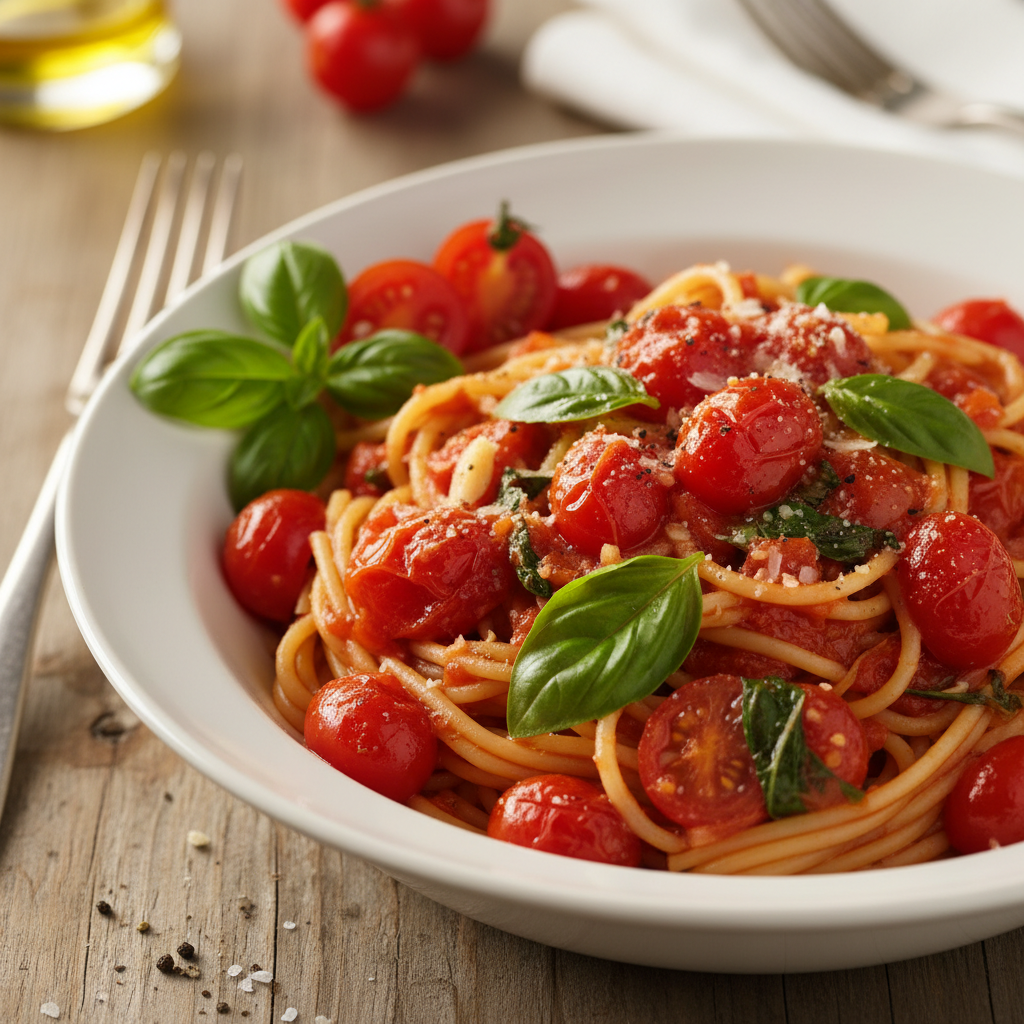
This is surprisingly delicious, especially if you use vine-ripened tomatoes. (And I’m really surprised because I don’t really love raw tomatoes!)
Removing the seeds from the tomatoes gets rid of that acidity that makes some people (like me) dislike them.
For a more adult version, try adding 2 teaspoons of dried chili flakes with the oil.
For the ultimate in simple and divine dining, buy fresh pasta such as papardelle (the really wide long noodles) for this recipe – it’s worth it!
This recipe was created by Kristine Duran-Thiessen for Kidspot, New Zealand’s best recipe finder.
Place rice and water in a saucepan, cover and bring to the boil. Reduce heat to a simmer for 10 minutes. Turn off heat and leave for 10 minutes covered.
Spread rice into a container and allow to cool, then sprinkle with combined vinegar and sugar. Stir thoroughly.
Use scissors to cut a sheet of nori in half. Place nori shiny side down on the bamboo mat. Place some of the rice on the sheet, press down with wet fingers to a depth of 0.5cm, leaving a 1cm gap at one end. Arrange fillings on top of the rice.
Start rolling up from the end with fillings. Lift the bamboo mat and roll tightly. Wet the strip at the end and push gently to seal the edges. Slice into six or eight pieces using a sharp, wet knife.
Place on a serving platter, cover with plastic wrap and refrigerate for 30-60 minutes to allow the nori to soften.
The kids will love helping prepare these sushi rolls. And the baby pieces are a great way to introduce sushi to the little ones. Although my daughter insists she likes the large hand rolls, like in the shops.
I like to lay the filling on top of the rice, but it might make it easier for the kids if you finely chop the filling and stir it through the rice. This would be a good way to sneak in some fish, prawns and ‘unmentionable vegetables’.
Leftover Chicken strips were fantastic in these sushi rolls.
250g grated mozzarella cheese + 100g mozzarella for the top layer
1 pkt (250g) large instant lasagne sheets
Method
In a frying pan, heat the oil and add the onions and garlic. Fry until the onions are translucent and then add the mince. Brown the mince and add the tomato paste, cooking for 2 minutes. Add the passata, tomatoes, herbs and water, and stir to mix well.
In a separate bowl, mix the three cheeses together.
Spoon a few tablespoons of the meat sauce over the base of your slow cooker. Layer lasagne sheets over the sauce and then crumble one quarter of the cheese mix over the sheets. Repeat layering – sauce, lasagne sheets, cheese – and end with a layer of meat sauce.
Cook in the slow cooker on low for 4-6 hours. Twenty minutes before cooking is complete, sprinkle over additional mozzarella cheese and replace lid. Serve with salad and garlic bread.
Serving Suggestions
Note
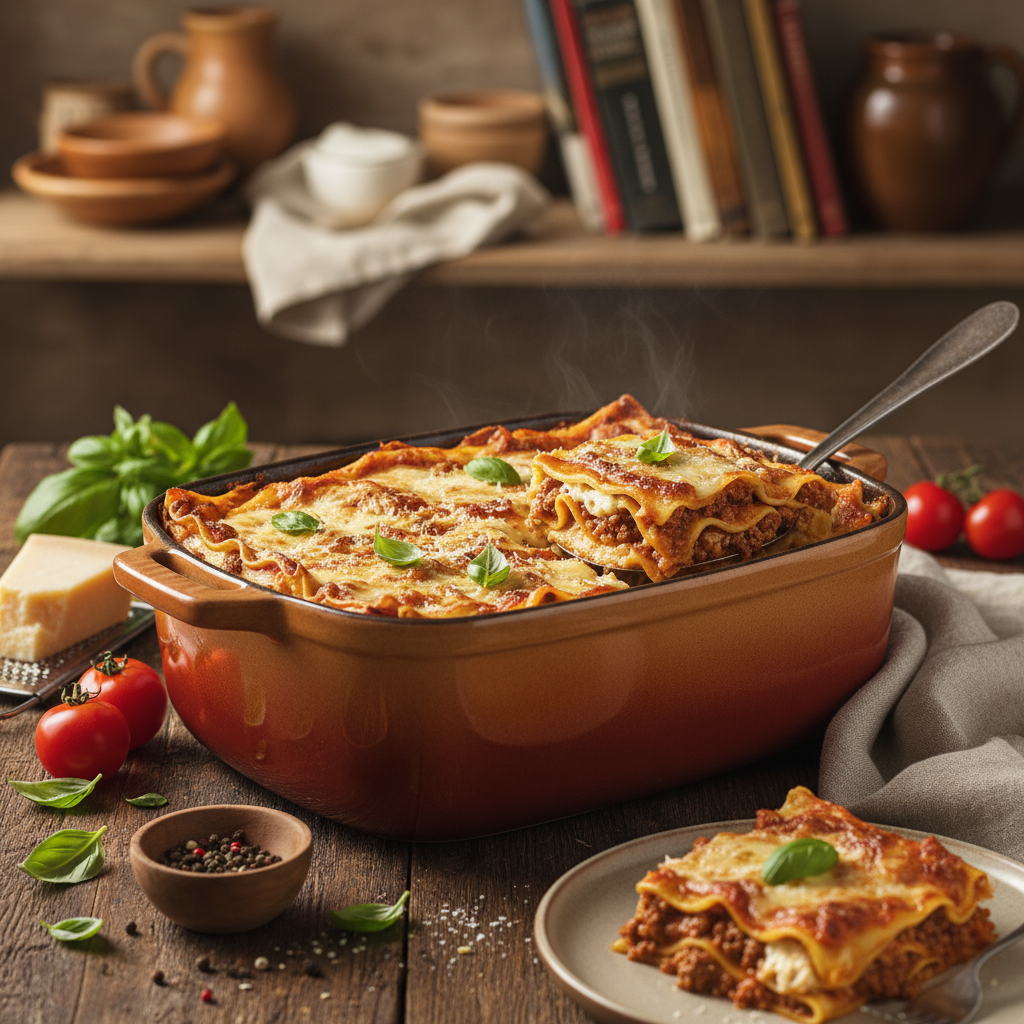
You may need to break the lasagne sheets up to fit them into your slow cooker. I have a rectangular cooker with rounded edges so I just broke off some corners.
I like to also sprinkle nutmeg on the cheese mixture for a hint of bechamel flavour.
Don’t worry if you think the sauce seems really thin – the lasagne sheets soak up a lot of sauce.
If you don’t have time (or patience!) to wait for this slow cooked lasagne, whip up this speedy lasagne in a hurry in a frying pan instead. It has all the same delicious flavours without needing to be baked or slow cooked.
Give everyone’s favourite dinner a twist by making chicken lasagne instead of beef. It’s easy, kids love it and you can also sneak some vegetables into the sauce.
Did you know you can cook lasagne in your dishwasher?! We didn’t believe it either so we tested this recipe. Turns out it’s actually very nice! Here’s how you can do it too.
If you want a lighter cheese sauce, this recipe for lamb and ricotta lasagne is a deviation from the traditional Italian lasagne and uses ricotta rather than bechamel sauce.
Cute! These individual-sized lasagnes are perfect for kids.
In a small saucepan, bring the water, oil and salt to boil. Pour in the couscous and stir. Remove from heat and cover – leave for around 3 minutes or until all water has been absorbed.
Swirl in butter and return to low heat, stirring until mixed and no longer lumpy.
Remove from heat and stir in creamed corn.
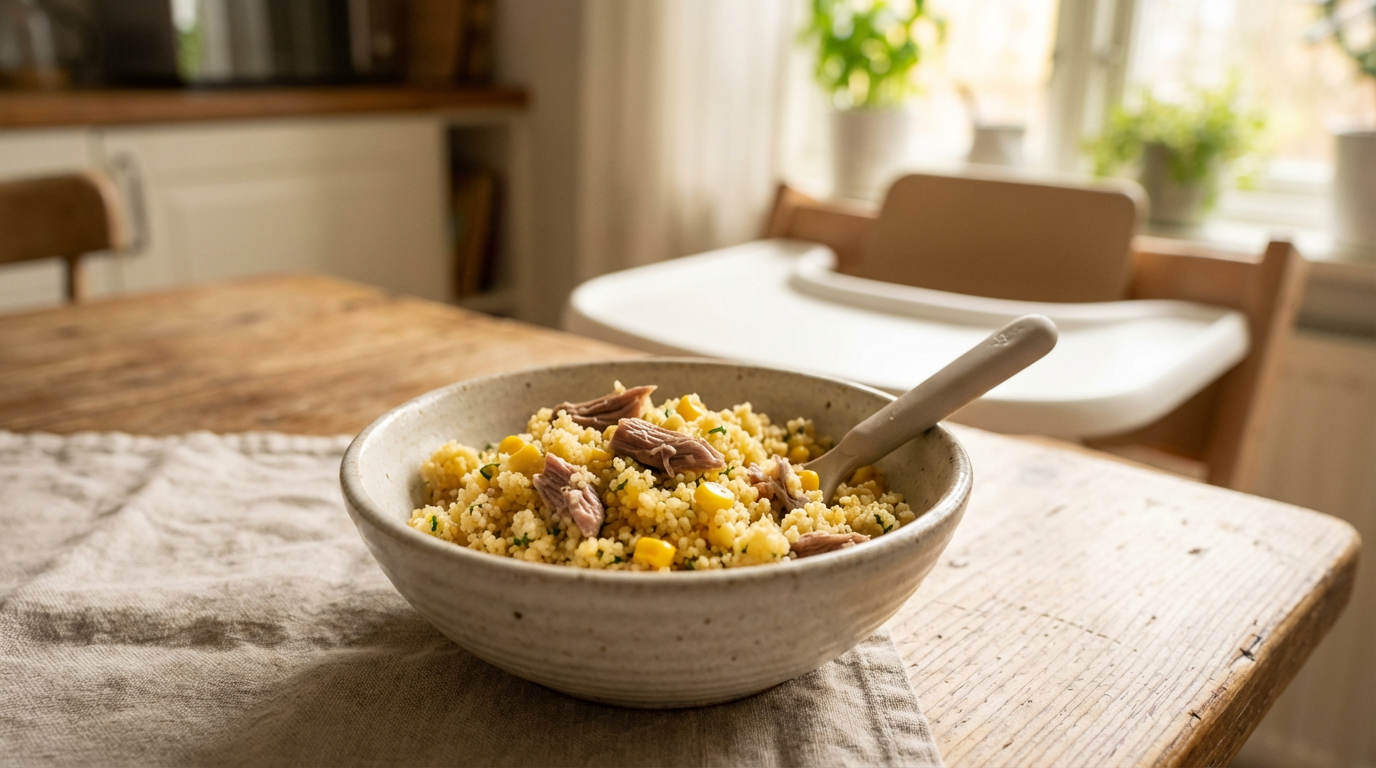
Using a fine grater, grate the piece of lamb and sprinkle over the top of the couscous. Serve immediately.
If you’d prefer to use fresh corn, cook a single corn on the cob in boiling water for 10 minutes or until cooked. Cut kernels from the cob and either puree with a dash of milk, or for a lumpier version crush corn with a fork.
You can replace the corn with mashed pumpkin for another flavour, if you prefer.
Looking for more ways to feed the entire family with just ONE meal? This Easy beef casserole will do the trick!
For dessert, every member of the family from big to small, will devour this Baked custard with gusto.
These Homemade teething rusks are great for babies who are cutting new teeth, and are so much nicer than what you can buy in the shops.
Does your little one suffer from constipation? Some Stewed prunes could be just what the doctor ordered.
Heat the oven to 180°C (160°C fan-forced) and line a 20cm square pan with baking paper.
In a medium bowl, sift together flour, cocoa powder and baking powder.
Place chocolate, espresso and butter into bowl, then place bowl over small saucepan 1/3 filled with water and bring to gentle simmer. Melt and set aside to cool slightly.
While chocolate is melting whisk eggs, vanilla and sour cream together. Mix egg and chocolate mixtures together with sugar and fold through dry ingredients until just combined (if you over mix it, the brownies will be crumbly).
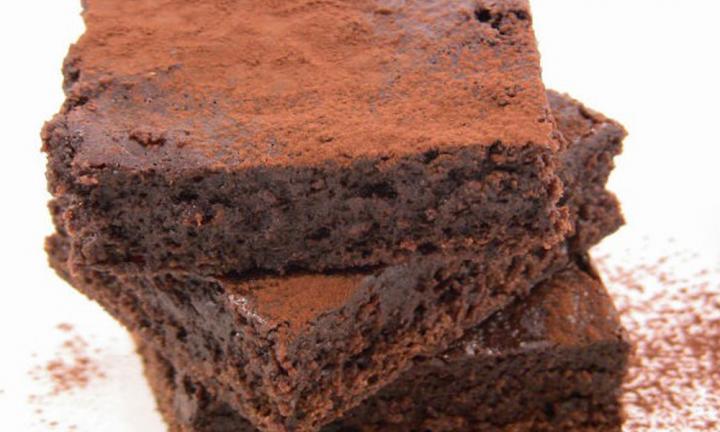
Pour into pan and bake for 14-16 mins until just set. It may look uncooked to your practiced baking eye, but it will continue to cook in the pan while cooling. Cool brownies completely in the pan and store in an airtight container.
These brownies are great for freezing – just wrap tightly in plastic wrap and store in an airtight container.
Brownies usually use a lot of butter, chocolate and eggs, but you don’t need a lot to get a lovely fudgy consistency. The key is to use quality cocoa and chocolate – this gives you all the flavour without the fat.
This recipe was created by Jay Rogers for Kidspot, New Zealand’s best recipe finder.
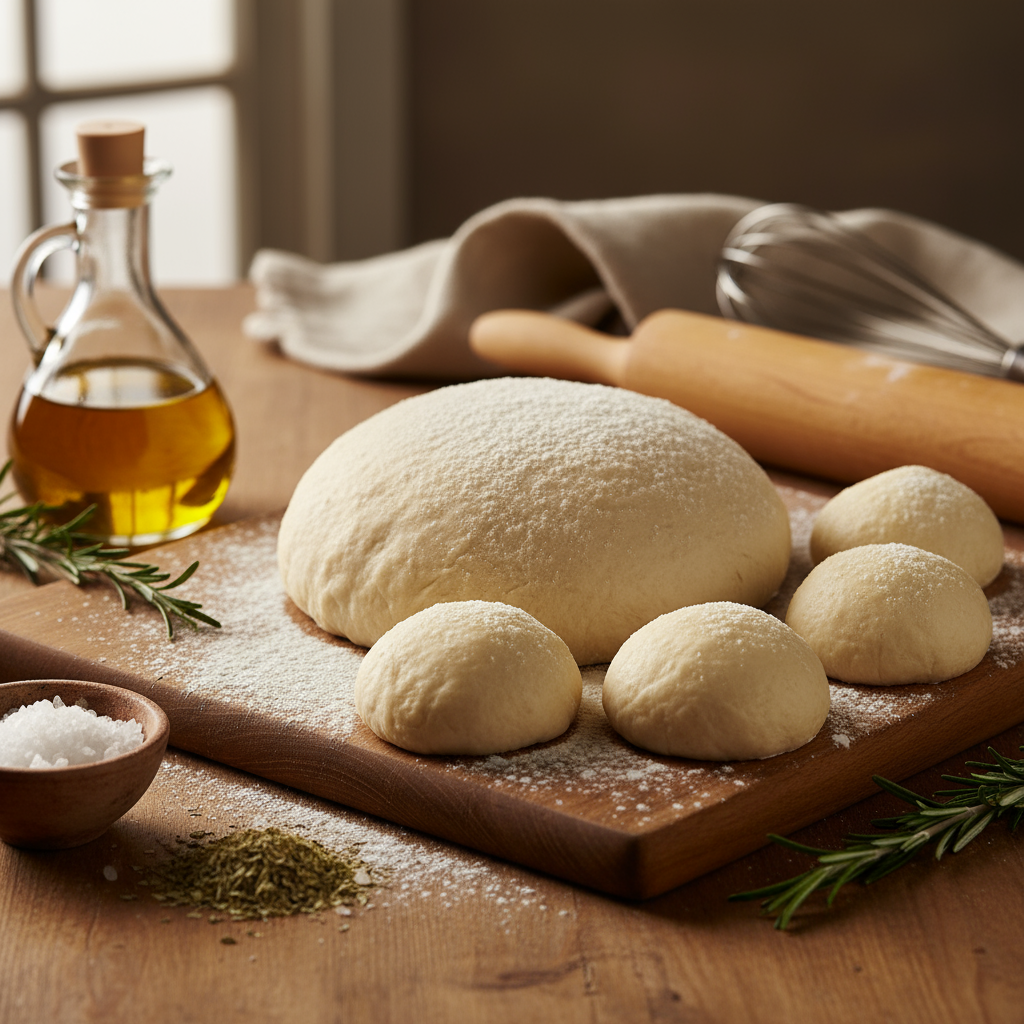
Sprinkle yeast over warm water, add a pinch of sugar, stir with a wooden spoon quickly then leave to activate (approx 5 min).
In a mixer with dough hook (or bowl) add flour and salt, mix to combine then when yeast has activated (top starts to foam) pour into the flour and mix on low speed adding 1 tablespoon on oil at a time until it forms into a ball.
Remove from bowl and kneed for 3-5 minutes, until the dough is soft and pliable.
Sprinkle flour in your bowl and place dough back in, cover with glad wrap and leave in a warm place for 30 minutes.
When doubled in size cut dough in half then half again and roll out to make your pizza base. Place dough onto your oven tray before applying sauce and topping.
Notes
I love making pizza so I will make up a dough once I have picked the boys up from school for dinner that night.
Because this dough recipe makes enough for two dinners (four pizzas), once I have split the dough in half, I wrap the half I dont need in glad wrap and freeze it until I need it.
Recipe created by Camilla Baker for Kidspot, New Zealands best recipe finder.
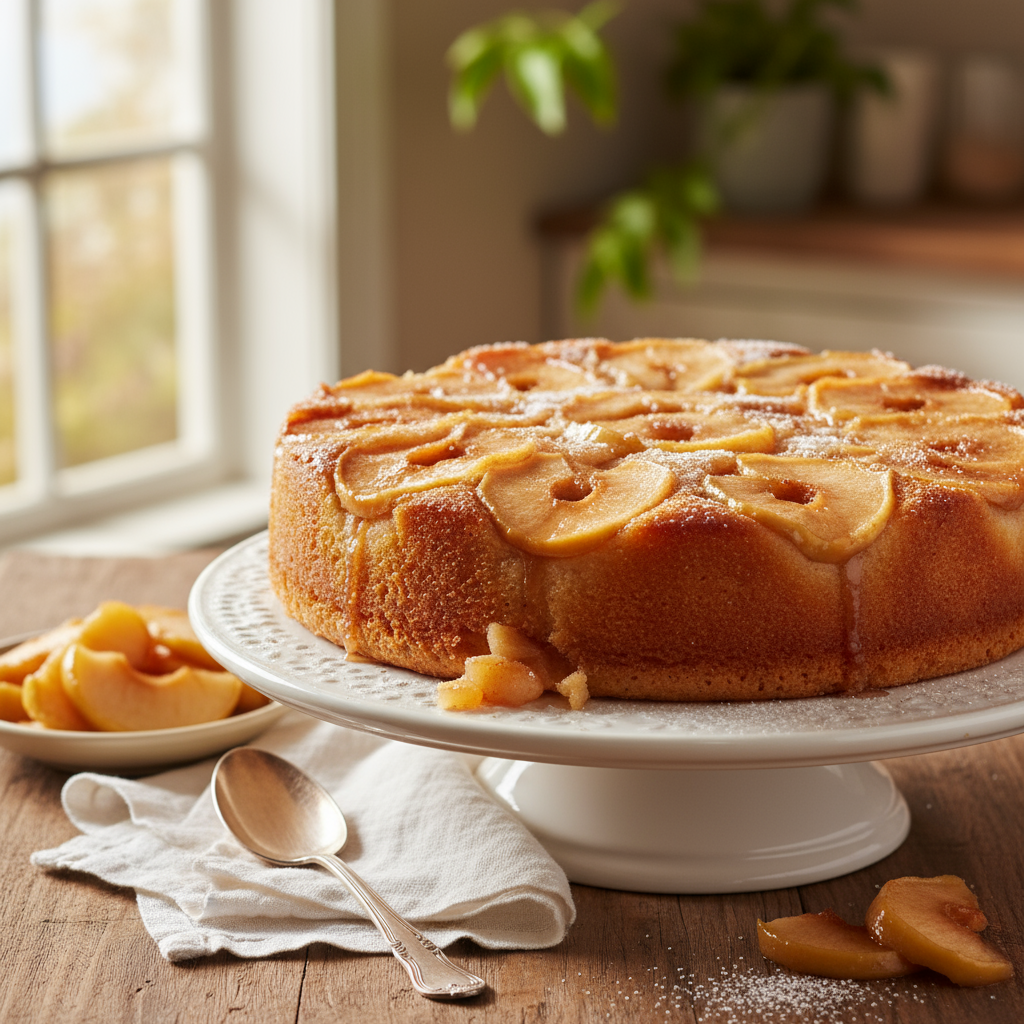
Heat oven to 180å¡C or 160å¡C fan-forced. Line a square baking tin (20cm x 20cm) with baking paper. Pour apples over the base of the baking tin and set aside.
Using an electric mixer, beat eggs, sugar and vanilla until thick. This should take around 5 minutes and is important in getting that lovely light, airy texture.
Melt butter with milk and leave to cool slightly before adding to egg mixture. Beat lightly to incorporate.
Sift in cinnamon, flour and baking powder and gently fold to incorporate. Pour over apples and bake for 30-35 minutes. Have a look at the 30-minute mark and see how you go. The cake should be golden brown with a soft texture, but not wobbly.
Allow to cool in the tin.
Notes:
You can serve this cake warm or cold. It also freezes well for up to three months.
798kj (190cals); 6.9g total fat (4g saturated fat)
This recipe was written by Jay Rogers for Kidspot,åÊNew Zealand’såÊbest recipe finder. You can follow Jay at The Moodie Foodie and on Facebook, Twitter or Pinterest.
Preheat oven to 190C. Grease and line a 20cm square cake tin.
Cream together the sugar, butter and egg.
In a separate bowl, sift together the flour, baking powder and salt. Stir into the sugar mixture, alternating with milk.
Stir in blueberries and pour into the prepared tin.
To make topping, combine all the ingredients and rub together until the mixture resembles soft breadcrumbs.
Sprinkle the crumble topping over the cake batter.
Bake for 45 minutes, or until a skewer comes out clean.
Serve hot with cream.
Notes
I stumbled on this old-fashioned American cake when I was looking for a recipe other than Blueberry muffins to use blueberries.
I was intrigued by the name after all, what is a buckle cake? After a little googling, I discovered that it is a single layer cake that has a heavy batter on the bottom covered in fruit and then a streusel topping. As the cake cooks, the heavier batter begins to buckle and push the topping upwards. Apparently.
I had a bit of trouble deciding whether the cake was cooked or not the cooked blueberries liquidise and make the cake appear uncooked. After stabbing my cake in various places with a skewer I decided it was actually cooked at the 45 minute mark, and it was perfectly cooked when I cut into it.
Blueberries are considered a super-food and I dont think you can have enough recipes that include them. This cake is perfect to have with a cup of tea at morning tea.
This recipe was created by Ella Walsh for Kidspot, New Zealand’s best recipe finder.
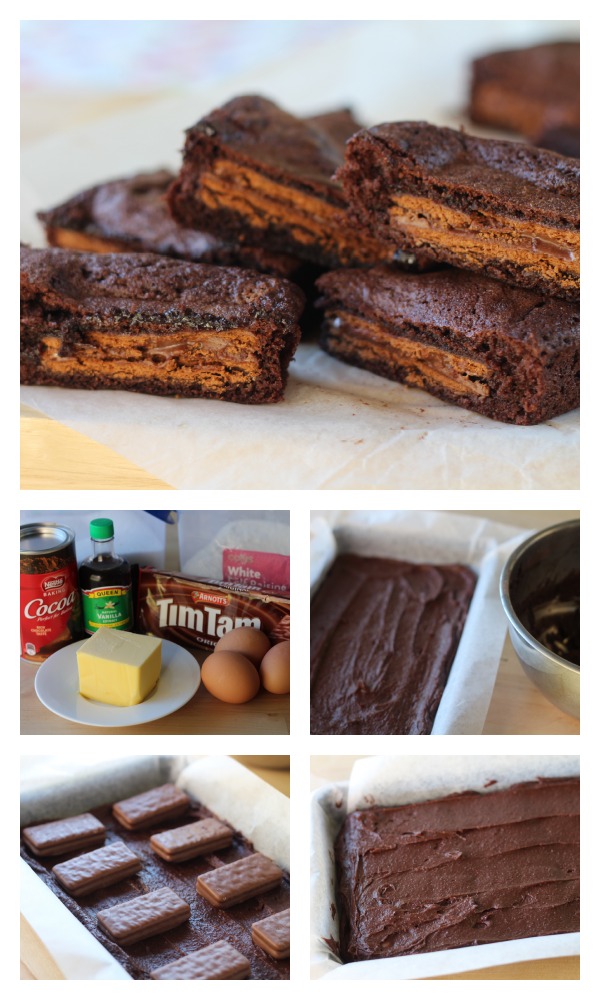
Step 1. Gather all ingredients together. Line a slice tray (15cm x 30cm) with baking paper and set aside. Preheat oven to 200°C (180°C fan-forced).
Step 2. Place flour, sugar and cocoa in a bowl and mix together. Add eggs, vanilla and butter and whisk until combined. Place 4-5 tablespoons of brownie mixture into the tray and spread to cover the base.
Step 3. Place 2 rows of 5 Tams on top of the brownie mixture. Pour remaining mixture into the tin and smooth over to cover the Tim Tams.
Step 4. Bake for 25-30 minutes or until lightly baked through. Cool and cut into squares or fingers and serve.
You can use any of your favourite chocolate biscuits to hide in this brownie mixture. I do like the idea of a Mint Slice hiding in there.
Baking time on these brownies will vary on how you like your brownies. If you want them soft and gooey then 25 minutes is perfect. If you want them firmer I would bake them for 35 minutes.
This recipe was created by Jennifer Cheung for Kidspot, New Zealand's best recipe finder.
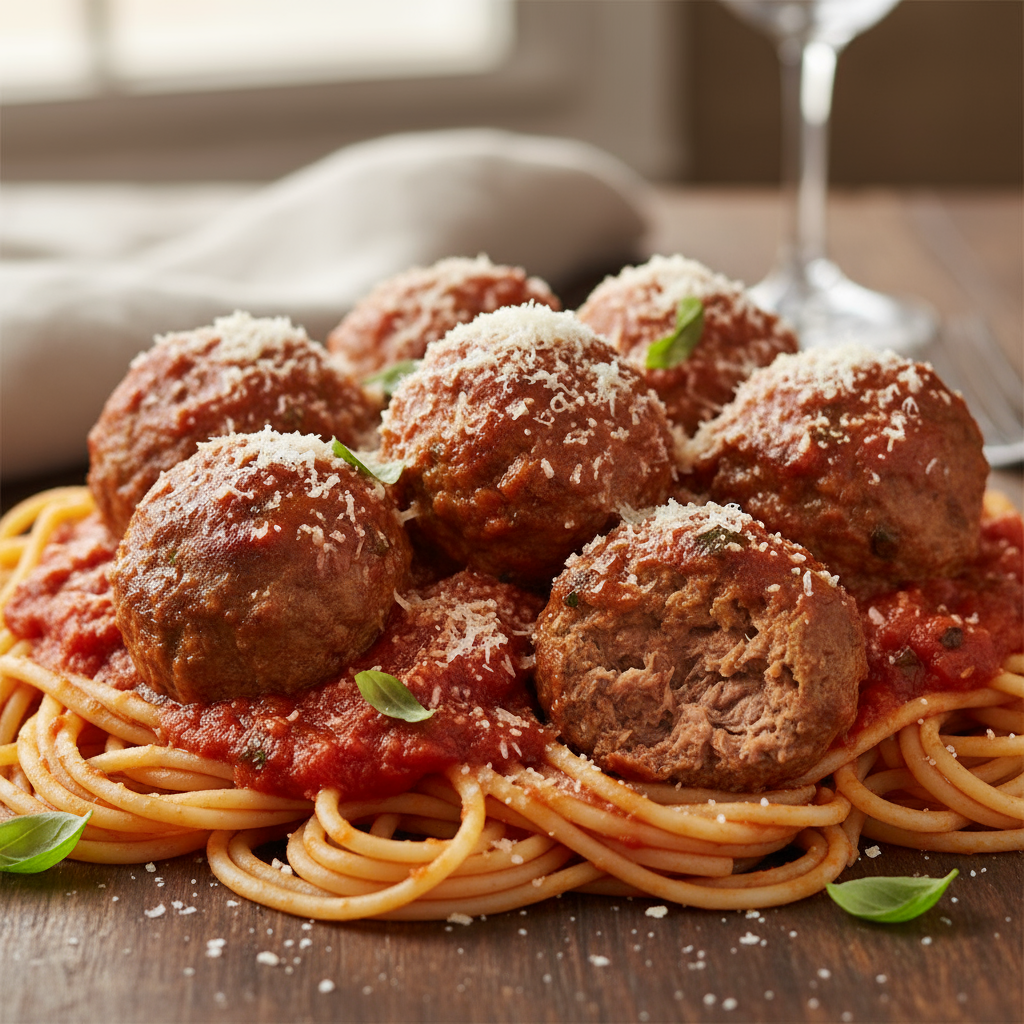
These delicious meatballs are big and juicy and come in their own beautiful tomatoey sauce. They sit perfectly on spaghetti and taste great with a sprinkle of fresh parmesan cheese.
Ingredients
Meatballs
500g beef mince
250g Italian sausage, skin removed
2 eggs
1/2 cup milk
1/2 cup dry breadcrumbs
3 tbsp grated parmesan cheese
2 cloves of garlic, crushed
Salt and pepper
Sauce
1 tin diced tomatoes
1/2 cup tomato paste
1 small onion, diced
1/2 green capsicum diced
1 cup beef stock
1/2 cup red wine
2 cloves garlic, crushed
1 tbsp Italian herb mix
1 tsp sugar
Method
Meatballs
Preheat oven to 180 C. Line a baking tray with baking paper.
In a large bowl mix the eggs and milk and add the rest of the ingredients for the meatballs.
Mix thoroughly and form 2 cm ball and place on baking tray.
Cook for 15 mins in the oven. Place in slow cooker.
Sauce
Pour all of the sauce ingredients into the slow cooker, stir and cover.
Cook on low for 4-5 hours.
Serve over spaghetti with extra parmesan cheese.
Notes
Buy a double quantity of meat and make an extra batch of meatballs to freeze for later That way you have a head-start next time you want to make this recipe.
One quantity of this make 36 meatballs which should easily feed a family of 6 if you serve it on spaghetti.
Get the kids to help you roll the meatballs. They are more likely to eat food they have had a hand in preparing.
1 tablespoon extra-virgin olive oil, plus 3 tablespoons more for frying
salt and pepper to taste
6 hamburger buns
½ cup light sour cream
2 small tomatoes, sliced
1 avocado, mashed
Butter for toasted buns
Tasty cheese slices
1½ cups salad greens
Method
Place the beans, ½ cup breadcrumbs, mayonnaise, coriander, 1 tablespoon oil, salt and pepper into a food processor and process gently until combined but still chunky.
Remove mixture and gently roll into 6 balls and then press into patties. Dredge each patty in the remaining breadcrumbs and set aside.
Bring a frying pan or barbecue grill to a medium heat , then add 3 tablespoons oil. Carefully add each patty and cook on each side for about 2 minutes until golden. Add a slice of cheese to the cooked side of the patty. Remove the patty from the heat when the cheese has melted.
In the meantime, slice and toast the buns under the grill. Spread the bottom half of the bun with avocado, add salad greens, and butter the top half.
Place the bean patty on top of the greens, top with tomato, a dollop of sour cream and the other half of hamburger bun.
Serve immediately.
Serving Suggestions
Note
Notes:
I love my sandwiches and burgers to be crunchy, so feel free to stick a few good-quality corn chips inside the burger before you serve.
Make each patty an appropriate size for whoever will be eating it – this recipe will make six adult portions so you could get 10 smaller patties out of the mixture for kids.
This is so delicious! This recipe easily wins over anyone who is normally suspicious of veggie burgers.
This recipe was created by Kristine Duran-Thiessen for Kidspot, New Zealand’s best recipe finder.
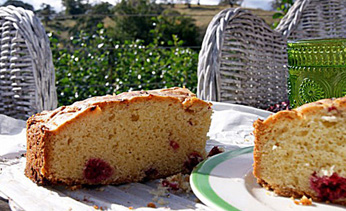
Preheat oven to 180°C or 160°C fan-forced. Butter a 20cm springform cake tin and set aside.
Cream butter and caster sugar together until pale and fluffy. Add the vanilla paste and then the eggs 1 at a time, beating well between each addition.
Fold through the flour and finally the raspberries. Pour the mixture into the tin.
Bake for about 35 minutes. It will be ready when the sides of the cake are just beginning to pull away from the cake tin and a skewer inserted into the middle comes out clean.
Let the cake cool on a wire rack.
Notes:
You can skip the fruit in this cake and make it as a beautiful plain vanilla cake. This served with warm chocolate sauce and ice cream is my husband’s ideal dessert. Otherwise swap the raspberries for apples, pears, plums or any other fruit.
Instead of vanilla, you could add a teaspoon of finely grated orange rind, some mixed spice or a tablespoon or two of cocoa.
This recipe was created by Sophie Hansen for Kidspot, New Zealand’s best recipe finder.
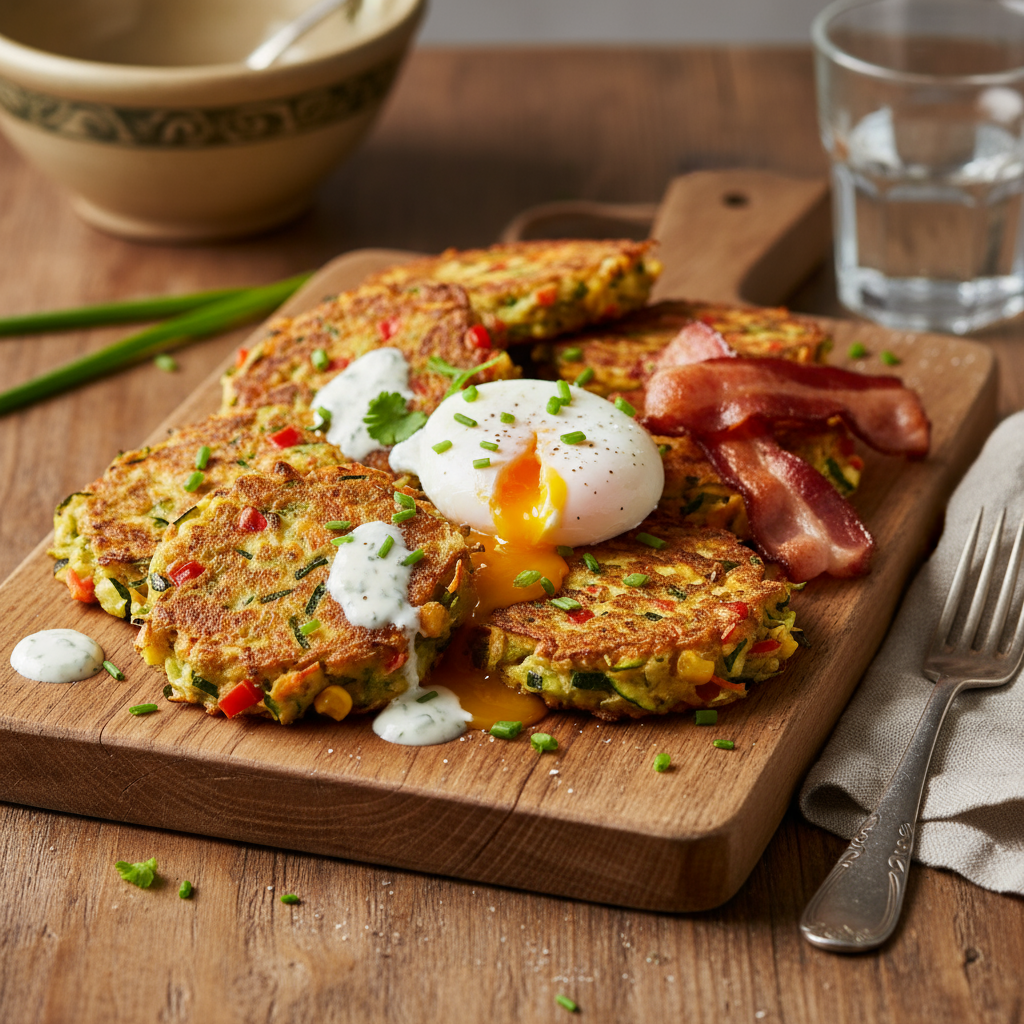
Great if you want to use up veggies in the fridge, these wholesome fritters are wonderful with a rasher of crispy bacon and a poached egg. Use whatever combo takes your fancy for a light lunch or breakfast side.
Ingredients
1/4 cup flour
1 egg
2 tablespoons milk
1/4 cup grated cheese
1/4 cup chopped veggies (grated carrot, zucchini, potato, silverbeet chopped finely, corn, peas – pretty much whatever is in fridge)
butter or oil for cooking
Veggie fritters
Beat together flour and egg with two tablespoons of milk, unitl it is a reasonably thick, smooth batter (add a little more add milk if necessary).
Add cheese and veggies to mixture, combine well.
Heat oil or butter in mid-heat frypan. Drop tablespoon-lots of fritter mix into pan.
Flip over fritters when bubbles appear on top and bottom is golden.
Note:
Use a mix of butter and oil to fry the fritters in as it has a higher smoke point
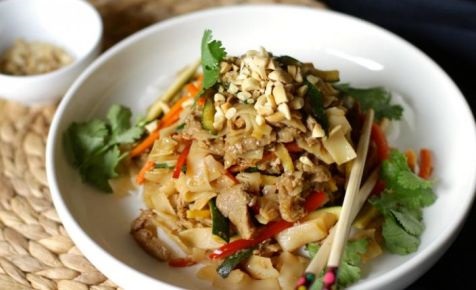
In a large non-metallic bowl, combine garlic, ginger, sauces, sugar and vinegar.
Thinly slice pork fillet. Add to marinade and stir to combine. Cover and refrigerate for 2 hours or overnight.
Cook rice noodles according to packet instructions.
Heat oil in a wok. Cook pork quickly in batches, removing to a plate once sealed and adding more oil to the wok as necessary. Quickly stir-fry julienned vegetables for 1-2 minutes. Return pork and toss to combine. Add noodles and stir-fry, being careful not to break them up too much. Serve topped with chopped peanuts and coriander.
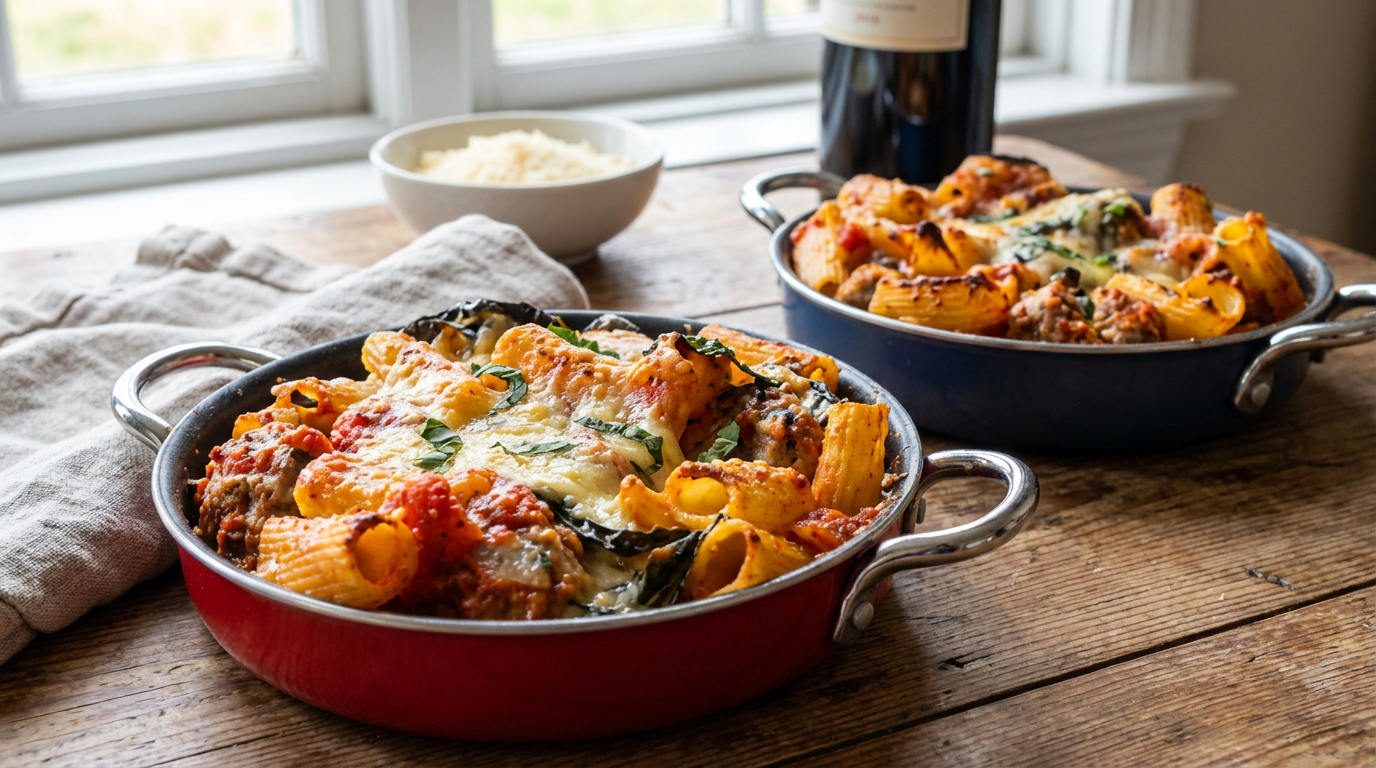
To make the meatballs; combine all ingredients in a bowl and season to taste. Wet your hands and roll the meat mixture into small balls (about half the size of a golf ball works for me). Heat olive oil in a frying pan over medium heat and brown the meatballs on all sides, in batches.
Meanwhile, heat olive oil over medium and cook onions until soft and translucent. Tip in the canned tomatoes, lower heat and cook for 15 mins. Season to taste.
Cook penne according to packet instructions. Drain, keeping 1/2 cup of the cooking liquid, and tip back into the saucepan. Carefully stir through the meatballs, cheeses and basil. Add the reserved pasta cooking liquid to thin the dish out and then tip into a large (8-cup capacity) baking dish.
Sprinkle with the parmesan and cook for 20 mins or until bubbly and golden.
Notes
If you don’t think your kids will like the fennel then either leave it out or swap for extra herbs.
If you’d like this dish to be extra ‘cheesy’, then dot some bocconcini cheese on the top before baking.
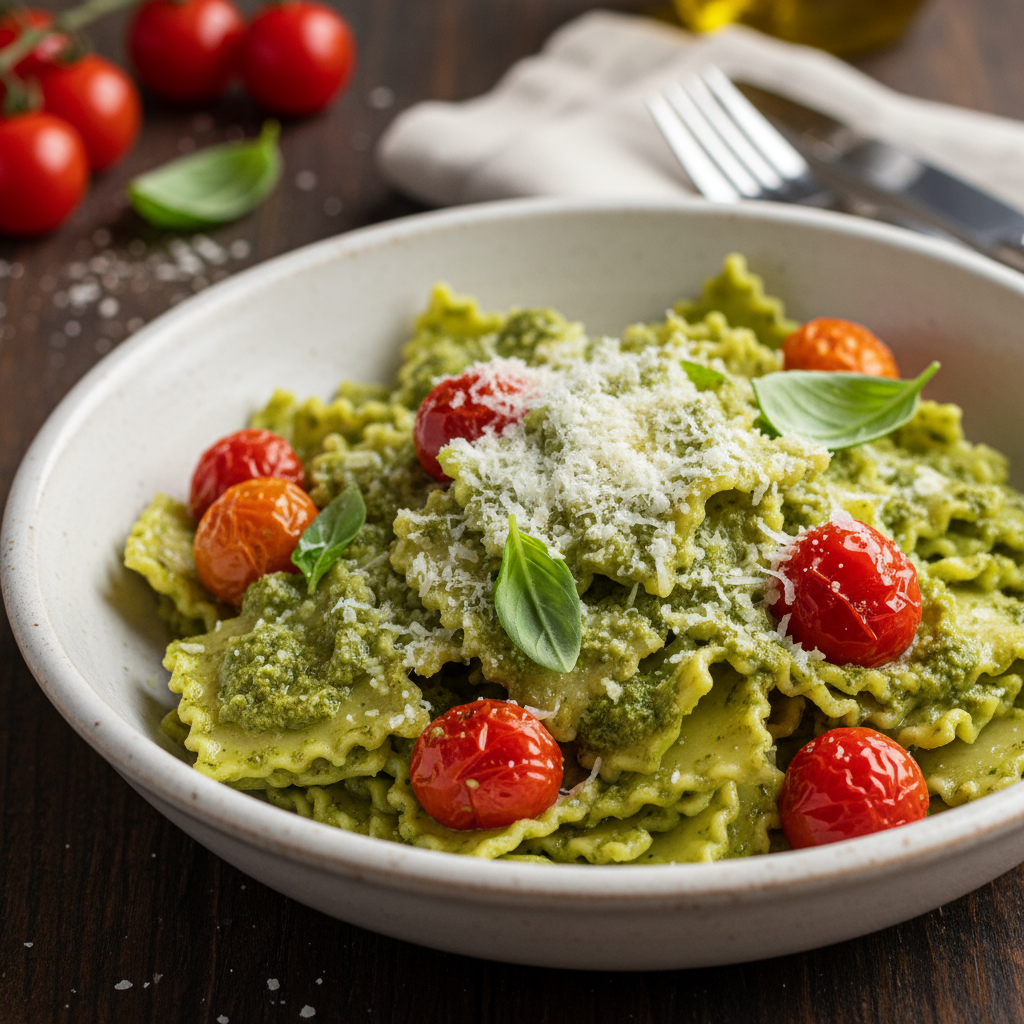
Bring a large pot of water to the boil. Rip lasagne sheets into large bite size pieces (this bit is very fun). Place lasagne bits in pot, return to the boil and cook for 2-3 minutes until al dente. Drain into a colander, return pasta to the pot and stir through pesto and tomatoes. Serve garnished with parmesan.
Notes:
This is a super quick dish. By all means make it more time consuming (but also more tasty) by making your own pasta and pesto!
I had been to the farmers market the day I made this pasta, so we had it with amazing Italian and fennel sausages AND locally grown cherry tomatoes. The tomatoes were so tasty and sweet if you have inferior tomatoes, roast them in a bit of olive oil at 180C until starting to collapse, this really intensifies their flavour.
2 garlic cloves, finely chopped, plus one garlic clove extra for bread
1 x 400g tin chopped tomatoes
1 loaf sourdough bread
Parmesan and parsley to serve
Method
Drain the beans of their soaking water, place in a saucepan, cover with fresh cold water and cook for about 35 minutes, or until the beans are tender and cooked through.
Meanwhile, cook the onions in a saucepan with the olive oil over a medium heat. Once soft and translucent (about five minutes), add the garlic and cook for another minute. Stir through the tomatoes and cook for about five minutes before pouring in the drained, cooked beans.
Toast the sourdough in nice thick slices (I use the grill for this). As soon as the slices are golden on each side, remove from heat and rub with a garlic clove then drizzle with a little olive oil. To serve, place a piece of bread in the centre of each plate and spoon over the beans.
Notes:
Dried beans are a staple in our house; delicious, healthy and cheap – they tick all my boxes. I usually make up (that is, soak overnight, drain then cook in boiling water until tender) a batch of beans once a week and then freeze them in snap-lock bags. They can be added to most dishes still frozen.
This recipe was created by Sophie Hansen for Kidspot, New Zealand’s best recipe finder.
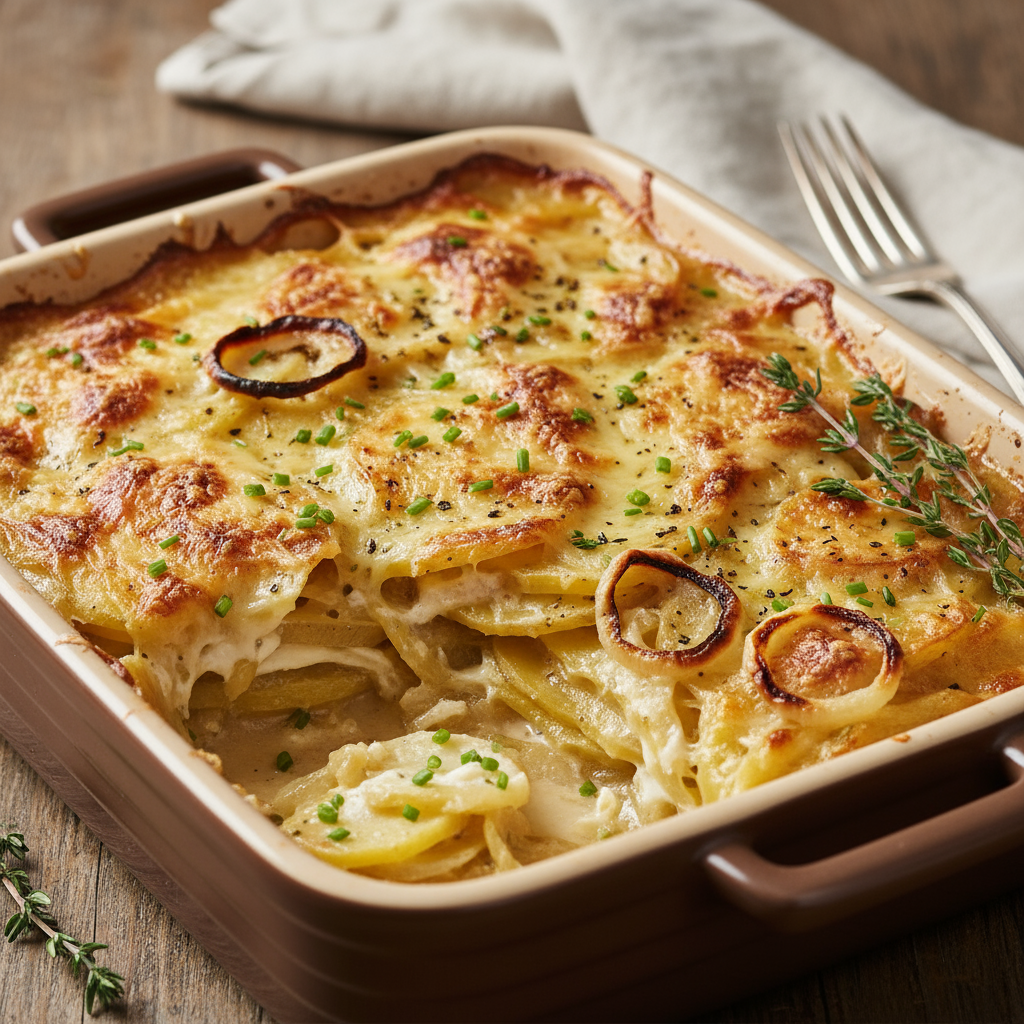
1kg potatoes (the varieties recommended for creamy mash)
1 cup grated cheese
25-50g butter
1/2 cup (125ml) cream or milk
1 tsp minced garlic
pinch of salt
2 tbsp dill, chopped
1 tbsp paprika
1 punnet cherry tomatoes
Meatloaf:
1kg minced beef (or 500g Pork and 500g beef)
Worchestershire sauce
1 tbsp tomato sauce
1 red capsicum
1 onion
1/4 cup chopped mushrooms
2 eggs, lightly beated
1 1/2 cups rolled oats
handful of parsley
generous pinch of rosemary
Method
Preheat oven to 170°C (150°C fan-forced)
Steam or boil peeled potatoes.
Mash and whisk potatoes with all the other frosting ingredients except the dill and paprika (while warm) to make cheesy creamy mash potatoes. Put aside to cool.
Place all meatloaf ingredients into a bowl and combine well using clean hands.
Line a 12-cup muffin pan with liners. Place a large handful of mixture into each liner.
Bake in the oven for 20 minutes. Stick a skewer into it to make sure it's cooked through. Remove from muffin tray and leave to cool for about 10 mins.
Spoon potato mixture into a piping bag. Pipe frosting on top of the cupcakes. Sprinkle dill and paprika over the top of the frosting to look like sprinkles and then top with a cherry tomato.
Cook the potatoes first because you want to give them time to cool before piping onto the cupcakes.
Unlike normal cupcakes these don't rise in the baking so make the top nice and round to get a muffin top and press it into the muffin tray to get the base shape.
You can use rolled oats or breadcrumbs in your mixture but I found oats give a better texture.
If you don't have a piping bag, you can use a zip-lock sandwich bag and snip the end off.
Other modifications can be to swirl tomato sauce or caramel balsamic over the top like chocolate sauce.
Combine mince, water, tomato paste and breadcrumbs and mix well. Form 2 tablespoons of mixture into mini burgers, you will make about 20. Heat a non-stick frypan to medium heat and cook burgers in two batches. Cook for 3-4 minutes each side and turn only once.
Use scone cutters to cut 4 circles out of each slice of bread. Top each round of bread with a spinach leaf or two, a small piece of cheese, a burger and a slice of tomato. Serve with tomato sauce.
Notes:
I usually make half a batch of mini burgers and the rest are adult sized to reduce the rolling and fiddling around with mini bits of food!
I had some leftover bacon and onion in the fridge, so added these to the grown up burgers.
And for fun if it is Valentines Day time of the year, I used my heart shape cutter for the bread. It never ceases to amaze me how a simple change of shape suddenly makes food appealing to my kids!
1 cup self-raising flour (see notes below for gluten-free)
2 tablespoons cream
2 small red apples
½ teaspoon cinnamon
1 teaspoon caster sugar, extra
Method
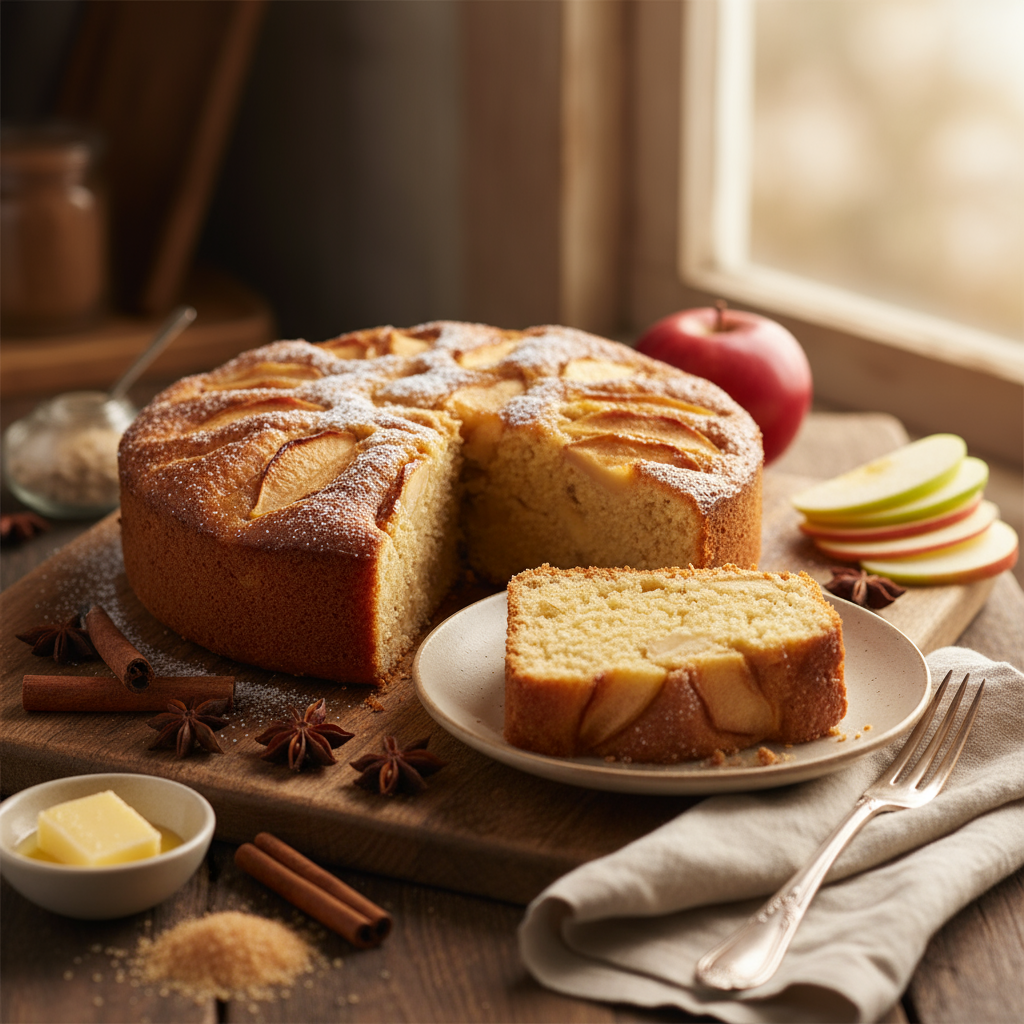
Preheat oven to 180°C. Grease and line a 20cm round cake tin.
Core and quarter apples, then slice each quarter into further quarters (i.e. 16 slices per apple).
Use an electric mixer to cream butter and sugar until light and fluffy, add eggs one at a time until well combined. Add flour and cream, beat until smooth.
Pour into prepared tin and press apple slices, skin side up, into batter.
The apple slices will be nearly touching. Sprinkle with cinnamon and caster sugar.
Bake for 35-40 minutes or until a skewer inserted into the centre of the cake comes out clean.
Allow cake to cool for 5 minutes in the tin and then turn out onto a wire rack to cool.
Notes
My school friend Beck gave me this recipe when we were about 16 years old (I take a small moment to acknowledge the years passed). It has become part of the family cookbook.
It is a wonderfully moist cake, quick to make and if there is any leftover, great for lunchboxes or after school snacks.
I used Pink Lady Apples.
Make this cake gluten-free by using gluten-free plain flour (e.g. Orgran) and 2 teaspoons gluten-free baking powder.
A smidgeon (about 1/8 teaspoon) of xanthan gum (from health food shops and some supermarkets) gives the ‘gluten-like’ consistency.
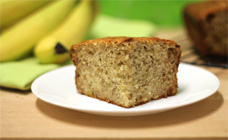
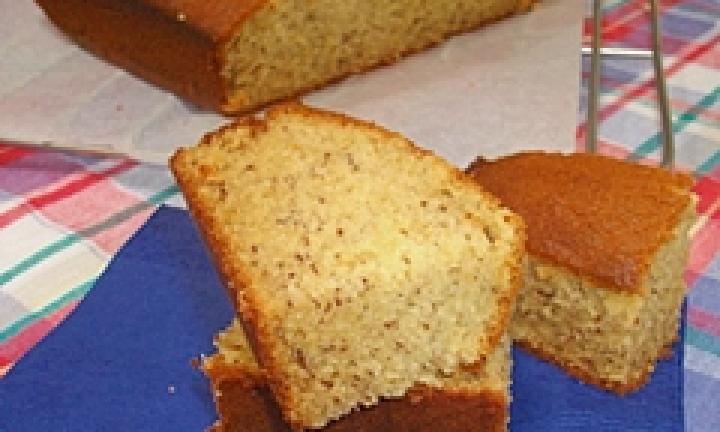
Preheat oven to 180 degrees C. Butter and line a square cake tin.
Cream butter and suar until light and fluffy. Beat in eggs, bananas and vanilla
Sift the dry ingredients together.
Mix together the milk and lemon juice.
Alternatng, add the dry ingredients and the milk, beating between each addition.
Bake in the oven for approximately 45 mins or until a skewer comes out clean.
Rest in the tin for 5 minutes before turning out onto a wire rack to cool.
Notes:
This banana cake has bee proclaimed the BEST cake ever by the toughest judges around – a group of 11-year old girls.
Thanks to Stephanie Alexander for giving the world this wonderful but super-easy cake recipe.
Delicious cool, this cake is even better (in my humble opinion!) still warm from the oven – it has a fantastic caramel-y flavour that is lip-smackingly good.
The ripeness of the bananas has a direct impact on the banana-iness of this cake.
This recipe was created by Ella Walsh for Kidspot, New Zealand’s best recipe finder.
Using a round cutter with an 8cm diameter, cut 9 circles from each sheet of pastry. Press them gently into the rounds of a patty-pan tray. (You will either need two trays or to do this in two batches).
Distribute the zucchini, ham and cheese evenly into each pastry case. Whisk eggs and milk in a jug and gently fill the pastry cases. Bake for 14 minutes until puffed and golden.