Sponsored content provided by Resene
Upcycle an old wooden kitchen tray into a useful and colourful chalkboard for the kitchen. Use it for menu planning, grocery lists, a welcome sign, chore lists, to-do lists … so many uses.
To reuse, simply wipe the chalk off with a damp cloth and start again. It’s a fun way to introduce a pop of bright colour into your home.
If you can’t find a tray, a piece of plywood or similar would also work.
Resene upcycling for good with Sarah Herring
You will need:
- An old wooden tray
- Sandpaper
- Testpot brushes
- Detail brushes
- Painters’ masking tape
- Resene Quick Dry primer undercoat
- Resene Chalkboard Paint or Resene SpaceCote Low Sheen paint in your choice of colour (this works as your blackboard surface). Sarah chose Resene Indian Ink.
- Resene testpots in your choice of colours. Sarah chose Resene Irresistible, Resene Spray, Resene Bright Spark, Resene Trinidad.
Step by step instructions
Step 1:
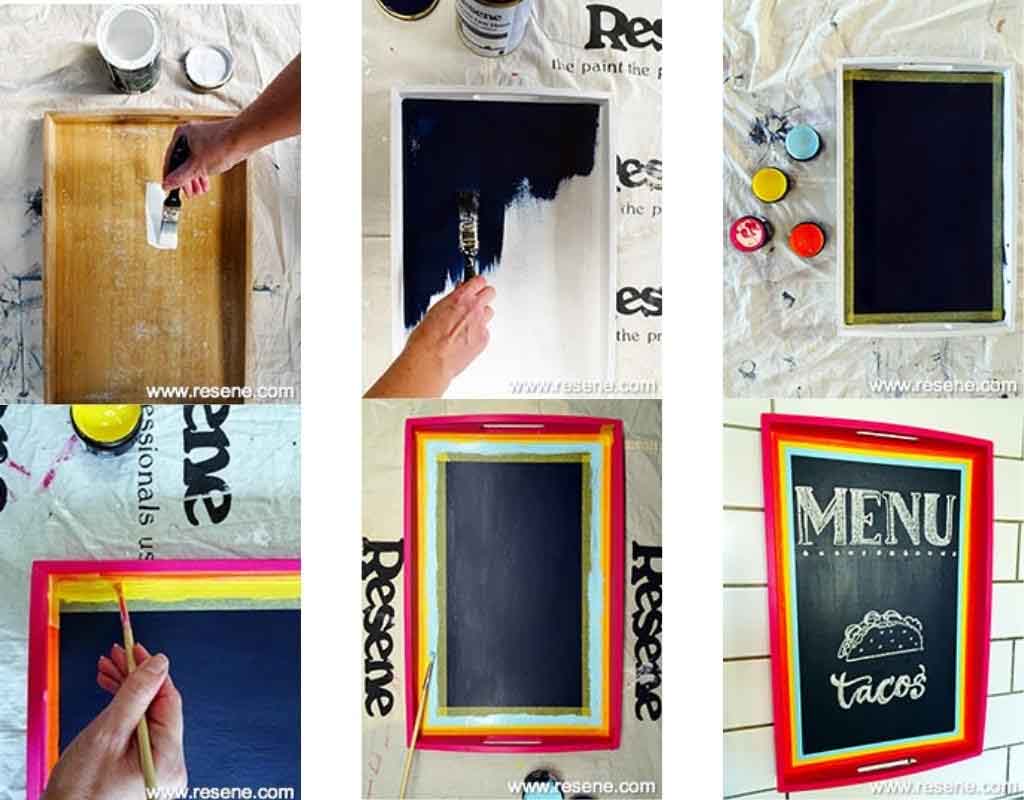
Give the old kitchen tray a light sand with sandpaper, wipe clean and then apply one coat of Resene Quick Dry primer undercoat using a testpot brush. Sarah didn’t need to paint the underside as her try is designed to be hung against a wall. If you are planning to use the tray as a tray you could prime and paint the underside also.
Step 2:
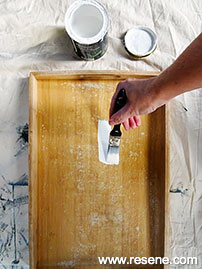
Apply your chosen chalkboard colour in 2-3 coats. You can use Resene Chalkboard Paint or Resene SpaceCote Low Sheen paint.
Step 3:
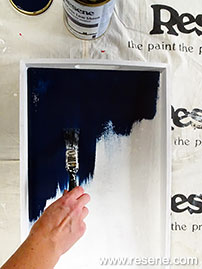
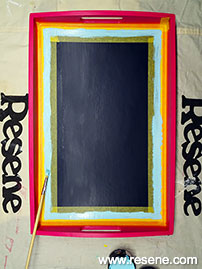
Choose four bright testpots to create a carnival-style striped theme. Sarah chose Resene Irresistible, Resene Spray, Resene Bright Spark and Resene Trinidad. Sarah applied two coats of Resene Irresistible as her first colour over the entire outside of the tray.
Step 4:
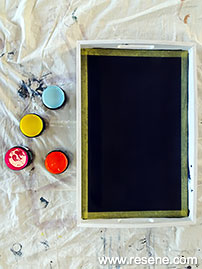
Once dry, mask out and paint stripes to create a frame effect. Sarah did this one colour at a time using Resene Trinidad, Resene Bright Spark and then Resene Spray. It’s best to use a detail brush for these stripes as they are quite narrow. Take your time with each section and make sure the paint on the previous colour is dry before you mask and paint a new one.

Step 5:
Once fully dry, use white chalk to turn the tray into a menu board for the kitchen – starting with Taco Tuesday!
For more projects and colour inspiration visit Resene.co.nz.
Article provided by Resene. Projects and images by Sarah Herring
Read more on Kidspot: