Sponsored content provided by Resene
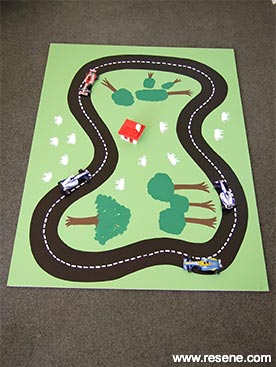
Make your own driving track for hours of driving fun. Add another dimension to your driving track with a few houses built from building bricks.
You don’t need to stop there either – a farm complete with animals, perhaps a refuelling (or recharging) stop will all add to the fun.
You will need:
- Large rectangular piece of 5mm MDF (or you can use a large piece of cardboard)
- Paintbrushes (including a fine bristle artist brush)
- Pencil
- Resene Lumbersider tinted to the following colours: Resene Groovy and Resene Nero, Resene Quick Dry Waterborne Primer Undercoat, Resene Testpots in the following colours: Resene Alabaster, Resene Grass Stain and Resene Woodburn
Check out the step by step instructions below. You can also download an instruction sheet here.
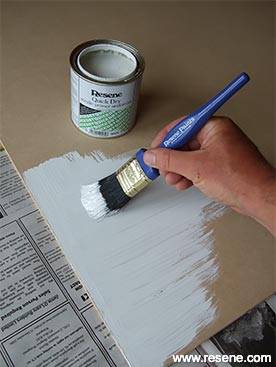
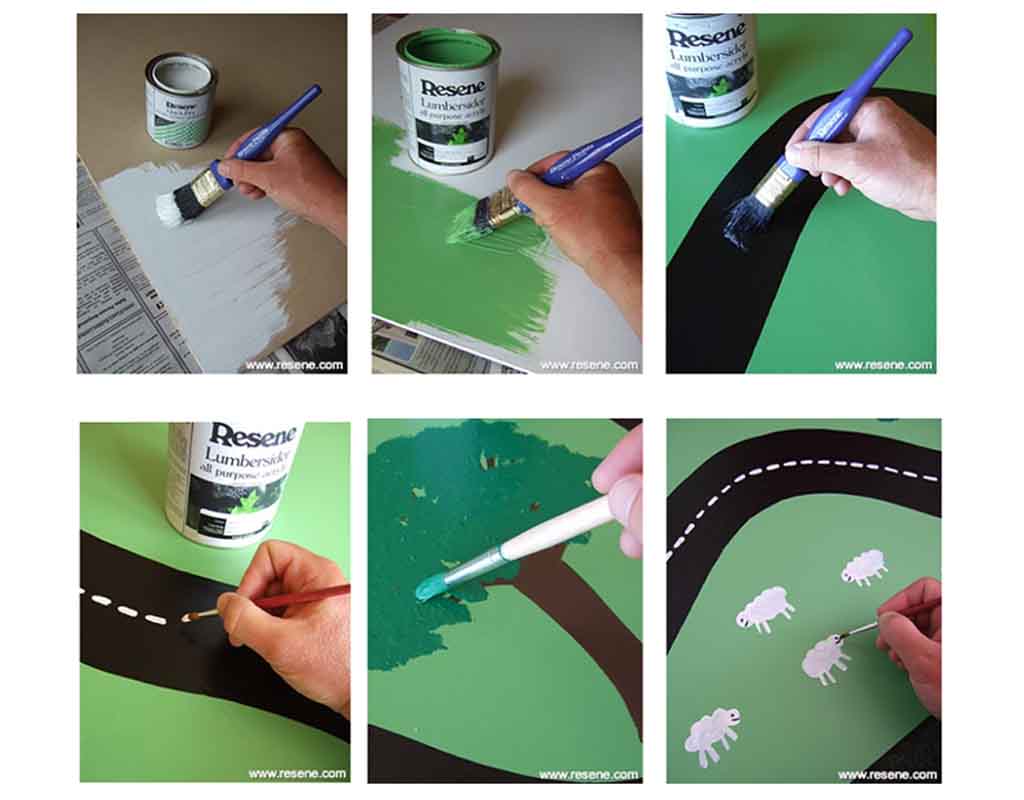
Step 1
Paint the piece of MDF with one coat of Resene Quick Dry waterborne primer undercoat. Allow to dry for two hours.

Step 2
Paint the piece of MDF with two coats of Resene Groovy, allowing two hours for each coat to dry.
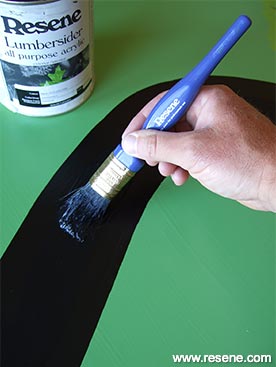
Step 3
Use the pencil to draw a curving road around the board and paint in with two coats of Resene Nero – again, allow two hours for each coat to dry.
Step 4
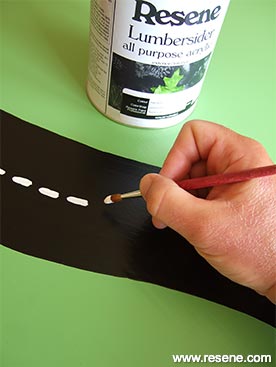
Use an artist brush to fill in the centre road markings with Resene Alabaster, as shown. Leave to dry
Step 5
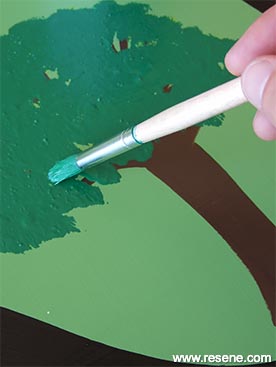
Paint tree trunks with Resene Woodburn, and once this is dry, paint in leafy treetops with Resene Grass Stain.
Step 6
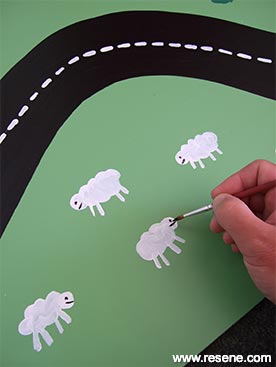
Paint in sheep with Resene Alabaster, and once this is dry use the fine bristle brush to paint in eyes and mouths. Once it’s all dry, bring out your toy cars and get driving!
For more projects and colour inspiration visit Resene.co.nz.
Article provided by Resene kids art with Mark Rayner
Read more on Kidspot:


Leave A Comment
You must be logged in to post a comment.