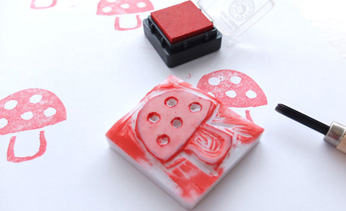
Make your own stamp
Making your own unique stamps is fun and inexpensive. It's a great way for kids to 'put a stamp' on cards, wrapping paper and artwork. Ask them to create a stamp, but make sure you do the carving!
What you need:
- Ezy Carve Printing Block (available at art stores) or a rubber
- lino carving tools; you need a V shape and a U shape
- craft blade or scalpel
- protective cutting mat or thick piece of cardboard to protect your table
- pen or pencil
- stamp pad in any colour
Number of players:
1+
Activity:
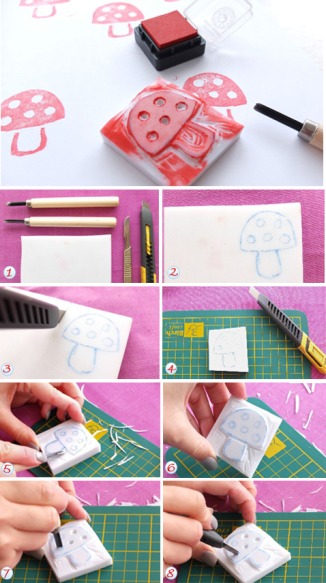
Step 1. Gather all you need to make your personalised stamp.
Step 2. Ask your child what they want on their stamp. Draw your design directly onto the block or rubber. Remember it will print as a mirror image!
Step 3. Using a craft blade, cut out the section that will become your stamp, leaving about 5mm around the design. Make sure any 'helpers' keep well away from this step.
Step 4. Now you're ready to do some carving, so make sure you have your cutting mat or thick cardboard underneath.
Step 5. With the V-shaped tool, carefully start carving away the part of the block you don't want to print. Always point the tool away from your hands.
Step 6. Your personalised stamp should now be the raised bit.
Step 7. Since we are making a mushroom stamp with a bit of detail, we're now going to use the U-shaped tool to outline the circular shape.
Step 8. Now use the blade to carefully carve out the circles. Voila! Get stamping.
NOTE: Start off with an easy design, like our mushroom, to build up your skills and confidence.
This craft was created by Cintia, who blogs at my poppet.