Welcome to Kidspot, New Zealand’s most comprehensive online resource for parents, covering everything from conception through to the teenage years.
Sorry we could not find the page you where looking for, so please take a look at these highly visited pages or use our site search.
Search Our Website
Can't find what you need? Take a moment and do a search below!
Kidspot pages you might like to look at

Environ skin care heroes
When it comes to looking after your skin, the basics are always a must – cleanser, toner and moisturiser. But as mums, our skin often goes through a lot of changes – from pregnancy and late nights with little ones, to the natural effects of getting older. That’s when having the right products on hand can really make a difference.
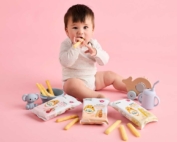
Little Bellies | Free trial
We're giving 50 families the opportunity to trial and review Little Bellies. Register for our free trial now.
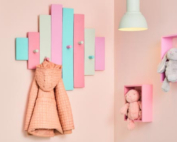
DIY storage solutions for your home
Tidying up and keeping things in their place is a breeze with these ideas by Resene for colourful and practical storage.
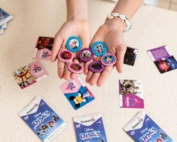
Bring the Magic of Disney home with Woolworths’ Disney Discs!
Get ready to add a little magic to your weekly shop! Woolworths is celebrating 70 years of Disneyland Resort in California with the launch of Disney Discs - a limited-edition collectible which is all about fun, connection, and spending time together.
Supporting every bite: How Little Bellies helps Kiwi kids grow with confidence
Feeding your baby is about more than just mealtimes - it's a journey of discovery, growth, and development. From those first curious nibbles to confident toddler snacking, each age and stage comes with exciting milestones.

What does ‘me time’ look like for dads?
For many dads, “me time” doesn’t always mean escaping the chaos - it often means finding little moments of connection, purpose, or peace amidst the everyday juggle of parenting. Discover why Little Bellies is proud to be a dad-founded brand, built on care, connection, and a deep understanding of what families truly need.

New looks for kids & teens rooms
Got a kids' room in need of a makeover? Be inspired with our pick of six of the best kids' room themes from Resene, with mood boards, colours and room ideas to help you get the right look and mood for your child's space.
Protected: Pulled pork sliders
This content is password protected. [...]
Protected: Weekday wonders with NZ Pork
There is no excerpt because this is a protected post.

Ten million reasons to celebrate free fruit at Woolworths
For the past decade, Woolworths has been offering free fruit to kids during grocery shopping - and they’ve just passed a pretty incredible milestone: 10 million pieces of fruit shared with tamariki across New Zealand! Find out more and get tips on making grocery shopping easier with kids in tow.