Sponsored content provided by Resene
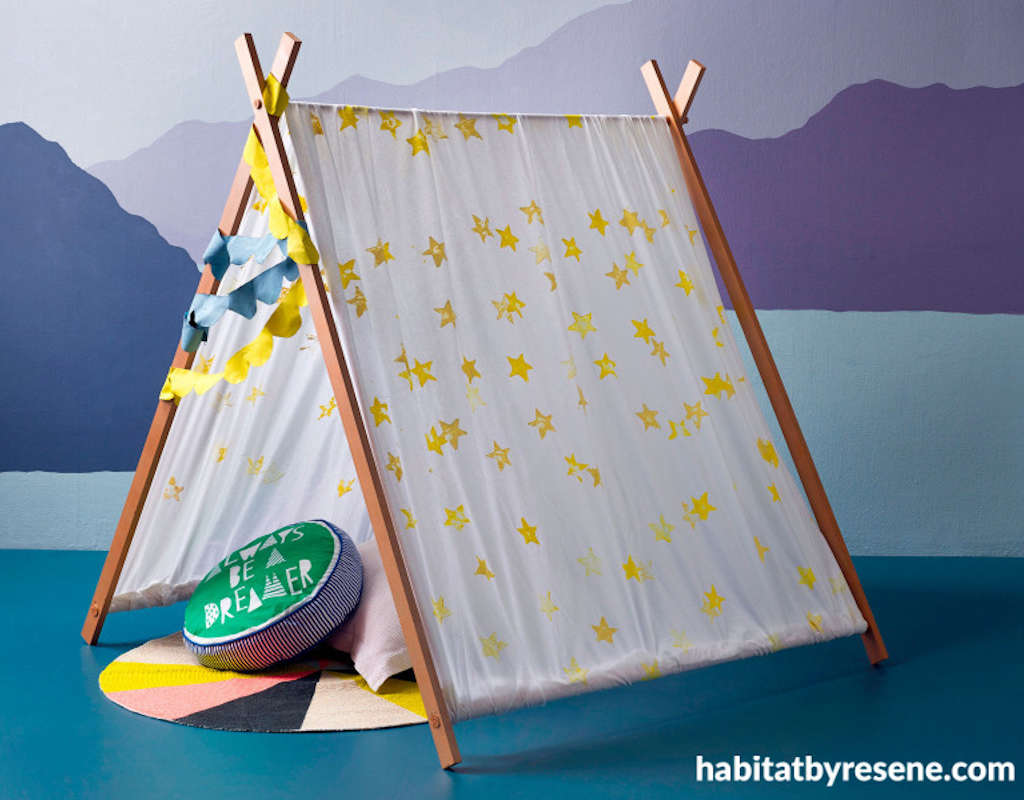
Kids love somewhere to hide and seek. This day tent is a perfect fort for indoors or a place to retreat from the sun when playing outside. Here are the easy steps.
You will need:
- 4x 1.5m battens (drilled holes in each, one top and one bottom, to insert dowels
- 3x 1.2m dowels
- Resene roller and tray
- 2x potatoes, knife
- calico (1.5m length; 1m width)
- sewing kit
- Resene testpots in your choice of colours: we used Resene Goldmine, Resene Frozen and Resene Smiles.
Top tip…
- Apply white paint stars and once dry apply two prints of Resene FX Nightlight glow in the dark over the top. This will give soft glowing stars that will slowly wane in brightness once the lights go out. Make sure you get a good amount of the white basecoat and the Resene FX Nightlight on the surface for the best glow effect.
Step by step instructions

Step one
Paint the battens and dowels using Resene Goldmine. Leave to dry.

Step two

Step three
Lay out the calico, with cardboard or something sturdy underneath (that you don’t mind getting paint on).

Step four
Dip the potatoes into Resene paint and print the stars onto the fabric. It doesn’t need to look perfect, and yes it will get messy.

Step five
While that dries, make an A frame with the dowels and pine boards. Get it to the width and height you’d like it.

Step six
Place the (dried) calico on top of the tent, and make each side taut. Sew the bottom of the tent to secure. Ask someone to hold the frame while you do it.

Step seven
If you made bunting, lace through each side of the frame and use it to secure in place. Use sturdy rope as an alternative. We painted our bunting in Resene Frozen and Resene Smiles.

Step eight
Fill with fun cushions and a rug and leave the kids to enjoy their new hiding spot.
For more projects and colour inspiration visit Resene.co.nz.
Styling by Leigh Stockton, photography by Melanie Jenkins
Read more on Kidspot:


Leave A Comment
You must be logged in to post a comment.