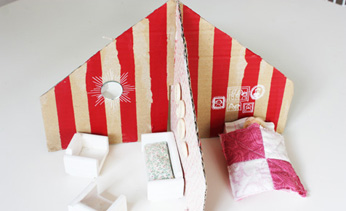
Cute cardboard box dollhouse idea
Yet another use for the humble cardboard box! Cut it up, decorate it and turn it into a dollhouse. At pack-up time, this flat-pack home simply pulls apart and stores flat – Ikea would be so proud!
What you need:
- A cardboard box
- Scissors
- Glue
- Patterned paper
- Paint
- Paintbrush
- Painter’s tape (Washi tape would work even better)
Number of players:
1
Activity:
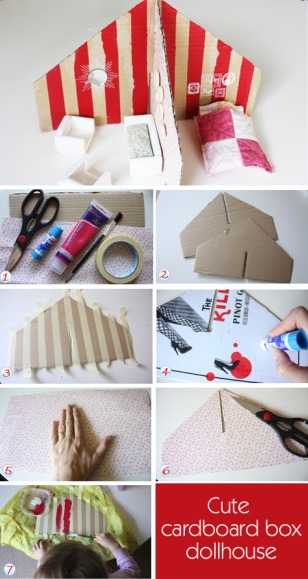
Step 1. Gather all the equipment you'll need to make this cute cardboard dollhouse.
Step 2.Cut the cardboard into a house shape. Cut around this as a template and make another one the same size. At the roof peak on one side, cut half way down into the house wall, leaving the gap around half a centimetre. Cut another from the middle of the other side, halfway up the wall.
Step 3. Use the painter’s tape (or washi tape) to create lines on the nice sides of the cardboard box.
Step 4. On the other side, glue all over the pattern.
Step 5. Place the piece of patterned paper over the template, patterned-side up, and smooth over the glue, sticking in place.
Step 6. Trim the paper, using the cardboard “wall” as a template and don’t forget the slice in the centre. Repeat with other “wall”.
Step 7. Have your child paint the exposed stripes on the taped “walls”. Leave to dry. Once dry, very carefully remove the tape strips to leave nice neat painted stripes. Line up the two slits and slide in so they create an “x” shape from the top. You’ve just created the basics of the dollhouse, now get decorating – mirror tiles make mirrors, a white gel pen can draw “frames” on the wall, buttons make nice wall art and regular dolls house furniture will work well (Spotlight sell this simple wooden furniture, which we then painted white).
This craft was created by Belinda Graham, who blogs at The Happy Home Blog.