How To Create A Painted Headboard

Sponsored content provided by Resene

Love the look of painted headboards? Create your own half-moon headboard featuring Scandi-inspired blues to achieve a modern, moody bedroom.

For a double moon effect, trace two semi-circles. Use a longer string for the outer one. Then paint each in a complementary colour, with the outer circle used to highlight the main half-moon shape.

You will need:

Step by step instructions

How to create a painted headboard

Step 1:

Place the thumbtack or nail in the midpoint at the bottom of your half-moon.

How to create a painted headboard

Step 2:

Attach the string and cut to the length of how big you’d like the half-moon.

How to make a flower wall

Step 3:

Tie the chalk at the end of the string and trace the headboard.

How to create a painted headboard

Step 4:

With a steady hand, paint along the trace headboard using your chosen Resene paint colour. We used Resene Seachange. Leave to dry.

Step 5:

Place your bed and complement the colours of the half-moon headboard with soft linens and matching accessories.

For more projects and colour inspiration visit Resene.co.nz.

Article provided by Resene. Styling/Project by Nikki Astwood

Read more on Kidspot:

Review: Earthwise Toilet Cleaner, Multi-Surface Cleaning Spray and Laundry Liquid

For those of us who have responsibility for at least some of the domestic cleaning chores, increasingly we are looking for products that not only help make cleaning easier, they are also easy on the environment and our pockets.

You might have noticed Earthwise products in the supermarket – after all, they have been around for years with the goal of creating effective products that are better for people and the world they live in.

Earthwise products utilise “plant power” and they have chosen things like lavender oil, tea tree, pine and eucalyptus oils to make use of their antiseptic, antifungal, and disinfectant properties.

As alluded to in my bio below, I have tried out heaps of cleaning products in the past, so it was only natural that I was chosen to review these three Earthwise products!

My first task was to pop to the supermarket to pick up the products – and that was no problem as they were fully stocked and waiting for me. I guess because Earthwise is New Zealand made, not only do we get to support local, there are no issues with the international supply chain.

Spray heaven

Earthwise Multi Purpose Spray Cleaner Citrus & Mint

First up was the Earthwise Multi-Surface Spray Cleaner Citrus & Mint. I love spray cleaners as they make me feel super efficient (!) and also I can target the cleaner on the harder spots.

The spray nozzle is comfortable to use and has two2 off options (so you know no matter which way you turn it after use, that it is safely off), plus a jet and mist option. Both dispense a useable amount of spray so you won’t be having to spray lots, nor will your surfaces be dripping with product.

I started in the bathroom and cleaned the sink, cupboard doors, external toilet surfaces (including the yucky seal between the toilet and the floor), around the bath and a quick wipe around the aluminium window frames – easy! All the marks gone, a nice shiny finish and a light, fresh and healthy eucalyptus scent left in my wake!

Our kitchen is a dirt, grease and fingerprint magnet so I was super keen to give the spray’s grease-cutting claim a test out. We have a lot of chrome and the spray certainly removed the grease – and a quick wipe over with a clean cloth after to remove any smears left me with satisfyingly shiny surfaces again. Inspired, I gave the buffet/sideboard top a clean. It’s a matt black laminate but has a tendency to cling to greasy finger marks so it was great to see them wipe away. Earthwise recommends that you do a patch test before you get spray happy on varnished surfaces.

I can see why NZ Consumer magazine recently recommended  Earthwise Multi-Surface Spray Cleaner Citrus & Mint 500ml as one of the highly recommended multi-surface cleaner options available in supermarkets.

Loo crew

Having just cleaned all the exterior surfaces of the toilet with spray it was on to the inside. I squirted the Earthwise Tea Tree and Pine Toilet Cleaner up under the rim – as it’s clear there is no chance of staining if you forget to scrub it off for a few hours (which has happened to me before). I put a bit on a cloth and wiped around the top of the bowl, a quick scrub, flush and done!

Earthwise Toilet Cleaner

Earthwise report that this plant-powered toilet cleaner kills 99.9% of germs and is also greywater and septic tank safe. I love that there is no bleach in this cleaner as I have ruined so many clothes accidentally splashing a bit of bleach-laden water on myself when flushing the toilet and rinsing the brush in the past.

My sensory child reports she likes the scent of the Tea Tree and Pine and I agree – I generally don’t love the smell of tea tree, but the pine smell softens it and the overall effect is a pleasing, fresh, clean fragrance. I would also be keen to try the Orange and Eucalyptus next time.

Washers delight

It’s a bit of a running joke in my family that I never feel quite complete unless I have done at least one load of washing so I was super happy to try out a new laundry liquid. As we are an eczema family, the Earthwise Ultra Sensitive Laundry Liquid was perfect for us to trial.

Earthwise Laundry Liquid - Ultra Sensitive Fragrance Free

Like the toilet cleaner, the laundry liquid is suitable for greywater and septic tanks, it has a low suds formula, and it’s suitable for top and front loaders as well as for handwashing. The bottle has a pouring spout and the lid doubles as a measure so it’s all easy to use.

The first load I did included a very urine smelling towel so I was interested to see if the smell came out with this fragrance-free liquid – and happily, it did! I have done loads of loads since then – from sweaty sportswear to black jeans – and everything has come out looking great. And since wearing the clothes, no one is itching.

The verdict

If, like me, you’re looking for cleaning products that are effective and good for the planet, Earthwise ticks all the boxes. In addition to harnessing plant power, they also use a high percentage of recycled plastic in their packaging, are greywater and septic tank safe, as well as locally owned and operated with an eye on their carbon footprint.

Choosing Earthwise was easy – from finding them at a great price at the supermarket through to spraying, squirting and pouring and effectively cleaning my house. I loved that I could choose fragrance-free laundry liquid (although they also have a lavender or lemon and gardenia option too) and that the other cleaning products worked well while leaving a satisfying, pleasant, fresh smell in the house. Even my husband with his underperforming sense of smell commented on it!

Created in partnership with Earthwise. The author was provided with the products for the purpose of this review. Views are those of the author.

See more:

author robynWritten by Robyn Cody

Robyn creates content on Kidspot NZ. Her hobbies include buying cleaning products and wondering why things don’t then clean themselves, eating cheese scones with her friends, and taking her kids to appointments. 

Favourite motto to live by: “This too will pass”

Camp by Kayla Miller | Kids Book Review

Sponsored content 

In the second book in the New York Times bestselling “Click” series, Olive is sure she’ll have the best time at camp with her friend Willow. But while Olive makes quick friends with the other campers, Willow struggles to form connections and latches on to the only person she knows – Olive.

The stress of being Willow’s living security blanket begins to wear on Olive and before long the girls aren’t just fighting, they may not even be friends by the time camp is over. Will the two be able to patch things up before the final lights out?

This graphic novel is about stepping out of one’s comfort zone, navigating new experiences, and the satisfaction of blazing your own trails.

Kayla Miller is a New York Times bestselling author and illustrator living and working in New York. They have a BFA in Illustration from the University of the Arts in Philadelphia. When not busy working on graphic novels, Kayla enjoys watching bad movies, trying to cook new recipes, playing games (both board and video), and reading other people’s graphic novels.

Watch Kids Book Reviewer Abbey review Camp by Kayla Miller ⬇️

See what our Kid Reviewer Abbey thought of Camp by Kayla Miller.

“Camp is a graphic novel about two girls who go to camp – Olive and Willow. Olive is much more of an extrovert and makes friends a lot quicker.

It’s a book about stepping out of your comfort zone, and friendship.

I really liked this book because of the pictures and the information at the back such as the map. 

There are two other books in the series – Click! and Act.

I recommend these books for girls who like graphic novels and stories about friendship.”

Grab your copy of Kayla Miller’s Camp now!

Einstein the Penguin by Iona Rangeley-Wilson | Kids Book Review

Sponsored content 

Get ready to welcome the most extraordinary penguin into your own home …

When the Stewarts spend a sunny, frosty December day at London Zoo, they’re enchanted by one small penguin. At the delight of young Imogen and Arthur, Mrs Stewart insists the penguin “must come and stay with them whenever he likes.”

But not one Stewart expects the penguin to turn up at their door that evening, rucksack labelled “Einstein” on his back …

The family’s new feathered friend helps Arthur to come out of his shell and makes massive demands on Imogen’s amateur sleuthing. But together they must find out why Einstein came to them and they must keep away from the mysterious white-coat man.

And Einstein can’t stay forever, can he?

‘This debut novel is a delight … A joy to read aloud’
Sunday Times Children’s Book of the Week

From stunning new writing talent Iona Rangeley, and illustrated with wit and brio by the award-winning David Tazzyman, this is a book that will be treasured for years to come.

Perfect for all readers from 7 to 70, Einstein the Penguin introduces an unforgettable new character in a future classic and fantastically funny debut for all the family to enjoy.

Watch Kids Book Reviewer April review Einstein the Penguin by Iona Rangeley-Wilson ⬇️

See what our Kid Reviewer April thought about Einstein the Penguin ⬇️

“Einstein is a very inquisitive little penguin. He is on a mission to find a long lost friend. The Stewarts happily take the penguin in with open arms. He brings along his orange backpack full of strange photos of a penguin taken from different tourist locations around the world. Unlike any other penguin, Einstein has the capability to understand what his family is saying to him, and communicate back via a nod or tilt of his little grey head. There is no place that Einstein hasn’t been; he has seen it all, including the inside of Arthur’s backpack!

This story is full of action-packed drama and lots of crazy adventures. And who would have thought that it all started off with a trip to the local zoo?! This was such a great book that I read it twice through (and I don’t do that very often). Iona Rangeley has written this book so beautifully, and the illustrations by David Tazzyman just bring it to life. I suggest this book to all readers, experienced or not, as this is an easy and joyous read. You too can experience the joy of reading this book as well, and trust me, it’s worth every penny.”

Grab your copy of Iona Rangeley-Wilson’s Einstein the Penguin  now!

Click by Kayla Miller | Kids Book Review

Sponsored content 

Olive wants to get in on the act … ANY act! Olive “clicks” with everyone in the fifth grade – until one day she doesn’t.

When a school variety show leaves Olive stranded without an act to join, she begins to panic, wondering why all her friends have already formed their own groups … without her. With the performance drawing closer by the minute, will Olive be able to find her own place in the show before the curtain comes up?

Written and illustrated by Kayla Miller, this is a heartfelt and insightful story about navigating friendships, leaning on family, and learning to take the stage in the most important role of all. Perfect for children in the 6 to 12 year age group.

Watch Kids Book Reviewer Nina review Click! by Kayla Miller ⬇️

Grab your copy of Kayla Miller’s Click! now!

The Māori Picture Dictionary / Te Papakupu Whakaahua | Book Review

With the kids finally due to return to school this week, we thought we’d have some fun with The Māori Picture Dictionary / Te Papakupu Whakaahua as a family, to test our knowledge and learn some new te reo words. And what a fantastic book this is for doing exactly that!

Making a game of it, we got each of the kids to choose a letter from the alphabet and then turn to the pages that represent that letter.

Kia kaha

Jaxon (age 8) first chose the letter ‘S’ and then picked out three words, all represented by beautiful illustrations: strong, surf, and strawberry.

The Māori Picture Dictionary / Te Papakupu Whakaahua

We learnt the Māori words for each of these together: kaha, karekare, and ropere. Then we closed the book and tested his memory – he surprised himself with his ability to recall the te reo words and was super proud of himself.

He loves the word ‘kaha’ so much that he says he’s never going to use the English word ‘strong’ again, he’ll replace it with the te reo word every chance he gets which I think is just brilliant.

Aria (age 5) selected the letter ‘P’ and chose her three favourite pictures on the page. There was lots of laughter at the adorableness of the Māori word for ‘picnic’ which is ‘pikiniki’ – that’s one we’ll never forget and Aria loved the sound of it, saying it over and over again.

The Māori Picture Dictionary / Te Papakupu Whakaahua

Learning te reo

The beauty of this book is that it is incredibly engaging for both kids and adults, with gorgeous illustrations corresponding to each word. It’s fun and easy to use, and the words are those most commonly used in daily life which makes it relevant to everyone.

There are also sections of the book which cover numbers, days of the week and months of the year with themes of school, home and the marae. For quick reference, there is also an index of Māori to English words at the back.

As a parent, I’m very aware that my te reo needs improvement and I found this book was a playful way of immersing the whole family in learning new words. The kids loved that we were learning with them and took the opportunity to test us on words just like we were testing them, so it was the kind of game they wanted to keep playing for ages.

The Māori Picture Dictionary / Te Papakupu Whakaahua | Book Review

Word of the day

We’ve decided we’ll each choose a ‘Word of the Day’ every day of the week and teach it to the rest of the family – a fantastic new routine for the beginning of the school year and one which we will keep up as the year progresses.

This book is a great introduction to the Māori language and well worth having in your home. You’ll be surprised how often you refer to it!

Get Ready For Omicron At Your Place

Last updated 27 January 2022

It’s looking likely that with the omicron variant of COVID-19 now out and about in the community, more of us will have to manage at home with at least one person self-isolating. We take a look at how you can get prepared to make this time as stress-free as possible.

New Zealand is at the Red Traffic Light level of the COVID-19 Protection Framework and is preparing for an increase in people who have tested positive for the omicron variant of COVID-19, or who are close contacts of people who have. It can feel a bit scary and unknown, so taking some time now to plan ahead is a great idea.

We take a look at how what we can do to ride out any self-isolation as safely and comfortably as possible.

Where to self-isolate

Now is a great time to have a think about the logistics of self-isolating. Because of how transmissible the Omicron variant is if one of your household members tests positive, you will all need to stay home and the positive person will need to stay away from the others for at least 14 days (in Stage 1). If you are worried that you may not have a suitable place to self-isolate, this can be discussed with a public health official at the time you test positive.

Ideally, a COVID-19 positive person should have their own space, so consider if there is a way you can free up a room for them. It is also recommended that the rest of the people in the house try to stay around two metres apart.

Your at-home Covid health kit

The most commonly experienced symptoms of omicron which have been reported are a runny/stuffy nose, headache, fatigue, sneeezing, coughing, and a sore throat. These can be followed by muscle aches and a cough.

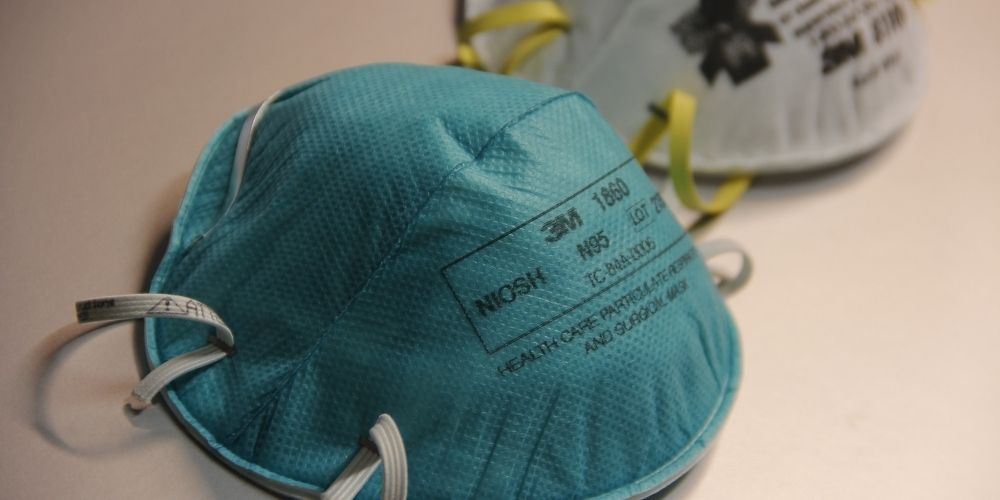
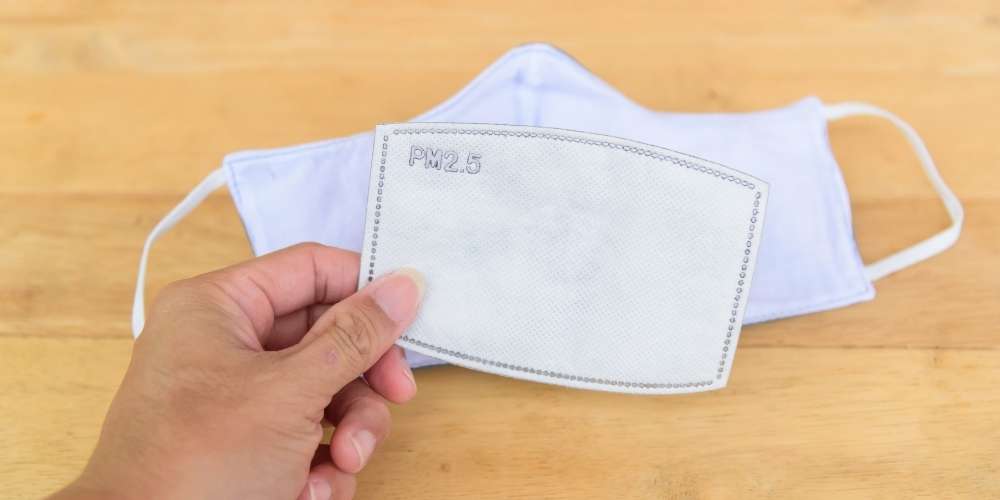
With this in mind (if you can) stock up on paracetamol and ibuprofen, a thermometer, tissues, hand sanitiser, and possibly an oximeter that monitors your heart rate and blood oxygen levels. You could also include your favourite nasal decongestant and sore throat remedies.

A longer list plus some other tips and information created by those who have first-hand home isolation experience can be found here.

Taking stock

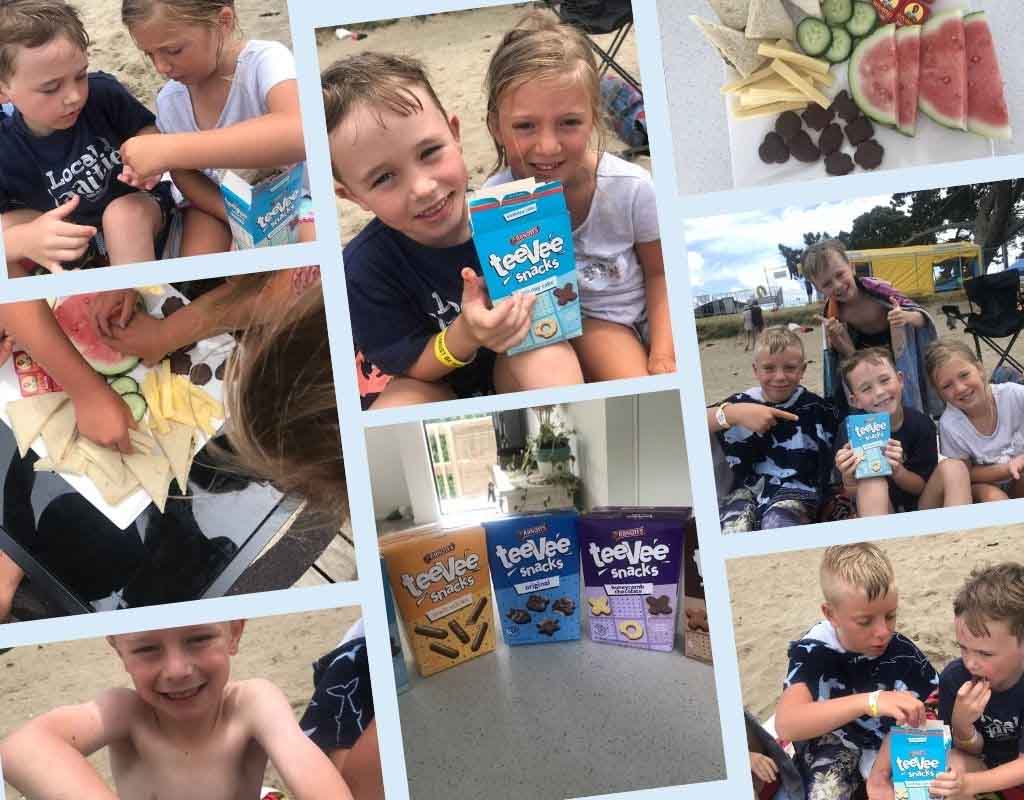
Because you will all need to be staying home, if you are in a position to, you could start stocking up on non-perishable and frozen items including pre-made meals. Look for foods that are nutritious, cook quickly, can be used in a variety of ways, and have a long life. For example:

  • Rice
  • Dried pasta
  • Tinned fish
  • Canned beans or lentils
  • Frozen or tinned veggies
  • Tinned fruit
  • Canned or packet soups

Ice blocks are great for soothing sore throats. Having milk powder in the cupboard will mean that you always have some on hand.

Home entertainment

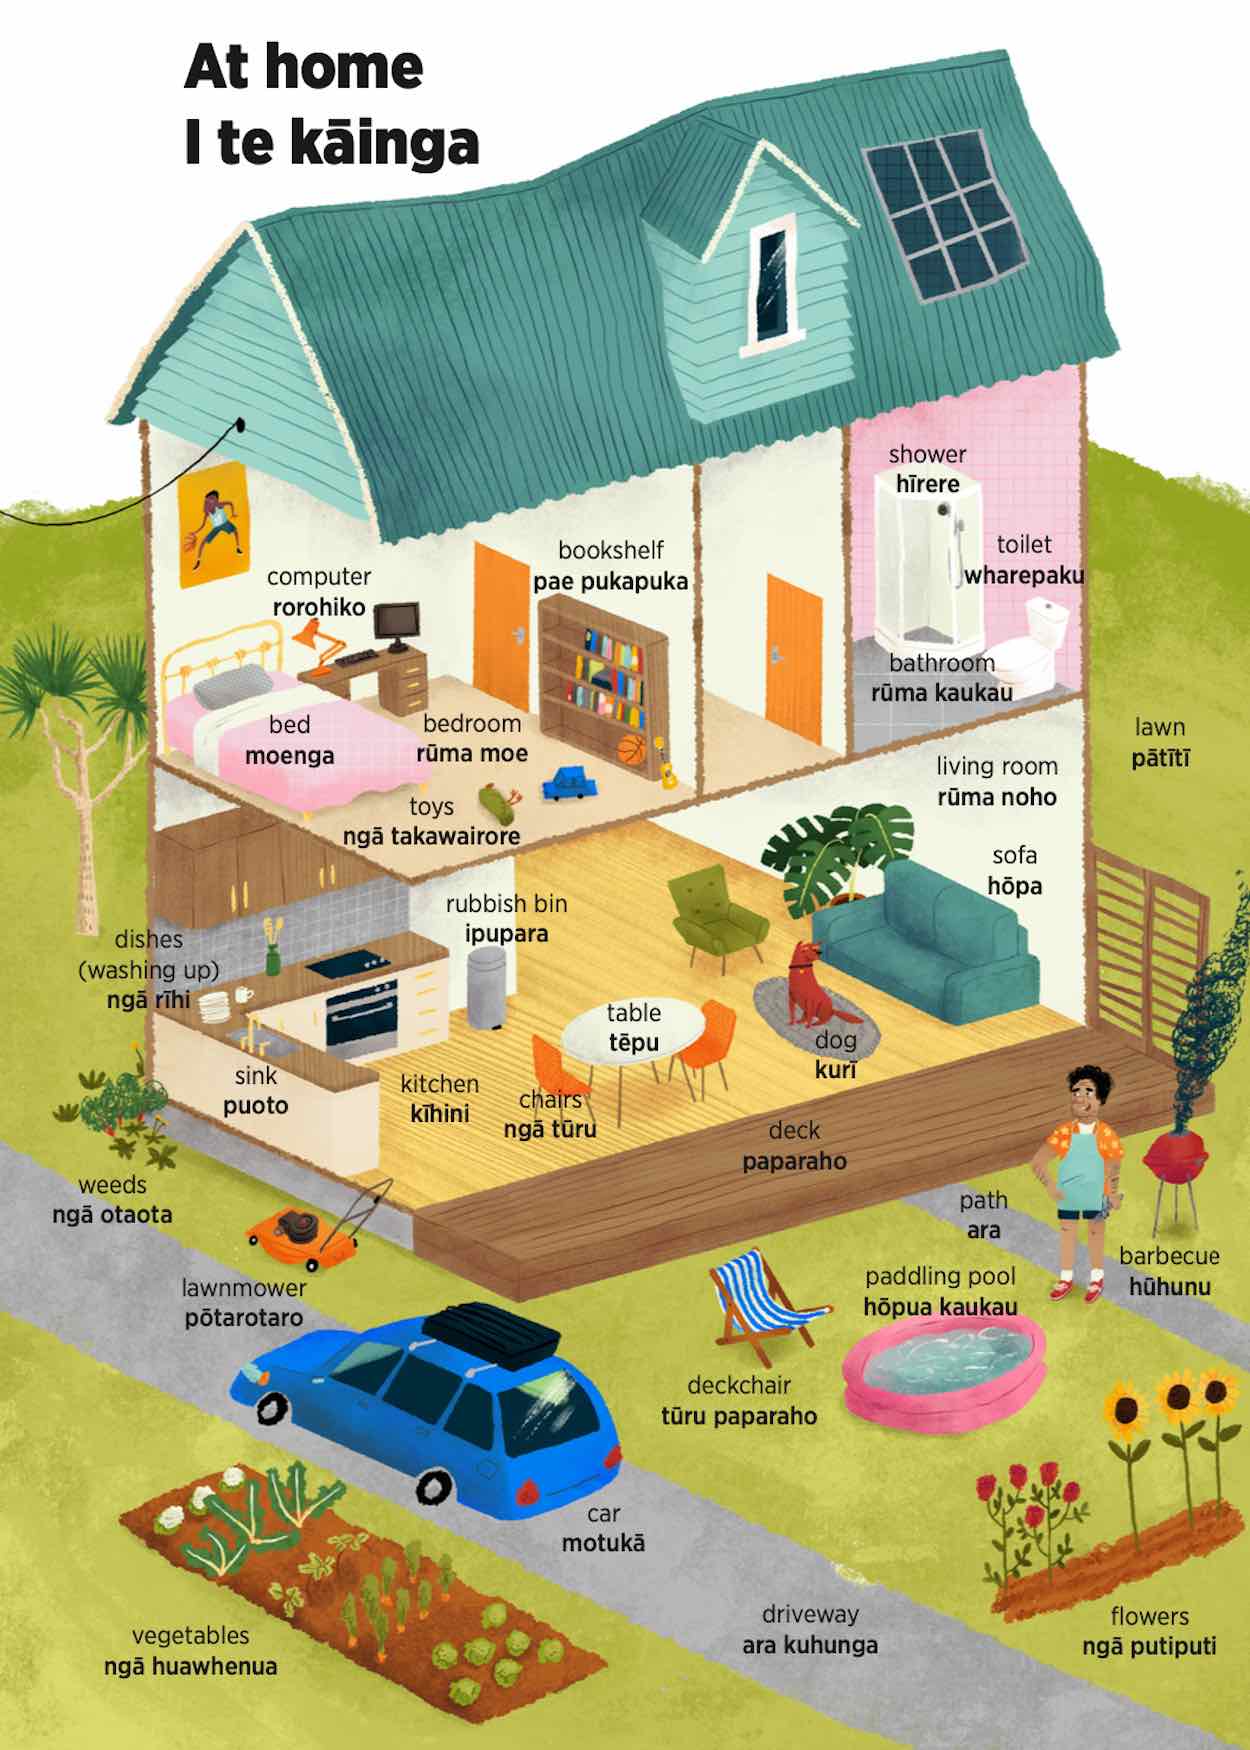
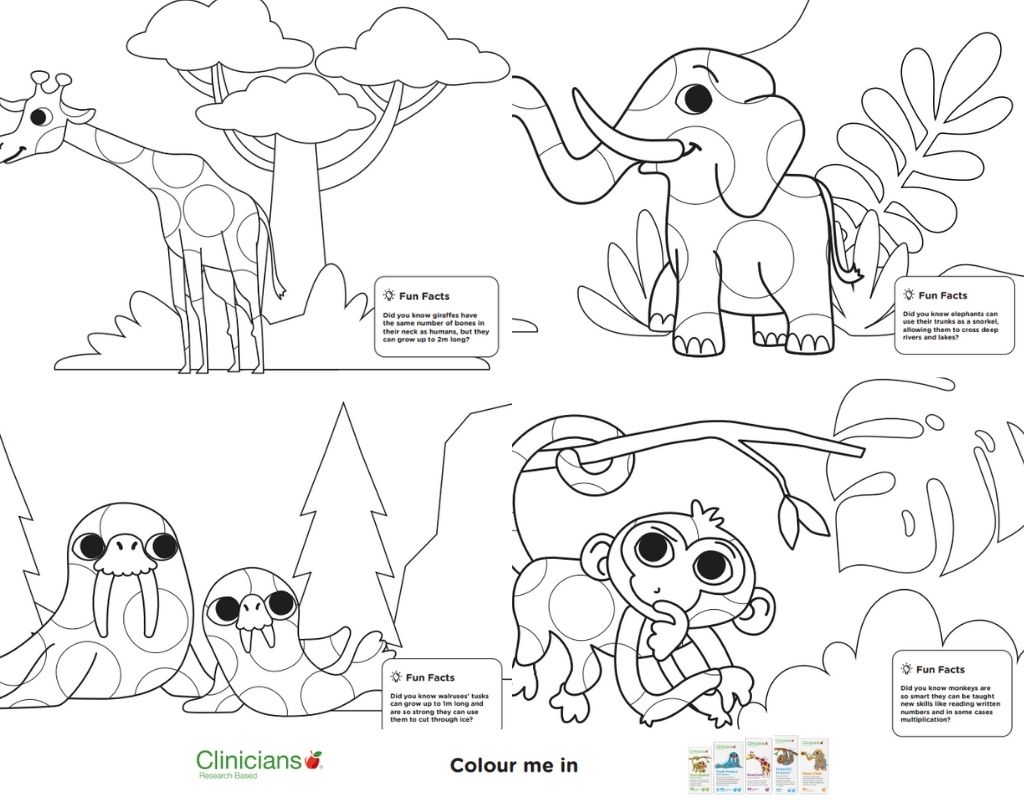
You could also take the time to think about ways to keep entertained during the isolation period. Is there a hobby or craft you want to restart or learn, books, podcasts, or movies you want to catch up on?

Kidspot has lots of fun, printable, colouring and activity sheets for children plus lots of craft ideas here.

Lining up support

If you test positive, a public health official will be in touch with you to help you manage the coming weeks, and also to find out your recent movements and contacts. Someone will continue to check in on you to make sure you are all managing OK. If it is apparent that you have nowhere suitable to self isolate they will discuss other options with you.

You could consider signing up to a grocery delivery service such as Countdown or New World and even start creating a shopping list.

If you have friends who can do shopping for you, consider getting an app that you can put items on as you need them and that they can see too – the OurGroceries app can be logged into by multiple people. If you do not have someone to support you, a welfare guide can be arranged for you. There has been a COVID-19 Welfare phone line set up –  0800 512 337.

As you will all be confined to the property, if you have animals or pets that require care off the property (eg feeding horses or walking active dogs), take some time to find someone in advance who can help. It is deemed a low possibility that a dog can transmit the omicron variant via their fur – good hand hygiene and mask-wearing from the dog walker is encouraged though and they might like to use their own lead.

You can find out more about what you can expect when self-isolating at home here.

Hygiene

The usual hygiene practices such as hand washing, coughing or sneezing into your arm, and avoiding touching your face remain important, along with regular cleaning of commonly touched surfaces such as door handles and the toilet flushing button. Use an antiviral disinfectant where possible.

Provide bins or bags for used tissues to be disposed of safely, and if the COVID-19 positive person is able, ask them to remove all the rubbish from their room themselves.

The COVID-19 positive person should always wear a mask if they come out of their room  – and you should all try to keep two metres apart at all times. If they use a family bathroom make sure the window is left wide open afterwards, keep the door shut and discourage anyone else from using it for up to an hour if possible.

Keep the windows in the house open but equally, try to block the airflow from the unwell person’s room into the rest of the house. If you can, put a fan in their room blowing the air out the open window combined with a towel (or similar) placed along the bottom of the door that goes into the house.

Communication

Keep up the communication both within your household and with other family and friends. especially if you are the only adult in your house.

Ensure your children know how to call emergency services if necessary.

Write down any household instructions someone else could easily follow if you get sick and have to go into managed isolation or hospital. Cover things like feeding pets, paying bills and watering plants. Also, note down who can be contacted to help with the children.

Let unplanned visitors to the house know that you are self-isolating with a note on the door – you can download a poster here.

For the latest official advice, check covid19.govt.nz.

Do you have some tips you can share with us for planning for at home isolation?

See more:

author robynWritten by Robyn Cody

Robyn creates content on Kidspot NZ. Her hobbies include buying cleaning products and wondering why things don’t then clean themselves, eating cheese scones with her friends, and taking her kids to appointments. 

Favourite motto to live by: “This too will pass”

Medical Disclaimer: As per our T&Cs, we make every effort to ensure the information we provide is accurate and update, but the information contained in this website is not intended and must not be taken to be the provision or practise of medical advice or services nor a substitute for medical advice, diagnosis or treatment. If you have questions, concerns about your health or treatment or would like more information, contact your doctor. Always see your doctor or another qualified health professional before starting or changing any treatment.

Colouring In With Clinicians

Your kids will love these fun, free colouring pages from Clinicians Kids.

Developed in New Zealand for Kiwi kids, Clinicians Kids is a range of high-quality and research-based supplements to support healthy, growing little people.

The range includes Brain Beams, a sugar-free chewable tablet with brain-specific nutrients to support optimal learning skills, focus, mental energy and brain health in school-aged kids, as well as Peaceful Dreams, a delicious and natural, sugar-free herbal syrup designed to support relaxation around bedtime and healthy sleep patterns in children.

Exclusively available at pharmacies and health stores.

See the full Clinicians Kids range

Click the images below to print these cute colouring pages⬇️

Clinicians Giraffe

Clinicians Colouring - Walrus

Clinicians Colouring - Elephant

Clinicians Monkey Colouring Page

Clinicians sloth colouring

All You Need To Know About Mask Wearing

With the Omicron variant of COVID-19 now out and about in the community and the requirement for a lot more mask-wearing, we take a look at the latest advice on masks.

At the beginning of the COVID-19 pandemic, the official guidance was that there was no need to wear a face mask or face covering unless we were symptomatic (or with people who were). But as the pandemic has changed, so has this advice.

Why do we need to wear masks?

The current understanding is that COVID-19 and its variants including Delta and Omicron are known to spread primarily from droplets and aerosol particles from an infected person’s mouth or nose, sometimes even before symptoms occur.

The heavier droplets can land on people in close contact while the smaller particles can stay airborne for an extended period of time and can then be breathed in by another person.

Surface transmission can also occur so make sure you keep up with the handwashing and surface cleaning, but close contact transmission is by far the most usual.

Correct mask-wearing can help reduce the chance of infected people spreading COVID-19 and help stop you from being infected.

Because they provide little protection, face coverings such as bandannas, scarves or t-shirts pulled up will no longer be acceptable.

When do we need to wear a mask?

Under Red on the Traffic Light System, we are encouraged to wear a face-covering whenever we leave the house and it is mandatory in almost all indoor locations and on public transport. This is because of the increased chance of virus transmission in indoor locations.

Importantly, it is mandatory for students from Year 4 and up to wear a face mask indoors at school – this includes in the classroom and at assemblies.

What is the best mask to wear?

There are many different types of masks and face-coverings available, and some are better than others. The advice around the best masks is continually being updated as evidence from other countries dealing with Omicron outbreaks is considered. Workers that are mandated to wear masks may have specific mask requirements.

There are two main factors in how well your mask will protect you – the fit and the filtering ability. To check the fit, there should be no air escaping up under your eyes and around the edges when you breathe – rather you should be able to feel warm air coming through the mask when you breathe out.

Respirator masks

n95 mask

Generally used by healthcare and border workers, respiratory type face masks can provide good protection if they are fitted well. You can find respirator masks marketed as  P2, FFP2, N95, KF94, and KN95.

The shape of these masks often allows for a snug fit around your face.

Unfortunately, there are a number of fake respirator masks on the market so check the supplier before you buy.

Surgical masks

surgical mask

Generally blue on one side and white on the other, surgical masks are commonly available and should be worn blue side out – that is because the blue side is water-resistant so it helps stop moist particles from getting in. The white side is more absorbent to help stop the particles getting out.

These masks may bunch around the side of the face and leave gaps and hence may be less effective than a respirator mask. They are designed to be disposable but may be washed a few times (see below).

Fabric masks

Cloth mask filter

Lots of people have been making and wearing fabric masks so it’s impossible to determine how effective these are overall. The two key factors for a good mask – fit and filtering – apply to fabric masks too so look for ones that have more than one layer of fabric and also include a PM2.5 filter. These can be bought individually and inserted in between layers of a fabric mask or an internal pocket to help filter the air. Your mask should be big enough to cover your nose, mouth and chin, and have a snug fit. A nose wire and adjustable ear loops can help you get a good fit.

Vented masks

Fitted with a vent, these masks are designed only to protect the wearer from inhaling large particles such as dust. The vent means that the air they breathe out is not filtered and is therefore not protecting others so they are not suitable for use during a pandemic.

Face shields

Face shields are not recommended to be used by the public and are generally only used in conjunction with a face mask.

Double masking

There is some debate around double masking, again take into account fit and filter. If other well-fitting options are not available, it is advised that you wear the cloth mask on the outside and the surgical mask against your face.

Reusing and washing masks

The advice around washing and reusing masks is not clear. However, reusing different types of masks is going to be a reality for most people simply for practical and cost reasons.

Cloth masks are ideal for washing and reusing and this should be done daily at a minimum. The PM2.5 filter that can be used in conjunction with cloth masks typically cannot be washed but can be used for extended periods (check the instructions that come with them).

One study 1 found that you can gently hand wash your surgical mask in warm tap water with no detergent or soak them in boiling water for five minutes, line-dry and reuse. This can be done up to ten times assuming there is no signs of damage or wear and tear.

Respirator masks cannot be washed but some people are happy to pop them in a labelled paper bag (rather than plastic, so it can dry out) or somewhere where there is good airflow for several days (at least 72 hours) and then reuse them once it is likely any virus on them has died.2

author robynWritten by Robyn Cody

Robyn creates content on Kidspot NZ. Her hobbies include buying cleaning products and wondering why things don’t then clean themselves, eating cheese scones with her friends, and taking her kids to appointments. 

Favourite motto to live by: “This too will pass”

Medical Disclaimer: As per our T&Cs, we make every effort to ensure the information we provide is accurate and update, but the information contained in this website is not intended and must not be taken to be the provision or practise of medical advice or services nor a substitute for medical advice, diagnosis or treatment. If you have questions, concerns about your health or treatment or would like more information, contact your doctor. Always see your doctor or another qualified health professional before starting or changing any treatment.

Make A Sturdy Wooden Desk Organiser

Sponsored content provided by Resene

Messy desk, messy life, so they say. Even if you disagree with the sentiment, there’s something calming about having an organised desk that lets you concentrate on being productive on the work that matters.

Keep your desktop clutter free with this clever DIY desk organiser. We’ve used a green/blue paint palette, but feel free to get creative with colours that you love.

You will need:

Make a desk organiser

Step 1:

Paint the timber base in Resene Elephant, and leave to dry.

Make a desk organiser

Step 2:

Paint the batten lengths in a different colour using the Resene testpots. Leave to dry.

How to make a flower wall

Step 3:

Apply a layer of liquid nails to each batten length and fix to the base, with equal spacing between each.

Make a desk organiser

Step 4:

We used masking tape to create a pattern to the front of ours, tying all the colours together.

Use the desk organiser to store pens, your mobile, notes and even your diary, and enjoy your new found organised life.

For more projects and colour inspiration visit Resene.co.nz.

Article provided by Resene. Styling/Project by Leigh Stockton

Read more on Kidspot:

How To Make A Flower Wall

Sponsored content provided by Resene

Flower walls are perfect for baby showers, birthdays and hen’s parties, and make a beautiful backdrop for special occasion photographs.

You can create this flower wall in an afternoon, using Resene testpots and coffee filters (yes, you read that right!).

Have fun with different colourways to suit the theme of your celebration.

You will need:

How to make a flower wall

Step 1:

Taking the coffee filters, paint each one inside and out using the Resene testpots.

How to make a flower wall

Step 2:

To create the petals, cut off the tops of each filter in a wavy pattern. We marked the pattern with a pencil first to make it easier.

How to make a flower wall

Step 3:

Take the petals and secure the bottoms onto the wire with garden tape.

How to make a flower wall

Step 4:

Once finished, hang the flowers onto string and arrange to create your flower wall.

For more projects and colour inspiration visit Resene.co.nz.

Article provided by Resene. Styling/Project by Leigh Stockton

Read more on Kidspot:

Desk Job – Make Your Own Desk Tidy

Sponsored content provided by Resene

Create your own groovy desk tidy using a few cardboard containers and a couple of Resene testpots.

Use the colour suggestions below or choose your own to match your decor!

Difficulty level: Moderate

You will need:

For the red and white desk tidy use testpots of Resene Alabaster and Resene Havoc to create a cool red and white desk tidy.

Desk tidy

Step 1:

Turn the shoe box lid upside down and fix the cardboard tubes, paper cup and small cardboard box into position using the PVA glue, as shown. Let the glue dry thoroughly.

Desk Job

Step 2:

Paint the desk tidy with one coat of Resene Quick Dry waterborne primer undercoat, and leave for about one hour to dry

Desk tidy

Step 3:

Paint the inside of the shoe box lid, cardboard tubes, paper cup and small cardboard box with two coats of Resene California, as shown – leave about two hours for each coat to dry.

Desk tidy

Step 4:

Paint the outside of the shoe box lid, cardboard tubes, paper cup and small cardboard box with two coats of Resene Lochmara. Once it’s dry, grab your pens and pencils and get organising!

You can download an instruction sheet here.

For more projects and colour inspiration visit Resene.co.nz.

Article provided by Resene. Resene kids art with Mark Rayner – Project 37

Read more on Kidspot:

Arnott’s teeVee Snacks – Kids Review

Kidspot review

The Arnott’s range of teeVee Snacks come in a great variety of shapes and flavours and are a really fun treat to have in the cupboard for something a bit different.

We were lucky enough to try five Arnott’s teeVee Snacks flavours (Birthday Cake, Malt Sticks, Original, Honeycomb Chocolate, and Chocolate Brownie) and they came almost everywhere with us this summer.

Out and about

After a very busy morning on the beach playing on a giant inflatable obstacle course in the ocean, bodyboarding and throwing a ball around, the kids were suitably hungry by midday. After some nourishing sandwiches and fruit, I broke out the Birthday Cake teeVee Snacks as a treat and they were a total hit!

teeVee snacks - birthday cake

The kids loved the X and O shapes of the snacks, and the flavour combo was delicious – they really did taste like birthday cake, with crunchy vanilla and sprinkles on one side and a chocolate coating on the other side.

Once the kids were refuelled, they went back to their activities and then the only challenge was how to keep the grown-ups from gobbling them all up when the kids weren’t looking!

We took the Honeycomb Chocolate flavour with us on a day trip to the lake, so that after some dune sliding and cooling off in the water we could have a lovely picnic on the lake bank. The kids ate their lunch first and then tucked into the teeVee snacks for an after-lunch treat. There were lots of “yummmm” and “these are so good!” comments from all of them before they jumped back into the lake.

As the one packing the picnic and trying to fit everything into a backpack, I appreciated the size of the teeVee Snacks boxes – they’re big enough to feel like you’re getting good value and a decent amount inside, yet small enough to pack easily, with a box sturdy enough to keep the contents being crushed inside.

Playdate perfection

playdate snacks

The summer holidays were also full of playdates, and I found teeVee Snacks to be a fantastic addition to the snack platters I usually put together when I have a bunch of kids at our house. Along with mini sandwiches, cheese sticks, and fruit, I added the Original flavour teeVee Snacks to the platter as a treat. These also come in cute shapes and the kids loved picking out their favourites.

The Original flavour is chocolate-coated and satisfyingly crunchy inside – delicious! Having them on the platter provided a small sweet treat that kept the kids happy but not overloaded with sugar, which makes them a perfect bite-sized option to include.

A pantry staple

With two more weeks of the school holidays remaining, I’m making sure we always have at least one box of teeVee Snacks in the cupboard. Even when the kids start school, I’ll include these in their lunchboxes on a Friday (which is the day I always slip in a little treat) and have them handy for after-school snacks before their sports and activities.

They would also be perfect for serving at birthday parties or other special occasions. While I like to keep an eye on how much sugar my kids eat, these are small enough to control the portion sizes you serve so that the kids are getting a sweet treat without the massive sugar hit.

The bright colourful packaging certainly grabs your attention and the flavours and shapes are really fun for kids. This was a great summer discovery and one worth checking out if you haven’t already.

Find out more about the new Arnott’s teeVee Snacks

Arnott’s teeVee snacks provided Kidspot with Birthday Cake, Malt Sticks, Original, Honeycomb Chocolate, and Chocolate Brownie teeVee snacks for this review. All views are those of the writer.

How To Introduce Your Child Into A New Sport

We all want to encourage our children to be physically active but starting a new sport for a child can be a bit intimidating. We take a look at all you need to know when introducing your child to a new sport.

There are many benefits of children being active including encouraging strong bone and muscle development, balance and coordination, greater confidence, and social skills. If you’re unsure where to start when getting your child into a new sport, read on to find out how you can avoid some common mistakes parents make and learn how to maximise your child’s enjoyment of their new adventure.

1. Eye on the goal

Consider the main reasons you’re looking for a new sport for your child. It may be their first time into an organised sport, or that the one they did last year wasn’t their thing. It’s easier for parents to choose a sport that they are familiar with but there is such a huge variety of options available now, take some time to find out about some of the less mainstream sports.

There are many different factors that will influence your decision, for example, accessibility to the practice and game venues, your child might be looking to develop a particular skill (eg self-confidence), meet new friends, or be able to hang out with their buddies more or it might be that you are looking to join a committee and meet new people.

If your child has expressed an interest in a particular sport, that will make this part of the process easy but also be open to changing sports and giving new things a try. A variety of activities can help your child to develop a range of skills and assist with all-around development.

For younger children just being outside and playing is enough so don’t worry if your child is not showing an interest in an organised sport just yet.

2. Change it up

Variety is good at keeping kids interested, so if off-season skills training is starting to feel a bit monotonous, give them the opportunity to play something completely different. It’s not only good for their body, but it’s also good for their mind.

Similarly. one training and one game per week for primary school-age children is enough – especially if they’re doing another after-school activity. Rest and recovery are important too.

3. Get into gear

Having appropriate gear that is in good condition will make the sport more enjoyable for your child. If you’re able, having their own gear rather than borrowing it from the club or school means they can practice at home.

4. Safety first

Getting hurt playing sport will take the fun out of the experience so ensuring your child has access to well-fitting safety gear is essential. Most sports have appropriate safety gear as an essential, eg your child will usually not be allowed on a basketball court for a competitive game without a mouthguard.

If you let your child choose the colour or pattern, they are more likely to wear it without complaint.

The Warehouse has safety top of mind with a huge range of safety gear for your kids.

5. Pressure off

Try not to put too much pressure to train and perform on your child. Keep silent on any negativity when you’re on the sidelines. Try not to dissect the game on the way home and don’t compare them, favourably or otherwise, to their team members or opposition. Sport at a young age should be fun and that should always be the focus. If you put the pressure on it can easily become a battleground at home instead of on the field!

Encourage them to train at home but don’t worry if they aren’t keen – the motivation needs to come from them for the practice to be really effective.

Enjoy your child’s sporting endeavors!

Tips For Preparing Your Child For Their First Day Of School

You’ve chosen the school your child is going to attend, have a starting date, and the countdown is on.

There are a number of things you can do to help ensure a smooth transition for both of you.

Getting familiar

Once you have chosen the school your child is going to attend, have a chat with them about school visits. If your child is attending a kindergarten right next to the school, there might be visits arranged through them.

The visits will generally be short and will allow your child to become familiar with the school layout, where the toilets are, where their classroom is, and some of the new rules and routines.

Talk it through

It is likely there is a lot of chatter around from well-meaning adults asking your child about starting school. Talk about this with your child and help them work through some answers to the questions. Ask your child what questions they have too and explain their school visits, how a school day works, and some of the basic school rules such as no running in and around classrooms. Ensure they know the name of their kaiako/teacher and practice greeting them.

Talk through what will happen on their first day, and let them know when and where you will be picking them up at the end of the day, even what the routine will be after school and up until bedtime. Your child is likely to be very tired for the first few weeks and even months so an afternoon and evening routine with an early bedtime will help.

Don’t forget to explain to them that they will be going every weekday. Lots of children have done their first day and think that they have done school now when they actually have around 13 years of it ahead of them!

Get practical

Settling into school will be much easier for your child if they can do some key tasks. These include:

  • Taking shoes on and off
  • Putting their hat on and putting it away when they take it off
  • Using a toilet comfortably and washing their hands thoroughly
  • Sneezing or coughing into their arm
  • Being able to dress themselves in the morning
  • Taking their top/sweater off and getting clothes on and off (for swimming or changing for sport)

If you can, buy their uniform well before they start school and let them practice at home.

School Bag – Choose a school bag that is not too big for them but that they are still able to fit everything in. Being able to recognise their bag amongst the piles of bags at school is important so let them choose the colour/pattern from your predetermined shortlist and perhaps tie a coloured ribbon to the top handle to make it super easy. Pop some spare clothes including undies in the bottom of the bag too.

Stationery – Your school will provide a list of stationery and other supplies either before your child starts or in the first few weeks. This is likely to be small and include a glue stick, pencils and pens, whiteboard markers, and different types of exercise books. A pencil case that is a reasonable size and easy to open and close can help keep things together. Don’t be tempted to buy more than you have been asked for, eg felt tip pens as it means more for your child to keep track of.

Lunch box – Choose a lunch box is that it is simple to open and close! Many schools now promote rubbish-free so a bento-type lunch box can be useful. Consider having a container for morning tea and one for lunch.

Drink bottle – It’s important that children keep well hydrated at school but it’s easy for them to forget to drink. An easy solution is to pop a refillable drink bottle in their bag. Make sure they know where the drinking fountains are at the school and how to use them to refill their bottle or get a hydration top-up.

Bonus tips for parents

Label – Name everything! Find a way to label everything that your child takes to school – as this makes it more likely things will come home again!

Book coverings – A rite of passage for many parents is the book covering session. If this is not your thing there is the option of a reusable book sleeve.

The learning foundation

Now that you have the practical things sorted, it’s time to think about some of the learning skills that will help your child when they start school.

Here are some of the key skills:

  • Be able to recognise their printed name
  • Know the names of the primary colours in English and te reo Māori
  • Be able to sing all or most of the alphabet
  • Be able to sit on a chair or the mat for a time
  • Know numbers up to 9 in English and te reo Māori
  • Hold a pencil with the correct grip (not all children find this easy)
  • Use scissors
  • Hold a book and turn the pages in order
  • Be able to listen, ask questions, and follow simple instructions
  • Be able to wait their turn

author robynWritten by Robyn Cody

Robyn creates content on Kidspot NZ. Her hobbies include buying cleaning products and wondering why things don’t then clean themselves, eating cheese scones with her friends, and taking her kids to appointments. 

Favourite motto to live by: “This too will pass”

School Organisation For Parents

It’s the start of a new school year, and this year you are determined to get organised and keep track of everything the kids have on.

No more turning up at school with the kids all decked out in their school uniform only to discover it’s mufti day, and no more scrabbling through the car looking for enough change for the PTA BBQ lunch – this is the year it’s all going to change!

If you have children at different learning places such as preschool, kindy, primary school, intermediate, and maybe even secondary, you might be getting notices and newsletters from several different places. Even if they are all at the same school, you may be getting emails or notices from individual teachers as well as regular school updates.

Add into the mix birthdays and anniversaries, the pet’s worming, flea and vaccine schedule, your own and possibly a partner’s appointments and travel, and it becomes really easy to miss or forget a few things along the way.

Choose your system

Because we all have different family dynamics and obligations along with children at varying ages and stages, no one system will work for everyone. Some people, especially if they have shared childcare, like to note every event, including recurring ones such as after school activities, while others prefer to just keep note of the extras.

We’ve put together some tried and tested systems for you to check out. If your week is really busy it may be that you need to run a weekly planner along with a longer term planner.

Keep it regular

Before you get started, take some time to think about how the information comes to you and how you are going to record it. One idea is to put aside some time each Saturday to update your chosen planners to give you time to get organised for the week ahead.

Sunday night is often too late to make food for a shared lunch or find some fancy dress for book week starting Monday!

Diary it

If you’re happy to keep tabs on the whole family in one place, the old fashioned diary is still ideal. A diary enables you to see at a glance what is coming up that day for everyone, to make notes, and for other family members to be able to refer to and add to it easily. Consider making entries with a nice pencil if you don’t like crossing out when things change.

Diaries come in a range of sizes and formats, from small that contain a week across two pages to larger ones that have a day to a page. Additionally you can also get diaries that allow you space to plan for each person in the family.

If you want it to stay open on the page, choose one with a more open binding such as spiral binding and if you intend to take it out and about with you choose a hard cover.

If you love to plan and create, a bullet journal will bring you great joy and superior planning skills! A bullet journal is a combination of planner, diary, mindfulness journal, and a place to record long term life goal setting – all wrapped up in a beautiful and detailed package. Rather than simply recording events as they come up, a bullet journals purpose is to encourage you to examine how each of these make you feel. Find out more about getting started on bullet journals here

Wall planner

As the children get older it’s great to be able to involve them in planning the activities and chores. In this case, a weekly or even monthly wall planner can be useful.

You can buy pre-printed wall planners, or you can make your own on a whiteboard or blackboard using colour-coded chalk or pens for each family member.

You could include a space, or a second board, for the shopping list and encourage family members to put the basics on there as they use them up.

Calendar

A calendar is a surprisingly versatile planning item if you like to just plan for the main events. Whether you use it as a mini diary or wall planner on its own, or in conjunction with another more detailed system such as a bullet journal, it can be a quick and easy reference point for the whole family and other caregivers in your home.

Digital Planning

If you prefer to ditch the paper and rely on digital technology there is a huge range of planning systems available in the tech sphere. You could use the standard systems that come on your device or download one of the many available online or via the app store.

An online version works well if things are constantly changing, more than one person needs to be kept in the loop, your handwriting is getting messier, or digital is your happy place.

You can combine shopping lists, to-do lists, and mood trackers – and, if you prefer to, take it with you wherever you go.

Keeping track of the paperwork

Hopefully, over the holidays you’ve found time to clean out the notices from school from the last term! Keeping track of the paperwork coming home from school, kura and ECE can be tricky, especially if you have children at different places.

Choose a filing system that will work for you, and the storage space you have available. If you have bench space a small tiered shelf could be perfect. Alternatively, a folder with dividers, a clear file, or a document folder for each school could do the trick.

author robynWritten by Robyn

Robyn creates content on Kidspot NZ. Her hobbies include buying cleaning products and wondering why things don’t then clean themselves, eating cheese scones with her friends, and taking her kids to appointments. 

Favourite motto to live by: “This too will pass”

Slinky Malinki’s Christmas Crackers | Christmas Book

This Christmas, the beloved Slinky Malinki’s Christmas Crackers by Lynley Dodd has been released as a very special, cased board-book edition.

Christmas was coming.
Out came the tree,
dressed up in finery,
splendid to see.
Trinkets and tinsel
with baubles and bows,
a mouse with a hat
and a very red
nose.

It’s Christmas in Slinky Malinki’s house and the rapscallion, mischievous cat is most curious about the Christmas tree. With its reindeer, ribbons, baubles and bells, it’s too tempting a treat for Slinky not to investigate. So Slinky Malinki, with mischievous glee, creeps out from the shadows to climb up the tree . . .

A special, large-format, board book gift edition of this hilarious story from Lynley Dodd’s bestselling Hairy Maclary and Friends series, which is the perfect gift for a young animal-lover.

To get your copy, visit Penguin Books. 

Slinky Malinki's Christmas Crackers

Grow A Healthy Smile With Proper Tooth Care

From around 6 years old, your child will begin losing their baby teeth and the teeth that they will hopefully have for the rest of their life will emerge. Looking after those teeth is essential for your child’s dental health.

Poor dental hygiene can result in infections, chronic pain, or bad breath, and may also affect the way your child chews and talks. It can also affect your child’s self-confidence. Ensuring good oral hygiene is part of their daily routine can be a struggle for some kids. We look at some tips and ideas on how to help your child establish good dental habits for life.

Why we need to keep our teeth and gums clean

In order to help encourage your child to brush their teeth regularly, it might help them to understand why it’s so important.

The tooth decay and gum disease process starts with plaque – a bacteria in your mouth that sticks to your teeth. After eating, this bacteria breaks down the sugar from the food, creating an acid that can damage the tooth enamel (covering of the tooth) and start the process of a cavity formation. Plaque can also cause a gum disease called gingivitis.

So plaque is the problem – and needs to be removed regularly.

Technique tips

You will have been helping your child with their brushing technique before now, but do take the time to refresh their memory in case they’ve slipped into bad habits. It is recommended that you supervise cleaning until they are around 8 years old.

Correct technique:

  • Follow the same cleaning pattern around your mouth each time
  • Brush the sides (inside and outside) of the teeth at a 45-degree angle using short back and forward strokes (not circles). Make sure the strokes go down over the start of the gums.
  • Use the same short back and forward brush technique for the top of the teeth too
  • Some people like to brush the back of their tongue too to remove any food and bacteria

It should take around two minutes to correctly clean teeth. A kitchen timer or similar can be used to help the kids know if they’re brushing for long enough.

Routine

You still have control of their daily routine so try to take advantage of that. Encourage them to brush their teeth after breakfast and before bed every day. This means that even on days that they don’t leave the house they still might remember to brush. Brushing before bed is a bit easier to remember than in the morning so you could create a routine after breakfast – dishes in the sink or the dishwasher, have a drink of water and head straight through to clean their teeth.

You could pop a reminder note on the back of the toilet door!

The toothpaste

Once your child is 6 years old they can begin to use regular adult fluoride toothpaste but some children find the mintiness of some toothpaste feels very ‘hot’ in their mouth. Try and ensure the toothpaste they like is available to them – it might be that you end up with different kinds of toothpaste for different family members.

The brush

Let your child choose their own brush. Just make sure it has soft bristles as medium and hard brushes can damage the protective enamel coating.

From 3 years old children can use electric toothbrushes and this may help your child clean their teeth more thoroughly. Some models will play a tune when two minutes of brushing is done. There is no need to move an electric toothbrush back and forward in a brushing motion – they can simply move the brush slowly around making sure to get at a 45-degree angle so the edge of the gums are well cleaned.

author robynWritten by Robyn Cody

Robyn creates content on Kidspot NZ. Her hobbies include buying cleaning products and wondering why things don’t then clean themselves, eating cheese scones with her friends, and taking her kids to appointments. 

Favourite motto to live by: “This too will pass”

Rabbit, Soldier, Angel, Thief By Katrina Nannestad | Kids Book Review

Sponsored content 

In Rabbit, Soldier, Angel, Thief, award-winning writer Katrina Nannestad transports us to Russia and the Great Patriotic War and into the life of Sasha, a soldier at only six years old. Find out what Kids Reviewer April thought of this moving story.

Wood splinters and Mama screams and the nearest soldier seizes her roughly by the arms. My sister pokes her bruised face out from beneath the table and shouts, ‘Run, Sasha! Run!’

So I run. I run like a rabbit.

It’s spring, 1942. The sky is blue, the air is warm and sweet with the scent of flowers.

And then everything is gone.

The flowers, the proud geese, the pretty wooden houses, the friendly neighbours. Only Sasha remains.

But one small boy, alone in war-torn Russia, cannot survive.

One small boy without a family cannot survive.

One small boy without his home cannot survive.

What that small boy needs is an army.

From the award-winning author of We Are Wolves comes the story of a young boy who becomes a soldier at six, fighting in the only way he can — with love. But is love ever enough when the world is at war?

Watch Kids Book Reviewer April review Rabbit, Soldier, Angel, Thief By Katrina Nannestad ⬇️

See what our Kid Reviewer April review of Rabbit, Soldier, Angel, Thief By Katrina Nannestad ⬇️

“Imagine being only six and a half years old, when all of a sudden war strikes. The German Nazis are a hard bunch to get rid of, but the Red Army of Russia certainly did the job, despite losing so many members in the process of that defeat.

Sasha’s sister, cat, mother and whole village were killed by the big-booted German prince-monsters, leaving him to fight with an army of once hundreds of warriors, but dwindling by the day. From mama’s ‘little rabbit’ to the Red Army’s treasured soldier, then the angel of Stalingrad, and thief of a German village, Sasha brings us along in his flashback journey, as the other German and Russian hospital patients gather to hear his fascinating tales.
Reading this story made me realise that, no matter what you’re going through, there will always be someone out there who is barely struggling to stay alive. We are so lucky, even with our pandemic, that we don’t suffer like the Russians and other poor victims of the Second World War did.

This heartwarming story has such an important message, and I must say that of all the books I have read, this one was just the icing on my cake. A lovely and suspenseful read for children aged 10 to 13.

Katrina Nannestad, you have opened our eyes to a greater look into the desolate world of war. Unbeatable, outstanding. A fascinating historical read.”

April

Grab your copy of Katrina Nannestad’s Rabbit, Soldier, Angel, Thief  now!

Spellbound Ponies: Dancing & Dreams by Stacy Gregg | Kids Book Review

Sponsored content 

Spellbound Ponies: Dancing & Dreams is the latest in Stacey Gregg’s series of enchanting stories, taking the reader on magical pony adventures. The ponies of Pemberley Stables have been bound by magic and each of them is trapped in time. Can two brave girls help get them back?

Margot the dressage pony keeps getting all of her steps wrong. Can Olivia and Eliza help break the spell that is making her so clumsy and bring her back to the stables? Can they rescue ALL the ponies …

Watch Kids Book Reviewer Nina’s review of  Spellbound Ponies: Dancing & Dreams By Stacy Gregg ⬇️

See what our Kid Reviewer Nina thought about Spellbound Ponies: Dancing & Dreams By Stacy Gregg ⬇️

“I’ve been reading Spellbound Ponies: Dancing and Dreams by Stacy Gregg.

There are two girls from different time periods: Olivia is from our time, but Eliza is from a long time ago. They’ve joined together to save all the ponies at Pemberley stables.

I love this book because it has all my favourite things: dancing, magic and ponies.

Its number six in the Spellbound Ponies series, and you get to find out lots of things you wanted to know at the start of the series.

It’s a bit sad at then end but only a little. There might be more to come!”

Nina 

Grab your copy of Stacey Gregg’s Spellbound Ponies: Dancing & Dreams By Stacy Gregg now!

How I Became a Dog Called Midnight By Ben Miller | Kids Book Review

Sponsored content 

Suitable for readers in the 8 to 12 year age group, How I Became a Dog Called Midnight by author Ben Miller is an exciting read about a boy and a dog swapping places.

George and his father live next door to a family who have a very soppy dog. One night, George chases an escaped Midnight into the garden and they both fall into a fountain, magically lit by moonlight.

Suddenly, the two have swapped places: George is now a dog, and Midnight is a ten year old boy! Finding out what it’s like to be a dog is completely amazing, until George uncovers an evil plan that could threaten his home and needs to switch back again. Can the two save the day before the clock strikes twelve again, or will they be stuck in each other’s bodies forever?

Watch Kids Book Reviewer Connor’s review of  How I Became a Dog Called Midnight By Ben Miller ⬇️

See what our Kid Reviewer Connor thought about How I Became a Dog Called Midnight By Ben Miller ⬇️

I’ve been reading How I Became a Dog Called Midnight.

It’s about a magician named Clive who is also a part-time thief experimenting with swapping the minds of creatures so he could sell the service to old people and make them young for a night (to make a small fortune).

The mix up happens when a boy called George and Clive’s dog Midnight had their minds swapped. I enjoyed it for its subtle and possibly unintentional humour, such as the time where George, in Midnight’s body, escaped the pound by sitting on one end of a seesaw while the other dogs sat on the other, throwing him over the fence. I recommend this book for most normal people under ten because it’s a fantasy book.

Connor 

Grab your copy of Ben Miller’s How I Became a Dog Called Midnight now!

Make A Sensory Table

Sponsored content provided by Resene

Take an old children’s table and turn it into a fun and tactile sensory board!

Sensory boards can be made with all sorts of textures and themes for young children, and are great learning tools. We always recommend that they are only used with careful adult supervision.

Sarah Herring created this sensory table for Resene – upcycling for good. If you don’t have an old childrens table, you could cut down the legs on an old coffee table.

You will need:

Sensory table step 1

Step 1:

Always check your item for repairs and give it a clean before starting. Lightly hand-sand the coloured laminate on the table top and apply a coat of Resene Quick Dry primer sealer undercoat. If the surface is very smooth, use Resene Waterborne Smooth Surface Sealer instead of the primer. Sarah left the plastic legs of this table black because they were in reasonably good condition, but you might like to paint your table base too.

Sensory table step 2

Step 2:

Apply two coats of Resene Black White all over the table top, waiting for each coat to dry completely in between. Once this colour was completely dried, measure and mask out a simple striped pattern.

Sensory Table Step 3

Step 3:

With your darkest colour (Fleur used Resene Black), paint an oval shape at the front. This will be the ladybird’s face.

Sensory table Step 4

Step 4:

Sarah wanted to make a sensory board with lots of fun ‘working’ objects for young children to enjoy playing with.

Use a mix of push-button lights, sliding locks with chains, stretchy plastic bands, stick on mirror shapes, a solar calculator, a spinning castor etc. It’s very important to ensure that all the items you select can be securely fastened to the table and are SAFE for a child to play with. Map out with a pencil where each item will go.

Resene Sensory Table Step 5

Step 5:

To make the table fun and colourful, paint a splat shape under where some of the objects will be fixed. Sarah used detail brushes to apply Resene HopbushResene ASAP and Resene She’ll Be Right. It took at least two coats of each colour to hide the black and white underneath.

Resene Sensory Table Step 6

Step 6:

Once all the splat shapes are dry, affix all the play objects with a drill and screws, or with extra strong glue. All that’s left to add to the finished table is a toddler!

For more projects and colour inspiration visit Resene.co.nz.

Images and project by Sarah Herring for Resene upcycling for good.

Read more on Kidspot:

Golf Ball Ladybirds

Sponsored content provided by Resene

Repurpose old golf balls and create some adorable ladybirds in this cute craft idea from Fleur Thorpe.

Suitable for children and adults, paint traditional red and black ladybirds or make your own ladybird characters with a medley of fun colours.

You will need:

Resene Ladybird Step 1

Step 1:

Use medium-grit sandpaper to sand the surface of the golf balls. Golf balls are tough little things, so do your best at roughing up the surface to create a key for the sealer to adhere to. If your kids are going to do this project, we recommend an adult complete this step.

Resene Ladybird Step 2

Step 2:

Prime the golf balls with Resene Waterborne Smooth Surface Sealer. Once the primer is dry, paint the balls completely with your red base – Fleur used Resene Jalapeno. Do two coats, allowing for the first coat to fully dry before applying the second coat.

Resene Ladybird Step 3

Step 3:

With your darkest colour (Fleur used Resene Black), paint an oval shape at the front. This will be the ladybird’s face.

Resene Ladybird Step 4

Step 4:

Use a thin paint brush to paint a black line from the top of the face to the back – this will give the impression of ladybird wings. Then, using the end of the paintbrush, make dots on the wings.

Resene Ladybird Step 5

Step 5:

For the eyes, do a larger dot with white paint (Fleur used Resene Quarter Dutch White). A cotton tip can be a handy way to get a slightly larger dot. Once this is dry, do another dot on top of the white dot with your darkest colour (Fleur used Resene Black).

Resene Ladybird Step 6

Step 6:

Once dry, dot them around the garden for a creative splash of colour.

For more projects and colour inspiration visit Resene.co.nz.

Images and project by Fleur Thorpe for Resene. 

Read more on Kidspot:

DIY Snowman Decoration

Sponsored content for Resene

Recycle bottle tops and make some cute snowman decorations for the Christmas tree

Follow the instructions and watch the video below.

You will need:

Santa Paint Brushes

  • Clean bottle tops
  • Resene testpots in Alabaster (white), Adrenalin (orange), and Black
  • Paintbrushes
  • Hot glue gun
  • Ribbon
  • Stick-on decoration

Ruby and Ella show you how to make them in the video plus we have step by step instructions below.

Step 1:

Paint all of your clean bottle tops with Alabaster (White) on one side and leave to dry then paint the other side.

Step 2:

Paint 2 black dots for the eyes and 5 for the mouth on one bottle top. Once the eyes are dry put a tiny white dot on each eye and add an Adrenalin (Orange) nose.

Step 3:

Next glue the 3 parts of the snowman together using your hot glue gun. Cut your desired length of ribbon (two each snowman), glue one around the snowman necks for the scarf and glue the second on the back of the head for a hanger.

Step 4:

Put a small Christmas decoration on the scarf – your snowman is now ready to hang on the Christmas tree.

Festive Paint Brushes

Sponsored content for Resene

Decorate some paintbrushes that can then double as Christmas tree decorations and a special homemade gift.

This Christmas craft ticks many Christmas boxes. The kids will be kept busy, the tree will have some new decorations, and you will have a present for that hard to buy for older person who will appreciate the time and love spent on their gift.

Follow the instructions, and watch the video below, on how to make Father Christmas, an elf, and trusty Rudolph.

You will need:

Santa Paint Brushes

  • Resene test pots – Alabaster (White), Metallic Gold (Gold), Noir (black), Red Berry (Red), Bingo (Green)
  • Scissors
  • Resene test pot brush
  • Small paint brush
  • Hot glue gun
  • Paint brush to decorate
  • Small Red & Green pompoms
  • Large red pompom
  • Googly eyes
  • Gold Pipe cleaners (x2)
  • White felt
  • Holly decoration
  • Christmas Ribbon

Check out the video as well as the step by step instructions below.

Santa Brush

Santa Paint Brush

Step 1
Paint two coats of Red Berry on handle only. Let it dry in between coats.

Santa Brush step 2

Step 2
Add a pattern to the Santa’s hat using Alabaster and paint two small Noir eyes near the bottom of the ferrule of the paint brush. Now glue a small red pom pom under the eyes for Santa’s nose.

Santa Brush Step 3

Step  3
Cut a small bit of felt to fit the majority of the ferrule, cut vertical lines up to make a fringe, glue it on so you can just see the eyes. Glue the holly decoration to the hat and finally thread a piece of ribbon through the top, tie it up.

Rudolph Brush

rudolph step 1

Step 1
Paint two coats of Metallic Gold on handle only, let it dry in between coats.

Drive time

Step 2
Glue two googly eyes on to the Ferrule at the top, underneath glue a big red pompom.

rudolph step 3

Step 3 
Take one gold pipe cleaner and wrap it around the handle, take the second one, cut it in two smaller pieces and join to the existing pipe cleaner, cut and shape the pipe cleaners to your desired length and shape to make the reindeer antlers.

Thread a piece of ribbon through the top, tie it up and you are done.

Elf Brush

elf step 1

Step 1
Paint two coats of Bingo on handle only, let it dry in between coats. Add a pattern to the Elf’s hat using Red Berry.

elf step 2

Step 2
At the bottom of the handle using the hot glue gun, glue a mixture of red and green small pompoms.

elf step 3

Step 3 
Glue to googly eyes on to the ferrule at the top. Thread a piece of ribbon through the top, tie it up and you are done.

The Uprising – The Mapmakers in Cruxcia by Eirlys Hunter | Kids Books

Sponsored content 

A follow-up to the internationally successful The Mapmakers’ Race – the Santander children are drawn into a community’s rebellion against a despot and use their mapping skills to avert an environmental scam.

“The Uprising is a great sequel that lives up to the high bar the first book in the series set. It’s a wonderful read, and read-aloud, that will appeal immensely to middle-grade readers and adults alike.” NZ Booklovers  

Read the first chapter here and check out the trailer below for The Uprising – The Mapmakers in Cruxcia ⬇️

Grab your copy of Eirlys Hunter‘s The Uprising – The Mapmakers in Cruxcia now!

When Pigs Fly – A Batpig Book by Rob Harrell | Kids Books

Sponsored content 

Look up at the sky – who is that daring hero floating by?

IT’S BATPIG!

Gary Yorkshire was your perfectly average, fuzzy pink pig who loved eating tasty sandwiches, playing video games and hanging out with his friends.

Now, he’s an unstoppable super-swine hero who boldly fights for justice – from catching litterers to defeating powerful supervillains intent on destruction.

Will Batpig prevail? And will he find a suitable spandex costume to flatter his rear end?

Rob Harrell is the author-illustrator of the highly praised graphic novel Monster on the Hill and the illustrated book series The Life of Zarf. His fifth book, Wink, is a fictional story drawn from his own experiences with a rare eye cancer. His latest graphic novel, Batpig: When Pigs Fly, is inspired by the illustrations from Wink.

Listen to what our kid reviewer Connor has to say about Batpig – When Pigs Fly ⬇️

Grab your copy of Rob Harrell’s Batpig – When Pigs Fly now!

Gangsta Granny Strikes Again! by David Walliams | Kids Books

Sponsored content 

The sequel to the much-loved and bestselling ‘Gangsta Granny’.

Ben is getting used to life without his beloved granny. She was a cabbage enthusiast, a Scrabble partner … and an international jewel thief known as The Black Cat. Now, only the memory of their extraordinary adventure to steal the Crown Jewels lives on. Then something inexplicable happens. World-famous treasures are stolen in the dead of night and the clues point to none other than The Black Cat? But that’s impossible … ?

This first-ever sequel from David Walliams will delight new fans, as well as the millions of readers that have loved Gangsta Granny.

Listen to what our kid reviewer Abbey has to say about Gangsta Granny Strikes Again! ⬇️

Grab your copy of David Walliams’ Gangsta Granny Strikes Again! now!

Upcycle Old Wooden Bowls

Sponsored content provided by Resene

Turn scratched and worn wooden bowls into a home for trinkets and jewellery using jewel-coloured Resene paints.

You will need:

– Small wooden bowls or dishes
– Sandpaper fine grit
– Painter’s masking tape
– Resene Quick Dry
– Resene testpots in your choice of colours – Sarah used Resene TaraweraResene Glorious and Resene Aqua
– Testpot of Resene FX Metallic Solid Gold

These colourful bowls are the perfect home for your treasures. Our bowls are painted in Resene TaraweraResene GloriousResene Aqua and Resene Solid Gold metallic. Create the gold dot bowl by using the back of a small paint brush to create dots using Resene FX Solid Gold Metallic before painting a gold edge.

DIY: Upcycle old wooden bowls

Step 1
Gently sand the wooden bowls.  Wipe clean with a dry cloth.

DIY: Upcycle old wooden bowls

Step 2
Prime with a coat of Resene Quick Dry to ready the surface for topcoating.

DIY: Upcycle old wooden bowls

Step  3
Paint with two coats of the base colour.  Sarah chose Resene Tarawera for one bowl and Resene Aqua for the other. Leave to dry between coats.

DIY: Upcycle old wooden bowls

Step 4
To create the multi-coloured bowl, use painter’s masking tape to divide the bowl in half then another piece of tape to create a wedge shape. Paint the wedge with two coats of Resene Glorious, leaving it to dry between coats. Remove tape and apply another piece to create the third wedge.

DIY: Upcycle old wooden bowls

Step 5
Paint the third wedge with two coats of Resene Solid Gold, leaving it to dry between coats.

DIY: Upcycle old wooden bowls

Step 6
Remove tape and fill with jewellery – enjoy!

For more projects and colour inspiration visit Resene.co.nz.

Article provided by Resene.

Read more on Kidspot:

Make A Driving Track

Sponsored content provided by Resene

Make your own driving track for hours of driving fun. Add another dimension to your driving track with a few houses built from building bricks.

You don’t need to stop there either – a farm complete with animals, perhaps a refuelling (or recharging) stop will all add to the fun.

You will need:

Drive time

Check out the step by step instructions below. You can also download an instruction sheet here.

Drive time

Step 1
Paint the piece of MDF with one coat of Resene Quick Dry waterborne primer undercoat. Allow to dry for two hours.

Drive time

Step 2
Paint the piece of MDF with two coats of Resene Groovy, allowing two hours for each coat to dry.

Drive Time

Step  3
Use the pencil to draw a curving road around the board and paint in with two coats of Resene Nero – again, allow two hours for each coat to dry.

Drive time

Step 4
Use an artist brush to fill in the centre road markings with Resene Alabaster, as shown. Leave to dry

Drive time

Step 5
Paint tree trunks with Resene Woodburn, and once this is dry, paint in leafy treetops with Resene Grass Stain.

Drive Time

Step 6
Paint in sheep with Resene Alabaster, and once this is dry use the fine bristle brush to paint in eyes and mouths. Once it’s all dry, bring out your toy cars and get driving!

For more projects and colour inspiration visit Resene.co.nz.

Article provided by Resene kids art with Mark Rayner

Read more on Kidspot:

Join the Catch Up

Join our community of parents and let the Kidspot Catchup be your guide to creating unforgetable family moments.