Preheat oven to 175C (155C fan-forced). Grease a cake tin and line with baking paper.
In one bowl, mix all the dry ingredients together. In another bowl, beat all the wet ingredients together. Make sure to leave your blueberries until the end.
Fold the wet ingredients into the dry ingredients until just combined, then add the blueberries and gently stir through.
Pour the mixture into your cake tin and pop into the oven for 40-50 minutes, or until skewer comes out clean.
Leave to cool in the pan for 5 minutes before turning out onto cake rack. Serve and enjoy!
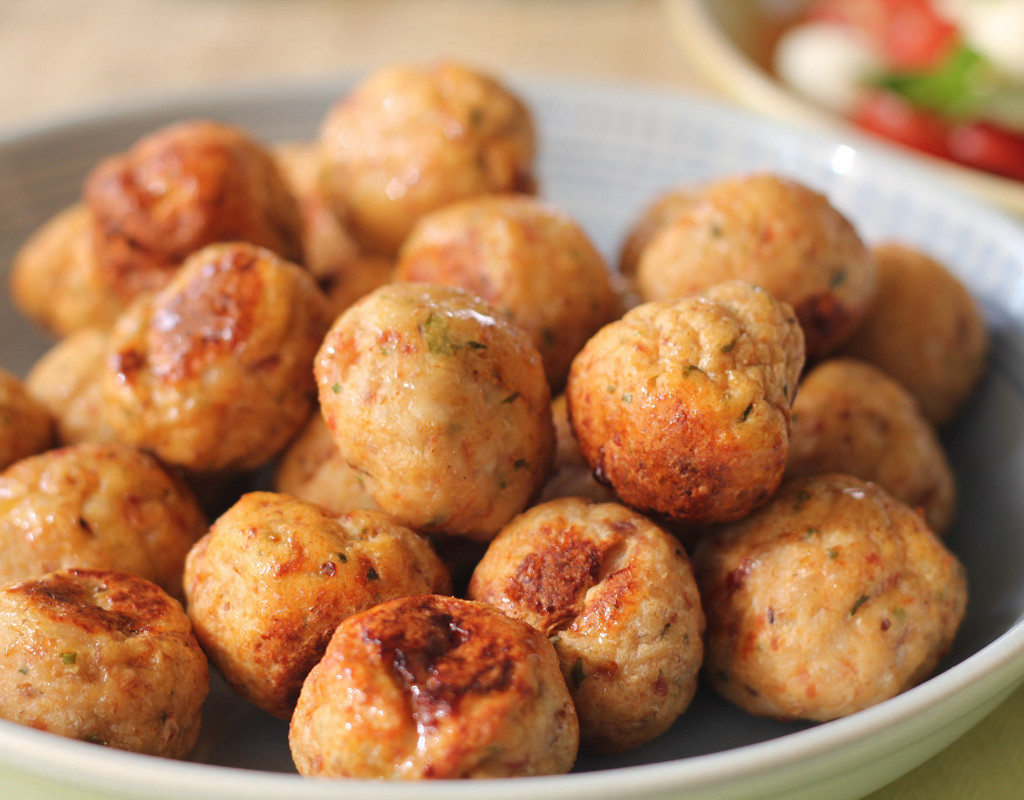
1 tbsp powdered chicken stock or 1 chicken stock cube.
½ cup flat leaf parsley, chopped
½ cup vegetable oil (for frying)
Method
Place all ingredients into a food processor – except for the oil – and process until thoroughly combined.
Cover a tray with baking paper. Roll tablespoon sized balls of the meat mixture and place on the tray.
Heat 3 tablespoons of oil in a frying pan over a medium heat and fry the meatballs, gently turning with a spatula until they are brown and cooked through. This should take around 5 minutes.
Alternately you can bake these at 160°C fan-forced for 15-20 minutes or until cooked through.
Serve in soft tortillas with salad and salsa or on a platter as finger food with a delicious chutney.
Notes:
Frying these in a pan makes them all nice and golden, but if you bake them they stay a pale colour.
If you don’t have a food processor you can just cut these ingredients finely and mix together with your hands and you will get the same great taste.
Preheat oven to 180°C or 160°C fan-forced. Spray a 6-cup Texas muffin tin with oil and set aside.
Spray oil in a frying pan; over medium heat, cook the onion and bacon until the onion is translucent.
Push the bread into the muffin tin and spoon in the bacon and onion mixture.
In a bowl, whisk together egg, milk and parsley and distribute evenly into the 6 muffin tins.
Bake for 20 minutes. Leave to sit for 3 mins before running a knife around the edges. Serve.
Notes:
When pouring in the egg mixture into the tins, it will overflow and then absorb down into the bread. It seems like it is too much but then is settles and you add the rest.
Make these muffins more scrumptious by adding a little grated cheese on the top.
Use your favourite bread. I prefer crunchy multigrain for the great texture it brings.
This recipe was created by Jennifer Cheung for Kidspot, New Zealand’s best recipe finder.
In a frying pan heat a tablespoon of vegetable oil and fry the beef strips in small batches to brown and seal in the flavour. Add a little more oil to the pan as you need it. Making sure that the pan is very hot as you begin each batch. Set aside in a warm place.
In the same frying pan cook the onions with the garlic, tomato paste, stock powder, paprika and mushrooms until the onions are translucent.
Add the water and beef and simmer for 5 minutes.
Stir through the sour cream and parsley.
Serve on steaming hot fettucine or rice.
Notes
When you slice the rump steak for this dish, make sure that you slice thin slices across the grain of the meat so it is tender.
If you pay attention to the method of this dish, the meat should melt in your mouth without being cooked for a long period of time.
In a large bowl, mix together all the patty ingredients until completely combined. Shape into 6 patties.
Bring a frying pan, grill pan or barbecue to a medium to high heat and place the patties onto the cooking surface. Cook for 5 minutes on each side, or until cooked just through.
In the meantime, whisk together all the yogurt sauce ingredients and chill.
When the burgers are ready, serve in a buttered hamburger bun or in a warm Lebanese wrap with cucumber, lettuce, tomato slices and mint-yoghurt sauce.
Serving Suggestions
Note
We are lucky enough to live near the world’s BEST delicatessen. The owner, Nazek makes the most amazing tabbouleh every day except Sunday (she deserves a break!). My husband loves it when I stuff this into wraps for him with these lamb burgers.
If you can’t find lamb mince, you can make your own by using boneless lamb rump, or something similar with a bit of fat in it, and then gently processing it until you have your own mince.
This recipe was created by Kristine Duran-Thiessen for Kidspot, New Zealand’s best recipe finder.
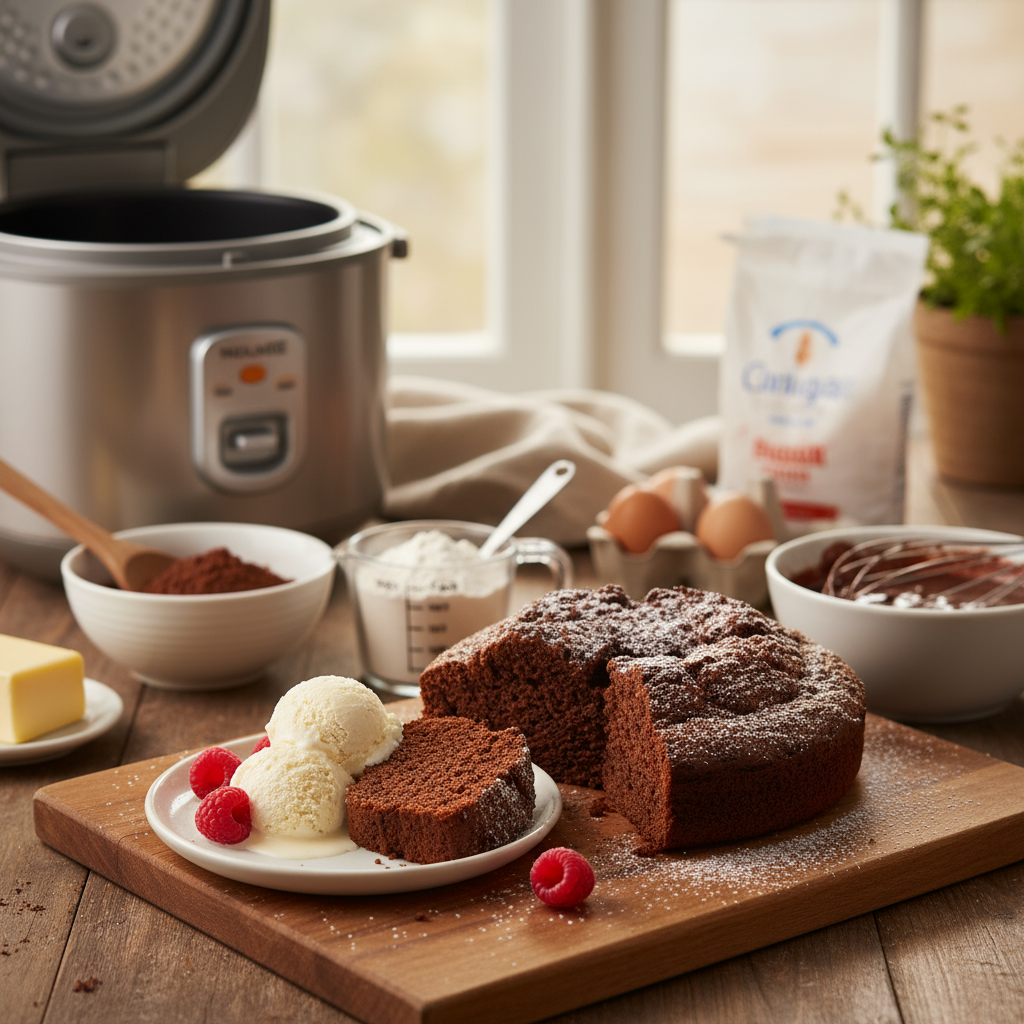
Step 1. Grease and flour the bowl of the rice cooker (unless it is non-stick).
Step 2. Place all ingredients into a mixing bowl and using a mixer, mix on high for 4 minutes or until combined.
Step 3. Pour mixture into the rice cooker bowl.
Step 4. Press cook on your rice cooker. If you have a standard rice cooker, you will have to push the cook button several times until this cake is cooked. You may need a rest between each push so the temperature sensor can cool down. If you have an advanced rice cooker you can choose the cake selection. Test you cake with a skewer to see if it is cooked. Turn out onto a cooling rack to cool and serve with raspberries and cream.
Notes:
You can double this recipe if you need a larger cake but you may also need to increase the cooking time.
We served this with raspberries but you can use any berries you like.
If you are looking for another simple recipe then try these 2 ingredient chocolate cupcakes. They give you a delicious chocolate hit.
If you are looking for a chocolate cake just like your mum used to make then try this Best chocolate cake recipe.
If you are not a fan of washing up then you can make this One pan chocolate cake. It is mixed in the pan and is so delicious that you’ll want to make it over and over.
This Flourless chocolate cake is a perfect, dense recipe and tastes just like the ones you buy in cafes.
This recipe was created by Jennifer Cheung for Kidspot, New Zealand’ best recipe finder.
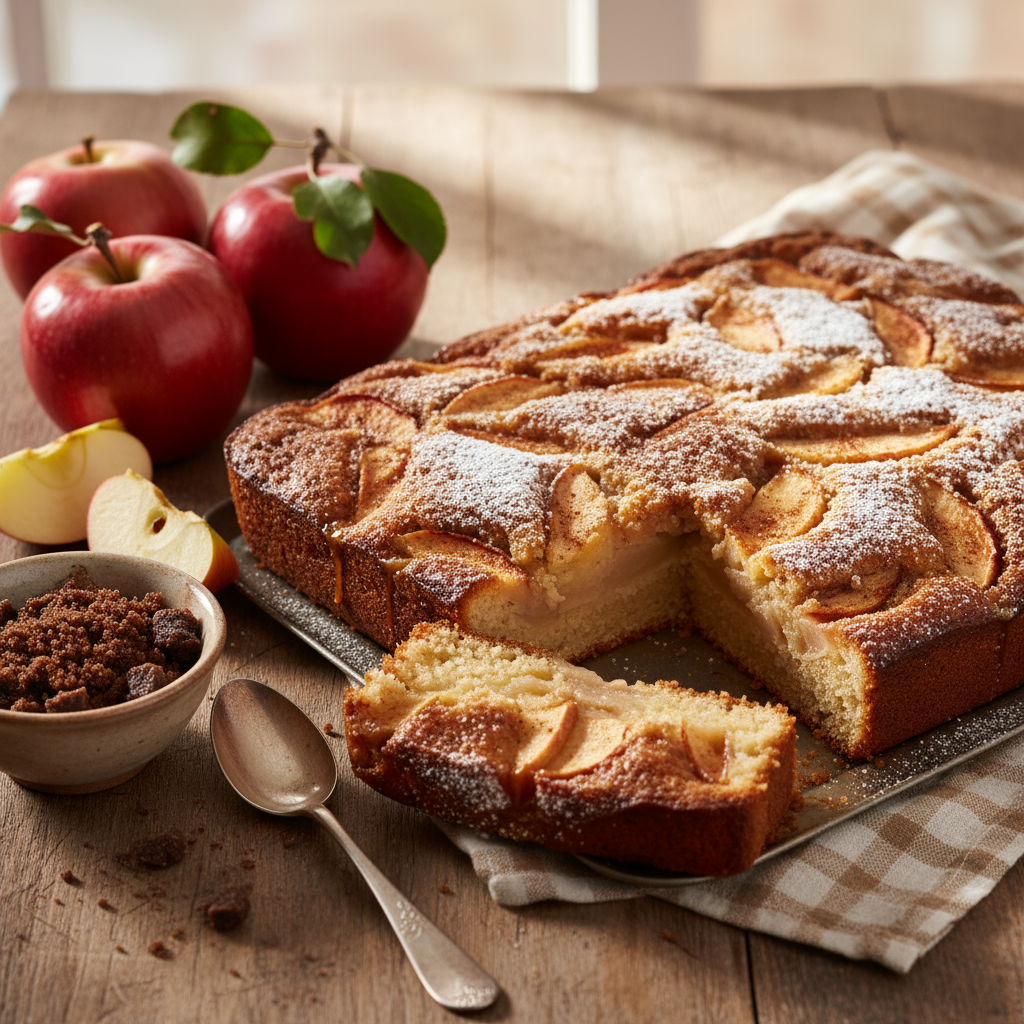
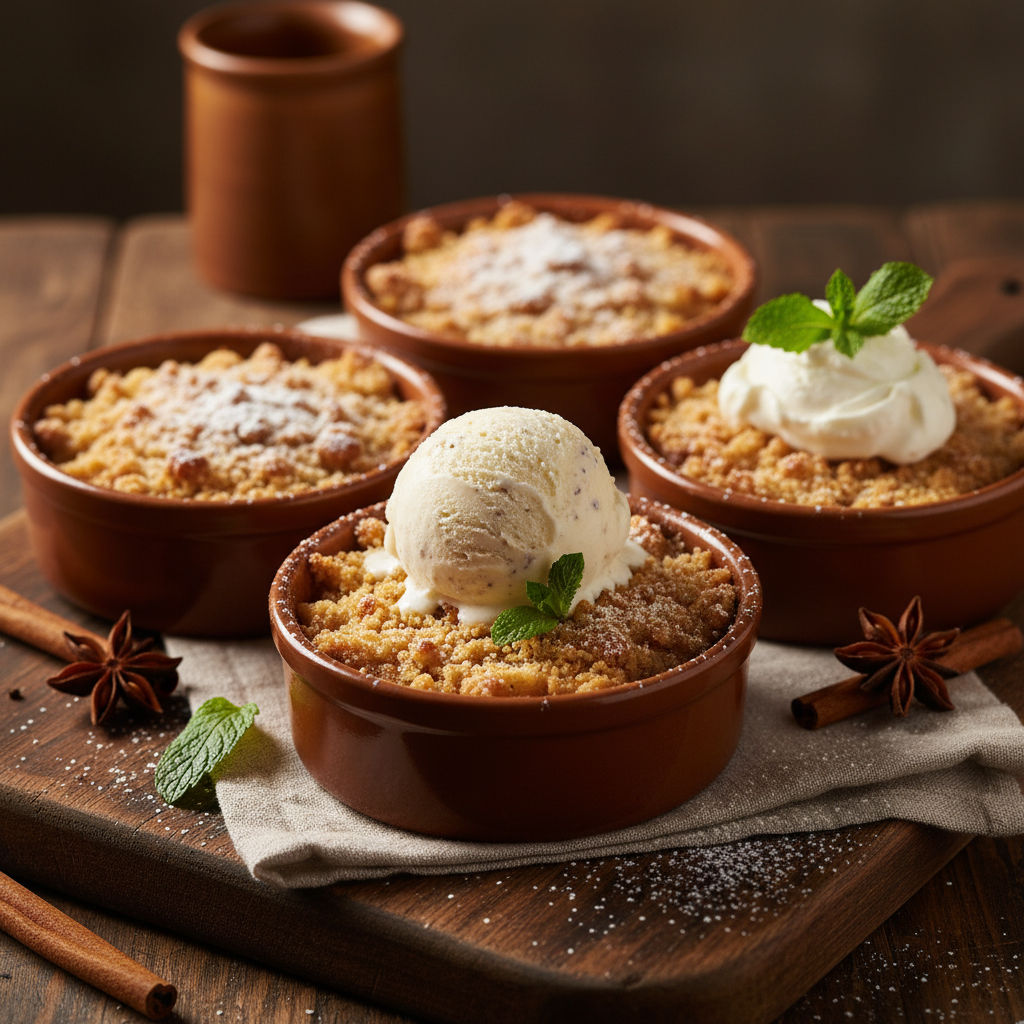
2 large apples (whatever fresh, crunchy ones you have available), cored and thinly sliced
Method
Preheat oven to 180°C (160°C fan-forced) and grease and line a baking tray with deep sides (about 5cm).
Cream the butter and sugar together with an electric mixer until pale and fluffy (this should take about 5 minutes). Add the eggs, one at a time, beating well between each addition.
Sift the flour, cinnamon, ginger and baking powder together then fold this through the butter mixture.
Spoon this into your prepared tray, press apple over the top and then bake for 35 minutes or until the sides of the cake are just pulling away from the tin and a skewer comes out clean. Let cool in the tin, dust with icing sugar and serve.
1/3 cup (75g) caster sugar, plus extra for dusting
1/3 cup (75g) currants or sultanas, or a mixture of both
grated zest of half a lemon
1 egg, beaten
a little milk, if needed
a little extra butter for greasing
2 tbsp caster sugar, for sprinkling
Method
Sift the flour, salt and cinnamon into a bowl and add the diced butter.
Rub with your fingertips until the mixture resembles breadcrumbs. It doesnÛªt have to be perfect.
Mix in the sugar, currants, lemon zest and beaten egg and stir to form a dough, adding a splash of milk if too dry. Try not to work it too much or your cakes will be tough.
On a lightly floured surface, roll out the dough to a thickness of about 1.5cm.
Cut into rounds with a 6 or 7cm plain cutter.
Warm a heavy based frypan over a medium to low heat.
With a piece of kitchen paper, wipe some extra butter over the frypan until lightly coated.
Cook each cake for about 4 minutes each side or until golden brown ÛÒ check them often to make sure they do not burn. Sprinkle with caster sugar and serve.
Note
TraditionallyåÊ these are served with a pot of tea. They are so easy you could even get the children to help while you have a cup of tea after your busy day. Afternoon snack and activity all rolled into one.
You can split them like a scone and top with whipped cream and jam to be fancy.
Apparently they keep in an airtight container for up to 4 four days, but honestly, theyÛªve never lasted long enough in our house to test that theory.
This recipe was created by Michele Crawford for Kidspot, New Zealand’s beståÊrecipe finder.
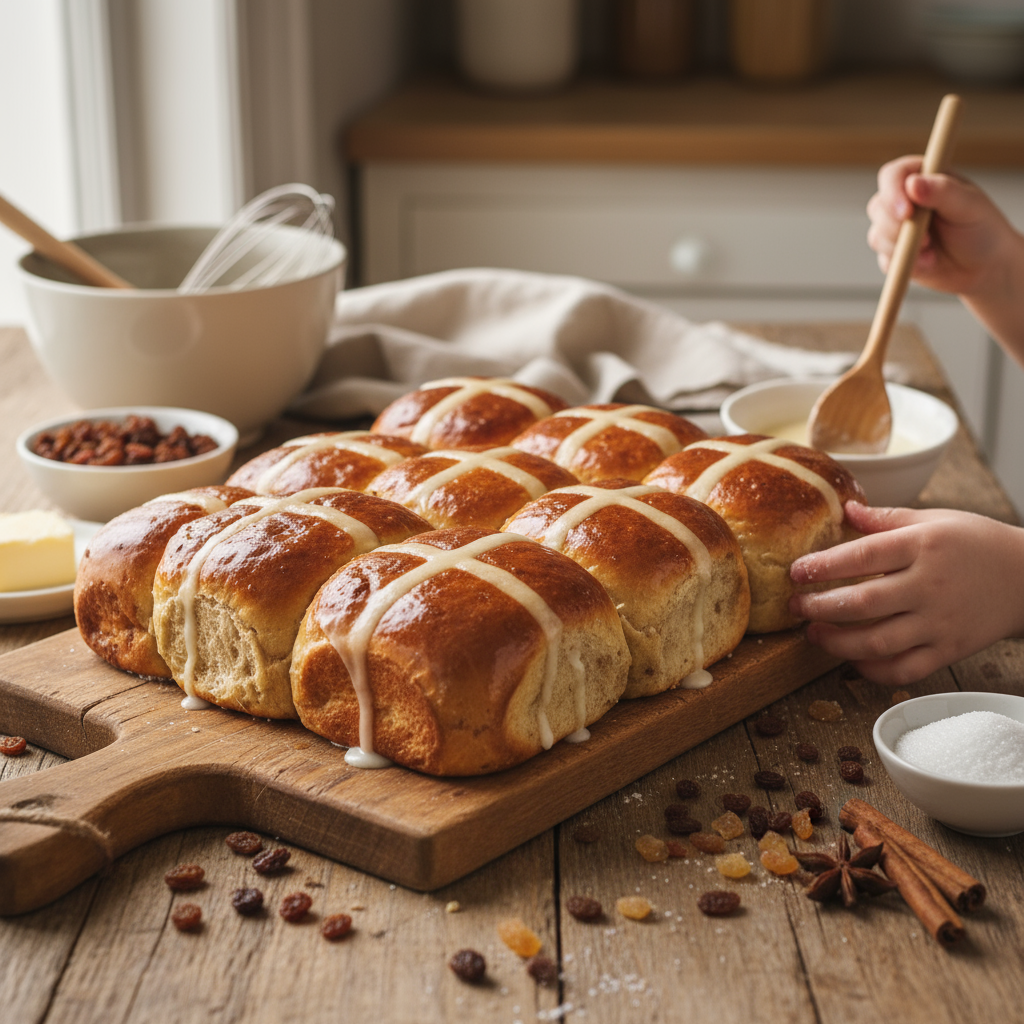
Mix flour, yeast, sugar, spices and salt in a large bowl.
Whisk eggs, milk and marmalade together and pour into the flour mixture to form a sticky dough.
Knead on a floured surface for 10 minutes until elastic. Add softened butter and knead for a further 5 minutes until smooth.
Fold in fruit and peel and knead for further 3 minutes.
Form the dough into a ball, put it in an oiled bowl and cover with cling film. Place it in a warm place for about 2 hours, or until dough has doubled in size. Then turn the dough out onto a floured surface.
Form into a loaf and use a knife to cut the loaf into 12 buns – in half lengthways, then six loaves each (see video).
Line a shallow baking dish with baking paper and put your hot cross buns onto it, ready for the oven.
Preheat oven to 180°C (160°C fan-forced).
To make the crosses, mix the flour, icing sugar and water into a thick paste.
Pour paste into a resealabe bag and snip off one of the corners to create a piping bag.
Pipe crosses on buns and bake for 15-20 mins. Turn out on wire rack.
To create glaze, bring the sugar and water to the boil until it is a clear syrup and then take it off the heat.
Apply glaze with a pastry brush while the buns are still hot.
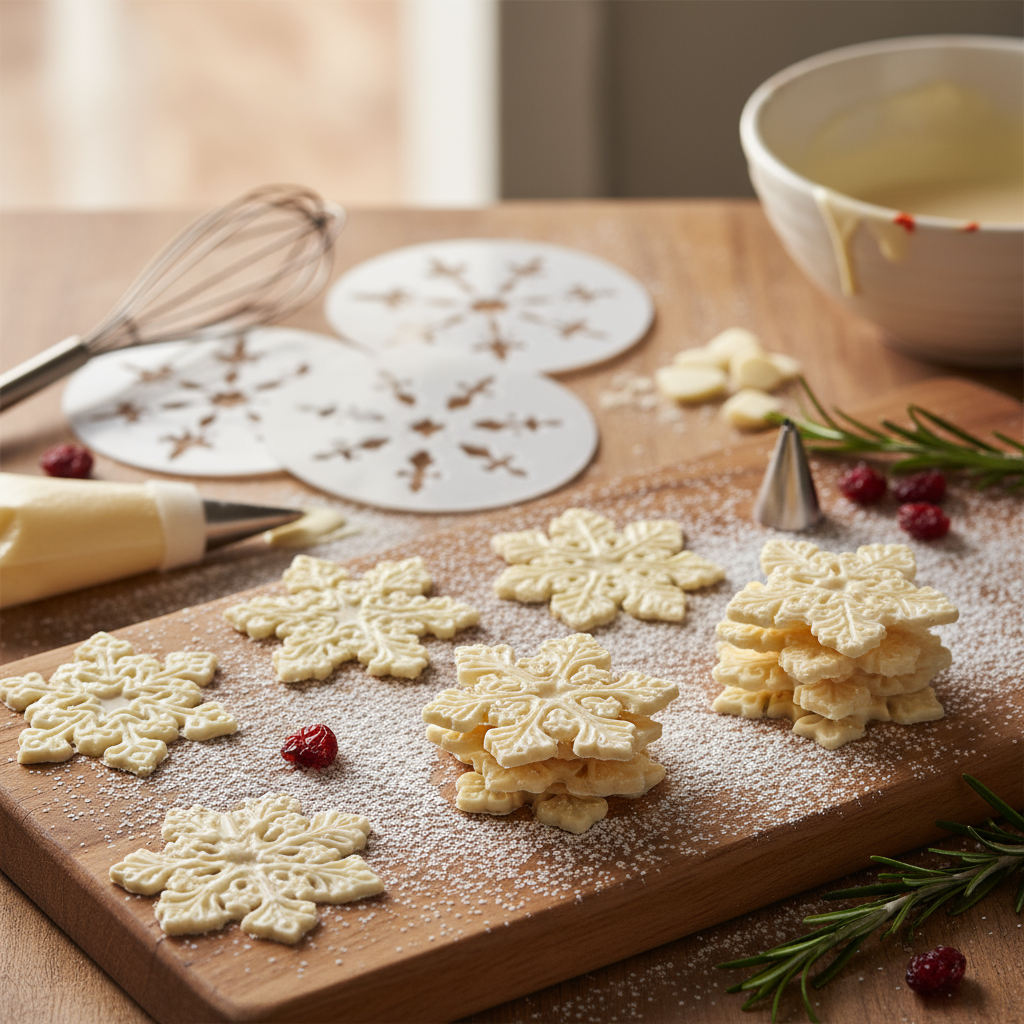
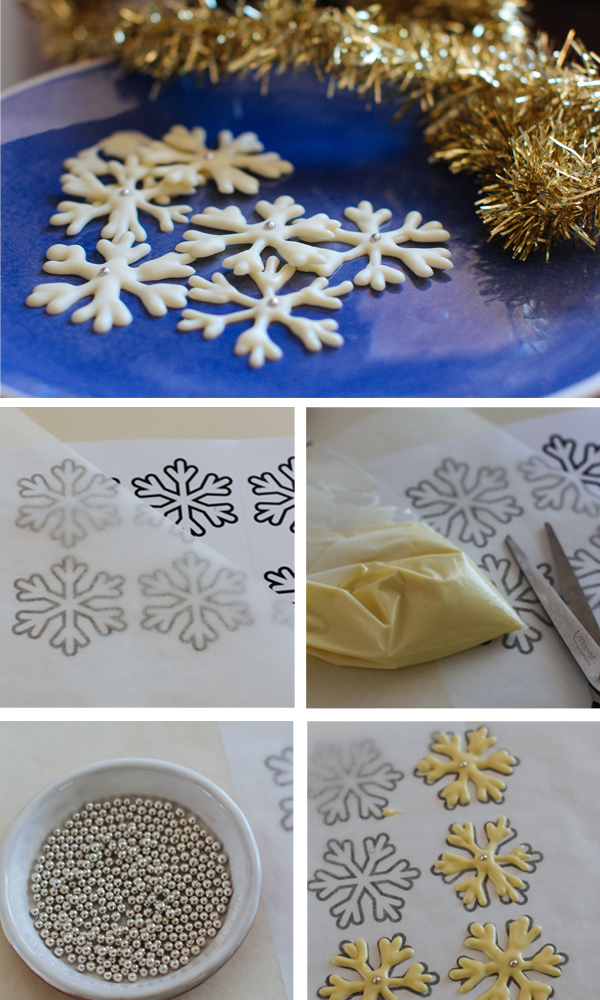
Step 1. Search online for a snowflake pattern that you like, repeat it on a blank document then print out.
Step 2. Melt the white chocolate in a heat-proof bowl over a saucepan of simmering water, stirring until smooth. Transfer to a snap-lock or piping bag.
Step 3. Lay a piece of baking paper over the snowflake stencil.
Step 4. Carefully snip a tiny corner from your bag of melted chocolate and pipe snowflakes onto the baking paper using stencils as a guide. DonÛªt worry if the first one or two donÛªt work out perfectly. This is a real case of trial and error; youÛªll soon figure out how much to squeeze the bag, how best to trace the pattern with chocolate – and the best thing is that any Û÷wobblyÛª ones will still taste delicious. Pop a silver cachou in the centre of each snowflake then set aside to set completely.
Swap white chocolate for milk chocolate or dark chocolate. Or use all three and marble together – fancy!
You could also sprinkle these with edible glitter.
This recipe was created by Sophie Hansen for Kidspot, New Zealand’s best recipe finder: You can follow Sophie on Local is Lovely, Facebook, Twitter or Pinterest.
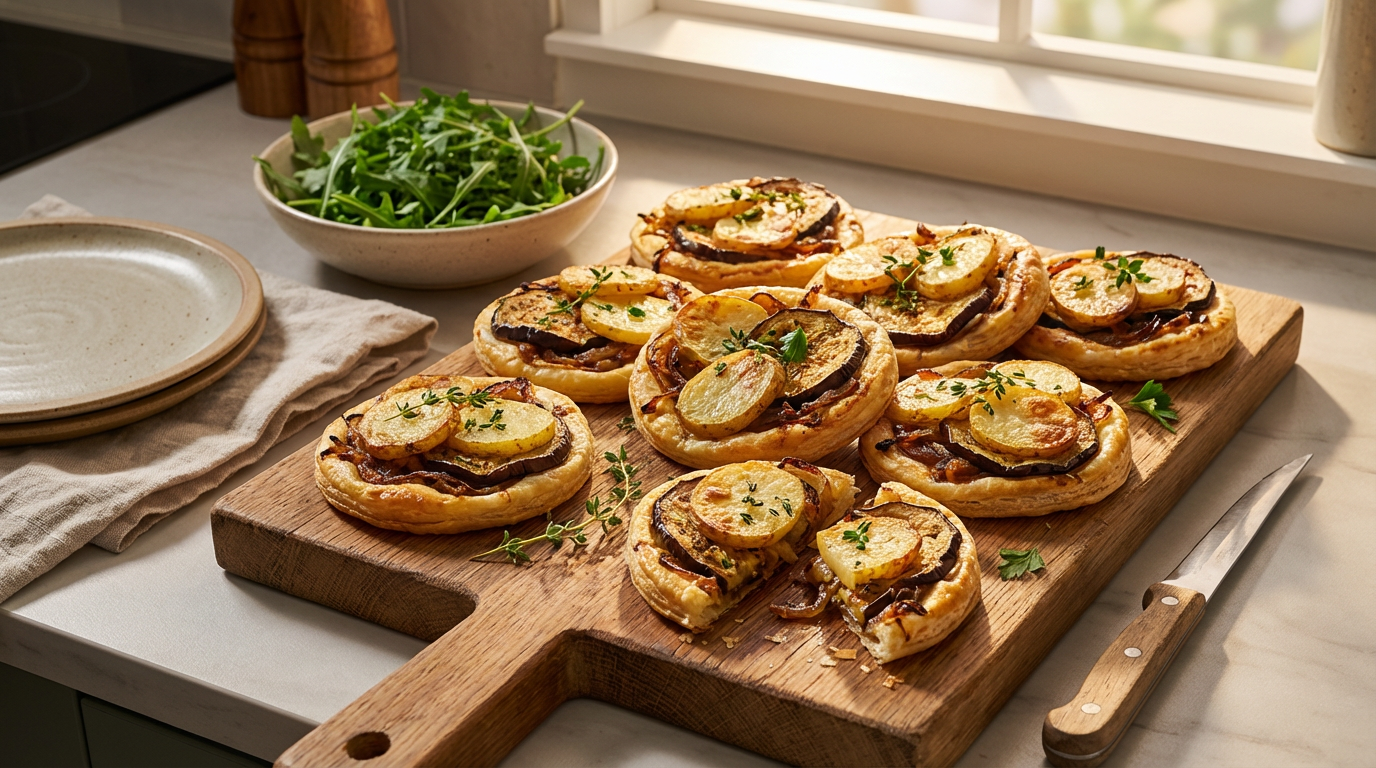
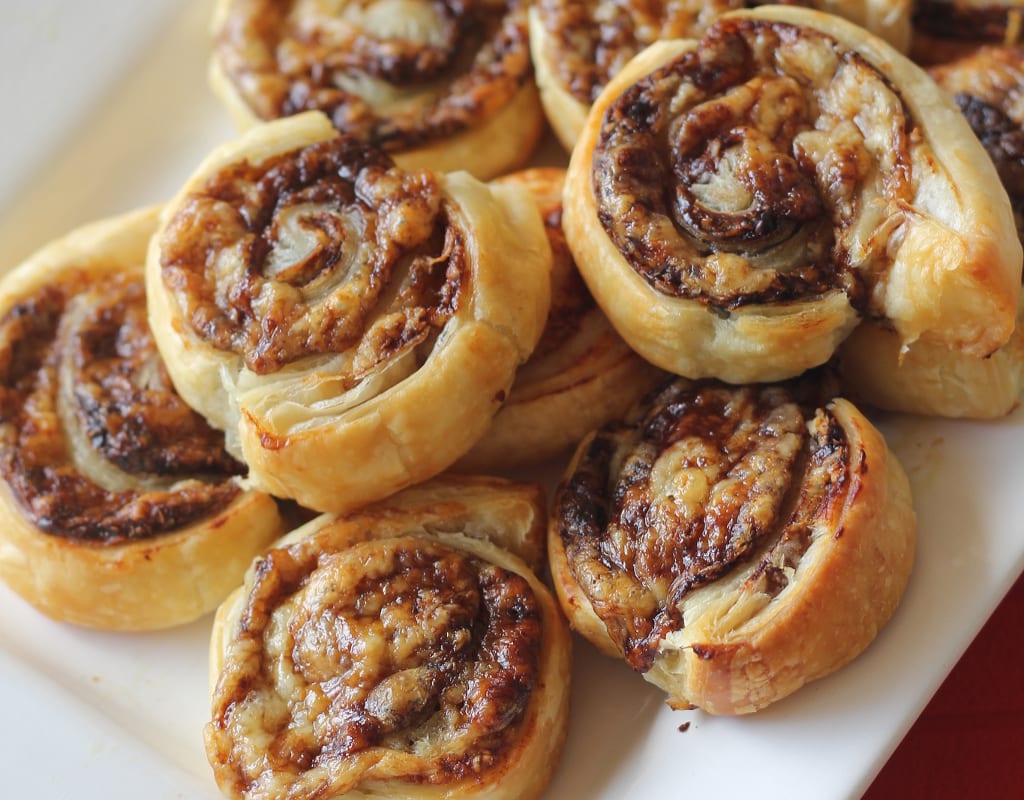
Preheat oven to 200°C conventional (180°C fan-forced)
Heat 1 tablespoon of oil in a large frypan. Cook eggplant slices over medium heat until golden and soft. Remove to a plate. Add 1 tablespoon oil and cook potatoes until tender and starting to brown. Remove to a plate.
Add 1 tablespoon oil and cook onion and garlic over very gentle heat for 6-8 minutes until starting to caramelise. Season well with salt and pepper then stir through chopped parsley.
Use a small bowl or cookie cutter as a guide to cut four circles from each pastry sheet. Place on a tray lined with baking paper. Divide onion mixture between each disc, being sure to leave a border. Top with cooked eggplant and potatoes. Brush a little extra oil on the pastry border.
Bake for 14 minutes until pastry is puffed and golden. Serve with a green salad.
half a cup continental parsley or coriander leaves
8 iceberg lettuce leaf cups
Method
Heat oil in a nonstick frypan over high heat. Cook chicken mince until all browned use the back of a wooden spoon to break the mince up into small pieces. Stir in celery, cook for 2-3 minutes, then add hoisin sauce and water chestnuts, heat through. Remove from heat and stir in parsley or coriander and bean sprouts.
Place one or two lettuce leaves on each plate and spoon chicken mince into leaves. Serve immediately with lots of serviettes!
Notes:
The best way to remove lettuce leaves: turn the lettuce upside down, use a small knife to cut out the stem and then carefully remove each leaf. Wash each leaf and dry with paper towel.
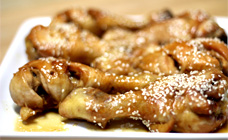
Combine soy sauce, honey, lemon juice and garlic in a bowl and mix well.
Place the chicken drumsticks in an ovenproof dish in a single layer and pour the marinade over the top.
Cover the dish with foil and cook drumsticks in preheated oven for 45 minutes or until the juices run clear when the drumsticks are pierced in the thickest part.
Turn the drumsticks and baste them with the marinade every 15 minutes.
Remove from oven, drain off marinade and cool to room temperature.
Store in an airtight container in the fridge for up to 2 days.
If you want to reheat the drumsticks, preheat the oven to 140ºC. Place the drumsticks in an ovenproof dish and reheat them for 10 minutes or until heated through.
When I finished cooking these I didn’t want to waste that yummy marinade. I reduced it to a third of its original volume in a pan on the stove and poured it over the chicken before serving. It made a delicious sticky sauce.
I also sprinkled a few sesame seeds over these before serving for garnish.
This recipe was created by Jennifer Cheung for Kidspot, New Zealand’s best recipe finder.
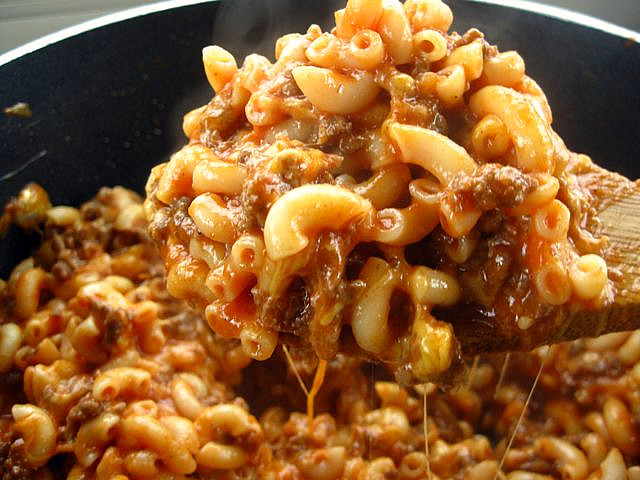
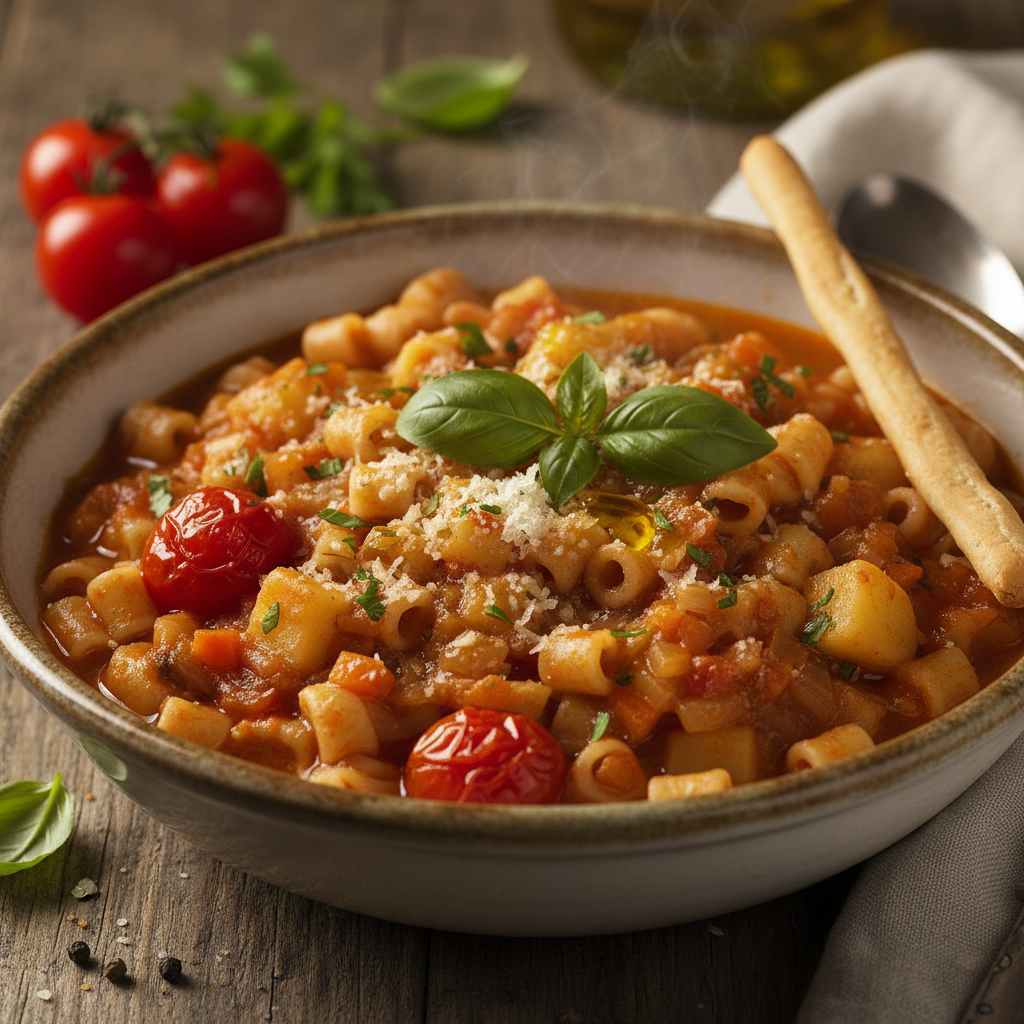
Heat the oil in a large saucepan over medium. Add the garlic, celery, carrot and onion and cook, stirring regularly until the onion is soft and translucent.
Add the tomatoes, water and potatoes to the pan, cover and cook until the potatoes are almost tender, about 30 minutes.
Add the pasta and cook for another 10 minutes or until the pasta is al dente. Remove from heat, season to taste and serve in big bowls with the parmesan and parsley.
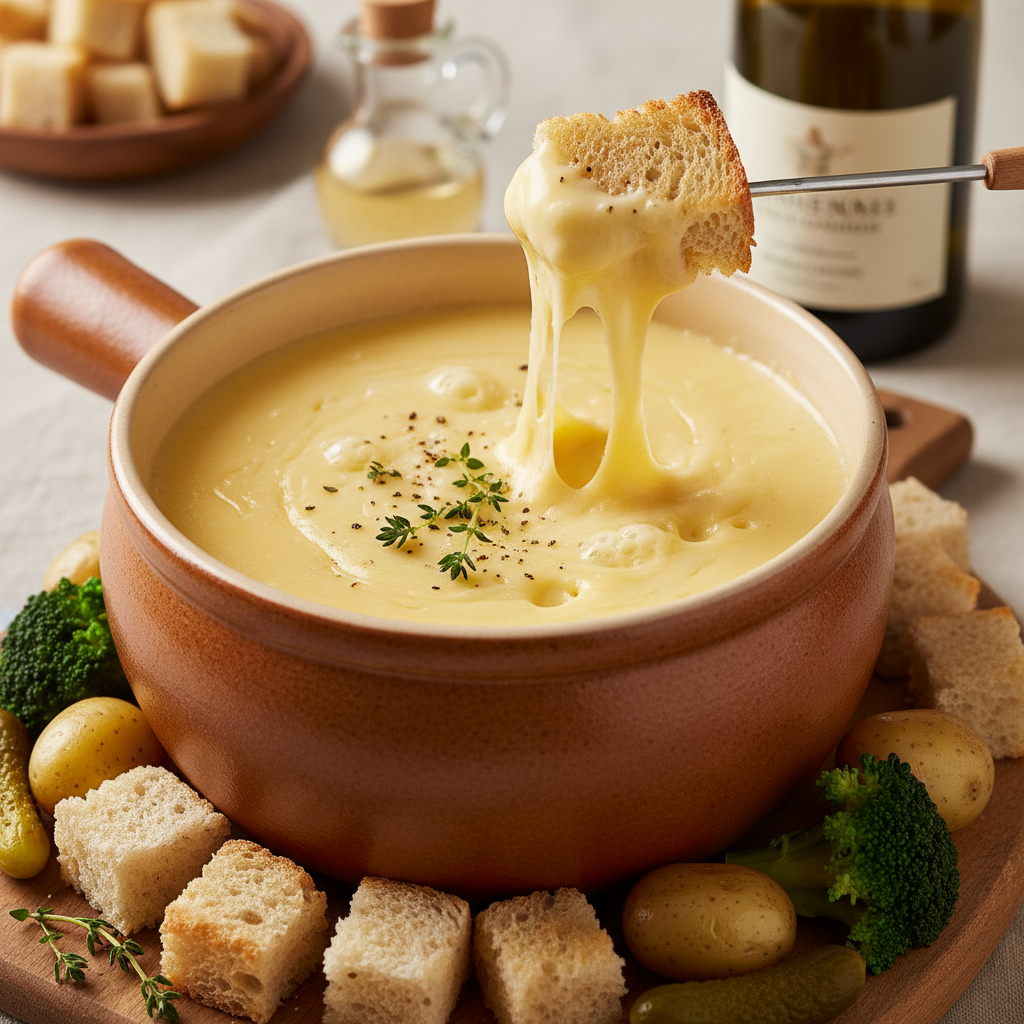
200ml dry white wine (sauvignon blanc or riesling)
200g gruyere cheese, grated
200g Emmental cheese, grated
1 tablespoon cornflour
2 tablespoons (30ml) kirsch
cubes of crusty bread, to serve
Method
Peel the garlic clove, slice in half and rub the inside of a heavy-based pan with garlic, then discard garlic. Place pan over low heat, add wine and bring to the boil.
Add cheeses in small handfuls, stirring constantly. Keep stirring for 8-10 minutes until cheese has melted. Mix cornflour with kirsch, add to cheese mixture and stir until the mixture combines into a smooth creamy mixture.
Transfer to a fondue pot set over a lit flame or rest over another pan of just-boiled water.
Keep stirring at the table to prevent the fondue becoming lumpy or sticking to the pan. If the fondue becomes too thick, thin down with some warmed wine.
Serve with bread for dipping.
Notes:
Much complaint from my husband regarding the smell of the Swiss cheeses. All doors and windows open on a balmy 10C day! It is a little pungent, but the taste is wonderful.
These cheeses are expensive (and tasty cheese doesnt give you the flavour or stringy consistency), so I have given amounts for a small portion for you to start with. If it is a huge hit, double the quantities next time.
Kirsch (clear cherry brandy) is about $30 for a bottle. Being a non-drinker, I decided against spending that much for 2 tablespoons! I used the only other clear liqueur we had (Cointreau), which worked beautifully.
Try other accompaniments such as steamed potatoes, carrot and celery sticks, pickled vegetables, apple and pear wedges.
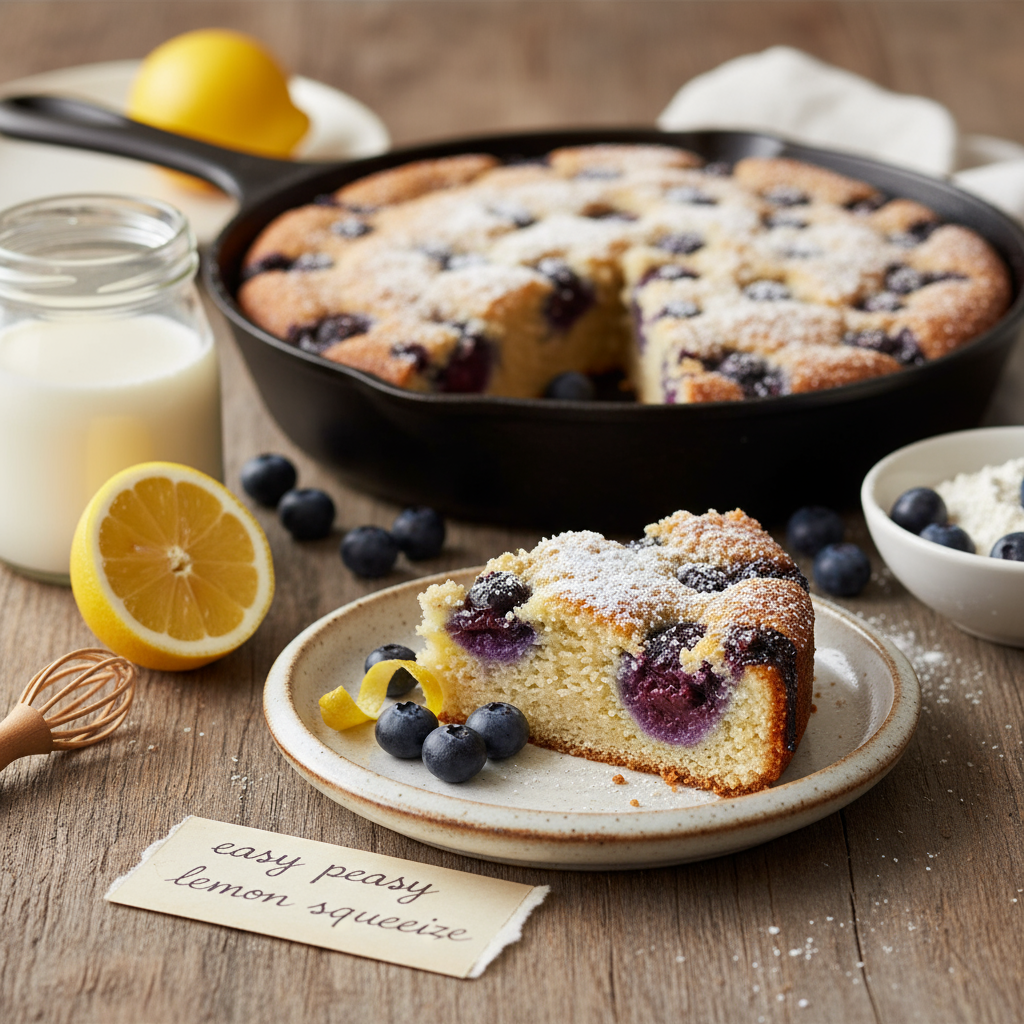
Heat oven to 210°C (190°C fan-forced). Line a round 20cm springform pan with baking paper and set aside.
Melt butter and allow to cool slightly.
Beat sugar, eggs and vanilla together until mixture is light and fluffy (about 2-3 minutes). Add melted butter and buttermilk and beat until combined. Add flour and gently mix through.
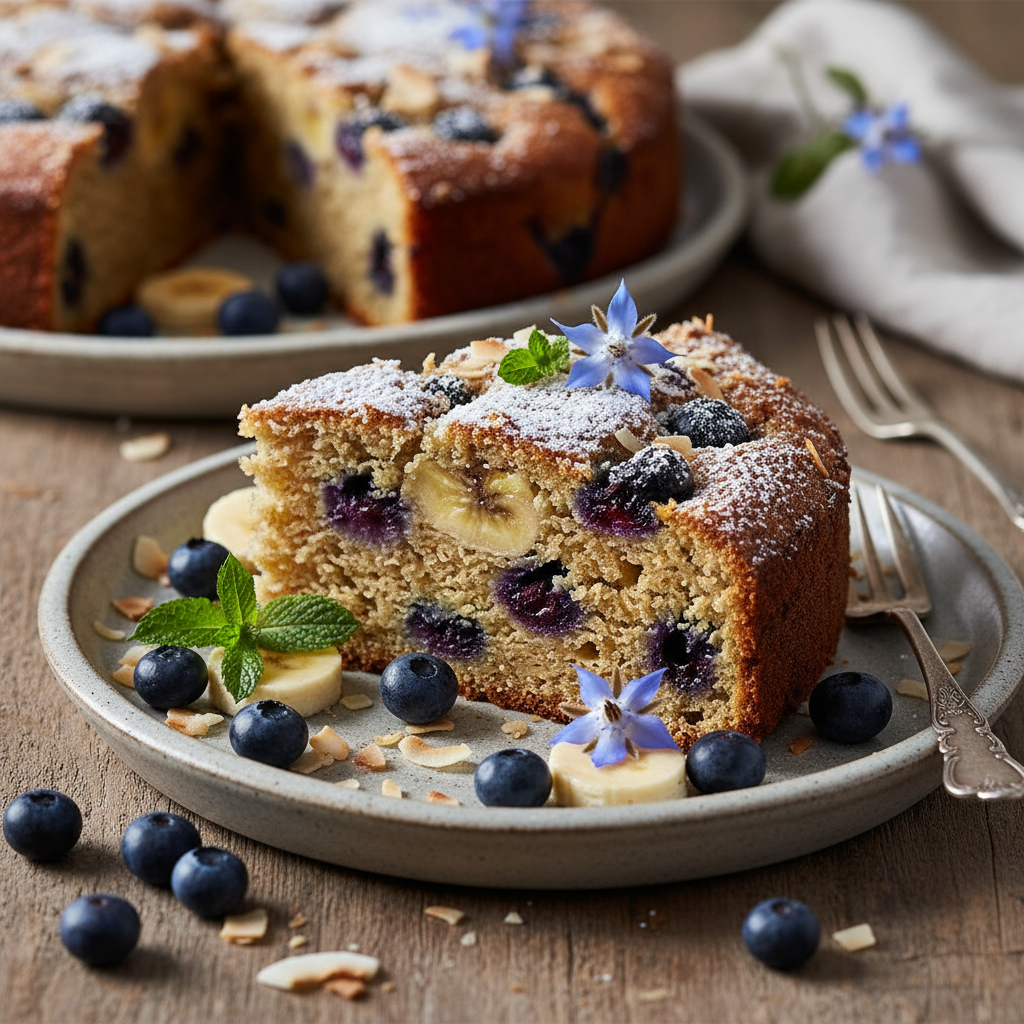
Stir half the blueberries through and pour mixture into prepared pan. Top with remaining blueberries and bake for 45 minutes or until centre is set and a cake skewer or toothpick comes out clean.
Remove from the oven, sprinkle with extra sugar and allow to cool for 5-10 minutes before transferring to a wire rack to cool completely.
I'm not much of a baker because I like to keep everything low fat. But after much research into low fat baking, I came up with this cake. It’s packed with blueberries which is wonderful and only uses a fraction of the butter of most cakes. Plus it's easy peasy lemon squeezy.
Make sure you beat the eggs, sugar and vanilla for at least 2 minutes until light, pale and fluffy.
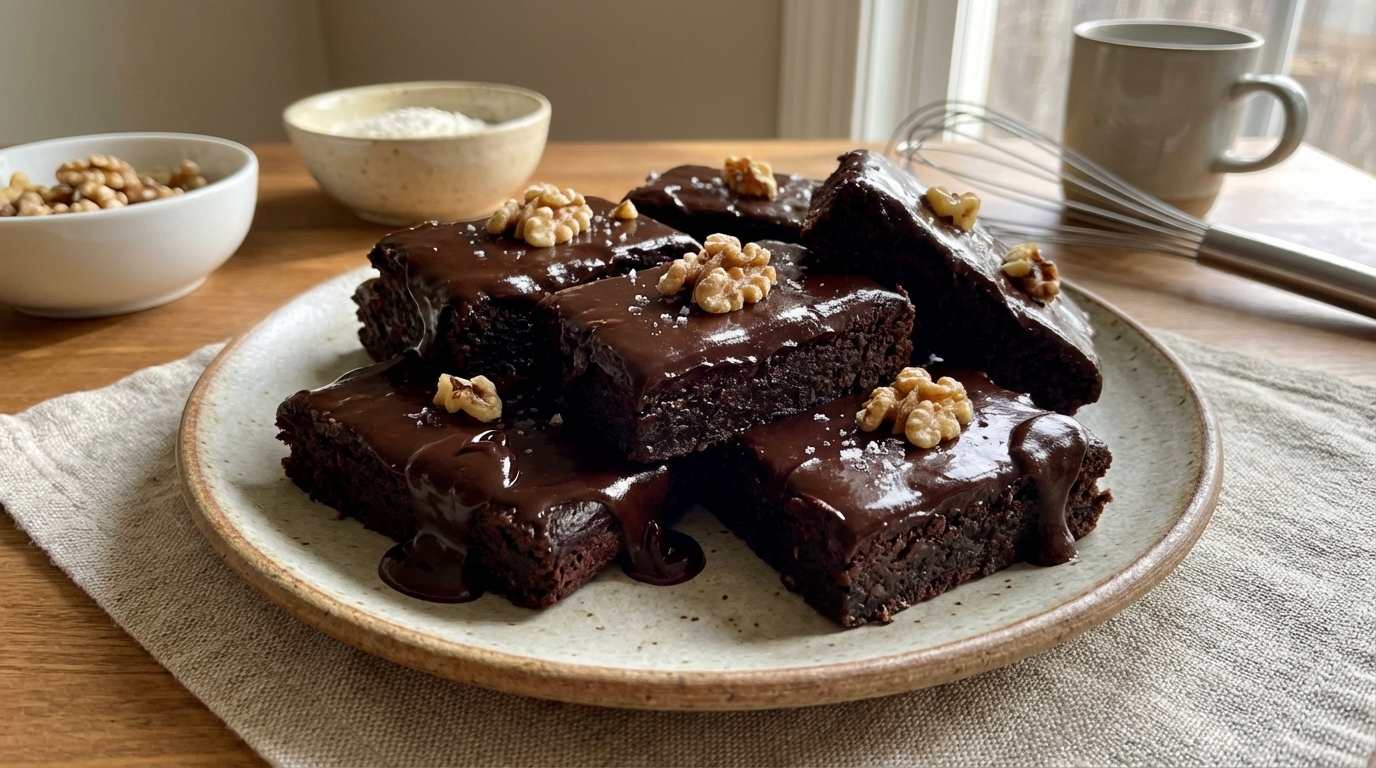
1 x 440g tin of black beans, well rinsed and strained
3 eggs
1/4 cup coconut oil
1 tsp vanilla extract
1/2 cup (75g) sugar-free cocoa
3/4 cup (125g) dark brown sugar
1/2 cup (75g) wholemeal flour
For ganache:
100g good quality dark chocolate, broken into pieces
1/3 cup (80ml) pouring cream
1 tbsp butter
Method
Preheat oven to 180°C (160°C fan-forced). Grease and line a shallow slice pan.
Put rinsed beans and eggs into a powerful blender and pulse until smooth.
One at a time, add the coconut oil, vanilla extract, cocoa, sugar and flour and whiz between additions to prevent clogging up or uneven blending.
Use a spatula to scrape the mixture into the pan.
Bake for 25 – 30 minutes, or until a skewer inserted into the middle comes out clean, then turn out onto a cake rack to cool.
To make the ganache, put chocolate, cream and butter into a small saucepan over low heat, stirring continuously until combined and smooth.
Transfer the uncut brownie slab onto a cutting board and pour the ganache over evenly, smoothing with a knife. Wait 10 minutes, or until the ganache sets, before slicing into 16 even fingers.
Serving Suggestions
Note
The black beans add a certain dense texture to the finished product, which is offset by the icing. If you can’t get a hold of black beans, kidney beans would work nicely, too.
If you have a wheat intolerance, you could substitute the wholemeal flour for spelt or whichever flour you prefer. And if you don’t have any coconut oil to hand, butter will work in this recipe just as well.
These Healthy chocolate brownies are made with agave nectar to make them naturally sweet, and pumpkin to keep them nice and moist.
The yummy biscuit base on these Anzac brownies give these little bites a lovely crunchy edge.
Crank up your regular brownie offering and serve up a batch of these Double choc fudge brownies instead. They are every chocolate lover's dream come true.
Give ordinary brownies a sweet little Easter twist, with these Caramello egg brownies. They're almost too cute to eat!
Here's an easy to way to make a really decadent treat. These Tim Tam brownies are better than you can possible imagine.
Any time you get a mid-afternoon chocolate craving, just whip together this Microwave brownie for one! You can thank us later.
Here's a novel way to sneak an extra serve of veggies into the kids' diet. These Zucchini brownies taste so much better than they sound!
If you're a traditionalist, then you can't go wrong with this recipe for Easy chocolate brownies. Best served with a mug of hot tea or a glass of warm milk.
This recipe was created by Katie Rainbird for Kidspot, New Zealand's best recipe finder. You can follow Katie at Katie180.
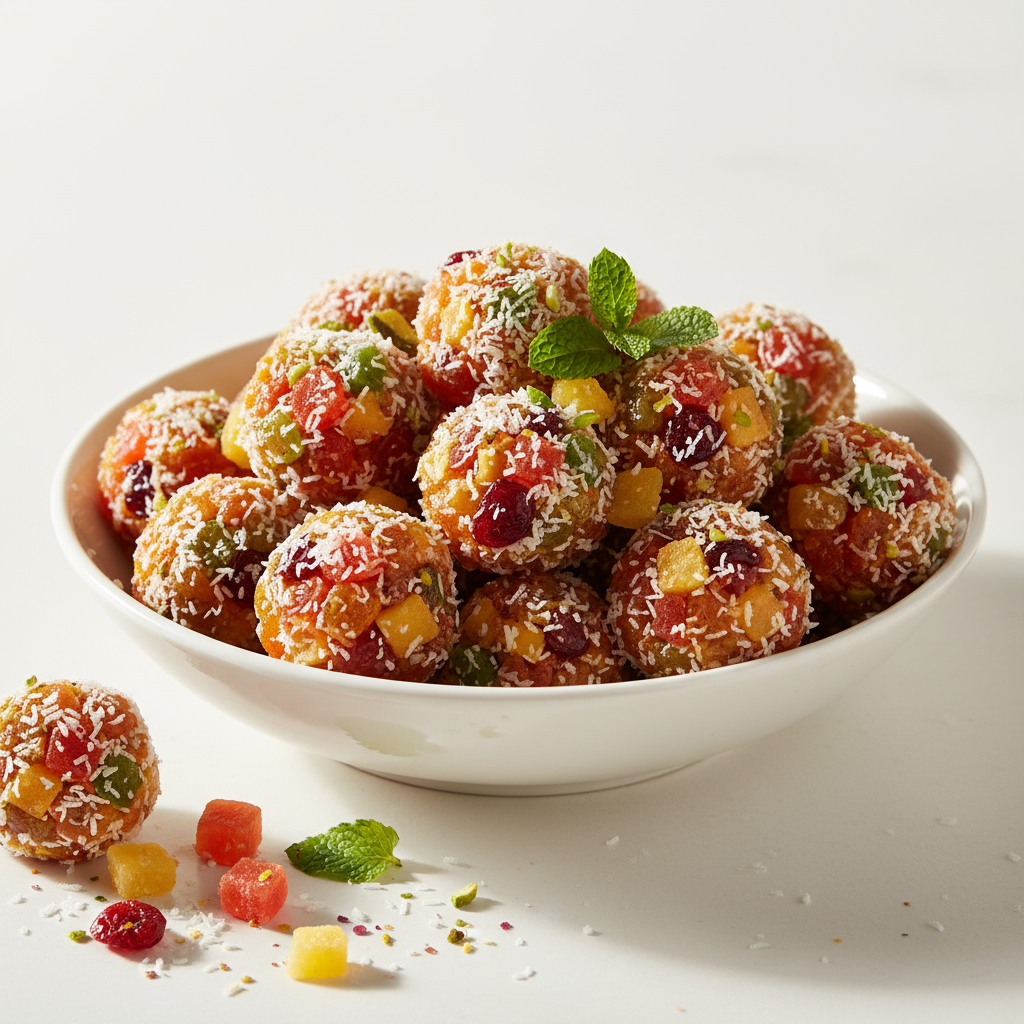
1 cup mixed fruit (can be glaced cherries, apricots, sultanas or a mix that you like)
1 can sweetened condensed milk,
Half a plain sponge cake (crumbled)
Optional grated chocolate
Melting chocolate (for rolling or dipping)
Tiny marshmallows (optional)
Method
Place all ingredients in the bowl (except for melting chocolate) and mix together.
Shape into balls and either roll in coconut, or dip in melted chocolate and then add marshmallows for a cool look, or you can roll in Nestle ‘Quik’ and sprinkles for variety and colour.
Great for parties and letting little hands get messy!.
Bring water to boil in a saucepan and add Tom yum paste.
Stir well to dissolve and add vegetables.
Simmer for 5 minutes and add prawns.
Cook for a further 3 minutes and serve garnished with coriander.
Serving Suggestions
Note
Most Thai recipes are written per person and when testing this recipe I discovered that the paste satchet is just exactly enough for one person, therefore if you are making this for a family of four you will need 4 satchets.
This is a really refreshing soup and I love the hot and sour aspects of it coupled with the crunchy prawns.
This recipe was created by Jennifer Cheung for Kidspot, New Zealand’s best recipe finder.
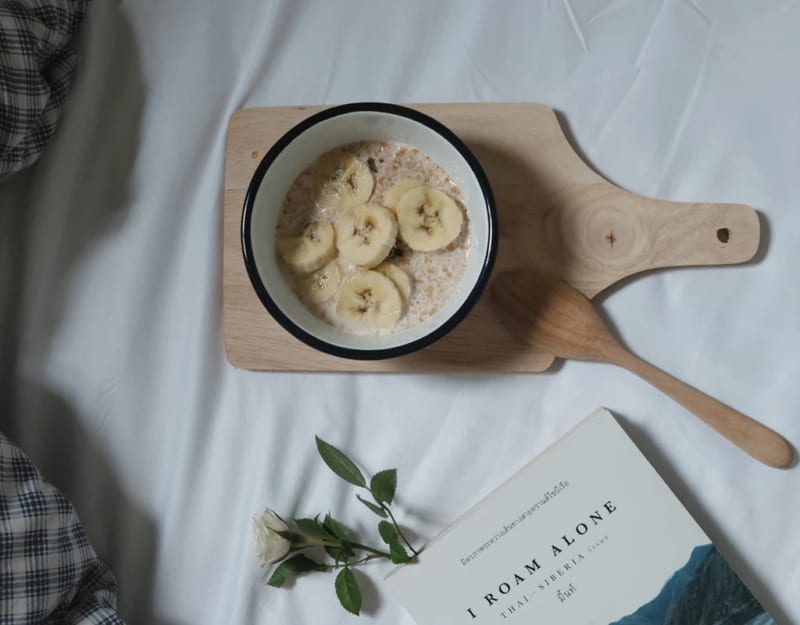
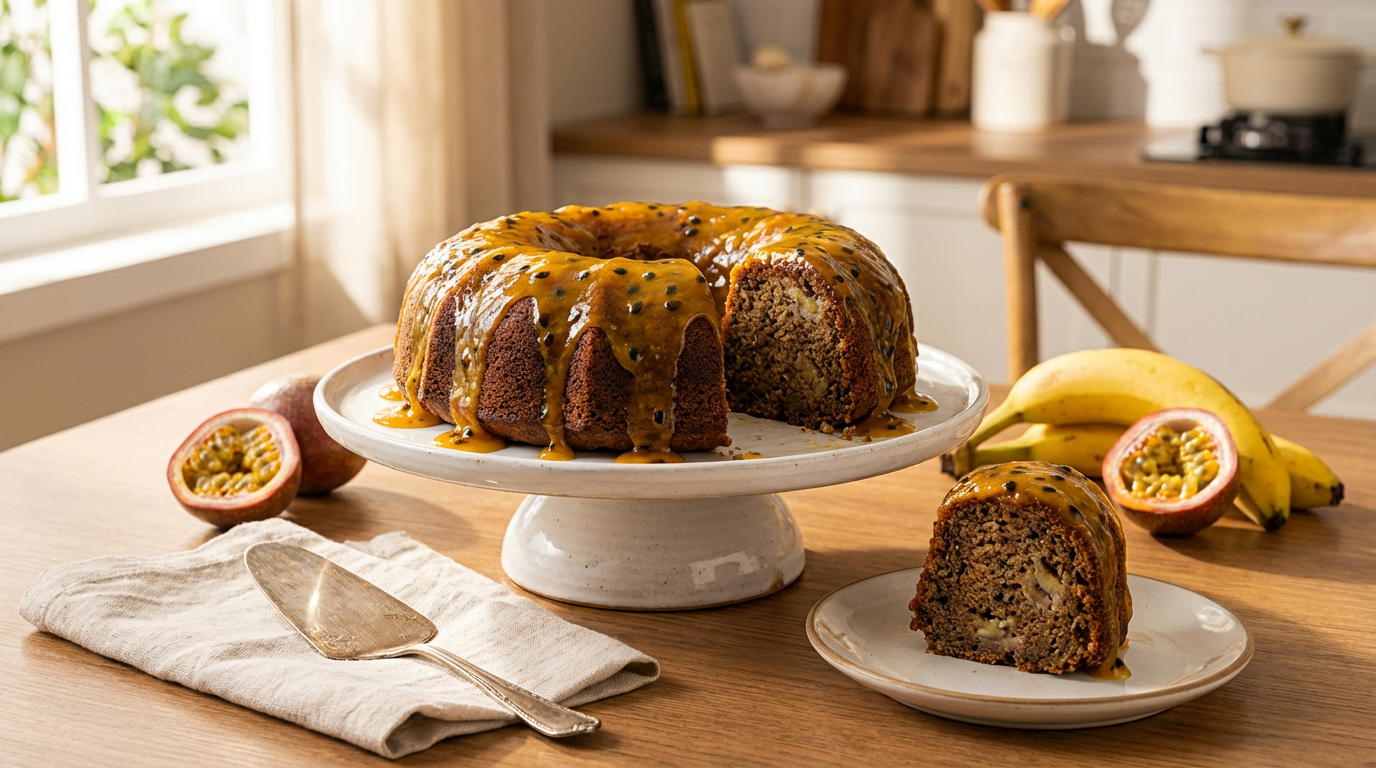
Preheat the oven to 180°C conventional or 160°C fan-forced. Line a loaf tin or spray a fluted ring cake tin with canola oil spray (I find that’s pretty much a fool-proof way to ensure the cake never sticks).
Mash the bananas and then combine the remaining ingredients except for the apricot jam.
Stir gently until just combined and then spoon into the cake tin and bake for 40 minutes.
Heat the jam in a small saucepan over a low heat or alternately warm it in the microwave for a minute so it’s easy to spread and then pour it over the cake as soon as it comes out of the oven.
Turn out of the ring onto a wire rack and let cool.
If you can’t find passionfruit in season then it’s OK to use tinned passionfruit pulp. Four passionfruit is roughly equal to half a cup of tinned passionfruit.
It’s not necessary to whip or beat this cake mix. It comes together so well from having the ingredients just combined. It’s very much like a muffin.
This recipe was created by Sophie Hansen for Kidspot, New Zealand’s best recipe finder. .
Homemade choc tops are always a hit in our house, even more so when made with this yummy cherry ice cream!
Makes six small cones
Ingredients
1/2L best quality vanilla ice cream, softened
1 handful fresh cherries, pitted and torn in half
400g milk chocolate
6 mini waffle cones
Method
Step 1. Scoop the soft ice cream into a large bowl then mix through the cherries and 100g of the chocolate, chopped. Return the ice cream to the freezer to firm up a bit.
Step 2. Melt the remaining 300g chocolate in a bowl over a saucepan of simmering water and set aside to cool just slightly.
Step 3. Scoop a ball of ice cream into one of the waffle cones and press down gently so it is wedged in nicely. Then turn the cone into the bowl of melted chocolate, swirling it around so all of the ice cream is nicely covered.
Step 4. Pop straight into the freezer, I find it’s easiest to put them in small jars or little milk bottles to keep the cones upright. Once they’re frozen, they can be laid flat. Enjoy!
Notes:
Serving Suggestions
Note
Use any flavour ice cream you fancy here. And please swap the cherries and chocolate for any other combination.
Roughly chopped honeycomb is also delicious!
Swap the milk chocolate for white or dark if you prefer.
As soon as you’ve dipped the cone in melted chocolate, sprinkle with crushed nuts or hundreds and thousands.
If you don’ t have any ice cream you can cheat and use our 2 ingredient ice cream recipe for a treat.
Preheat oven to 180°C (160°C fan-forced). Line a 12 cup tray with patty cases.
Cream the butter, sugar and vanilla essence with electric beaters. Add eggs and beat well. Add milk and self-raising flour. Mix with wooden spoon to combine then beat with electric beaters until ingredients are incorporated (don’t overbeat, or cupcakes will be dry and firm). Spoon into patty cases.
Bake for around 12-15 minutes, or until golden. Cool on wire racks.
Once the cupcakes are cooled, ice them with white icing. Use horizontally halved marshmallows as noses, with black jelly beans as snouts. Draw a mouth with black writing icing. Use brown mini M&Ms for eyes. Cut marshmallows in halves vertically and place cut-side down as ears.
I’ve put a mild chilli in the salad to get my kids used to the flavour and heat, but if you have seasoned chilli eaters in your house, whack one in the crab cake mixture too. If you like the taste of chilli but don’t want to set your mouth on fire, use a larger red chilli – all the taste without the heat.
Crab cakes have a soft consistency and can fall apart so be extra careful when you flip them.
If I can get to the fresh food market, I use fresh crab meat for this recipe, but I’ve also used canned meat which is absolutely fine. If you are using canned, grab 4 x 170g cans and drain them as it only adds up to about 100g of meat per can.