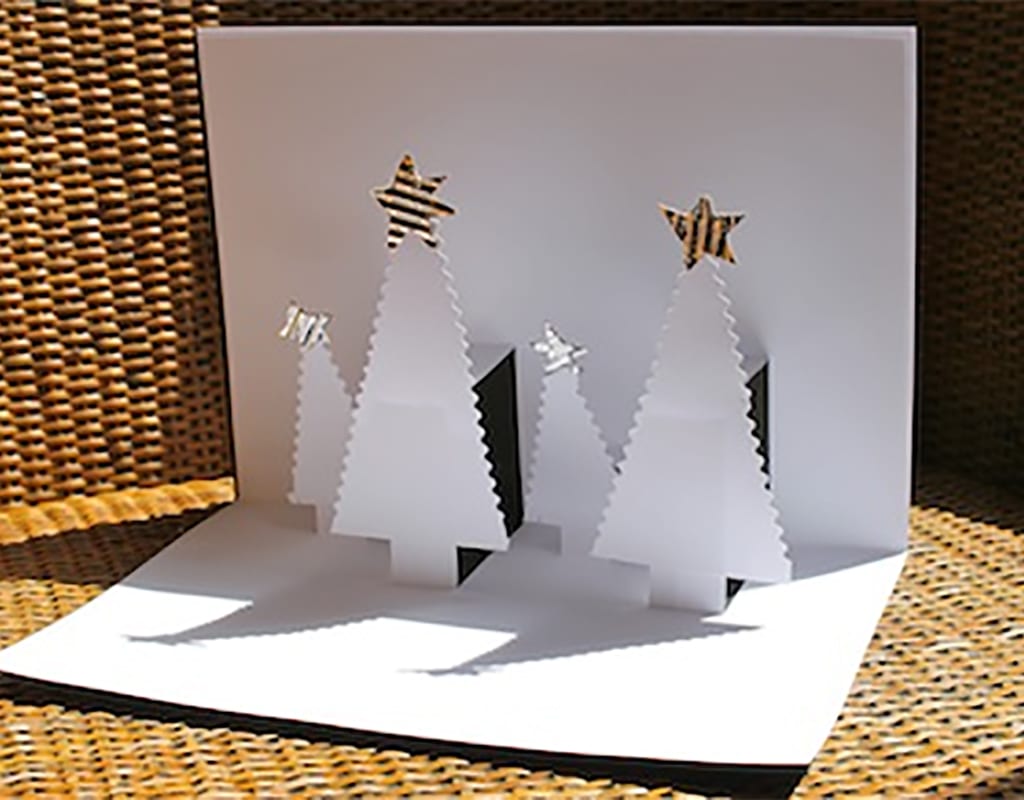
Homemade Christmas cards are a win-win: a fun craft activity for kids plus some unique Christmas wishes for friends and family. This woodland diorama card idea looks fancy but it’s really quite simple. Follow the instructions below to find out how to make this cute pop up Christmas card.
You will need:
- 2 x A4 sheets of card
- 1 x A4 piece of black construction paper
- Crimping scissors
- A ruler
- A pencil
- Craft knife
- Cutting mat
- Glue stick
Fold one sheet of white card in half. Now mark and measure 4cm from the left hand edge.
From that point, mark measures at:
1cm, 1.5cm, 3.5cm, 5.5cm, 7.5cm, 9cm, 11cm and 13cm.
Your two small trees will have trunks 1.5cm x 2.5cm.
The two bigger trees at the front will have trunks 2cm x 5cm.
Now rule a line lengthways, at 2.5cm. This is the height of your small trees trunks.
Now rule a line lengthways at 5.5c. This is the height of your larger, front tree trunks.
With the piece of paper still folded over, use a craft knife on a cutting mat to cut the vertical lines only (so only along the height of the trunks, don’t cut them out completely. (See video.)
Now when you fold at the top lines, you should get pop up tree trunks.
Now make your trees
Use crimping scissors to cut two tall triangles (about 9cm tall with a base of about 5cm) and two smaller triangles, (4.5cm x 2.5cm base)
Stick them to the trunks.
Now conceal all the cutting with a piece of black paper on the outside of the card. You can use a white marker pen or cut out letters to put your Christmas message here.
When the card is opened, voila! A Christmas woodland diorama.
You can experiment with different scenes now you know the basics of a pop up card.
- Thanks to our sister company Kidspot Australia for creating the instructional video.


Leave A Comment
You must be logged in to post a comment.