Cut all the white meat from the BBQ chicken. Remove the skin and then cut the meat into small bite-szed pieces. Set aside.
Heat the vegetable oil in a large saucepan over a medium heat. Add leek and cook until transluscent.
Add the chicken stock and bring to the boil. Turn down heat to a simmer then add the chicken pieces and the creamed corn.
Stir through and allow to simmer for 20 minutes.
Take off heat and using a fork, gently stir the soup as you add the beaten egg in a continuous stream. Continue stirring the soup with the fork for another minute once all the egg has been added.
Serve immediately with a small handful of chopped spring onions as a garnish.
If you like to order Chicken and sweet corn soup in chinese restaurants, then you’ll LOVE this soup. It tastes exactly the same as the professionally made variety!
It is really important that you take the soup off the heat when you add the egg – this way, you’ll get long strands of egg in the soup. In fact, the egg almost resembles super-thin noodles.
This soup tastes very zen and good for you – I almost feel guilty that it is so easy and quick to make.
My kids love this soup as the chicken pieces provide something for them to get their teeth stuck into!
You could twist this soup up a bit by adding asian noodles and fancy herbs but I find that it is perfect as it is.
This Chinese chicken and sweet corn soup recipe was created by Ella Walsh for Kidspot, New Zealand’såÊbest recipe finder.
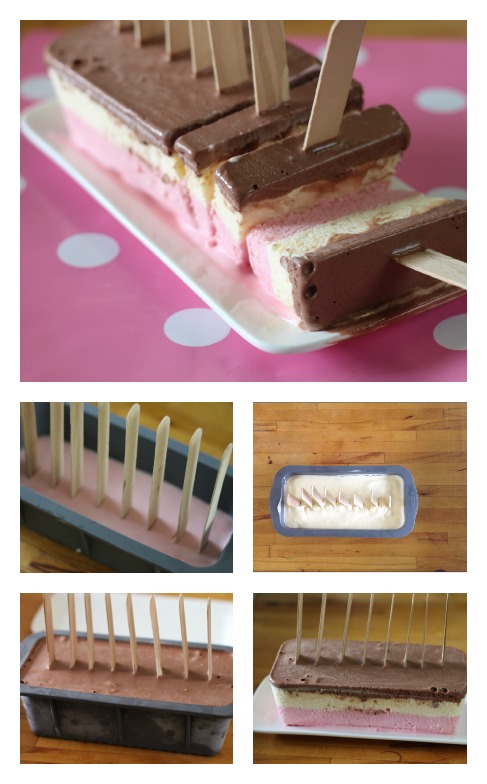
Step 1.åÊPour the melted strawberry ice cream into a silicon loaf pan. Freeze for 2-3 hours or until set, then carefully push the 8 popsicle sticks into the ice cream, an even distance apart.
Step 2.åÊNext, pour in the vanilla ice cream and freeze for another 2-3 hours, or until the second layer has set.
Step 3.åÊPour in the chocolate ice cream and freeze for a further 2-3 hours, again waiting for the final layer to set.
Step 4.åÊRemove from freezer and flex the loaf pan (the same way you would pop an ice cube out of the tray) to remove the ice cream block. Slice in between popsicle sticks and serve.
Note
I recommend that you pop the serving dish in the freezer too. This helps it stay cold while you are serving.
If you don’t have a silicon loaf pan, you could line a rigid cake pan with baking paper and then dip it in warm water to turn the cake out.
I used neapolitan flavours but you can use any ice cream that you like. Peanut butter, caramel and chocolate flavours would also be nice.
This recipe was created by Jennifer Cheung foråÊKidspot, New Zealand’s beståÊrecipe finder.
In a frying pan heat a tablespoon of vegetable oil and fry the beef strips in small batches to brown and seal in the flavour. Add a little more oil to the pan as you need it. Making sure that the pan is very hot as you begin each batch. Set aside in a warm place.
In the same frying pan cook the onions with the garlic, tomato paste, stock powder, paprika and mushrooms until the onions are translucent.
Add the water and beef and simmer for 5 minutes.
Stir through the sour cream and parsley.
Serve on steaming hot fettucine or rice.
Notes
When you slice the rump steak for this dish, make sure that you slice thin slices across the grain of the meat so it is tender.
If you pay attention to the method of this dish, the meat should melt in your mouth without being cooked for a long period of time.
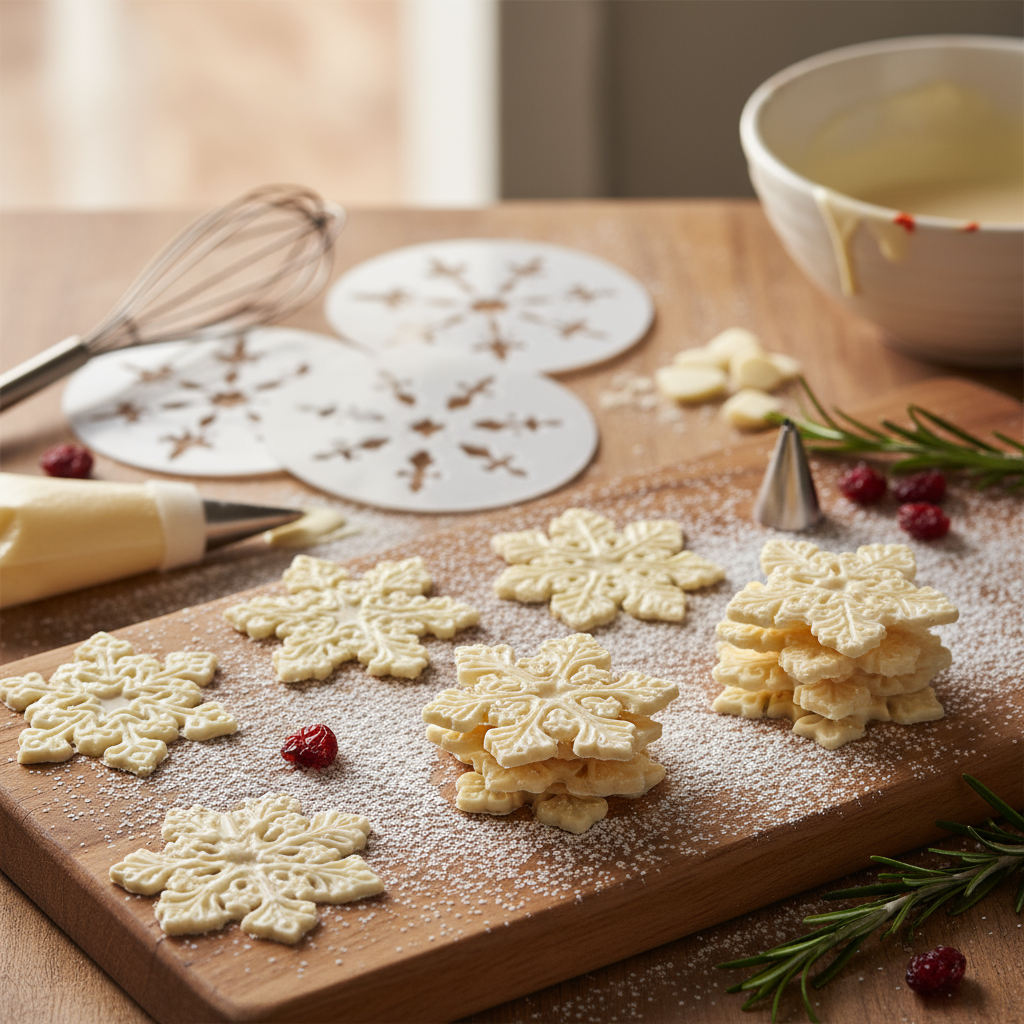
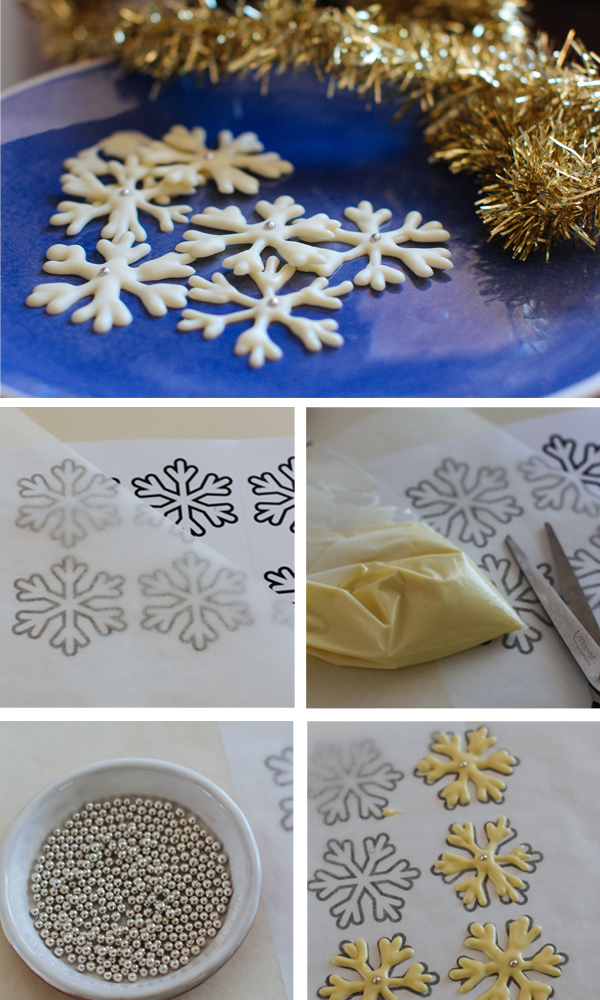
Step 1. Search online for a snowflake pattern that you like, repeat it on a blank document then print out.
Step 2. Melt the white chocolate in a heat-proof bowl over a saucepan of simmering water, stirring until smooth. Transfer to a snap-lock or piping bag.
Step 3. Lay a piece of baking paper over the snowflake stencil.
Step 4. Carefully snip a tiny corner from your bag of melted chocolate and pipe snowflakes onto the baking paper using stencils as a guide. DonÛªt worry if the first one or two donÛªt work out perfectly. This is a real case of trial and error; youÛªll soon figure out how much to squeeze the bag, how best to trace the pattern with chocolate – and the best thing is that any Û÷wobblyÛª ones will still taste delicious. Pop a silver cachou in the centre of each snowflake then set aside to set completely.
Swap white chocolate for milk chocolate or dark chocolate. Or use all three and marble together – fancy!
You could also sprinkle these with edible glitter.
This recipe was created by Sophie Hansen for Kidspot, New Zealand’s best recipe finder: You can follow Sophie on Local is Lovely, Facebook, Twitter or Pinterest.
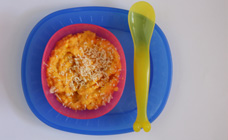
Give little ones a well-rounded meal with this easy carrot, corn and chicken dish.
This is an easy one to make if you’ve already got pureed carrot and corn in the freezer – simply grate in a little chicken from your meal and you’re good to go.
Ingredients
1 carrot
1 cob sweet corn
olive oil, for frying
1 small piece (50g-100g) chicken breast or thigh, or a portion of roast chicken
1 tsp water (or breastmilk/formula)
Method
Peel and chop the carrot and tear off the husks of corn.
Place both the carrots and corn cob into a pan of boiling water. Boil until soft, around 10 minutes.
Meanwhile, heat a little olive oil in a frying pan and cook the chicken until cooked through. Allow chicken to cool.
Remove carrot and corn from water and once corn cob is cooled, cut kernels from the cob.
Place cooked corn kernels and carrot into a blender with a teaspoon of water and blend until smooth. Add more water if needed to get a creamy consistency. Breastmilk or formula could also be used for a creamier taste.
Use a fine grater to grate the chicken over the top of the puree. Stir to combine and serve.
Peel and chop the carrot and tear off husks of corn. Place both the carrots and the corn cob into a microwave-safe container. Place a lid loosely on the container and cook on HIGH for around 2 minutes.
Remove the vegetables from the container and replace with the chicken – cook for another two minutes or until cooked through. Allow the chicken to cool.
Once the corn cob is cooled, cut the kernels from the cob and place in blender with the carrot with a teaspoon of water and blend until smooth. Add more water if needed to get a creamy consistency. Breast milk or formula could also be used for a creamier taste.
Use a fine grater to grate the chicken over the top of the puree. Stir to combine and serve.
Notes:
Serving Suggestions
Note
Up until recently it was advised to wait until baby is 12 months old before introducing corn due to the potential for allergies. Happily, this advice has changed and babies as young as six months old can enjoy sweet corn pureed – a great veggie to mix with chicken and other vegetables such as carrot, sweet potato or pumpkin. If your child has a history of eczema, asthma or other food allergies, ask your doctor first. And don’t feed them whole kernels until around they’re about one year old. Look for signs of an allergic reaction: rash around the mouth area, swelling of the tongue, lips or face, a rash, vomiting or diarrhoea.
Can be frozen for up to four weeks.
This recipe was created by Belinda Graham for Kidspot.
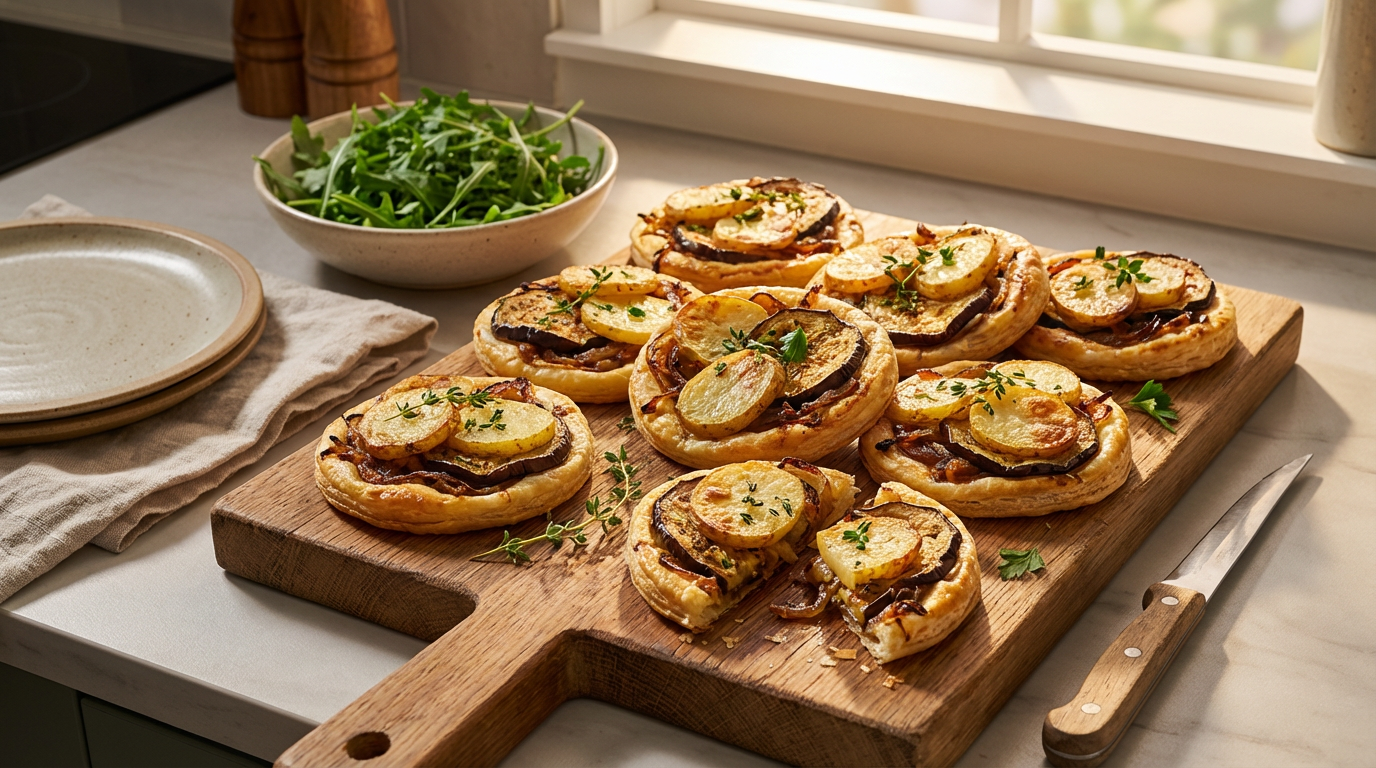
Preheat oven to 200°C conventional (180°C fan-forced)
Heat 1 tablespoon of oil in a large frypan. Cook eggplant slices over medium heat until golden and soft. Remove to a plate. Add 1 tablespoon oil and cook potatoes until tender and starting to brown. Remove to a plate.
Add 1 tablespoon oil and cook onion and garlic over very gentle heat for 6-8 minutes until starting to caramelise. Season well with salt and pepper then stir through chopped parsley.
Use a small bowl or cookie cutter as a guide to cut four circles from each pastry sheet. Place on a tray lined with baking paper. Divide onion mixture between each disc, being sure to leave a border. Top with cooked eggplant and potatoes. Brush a little extra oil on the pastry border.
Bake for 14 minutes until pastry is puffed and golden. Serve with a green salad.
half a cup continental parsley or coriander leaves
8 iceberg lettuce leaf cups
Method
Heat oil in a nonstick frypan over high heat. Cook chicken mince until all browned use the back of a wooden spoon to break the mince up into small pieces. Stir in celery, cook for 2-3 minutes, then add hoisin sauce and water chestnuts, heat through. Remove from heat and stir in parsley or coriander and bean sprouts.
Place one or two lettuce leaves on each plate and spoon chicken mince into leaves. Serve immediately with lots of serviettes!
Notes:
The best way to remove lettuce leaves: turn the lettuce upside down, use a small knife to cut out the stem and then carefully remove each leaf. Wash each leaf and dry with paper towel.
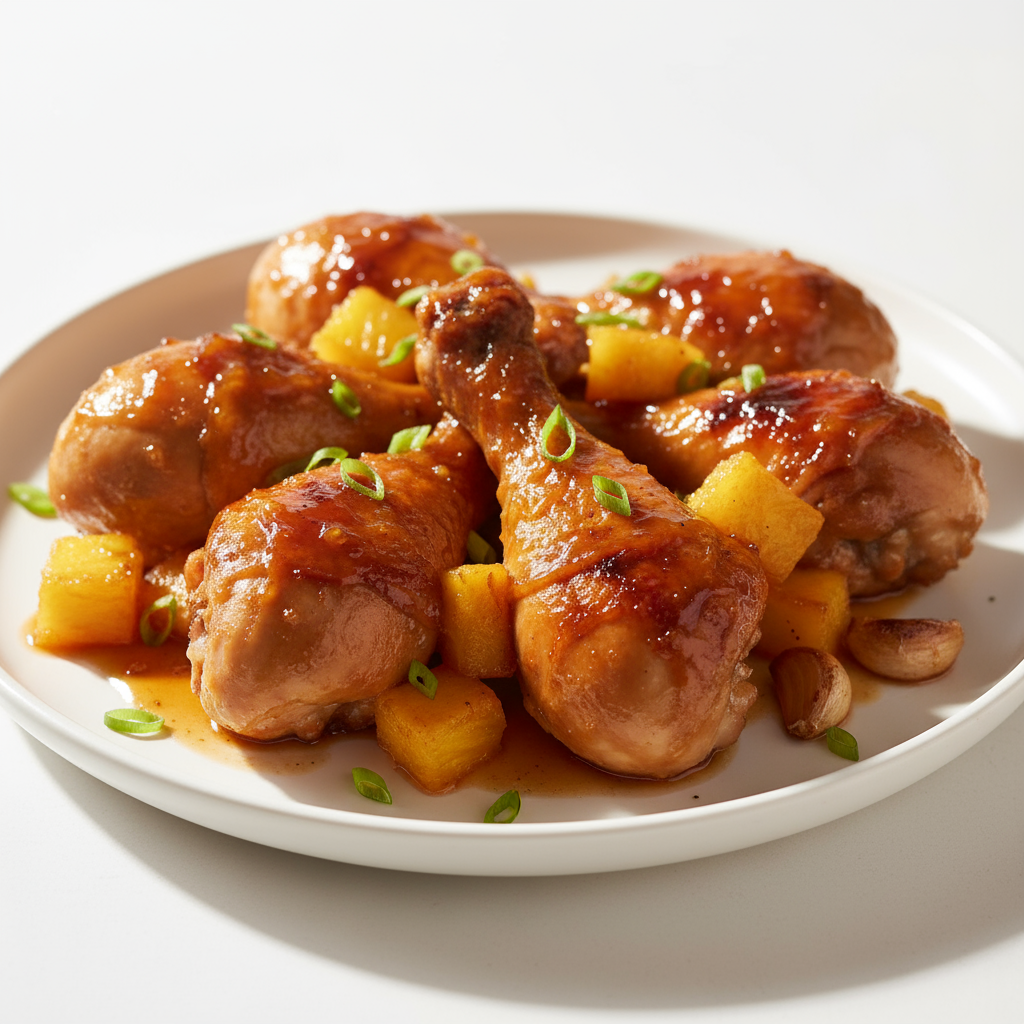
Combine soy sauce, honey, lemon juice and garlic in a bowl and mix well.
Place the chicken drumsticks in an ovenproof dish in a single layer and pour the marinade over the top.
Cover the dish with foil and cook drumsticks in preheated oven for 45 minutes or until the juices run clear when the drumsticks are pierced in the thickest part.
Turn the drumsticks and baste them with the marinade every 15 minutes.
Remove from oven, drain off marinade and cool to room temperature.
Store in an airtight container in the fridge for up to 2 days.
If you want to reheat the drumsticks, preheat the oven to 140ºC. Place the drumsticks in an ovenproof dish and reheat them for 10 minutes or until heated through.
When I finished cooking these I didn’t want to waste that yummy marinade. I reduced it to a third of its original volume in a pan on the stove and poured it over the chicken before serving. It made a delicious sticky sauce.
I also sprinkled a few sesame seeds over these before serving for garnish.
This recipe was created by Jennifer Cheung for Kidspot, New Zealand’s best recipe finder.
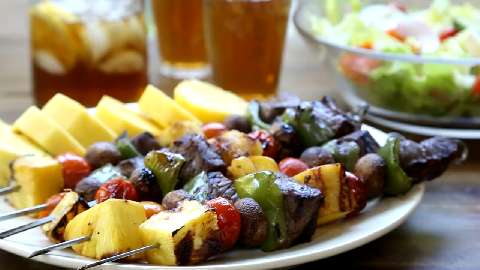
2 cups chopped fresh pineapple (or 440g can unsweetened)
Method
Trim steak and bash mercilessly. Marinate in soy sauce and garlic for at least 30 minutes. If you are using wooden skewers, soak them in water while the meat is marinating.
Thread meat, capsicum and pineapple onto 8-10 skewers. Make smaller skewers for kids. Grill or barbecue kebabs for 8-10 minutes, turning half way though until browned and cooked through (or to your liking).
Notes:
These kebabs are wonderfully colourful and tasty. I am not traditionally a fan of pineapple in savoury dishes, but this combination is great and it might just get the kids interested. Mine were interested.
Serve with steamed rice or a salad to bulk up the meal.
1 x 440g tin of black beans, well rinsed and strained
3 eggs
1/4 cup coconut oil
1 tsp vanilla extract
1/2 cup (75g) sugar-free cocoa
3/4 cup (125g) dark brown sugar
1/2 cup (75g) wholemeal flour
For ganache:
100g good quality dark chocolate, broken into pieces
1/3 cup (80ml) pouring cream
1 tbsp butter
Method
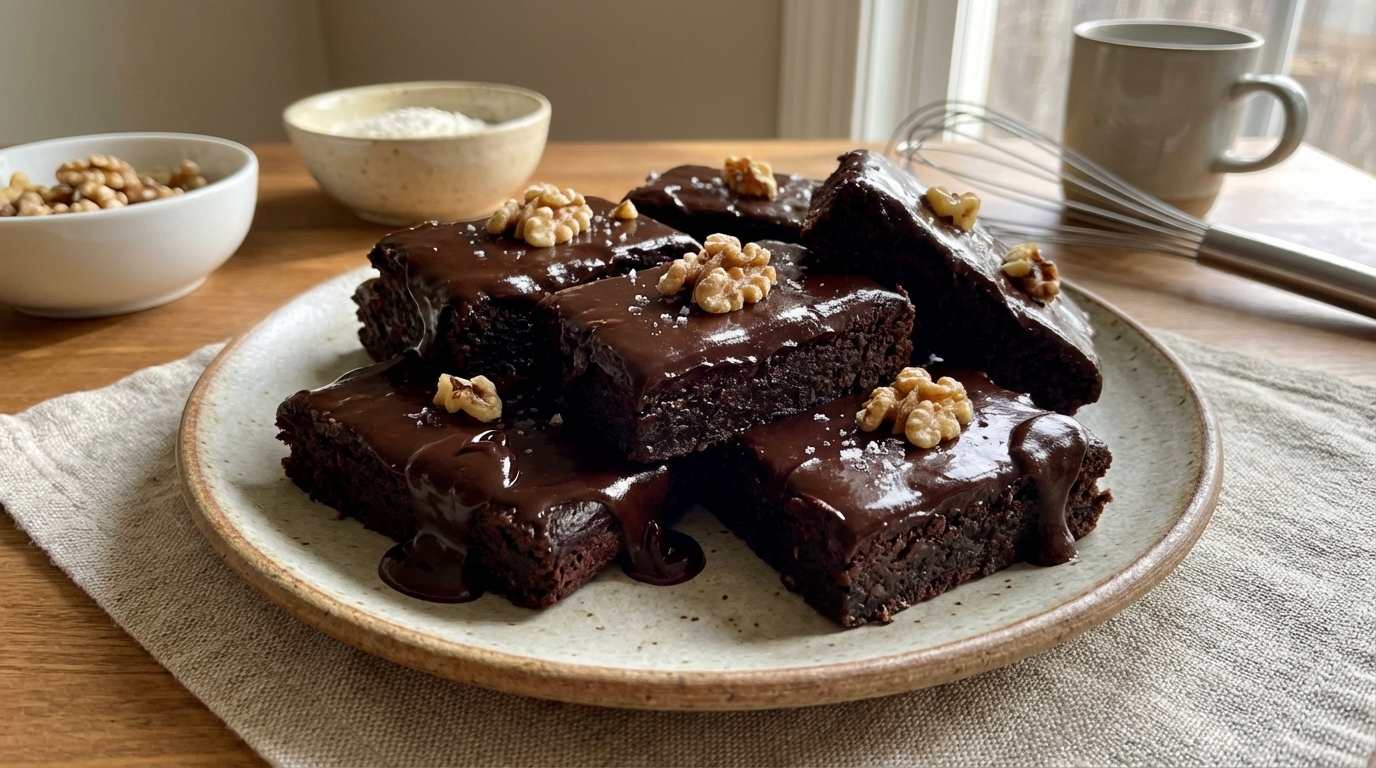
Preheat oven to 180°C (160°C fan-forced). Grease and line a shallow slice pan.
Put rinsed beans and eggs into a powerful blender and pulse until smooth.
One at a time, add the coconut oil, vanilla extract, cocoa, sugar and flour and whiz between additions to prevent clogging up or uneven blending.
Use a spatula to scrape the mixture into the pan.
Bake for 25 – 30 minutes, or until a skewer inserted into the middle comes out clean, then turn out onto a cake rack to cool.
To make the ganache, put chocolate, cream and butter into a small saucepan over low heat, stirring continuously until combined and smooth.
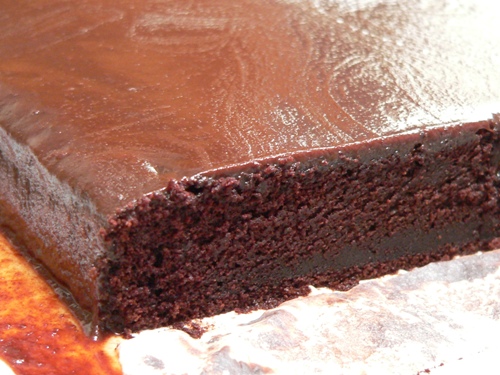
Transfer the uncut brownie slab onto a cutting board and pour the ganache over evenly, smoothing with a knife. Wait 10 minutes, or until the ganache sets, before slicing into 16 even fingers.
Serving Suggestions
Note
The black beans add a certain dense texture to the finished product, which is offset by the icing. If you can’t get a hold of black beans, kidney beans would work nicely, too.
If you have a wheat intolerance, you could substitute the wholemeal flour for spelt or whichever flour you prefer. And if you don’t have any coconut oil to hand, butter will work in this recipe just as well.
These Healthy chocolate brownies are made with agave nectar to make them naturally sweet, and pumpkin to keep them nice and moist.
The yummy biscuit base on these Anzac brownies give these little bites a lovely crunchy edge.
Crank up your regular brownie offering and serve up a batch of these Double choc fudge brownies instead. They are every chocolate lover's dream come true.
Give ordinary brownies a sweet little Easter twist, with these Caramello egg brownies. They're almost too cute to eat!
Here's an easy to way to make a really decadent treat. These Tim Tam brownies are better than you can possible imagine.
Any time you get a mid-afternoon chocolate craving, just whip together this Microwave brownie for one! You can thank us later.
Here's a novel way to sneak an extra serve of veggies into the kids' diet. These Zucchini brownies taste so much better than they sound!
If you're a traditionalist, then you can't go wrong with this recipe for Easy chocolate brownies. Best served with a mug of hot tea or a glass of warm milk.
This recipe was created by Katie Rainbird for Kidspot, New Zealand's best recipe finder. You can follow Katie at Katie180.
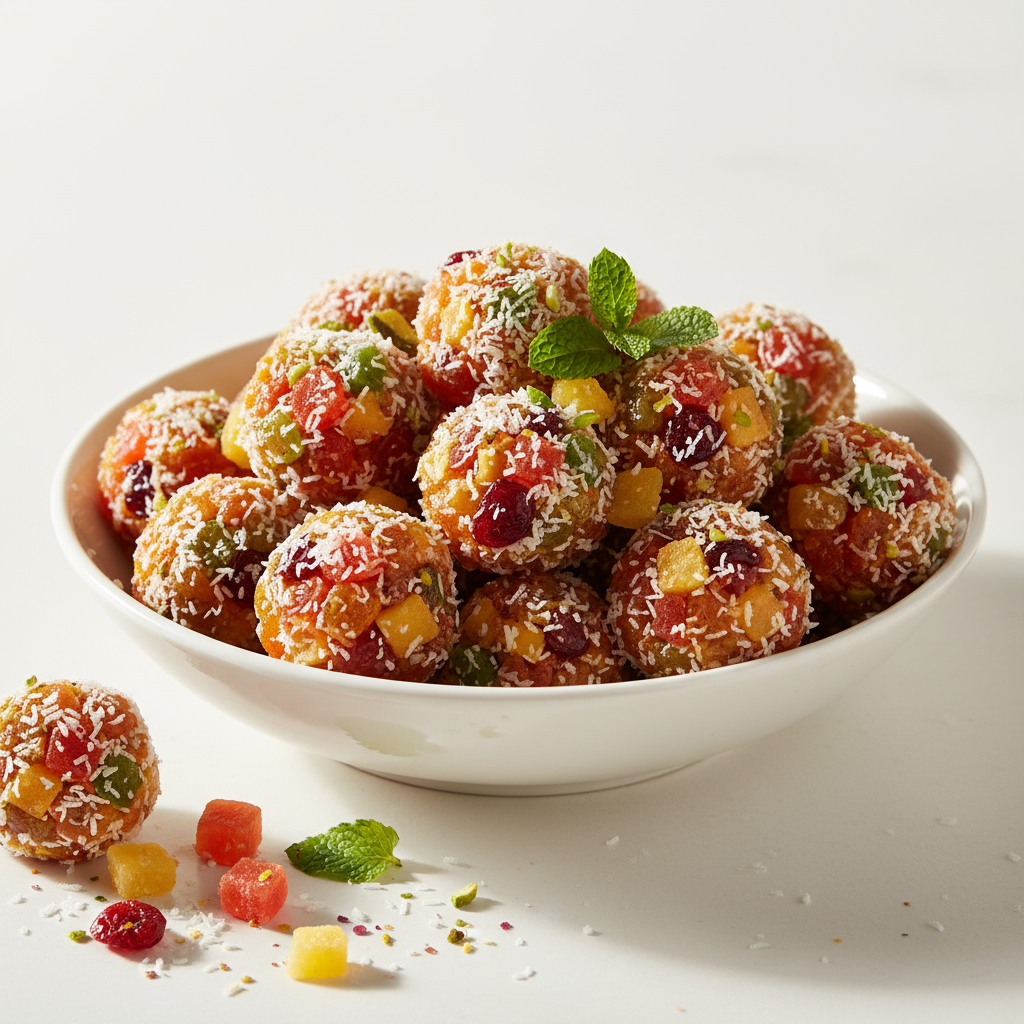
1 cup mixed fruit (can be glaced cherries, apricots, sultanas or a mix that you like)
1 can sweetened condensed milk,
Half a plain sponge cake (crumbled)
Optional grated chocolate
Melting chocolate (for rolling or dipping)
Tiny marshmallows (optional)
Method
Place all ingredients in the bowl (except for melting chocolate) and mix together.
Shape into balls and either roll in coconut, or dip in melted chocolate and then add marshmallows for a cool look, or you can roll in Nestle ‘Quik’ and sprinkles for variety and colour.
Great for parties and letting little hands get messy!.
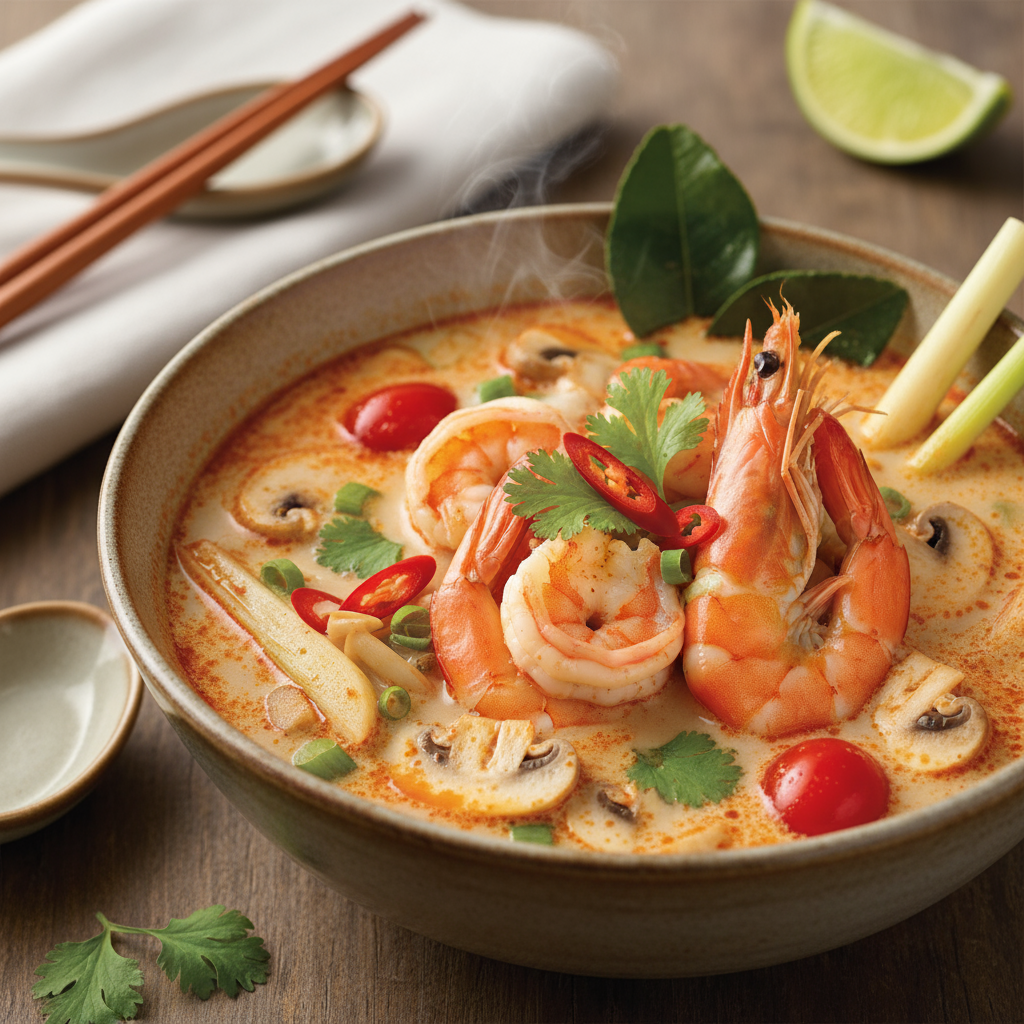
Bring water to boil in a saucepan and add Tom yum paste.
Stir well to dissolve and add vegetables.
Simmer for 5 minutes and add prawns.
Cook for a further 3 minutes and serve garnished with coriander.
Serving Suggestions
Note
Most Thai recipes are written per person and when testing this recipe I discovered that the paste satchet is just exactly enough for one person, therefore if you are making this for a family of four you will need 4 satchets.
This is a really refreshing soup and I love the hot and sour aspects of it coupled with the crunchy prawns.
This recipe was created by Jennifer Cheung for Kidspot, New Zealand’s best recipe finder.
Homemade choc tops are always a hit in our house, even more so when made with this yummy cherry ice cream!
Makes six small cones
Ingredients
1/2L best quality vanilla ice cream, softened
1 handful fresh cherries, pitted and torn in half
400g milk chocolate
6 mini waffle cones
Method
Step 1. Scoop the soft ice cream into a large bowl then mix through the cherries and 100g of the chocolate, chopped. Return the ice cream to the freezer to firm up a bit.
Step 2. Melt the remaining 300g chocolate in a bowl over a saucepan of simmering water and set aside to cool just slightly.
Step 3. Scoop a ball of ice cream into one of the waffle cones and press down gently so it is wedged in nicely. Then turn the cone into the bowl of melted chocolate, swirling it around so all of the ice cream is nicely covered.
Step 4. Pop straight into the freezer, I find it’s easiest to put them in small jars or little milk bottles to keep the cones upright. Once they’re frozen, they can be laid flat. Enjoy!
Notes:
Serving Suggestions
Note
Use any flavour ice cream you fancy here. And please swap the cherries and chocolate for any other combination.
Roughly chopped honeycomb is also delicious!
Swap the milk chocolate for white or dark if you prefer.
As soon as you’ve dipped the cone in melted chocolate, sprinkle with crushed nuts or hundreds and thousands.
If you don’ t have any ice cream you can cheat and use our 2 ingredient ice cream recipe for a treat.
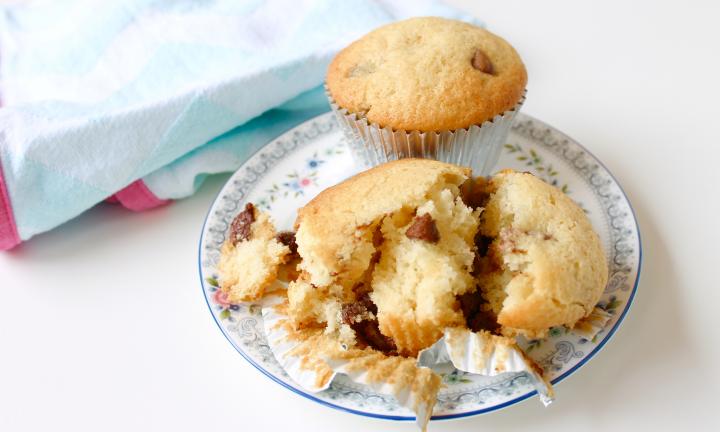
Preheat oven to 180°C (160°C fan-forced). Line a 12 cup tray with patty cases.
Cream the butter, sugar and vanilla essence with electric beaters. Add eggs and beat well. Add milk and self-raising flour. Mix with wooden spoon to combine then beat with electric beaters until ingredients are incorporated (don’t overbeat, or cupcakes will be dry and firm). Spoon into patty cases.
Bake for around 12-15 minutes, or until golden. Cool on wire racks.
Once the cupcakes are cooled, ice them with white icing. Use horizontally halved marshmallows as noses, with black jelly beans as snouts. Draw a mouth with black writing icing. Use brown mini M&Ms for eyes. Cut marshmallows in halves vertically and place cut-side down as ears.
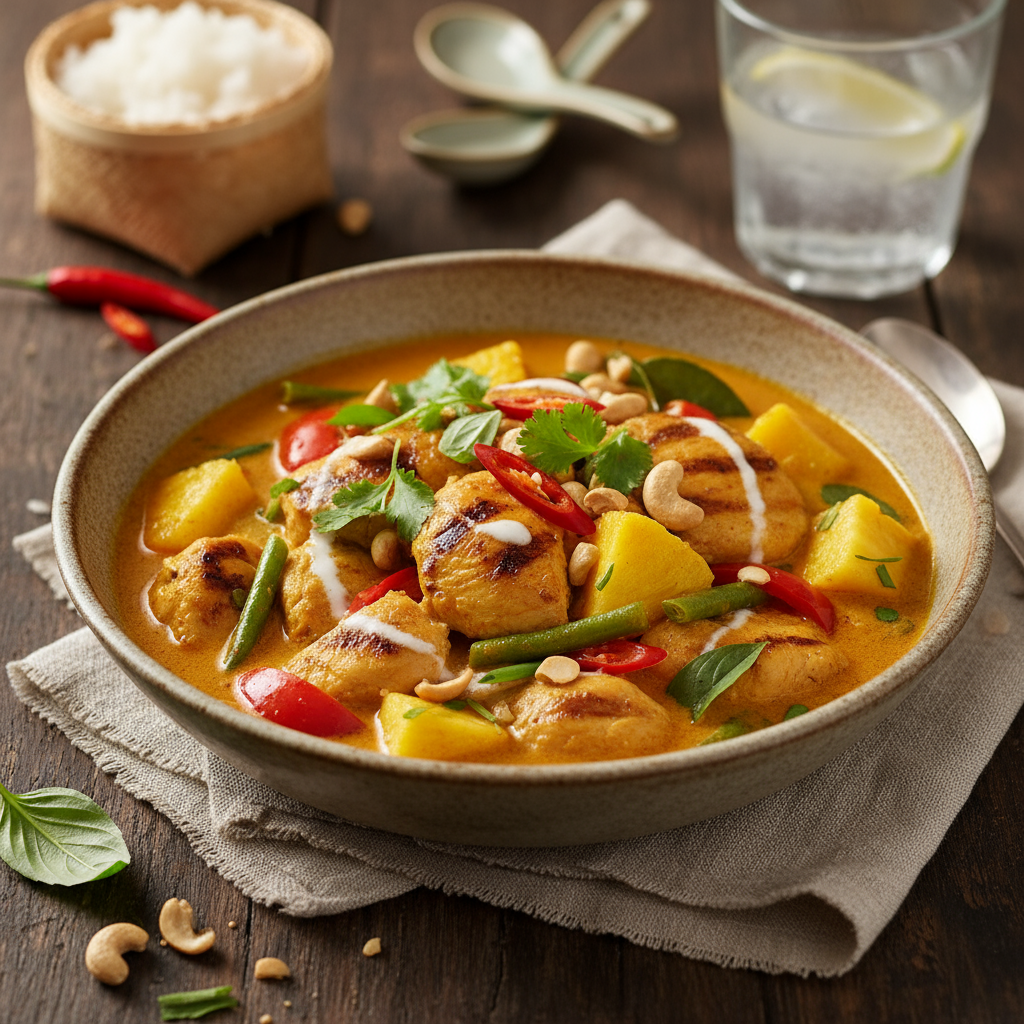
Spicy but not too hot, this Thai Chicken and Tropical Gold Pineapple curry is one to try for all the family.
Ingredients
1 tbsp oil
500 g boneless chicken breast, cut into strips
1 onion, chopped
2 tbsp mild curry paste
3/4 cup chicken stock or water
2 teaspoons fish sauce
½ tsp finely grated lemon or lime zest
2 tbsp lemon or lime juice
½ tsp sugar
1 cup coconut cream
½ Dole Tropical Gold pineapple, cut into chunks
pepper
2 tbsp chopped coriander
Method
Heat the oil in a frying pan over medium heat. Add the chicken and cook until brown. Remove from the pan and set aside.
Add the onion to the pan and cook for 2 to 3 minutes. Add the curry paste and cook for a further minute.
Return the chicken to the pan with the chicken stock or water, fish sauce, lemon or lime zest and juice, sugar and coconut cream. Simmer for 15 minutes or until the chicken is cooked and the sauce has thickened. Add extra water if necessary.
Add the pineapple and season with black pepper. Cook for a further 2 minutes.
Stir in the coriander before serving.
Serve with steamed rice.
Find more Delicious Dole Tropical Gold Pineapple recipes:
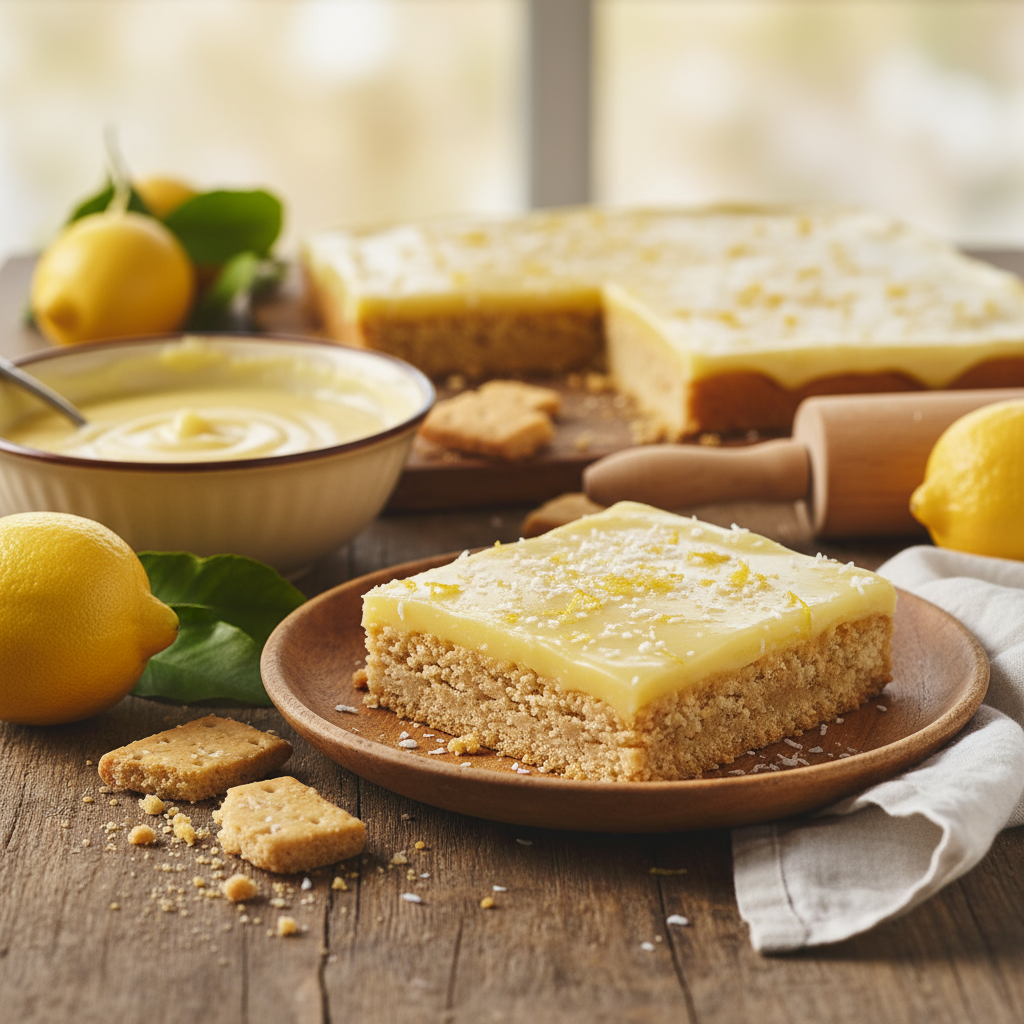
2 x 200g packets shortbread biscuits (I used Paradise Butterscotch Shortbread)
2 cups desiccated coconut
400g can skim condensed milk
125g butter, melted
Zest of 1 lemon, finely chopped
Icing
2 cups icing sugar
30g butter, softened
2-3 tablespoons fresh lemon juice
1 tablespoon desiccated coconut
Method
Grease a 20cm x 30cm slice tin with butter.
Use a food processor to crush the biscuits, this takes 2-3 batches (if you donÛªt have a food processor, put the biscuits in a strong plastic bag and roll/smash/crunch with a rolling pin).
Place crushed biscuits, coconut, lemon rind and condensed milk in a large bowl.
Melt butter and add to other ingredients, mix well. Firmly press mixture into tray.
To make icing, sift icing sugar into bowl and stir in butter. Add lemon juice one tablespoon at a time until icing is a smooth, spreadable consistency.
Spread slice with icing, sprinkle with coconut, refrigerate until firm and then slice into squares or triangles. Store in the fridge.
Notes:
You can make this recipe in stages. I usually make the base, refrigerate overnight and then ice the next morning ÛÓ also easier to ice when the base is cold ÛÓ then slice when you get a chance.
1/2 cup (125ml) shao tsing wine (Chinese rice wine)
2 tbsp red wine vinegar
1 tsp sesame oil
1 cup shallots (green onions), sliced
Method
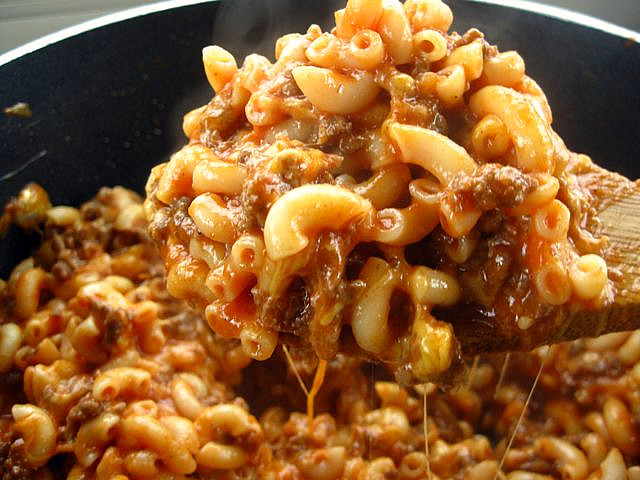
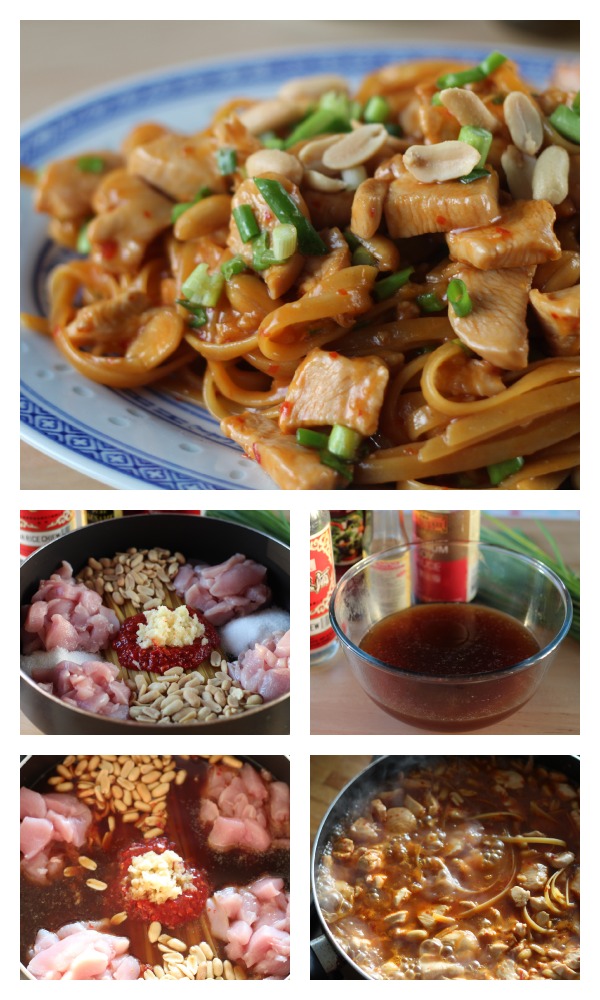
Step 1. Place pasta, chicken breast, sugar, peanuts, chilli garlic sauce and garlic in a frying pan. In a bowl, mix together stock, soy sauce, wine, vinegar and oil.
Step 2. Pour stock mix into the pan and bring to the boil over high heat.
Step 3. Reduce heat to simmer and stir constantly until there is just enough sauce to coat the pasta and it is cooked al dente. Add more water if required.
Step 4. Remove from heat and stir through shallots. Garnish each serving with a sprinke of peanuts and serve.
Note
My chef father would be mortified to see this dish. In Chinese cuisine you don’t add pasta to a dish and you definitely don’t use the one-pot method. But I am a time poor mum and a tasty, fast meal will win every time!
The chilli garlic sauce I used in this recipe is Lee Kum Kee brand and the shao tsing wine can be found in the Asian grocery section of most stores.
This recipe was created by Jennifer Cheung for Kidspot, New Zealand’s beståÊrecipe finder.
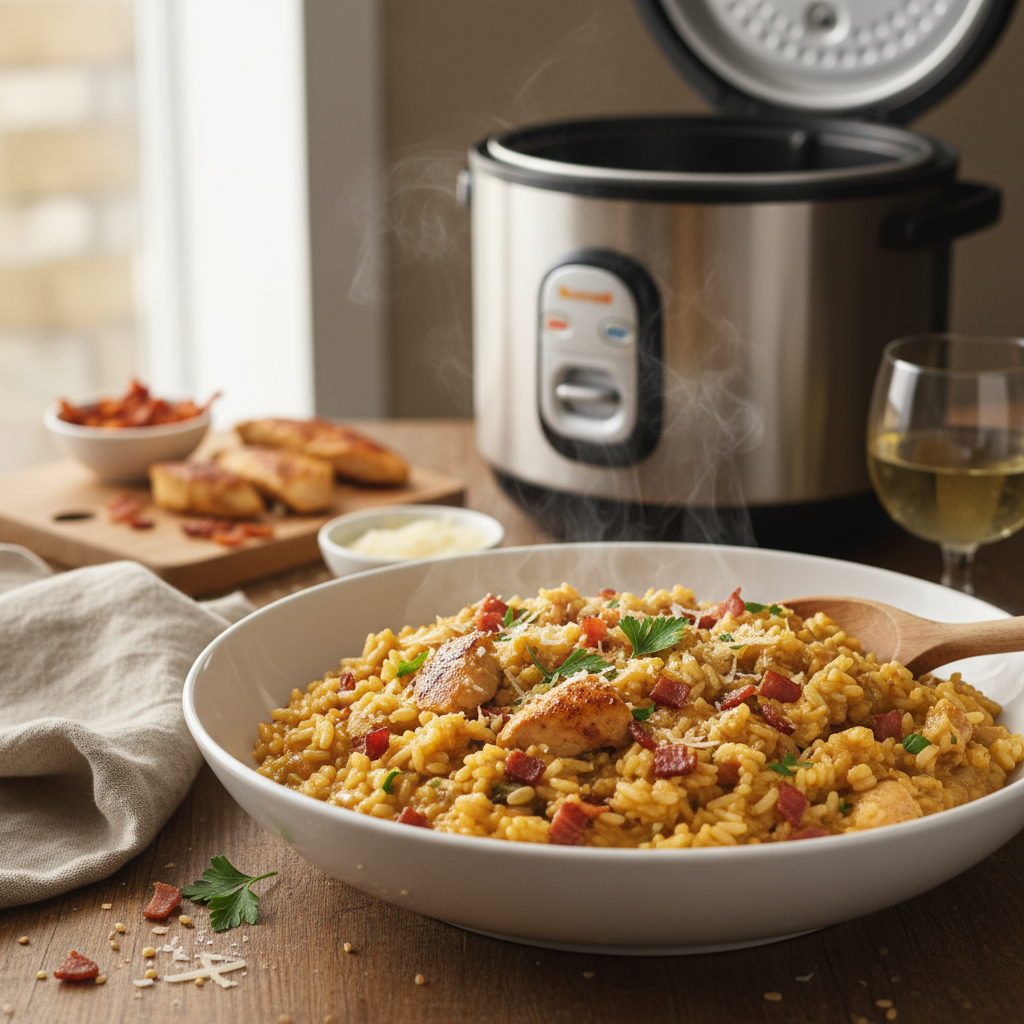
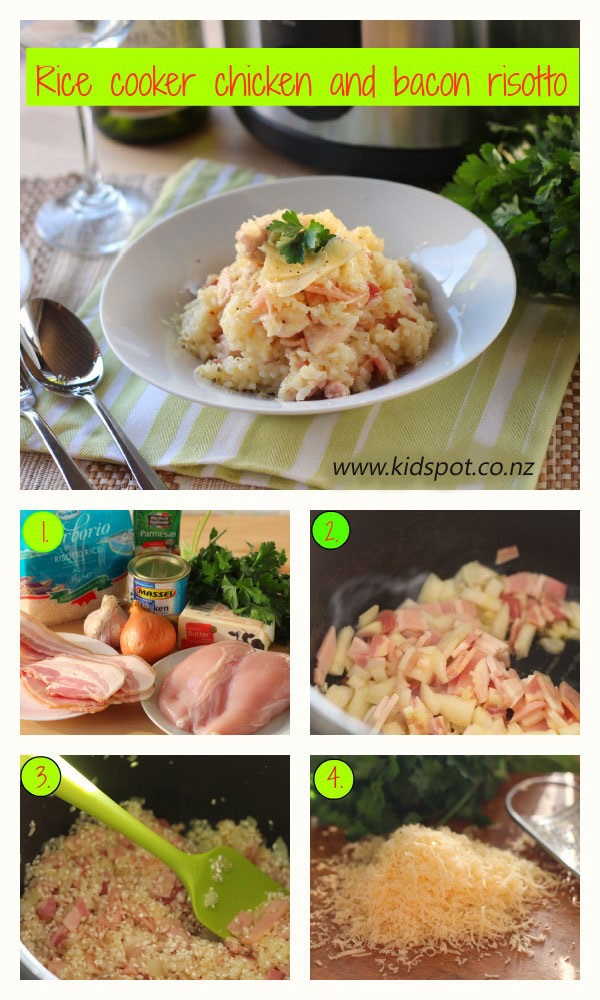
Step 2. Set the rice cooker to cook position and place butter, garlic, onion and bacon into the bowl. Fry until the onion is translucent.
Step 3. Add the rice and cook for 2-3 minutes ensuring that the grains are coated in the butter. Add the stock powder, boiling water and chicken. Stir to combine, making sure the cook button is still down.
Step 4. Cook for approximately 15-20 minutes or until the rice is cooked but still has a firm bite. If it is a little dry just add a few tablespoons of water and stir. Stir in parmesan cheese, garnish with parsley and serve.
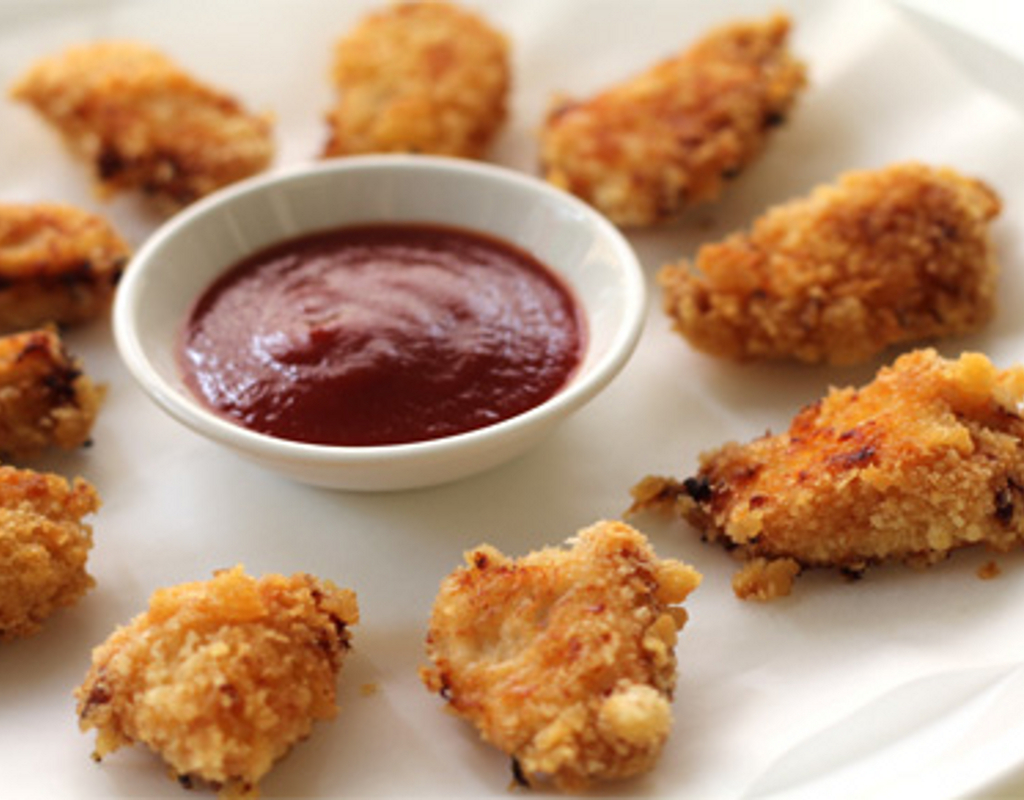
Tear bread into pieces and whiz in a food processor to get fine bread crumbs.
Slice chicken breasts into bite size pieces. Put the flour on a large square of baking paper.
Whisk eggs in a small bowl. Mix breadcrumbs, cornflake crumbs and parmesan cheese in a bowl. Coat the chicken pieces in flour, dust off, dip in egg wash and then coat in crumb mix. You may need to press the crumbs on. Place the coated chicken pieces onto a baking tray lined with baking paper. Refrigerate for 30 minutes.
Preheat oven to 180C and bake the chicken for 10 minutes or until cooked through. To make the dipping sauce, combine mayonnaise and sweet chilli sauce in a small bowl.
Serve nuggets with dipping sauce.
Notes:
This is a great entree or appetiser and prepare in advance and then just bake before serving. Serve with a potato salad and/or green salad for a main meal.
I love sweet chilli mayo, but my kids are more than happy to stick with good old tomato sauce.
Preheat oven to 180°C or 160°C fan-forced. In a 27cm x 19cm ovenproof dish, combine the mushroom soup, chicken soup, cream and stock powder.
Add the chicken and vegetables and combine.
Place pom poms carefully over the top and bake for 45-50 minutes.
Notes:
This dish was inspired by the Duggar family Tater Tot casserole but I have varied a few things so New Zealand families can find the ingredients here. I also added 500g of vegetables so it is a meal in a dish.
You can use a rotisserie chicken in this recipe. One whole barbecued chicken de-boned is equal to 500g of cooked chicken.
This recipe was created by Jennifer Cheung for Kidspot, New Zealand’s best recipe finder.
Pick up a skewer/toothpick; slide on a strawberry followed by a marshmallow, making sure the marshmallow covers the tip.
Dip one half of the strawberry/marshmallow combo in melted chocolate and then dip it into the sprinkles.
Place on a plate and wait for choc to set (5-10 minutes depending on weather)
Eat!
Serving Suggestions
Note
Kids of all ages LOVE to make these.
I went to the local day care centre and got the preschoolers to make these and there was lots of excitement. I even heard the comment ‘I want one with a strawberry too’!
You can swap strawberries for other fruit, and you may want to swap sprinkles for coconut, nuts or even currants.
Recipe created by Camilla Baker for Kidspot, New Zealand’s best recipe finder.
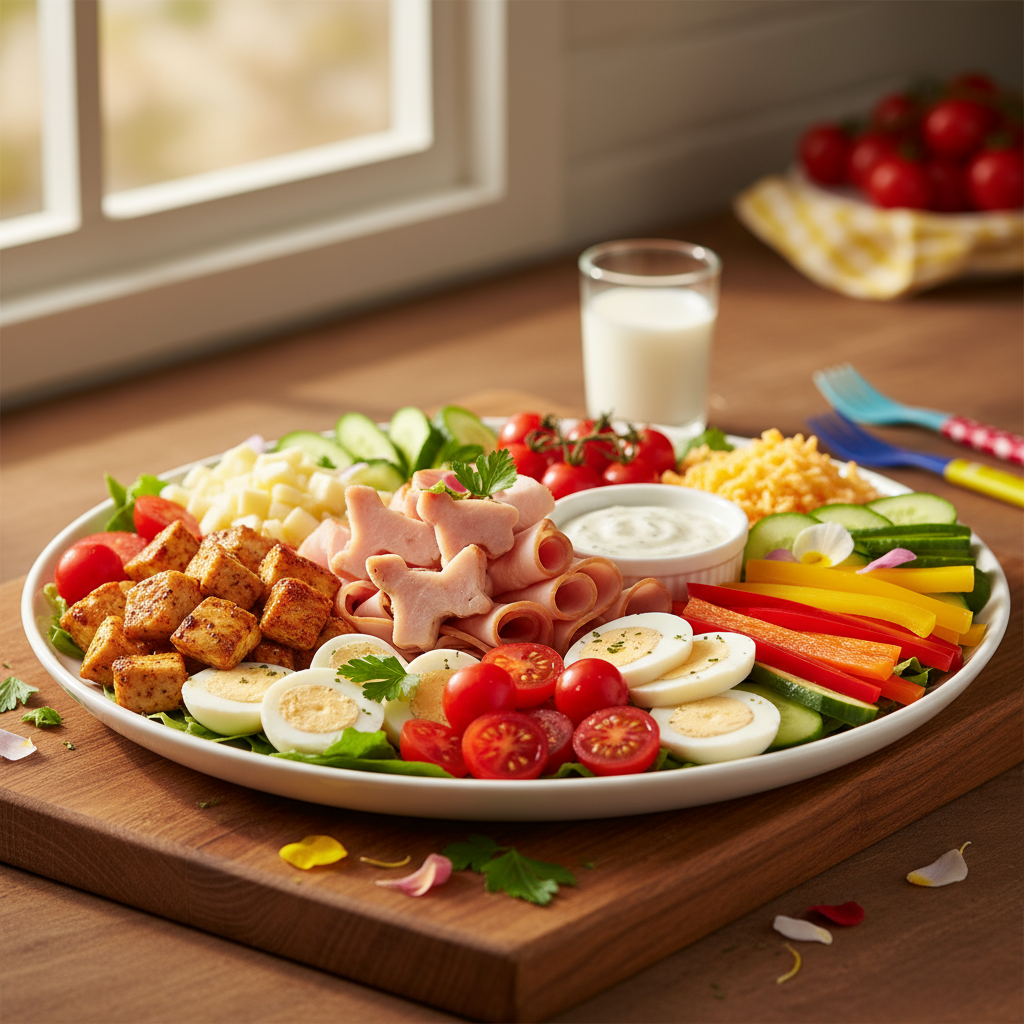
Prepare vegetables – peel and cut carrot into long sticks; cut cucumber into strips, remove inner seeds if you like; slice tomatoes into halves, slice capsicum.
Prepare proteins – roll up ham slices or cut into long strips. Cut cheese into long strips.
Arrange all ingredients on a plate in groups of individual foods so the child can choose what they like.
Serve with soft wholemeal bread and a glass of milk. Let your child eat with their fingers.
Cheese and ham are the cornerstone of a Chef’s salad but after that it’s really what you’ve got hanging around in the fridge. Any combo of vegetables and cold meats or chicken works well. Sometimes I like to add green grapes or a few blueberries for a sweet note.
If your child is fussy about eating their food separately, arrange the long strips in a nice pattern, grouping the single foods together so “nothing touches each other”.
This recipe was created by Catherine Saxelby for Kidspot, New Zealand’s best recipe finder.
You will need four rabbit (or egg or chicken) moulds for this recipe.
Melt the chocolate in a heatproof bowl over a saucepan of simmering water (bowl shouldn’t touch the water). Or in the microwave on medium heat in 30 second intervals.
Coat the inside of each mould with chocolate – use the back of a spoon, a pastry brush or a clean paintbrush. Keep the edges of the mould smooth. Refrigerate for 10 minutes until set, then do another ‘coat’. Refrigerate for an hour.
Carefully press the rabbit halves out of the moulds and use some melted chocolate to join them together.
Serving Suggestions
Note
The number of bunnies or chickens or eggs you will make depends on the size of your moulds (obviously).
Hide some little Easter eggs or lollies in the rabbits by placing some in one half before sealing them together.
Preheat oven to 180°C (160°C fan-forced) and grease and line a 20cm x 30cm rectangular cake tin. Combine all cake ingredients using an electric mixer and beat for 5 minutes. Spoon into prepared cake tin and bake for 30 minutes or until the cake is golden and a skewer comes out clean. Let cool in tin for about 5 minutes before turning out to cool completely on a wire rack.
For the icing, combine all ingredients except the icing sugar in a saucepan on medium heat. Cook, stirring often, for about 3 minutes, or until the butter melts and you have a lovely thick sauce. Remove from heat and set aside to cool completely. Beat in the icing sugar until smooth.
Once the cake is completely cool, spread over the icing. A palate knife makes this much easier, and if the icing feels a bit thick, dip the knife in hot water before smoothing and it will be much easier.
Now to decorate! Let the kids’ imaginations run wild with this … We used Smarties to ‘outline’ each grave, then finely crushed Oreo biscuits to resemble freshly dug graves. Use any little ghoulish toys you have handy, too.
Serving Suggestions
Note
You could skip making your own cake and just ice a slab sponge from the bakery or supermarket but the recipe below is super easy and takes only 5 minutes to put together.
Make it a chocolate on chocolate affair by adding a few tablespoons of cocoa powder to the cake mixture before beating.
If the writing icing is stiff in the tube just hold the tube in your hand for a minute or two to soften it up.
Place rice and water in a saucepan, cover and bring to the boil. Reduce heat to a simmer for 10 minutes. Turn off heat and leave for 10 minutes covered.
Spread rice into a container and allow to cool, then sprinkle with combined vinegar and sugar. Stir thoroughly.
Use scissors to cut a sheet of nori in half. Place nori shiny side down on the bamboo mat. Place some of the rice on the sheet, press down with wet fingers to a depth of 0.5cm, leaving a 1cm gap at one end. Arrange fillings on top of the rice.
Start rolling up from the end with fillings. Lift the bamboo mat and roll tightly. Wet the strip at the end and push gently to seal the edges. Slice into six or eight pieces using a sharp, wet knife.
Place on a serving platter, cover with plastic wrap and refrigerate for 30-60 minutes to allow the nori to soften.
The kids will love helping prepare these sushi rolls. And the baby pieces are a great way to introduce sushi to the little ones. Although my daughter insists she likes the large hand rolls, like in the shops.
I like to lay the filling on top of the rice, but it might make it easier for the kids if you finely chop the filling and stir it through the rice. This would be a good way to sneak in some fish, prawns and ‘unmentionable vegetables’.
Leftover Chicken strips were fantastic in these sushi rolls.
Recipe created by Melissa Hughes for Kidspot.
close
Join the Catch Up
Join our community of parents and let the Kidspot Catchup be your guide to creating unforgetable family moments.