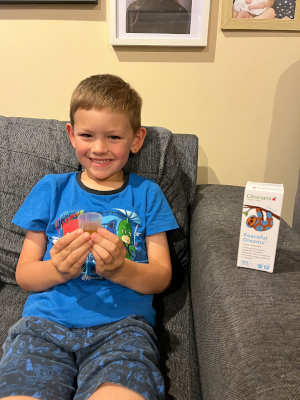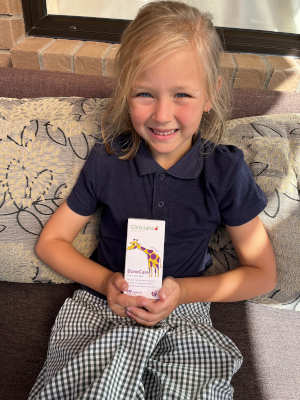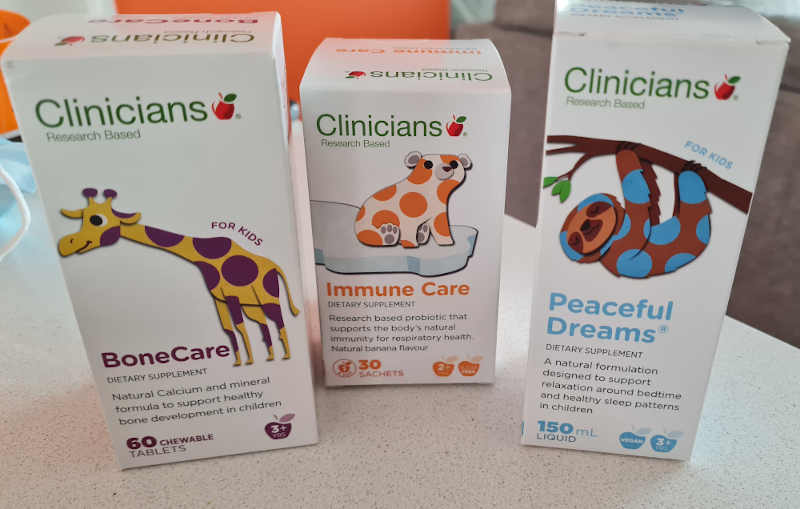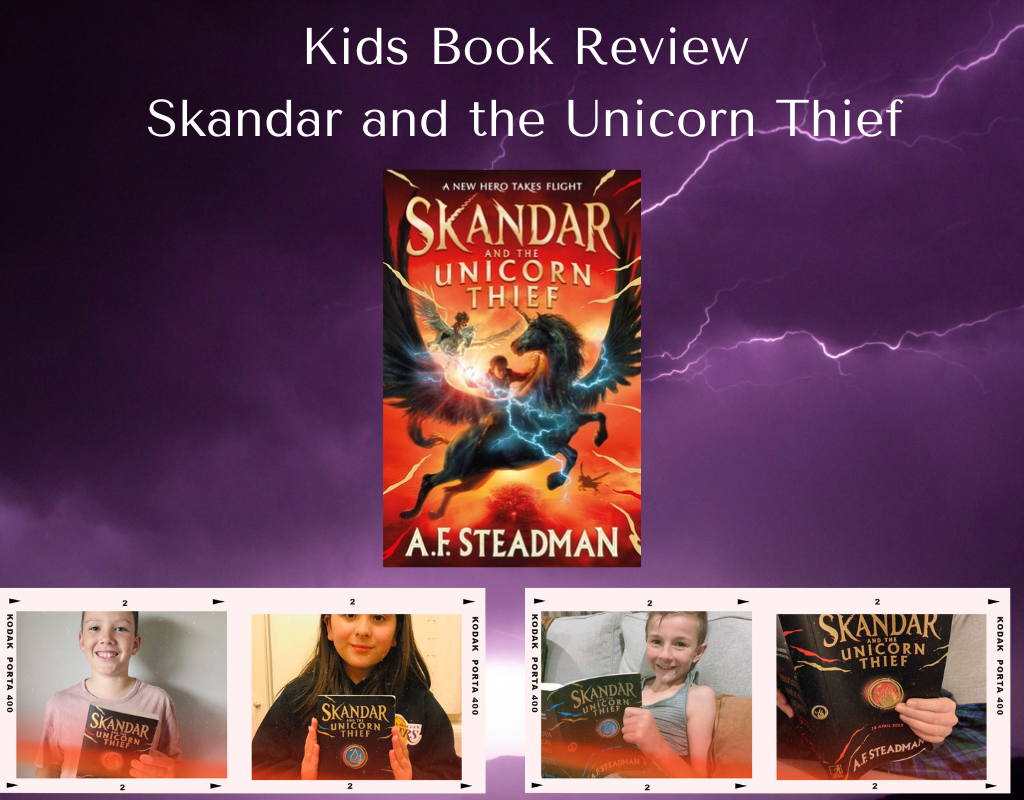
Quorn Vegan Roarsomes

Star rating

Tried and tested by Kidspot parents

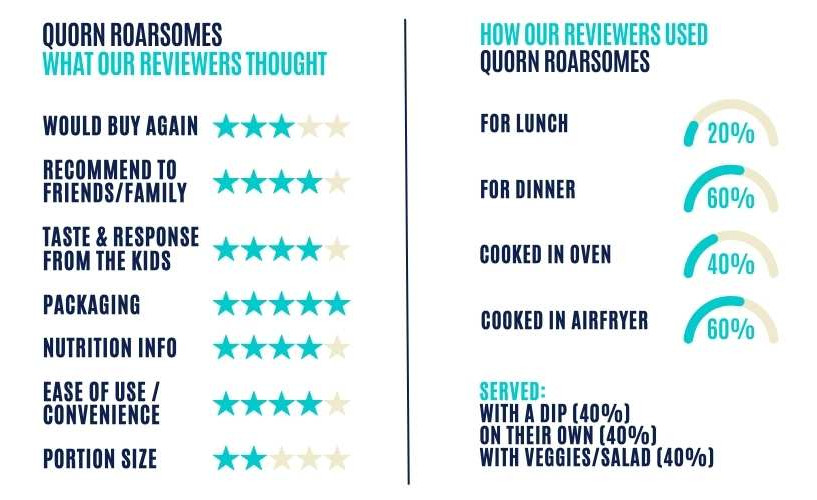
Kidspot parents gave Quorn Roarsomes an overall rating of

3.8 out of 5

Try NEW Quorn Roarsomes – a healthy, meat-free alternative to a chicken nugget!

Totally vegan, dino-liciously crispy, and tasty – that’s new Quorn Roarsomes! These savoury dinosaur-shaped crunchy nuggets make mealtime fun. They’re also an exceptionally healthy meal option for the young (and the young at heart!) boasting a 5-star health rating.

🦖 What’s in Quorn Roarsomes?

Quorn Roarsomes are made with mycoprotein, coated in breadcrumbs. Mycoprotein is a highly nutritious plant-based protein, which is derived from a natural micro-fungus (Fusarium Venenatum). The fungus is fermented in a similar way to yogurt, which promotes growth of the mycoprotein and from the mycoprotein, Quorn is made.

🦖 Why Quorn Roarsomes are good for kids

Quorn Roarsomes are a healthy and convenient vegan meal option that adds fun and deliciousness to any meal.

  • High in protein
  • 5-star health rating
  • Great source of fibre – 8.4 g per 100g
  • Low in sodium – 620mg per 100g
  • Low in saturated fat – 900g per 100g (chicken nuggets have a minimum of 1200g of saturated fat per 100g)
  • Soy-free

Quorn Roarsomes are available at Countdown and selected New World and PAK’nSAVE stores.

For further information, visit Quorn.co.nz.

🦖 Read the reviews!

We’ve given 10 families the chance to trial and review Quorn Roarsomes. See their photos below and scroll down to read more reviews in the comments.

Overall I thought they were a fun alternative to meat and like the fact that they are healthier than other options like chicken nuggets. They were also super easy to prepare and crisp up nicely & have a good texture.

sarah.elizabeth158

The boys were super excited that they were in the shape of dinosaurs. They both ate them all up and asked for some more. We would look to buy these at the shops in the future. They were a win in our household.

Katnaylan

Golden and crispy on the outside and juicy on the inside. Tasted a lot like your regular chicken nuggets so are a healthier alternative for meat free dinners that your kids will still love (that still have protein in them).

Neha

Quorn Roarsomes

Reviewer notes

  • If you have received the product for review, please scroll to the bottom of the page and add your feedback as a new comment.
  • Upload your review photos/videos to this Dropbox folder.
  • Each selected reviewer will receive: 1 x 240g box of Quorn Roarsomes (6 per pack)
  • By registering for this product trial, you agree to the terms and conditions. Please note that comments, images, or videos provided by reviewers may be used by Quorn on their website and social media channels to promote the product.

Please note

  • If you are selected to trial, the product will be sent to the address on your profile.
  • Please check your address now to ensure that it is up to date.
  • Not a member yet? Then sign up now.
  • Kidspot Terms and Conditions apply, including: Open to Kidspot members 18+ only. Only available for NZ residents. If you are selected, you will be required to use the product as soon as possible and supply a review, as set out in our review instructions. Your name, email address, and contact phone number will be given to the supplier for the purpose of delivery.

Why Kids Need More Than Just Calcium For Bone Health

As kids, we were told to drink lots of milk to ensure that we grew up with strong, healthy bones. What you may not have realised is that there’s more to bone health than just calcium.

Did you know that the bones in your body reach their maximum strength and density by approximately 18 years for girls and age 20 for boys? Bone development starts in the womb, but optimal bone growth occurs in childhood and teens with around 40% of their bone mass (the amount of bone tissue in the skeleton) being built between 9 and 14 years of age.

So you can see how nurturing your child’s bone health during these growing years can play an important part in ongoing bone density and strength in later life.

What do bones need?

Calcium is necessary for bone health, but it’s not the only requirement. In order for calcium to be absorbed properly into our bones we need Vitamin D. So be sure to send the kids out for some fresh air and sunshine (whilst being sun smart) after their glass of milk!

Other nutrients that are important for bone health include magnesium (for flexibility), zinc, manganese, and boron.

For foods that cater to many of these requirements, you can’t go past leafy green vegetables like lettuce, spinach, rocket, and seaweed, or veggies from the brassica family (broccoli, bok choy, cabbage). They contain calcium, magnesium, and other minerals. They’re also alkaline foods that can help to lower the acidity in the blood. As calcium is also used by the body to reduce acidity, eating these foods can help to ensure that more of the body’s supply of calcium is retained for bone growth.

Other sources of essential minerals and vitamins for bone health include meat, fish, nuts, seeds, legumes, dairy products, and eggs.

The importance of exercise

Another way to support your child’s bone health is to ensure that they are engaging in weight-bearing exercise. Weight-bearing exercise is movement that makes you move against gravity whilst on your feet and can assist in building bone density. Examples are jogging, skipping, dancing, basketball, netball, tennis, etc.

her world julieWritten by Julie Scanlon

Julie is Editor for Kidspot NZ and our MVP. Her hobbies include laughing uncontrollably at her own jokes, annoying her family by asking questions about movie plots, and never taking anything too seriously. She speaks a little Spanish and a lot of Yorkshire. 

Favourite motto to live by: “It ain’t nothing but a thing”

Zeapure VitaScoop Immunity Support

Star rating

Tried and tested by Kidspot parents

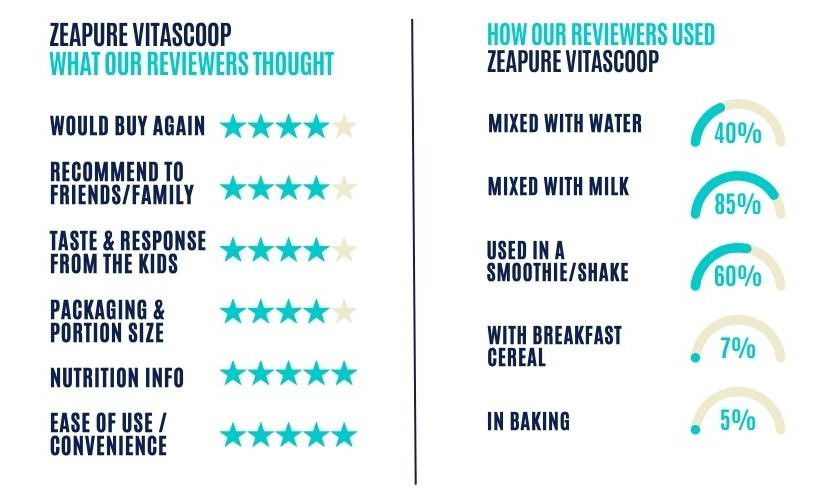
Kidspot parents gave Zeapure VitaScoop an overall rating of

4.3 out of 5

Supercharge every day with Zeapure VitaScoop!

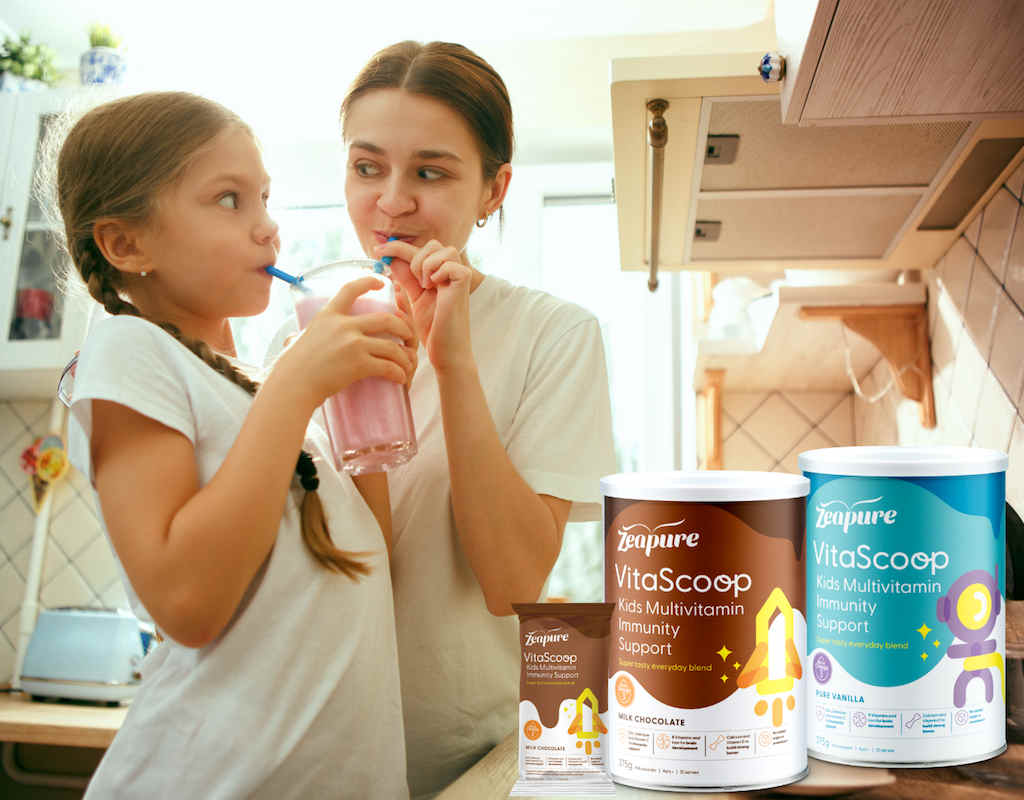
Zeapure VitaScoop is a delicious and convenient family supplement, made in New Zealand from premium dairy. Formulated with essential vitamins and minerals, plus Omega 3 and protein, it’s ideal for kids, teens, and adults.

There’s no added sugar or sweetener, it’s gluten-free, and so convenient – prepare in 30 seconds as a yummy shake or smoothie, with breakfast cereal, in baking, and even on desserts!

Zeapure VitaScoop

With selenium, zinc, iron and vitamin C, Zeapure VitaScoop is an essential immunity boost and is specifically formulated for kids (4-13yrs) and families (14+ yrs). Supercharged with 17 vitamins and minerals, healthy energy, no artificial colours/flavours and natural nutrition from New Zealand farms, Zeapure VitaScoop is available in tasty Chocolate and Vanilla, as value cans or single-serve sachets, from your local retailer or online.

Zeapure VitaScoop is available online or at selected stores nationwide – click here to find your local stockist.

For further information, visit Zeapure.co.nz, Facebook or Instagram.

Read the reviews now!

We’ve given members with a child aged 4+ the opportunity to trial and review Zeapure VitaScoop Immunity Support. See their photos below and scroll down to read more reviews in the comments.

This is amazing for my gluten intolerant kids! Coming home after a league match and having this is amazing! Great single serves, kids love the taste! They wanted more! Loved the vanilla flavour. So good knowing they are having vitamins that they need! Will definitely be getting more.

Timmi6981

I had high hopes that this would be a yummy addition to our blueberry smoothies and I wasn’t wrong. We all found it really delicious! It gave the smoothie an extra oomph of flavour and goodness. I would highly recommend these

briii12

How good is Zeapure VitaScoop?! Reeeeallllllyyyyy GOOD!! According to Mr 4.5yr old and also to me, Mum! My guy loved shaking up his chocolate flavoured VitaScoop and I don’t believe it lasted long in his cup, then we made a yummy morning tea smoothie with the vanilla flavour. Both times he has been filled up for longer and required less snacks between main meals.

amandacam

My 14 is T1 diabetes and she loves it just the fact that it has no sugar is music to my ears and she doesn’t have to worry about at all great to have something that is healthy and good especially for diabetic side of things thank you for creating it

Jovess

My 4 year old hates eating breakfast but we have now found a new alternative, she loves it, especially being able to mix it up herself. She loves it with banana! In her words the flavour is delicious. Miss 14, typical teenager, always wants something quick and easy, this product is perfect! Tastes amazing, can add anything to it (fruit and veges) and the best thing about it, I know her mind and body are getting all the right nutrients. We are definitely purchasing more of this product and if you haven’t yet, just do it, you will not regret it!

tunzdhg

Zeapure VitaScoop

Reviewer notes

  • If you have received the product for review, please scroll to the bottom of the page and add your feedback as a new comment.
  • Upload your review photos/videos to this Dropbox folder.
  • Each selected reviewer will receive 9 x single-serve sachets of Zeapure VitaScoop in each of these three varieties – Kids Chocolate, Kids Vanilla, Family Vanilla.
  • By registering for this product trial, you agree to the terms and conditions. Please note that comments, images, or videos provided by reviewers may be used by Zeapure on their website and social media channels to promote the product.

Please note

  • If you are selected to trial, the product will be sent to the address on your profile.
  • Please check your address now to ensure that it is up to date.
  • Not a member yet? Then sign up now.
  • Kidspot Terms and Conditions apply, including: Open to Kidspot members 18+ only. Only available for NZ residents. If you are selected, you will be required to use the product as soon as possible and supply a review, as set out in our review instructions. Your name, email address, and contact phone number will be given to the supplier for the purpose of delivery.

9 Cheap & Easy Ways To Make Meals Stretch Further

The cost of feeding the family, along with other everyday costs, just seems to keep going up and up. To help make the most of your grocery budget, here are nine easy ways to make family meals stretch further.

Whether you’re wanting to use a small portion of meat or a cheap cut to create a tummy-filling dinner, make meals stretch to feed more people, or cook a larger batch so you have leftovers for another day, these cheap and easy tips will help you make the most of what’s in your fridge, freezer, and pantry.

1. Cheap cuts

Don’t overlook those cheaper cuts of meat just because you think they won’t taste as good. Cheaper cuts such as shoulder, brisket, or meat on the bone can be cooked in your slow cooker until tender and juicy. Slow and low cooking breaks down the toughness and means you get more usable meat for your dollar.

2. Bulk up the protein

By adding cheaper protein sources you can reduce the amount of meat that your dish needs and yet still keep the basic flavour. Chickpeas or lentils are great for adding to curries, casseroles, and stews, while beans (red kidney, pinto, cannellini, navy, black, etc) are great for chillis, hotpots and Mexican dishes. You can also add strips of plain omelette to Asian rice dishes.

3. Veggies, veggies, veggies

Making your meals go further by adding veggies has the added benefit of helping you reach your 5-a-day. Sliced or diced zucchini, carrot, tomatoes, pumpkin, and capsicum are easy additions to casseroles and bakes. You can also grate zucchini or carrot into sauces. Broccoli, cauliflower, or peas are an easy addition to curries and casseroles, especially if you use frozen – just make sure you either soften them in the microwave first or cook them in the sauce long enough to cook through. Baby spinach seems to be great in just about everything and is surprisingly easy to grow at home!

As veggies tend to be cheaper than meat you may also want to introduce a vegetarian meal or two each week into your family dinner plan.

4. Lots of sauce

As long as there’s plenty of sauce to go with pasta or rice, no one really notices if the meat content is reduced. If you use a premade tomato-based pasta sauce, adding a can of chopped tomatoes is an easy option to ensure there’s plenty of sauce to go around. For cream-based sauces, you can add a few dollops of cream cheese or Greek yoghurt. For curries, adding coconut milk or coconut cream will make your sauce go further. It makes the sauce slightly sweeter and less intense, which is often great for kids (and adults who can’t do spice!).

5. Adding easy staples

Staples like rice, pasta, and potatoes are great for bulking up meals. Add rice to curries and Mexican dishes. Pasta can be added to soups, while potatoes are also great in curries, casseroles or stews. Experiment with other grains too like couscous and quinoa. Staples are also an easy way to use up leftovers. Cooked meats and leftover veggies can be used in fried rice or pasta dishes.

6. Clear the fridge and use up leftovers

Wilted greens, remnants of deli meats, and half-used vegetables are common inhabitants of the fridge. Along with leftover cooked veg and meats, you can use them to make fritters, fill toasted sandwiches, pop them in a frittata or quiche, or chuck them in a stir fry. Try to have one meal each week that uses up all the bits and pieces from the fridge – Sunday lunch is a good time for this. Homemade pizzas are also an ideal way to use up leftovers.

7. Plan ahead and reduce waste

One of the best ways to reduce your grocery bill (and reduce waste) is to make sure you’re only buying what you need. So make a meal plan, ideally using plenty of what’s already in the fridge, freezer, or pantry, then make a shopping list and stick to it.

Keep the contents of your fridge organised and visible so you’re more likely to use the contents before they go off.

Rather than throwing them out in the compost, you can use veggie scraps to make stock. Just freeze scraps in a container until you have enough to cook up the stock.

8. Add extras

While it’s not ideal nutrition, occasionally adding extras to a meal like bread rolls, Yorkshire Puddings, tacos, or wraps, can be an inexpensive way to make more of a meal. This is especially handy when an unexpected dinner guest arrives.

Adding an extra side of veggies can be a healthy way to stretch a meal. Frozen or canned veggies are easy and quick to cook and handy to have in the pantry or freezer.

9. Bump up the salad

Once you’ve got the usual salad ingredients, add some sliced fruit like apples or pears, cubed cheese, nuts, seeds, corn, couscous, quinoa, or homemade croutons.

her world julieWritten by Julie Scanlon

Julie is Editor for Kidspot NZ and our MVP. Her hobbies include laughing uncontrollably at her own jokes, annoying her family by asking questions about movie plots, and never taking anything too seriously. She speaks a little Spanish and a lot of Yorkshire. 

Favourite motto to live by: “It ain’t nothing but a thing”

Mums Review: Save The Children Good Food Guide

Save The Children recently gave NZ families the opportunity to engage their kids in learning why good food matters through their Good Food Guide. Inside was a seed pack and recipes, plus information on how to help families and children overseas get the good food they need too.

We asked three Kiwi mums to let us know what they thought of the Good Food Guide and Seed Pack.

Kids in the garden

Why try to explain miracles to your kids when you can just have them plant a garden. – Robert Brault

As food prices increase, seemingly by the week, the focus of many households on being able to provide enough food to feed their family has never been stronger. In New Zealand, we are incredibly blessed with pretty much perfect conditions for growing a wide variety of crops. This summer has brought into sharp focus for many the impacts that future climate changes may bring. However, compared to other countries suffering with even greater issues with heat, rain and other extreme weather conditions, New Zealanders remain in an exceptionally privileged position of being able to grow much of their own food. Growing a few of your own crops (herbs, vegetables or fruit) remains, to me, one of the easiest and most accessible ways of being able to top-up your family’s nutrition, whilst reducing your carbon footprint and with the added bonus of being able to save some coin on your weekly shop.

Now, don’t get me wrong, having kids in the garden with you, especially as a novice gardener yourself, isn’t that easy. My kids remove seedlings instead of weeds when weeding, they get a little crazy with the seeds when planting and things randomly sprout all over the place (like 8 butternuts which are currently sat in our garden bed that I had no idea were there), squeal when they uncover a worm or a skink, and they eat most of the strawberries before I get a chance to have a taste myself. But they really enjoy being out in the garden with me, and ask to go out there. It is a happy place, one which gives them as much pleasure as it gives me. They love seeing how food grows and different stages of its development, they love tasting the fruit and veggies straight after they are picked, they love watching the bees and butterflies (and we’re working on the worms) and they love being able to truly participate in something, and not just watch from the sidelines. This is why I believe gardening with kids is so valuable – a better understanding of food and the environment, better nutrition and more willingness to try fruit and vegetables, empowered kids who take ownership, as well as more patience and acceptance of mistakes (that one is for me too if I’m honest …). It’s also why I love getting my kids in the garden with me, even if a deep breath is sometimes required! So I was excited to try out the Growing Healthy Kids seed kit from Save The Children as a project which my kids could help me with from start to finish.

Save The Children Good Food Guide

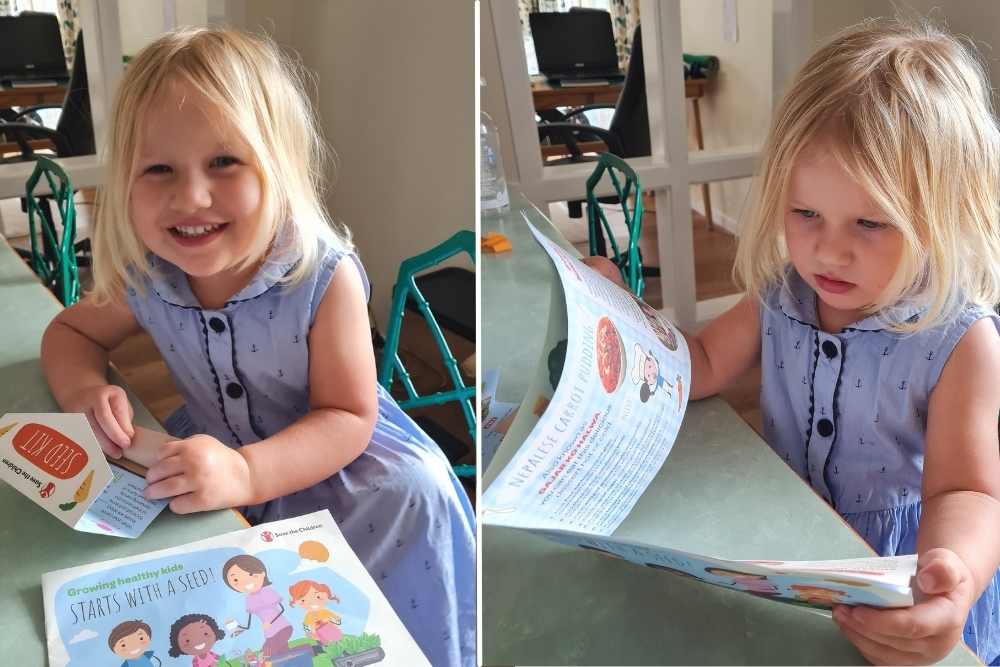
The kit contains a Growing Healthy Kids guide, as well as a pack of carrot seeds to get you growing. The guide is presented in a really family-friendly way, with heaps of information but also loads of pictures, making it great for kids and adults to share together. As soon as we received the guide my kids (aged 6 and 3) started reading the booklet together, loving looking through the pictures and my eldest reading most of the words to her younger sister. The DIY guide, which is also found in a less detailed version on the seed packet for when you come to plant the seeds, was set out to encourage even the most novice gardener to have a go, and the page giving details on which vitamins and minerals a body needs to grow prompted some really interesting discussion about the things we liked to eat which contained them, and what would happen if we didn’t eat enough.

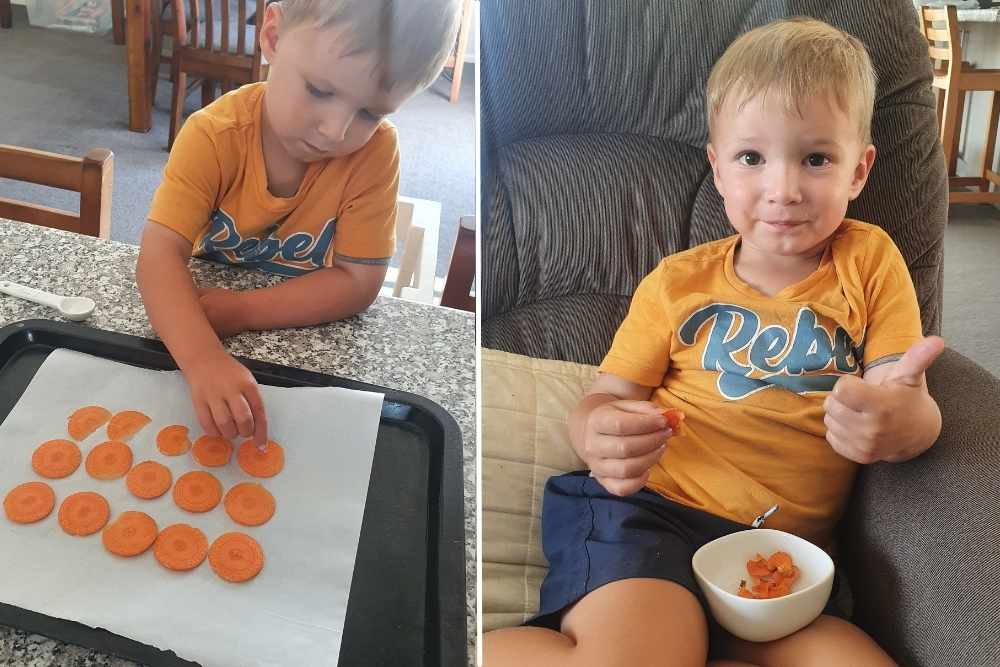
But the page my kids loved the most was the recipe page. The pictures looked so enticing they wanted to try them all, however we settled on making the Nepalese Carrot pudding and the baked carrot chips. The chips were delicious – in fact, the first batch was eaten so quickly (approximately 30 seconds), I had to make another. They were a lovely mix of sweet and savoury, with a really great crunch, and would be perfect for a snack box or lunchbox. The Nepalese carrot pudding was a little more involved to produce, but still pretty simple. I have to say, I was a little dubious of how it would turn out, but it was sweet and creamy and subtly spiced. My kids gobbled it up, and have asked to make it again, so I will definitely be keeping that recipe.

Save The Children Good Food Guide

In addition to the information for parents and kids in New Zealand, the guide also has information on the ways it has helped families and communities across the Pacific with tools and expertise to become more productive and also resilient in the face of a more extreme climate. In particular, the kids loved hearing about how Mr Chhuon Yi went from growing 120kgs to 1329kgs of cucumbers, enabling him to send all of his kids to school. My eldest daughter also loved Gloria’s story about growing food at school after a cyclone destroyed her and many other families’ gardens. Growing food at school means kids have plenty of food to eat at lunchtime, and by choosing stronger crops this will be able to continue into the future, no matter what the climate throws at them. She loved this story as it reminded her of her own school veggie garden, and we talked about how cool it was that the school is able to provide food, as well as how important it was to have a full tummy to learn and play. These types of projects are clearly hugely valuable and based on making communities more resilient and able to grow stronger together towards a future that provides opportunities for everyone.

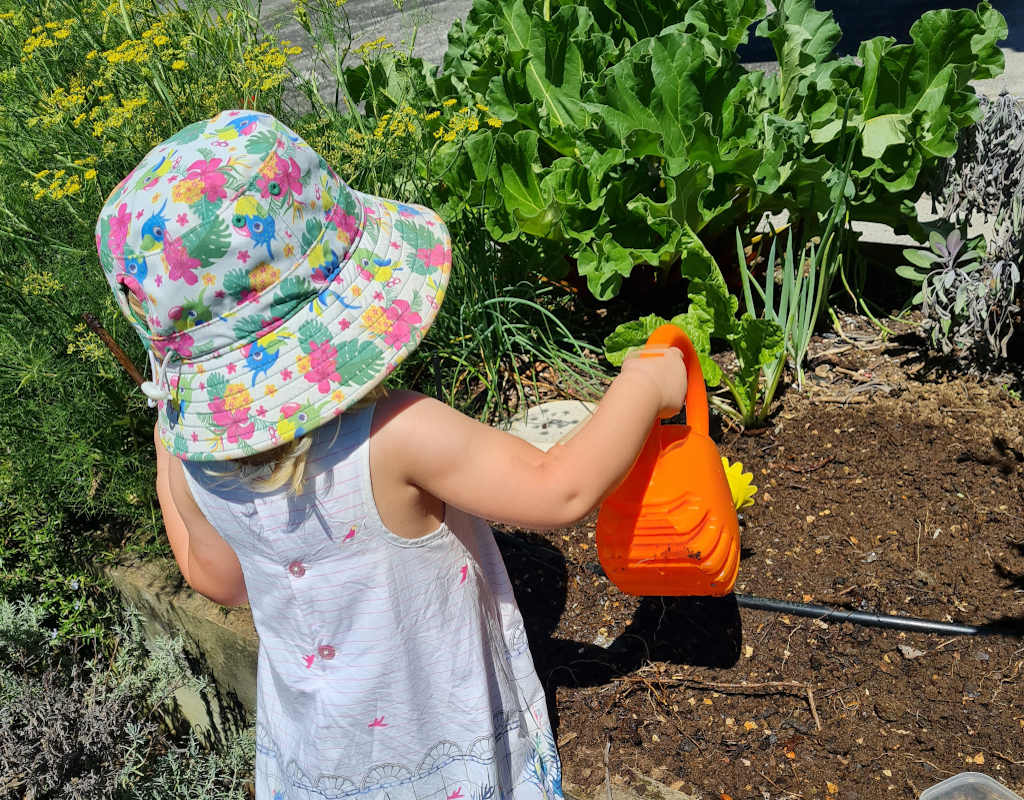
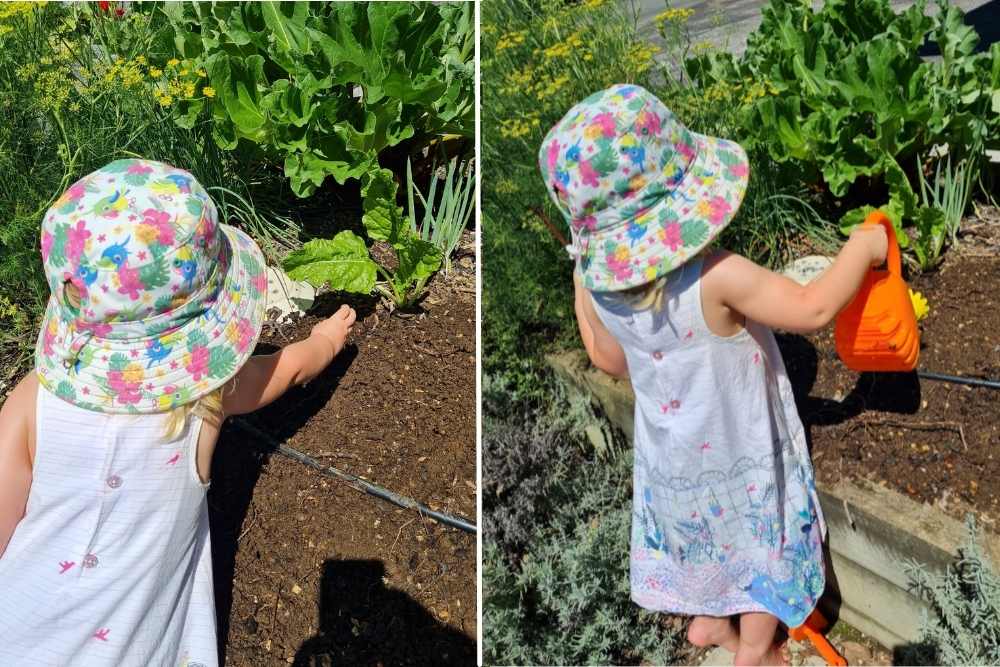
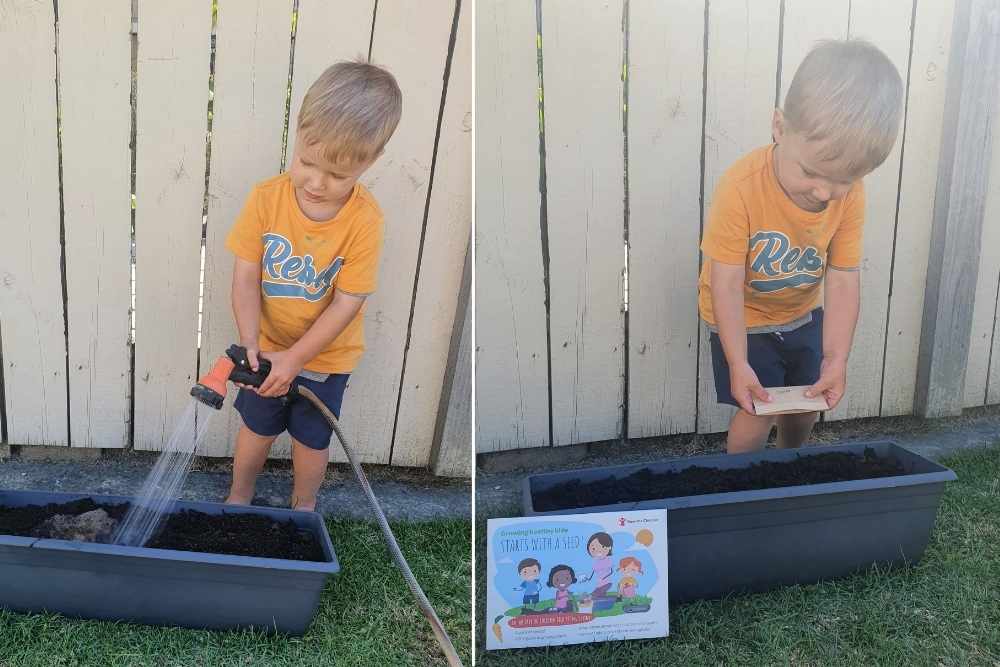
As my 3-year-old is currently not at Kindy, I decided to save the seed packet as a project for us to do whilst her sister was at school. We were lucky enough to have some space in our veggie bed to plant these seeds, but there were plenty of other options such as using a pot or a small area in your garden if you didn’t have one. Once we had cleared a space in our veggie bed and had a good read of the instructions, we set to work to plant the seeds. At first, my daughter couldn’t believe that the seeds I showed her would become carrots like the ones in our fridge. The instructions were easy enough that, with some guidance, my daughter was able to complete the process herself. She loved making a channel for the seeds and sprinkling them inside and covering them back over with soil, but her favourite activity was watering the seeds in afterwards – because what child doesn’t love a bit of water play! She was so proud of her work that she has been going outside every day since to water them and check to see if they have sprouted yet, and I know she’ll be so excited when they do.

Overall, this kit was really well planned and thought out, accessible for a wide variety of ages and gardening abilities, and really engaging for my kids wanting to grow, and make, some food. The seed pack was such a fun activity for anyone to try, no matter how much space you have, and has the bonus of being able to watch and then harvest your own food to eat as a reward. I would really encourage anyone to give it a go, and maybe you will plant a life-long love of growing in your children.

Katie – Follow Katie’s frugal journey of gardening and home-cooking at @thatfugalmum on Instagram.

Carrots and carbon footprints

My son was so excited to receive his very own “gardening kit” in the mail, we had to plant our seeds straight away! The planting guide was easy to use and my son could follow along with the pictures too.

Save The Children Good Food Guide

The Good Food Guide contained awesome information on the amazing work that Save The Children are doing in the Pacific – my son loved reading the stories and seeing the pictures of other families. I explained to him how not all families are fortunate to have food like we do or that sometimes natural disasters occur and that people’s resources are wiped out. This brought up the vital topic of how lucky we are in New Zealand that we have the resources and capabilities to grow our own food and what an important skill it is to learn.
I believe it is incredibly poignant for everyone to learn how to grow and cultivate their own food, not only to know where our food has come from but to reduce our carbon footprint and to ensure we have a supply of fresh food in case of disasters.

Save The Children Good Food Guide

My son chose to make the carrots chips (because chips are a favourite of course!). He helped me slice them very thin and he kept a close eye on them when they were in the oven. Once they were done we enjoyed them together with hummus!

Emmeline

The benefits of growing our own

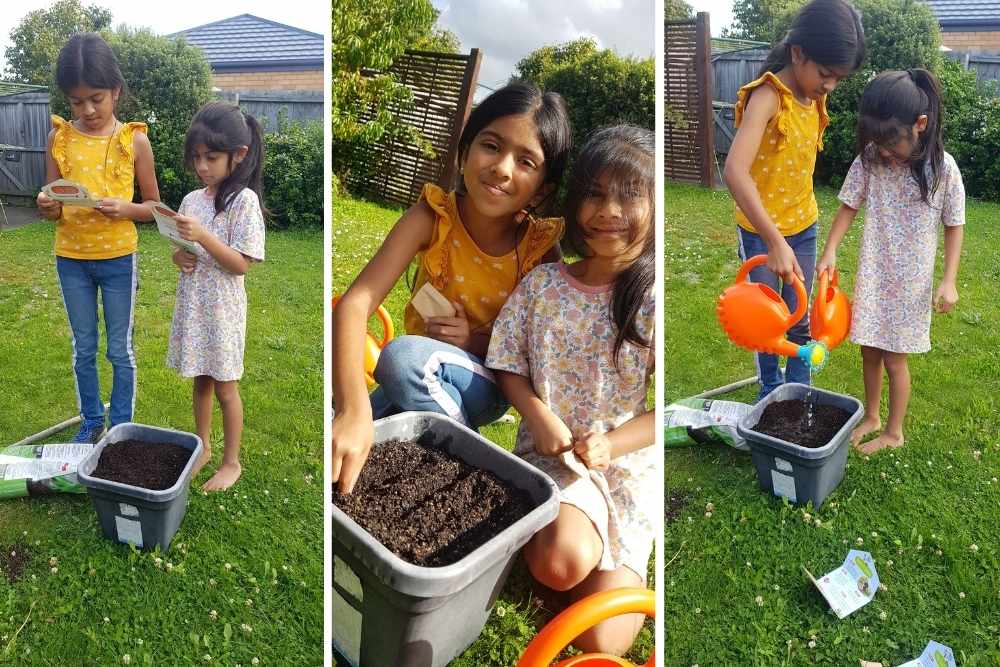
Our seed kit from Save The Children included an information booklet and two packs of carrot seeds. The seeds were neatly packaged with instructions on how to plant them step by step and were easy for kids to understand. The kids were able to follow through and plant their seeds successfully without much help at all.

Save The Children Good Food Guide

We read through the booklet together and learnt about the benefits of fresh fruit and vegetables as well as the amazing work Save The Children has done in Cambodia, Nepal and Fiji to help families struggling with poverty and unable to educate their kids because of these challenges.

Save The Children’s involvement in empowering these families through equipping them with skills and giving them the resources to be able to sustain their homes and meet their basic needs has been incredible and enabled them to take care of their families financially as well as educate their children.

My girls (aged 5 and 8) and I discussed more about poverty in other countries (as well as where I am originally from, South Africa); what causes it, as well as the current rising cost of food we are experiencing at the moment in New Zealand. What would we have to do if we could not afford to buy food?!

We also discussed the benefits of being able to grow our own food and being able to feed ourselves – considering the rising costs at the moment of groceries and especially fresh produce with a cauliflower just last week being sold for $14.99. We’re blessed to live in a country that has healthy ground, where crops flourish.

In this day and age of technology and focus on indoor entertainment, a welcome change was being able to get out in the dirt and explore, engage, and acquire skills that will benefit them now as well as generations to come.

Save The Children Good Food Guide

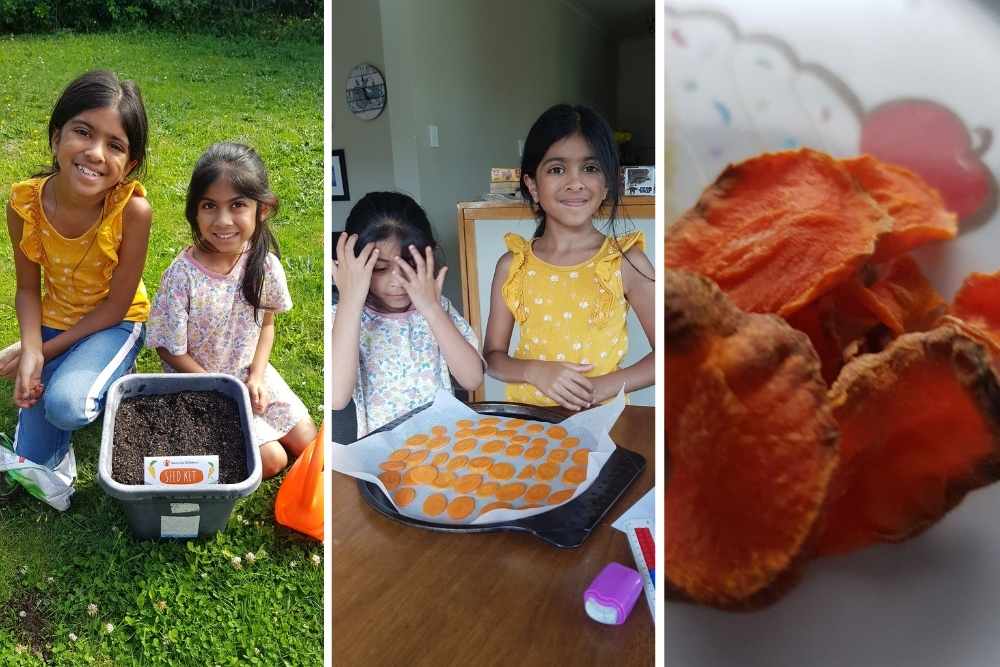
The recipes in the book were easy to follow (we made carrot chips) and handy to teach about the versatility of carrots as well as their nutritional value and informing kids of the reasons we as parents insist, they get their 5 a day of fruit and vegetables.

This is a great initiative by Save The Children and definitely one to support not only for our kids but for the help of the many lives that are touched and changed by this organization.

Michelle

To find out more about the work of Save The Children visit their website.

3 Easy Paper Crafts For Easter Fun

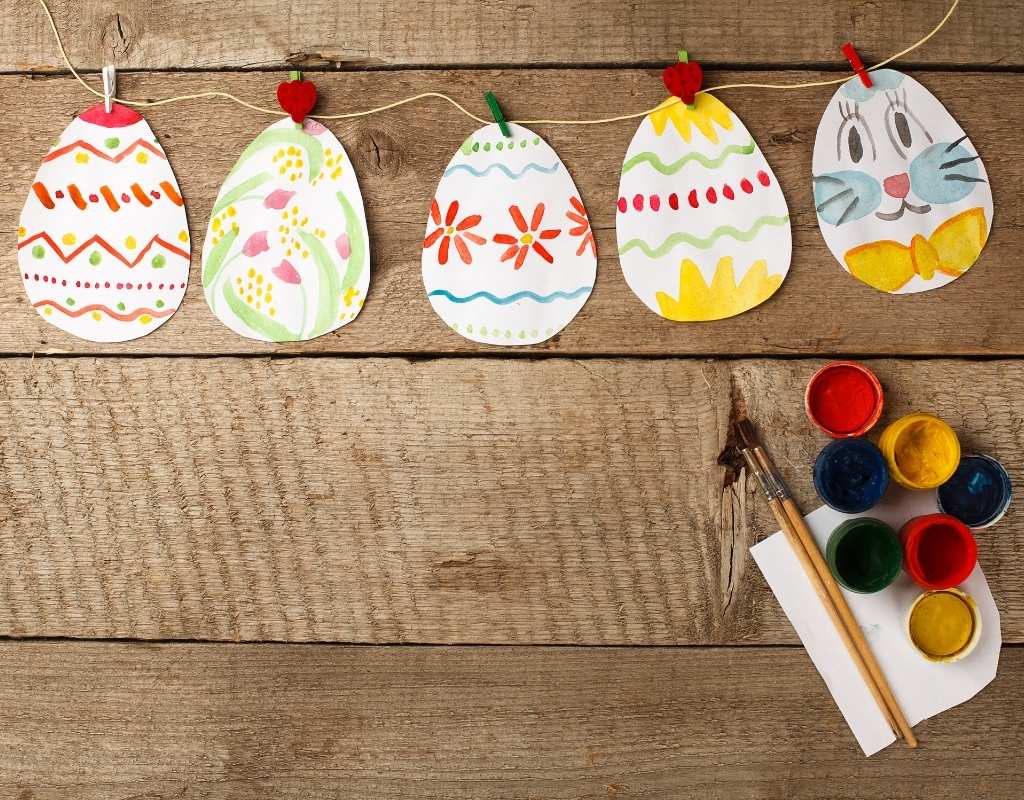
Easter is a wonderful time for kids to get creative. These three easy paper crafts are ready to print – then let the kids decorate them with colour and patterns.

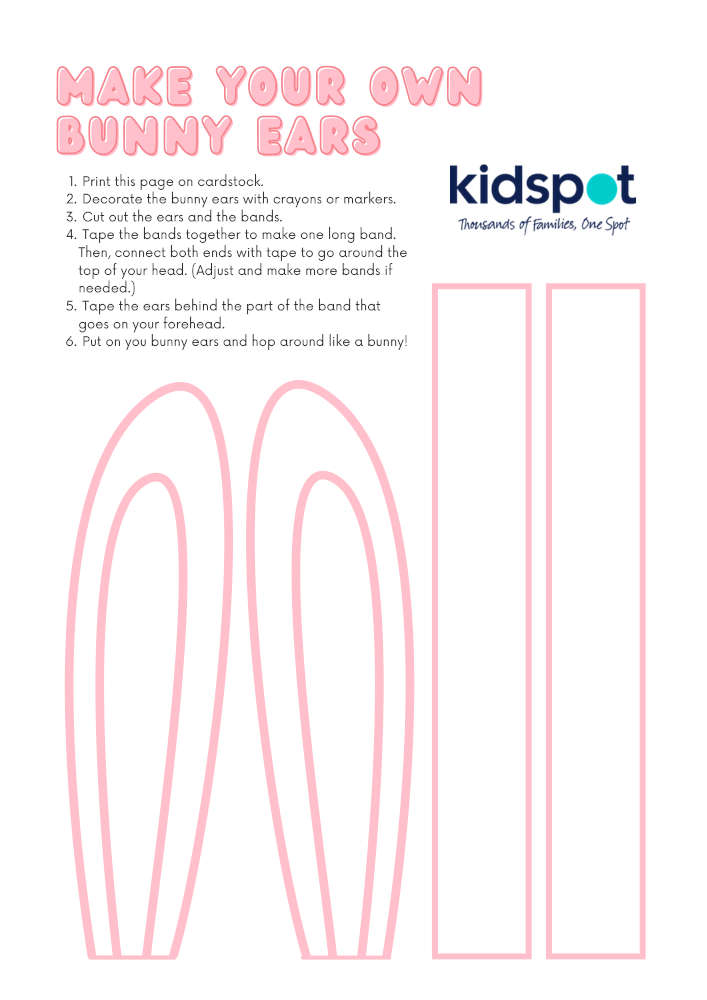
Make bunny ears

Perfect for the Easter parade, dress-ups, or just to wear during the Easter Egg Hunt!

Click the image below to print this activity ⬇️

Bunny Ears Paper Craft

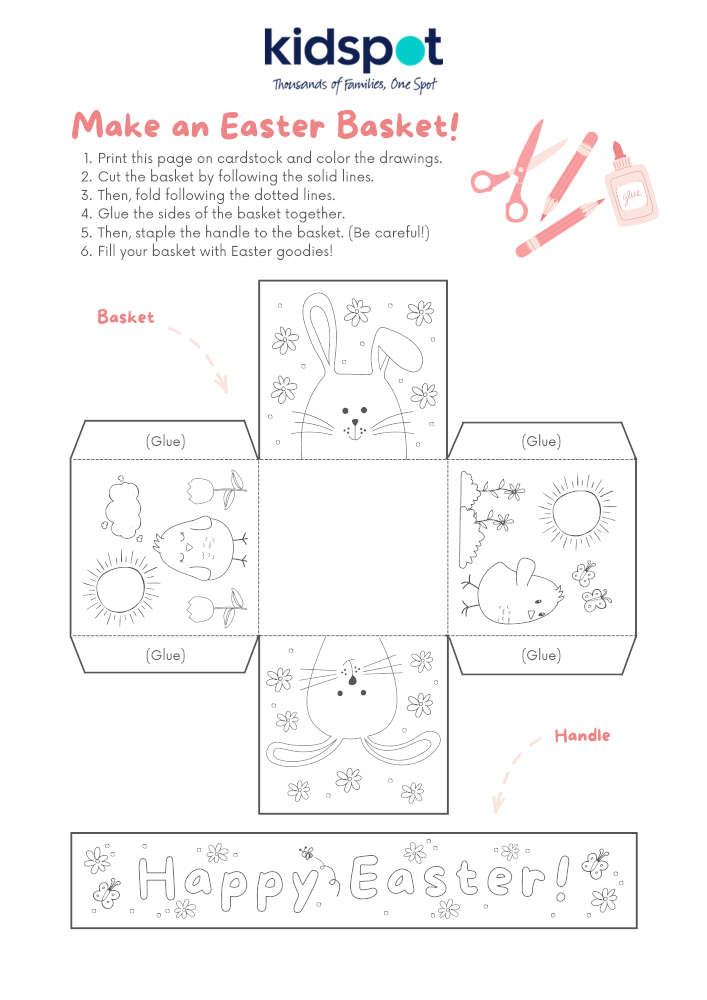
Make an Easter basket

This cute little basket is an awesome craft to keep the kids busy while you hide those Easter eggs!

Click the image below to print this activity ⬇️

Easter Basket Paper Craft

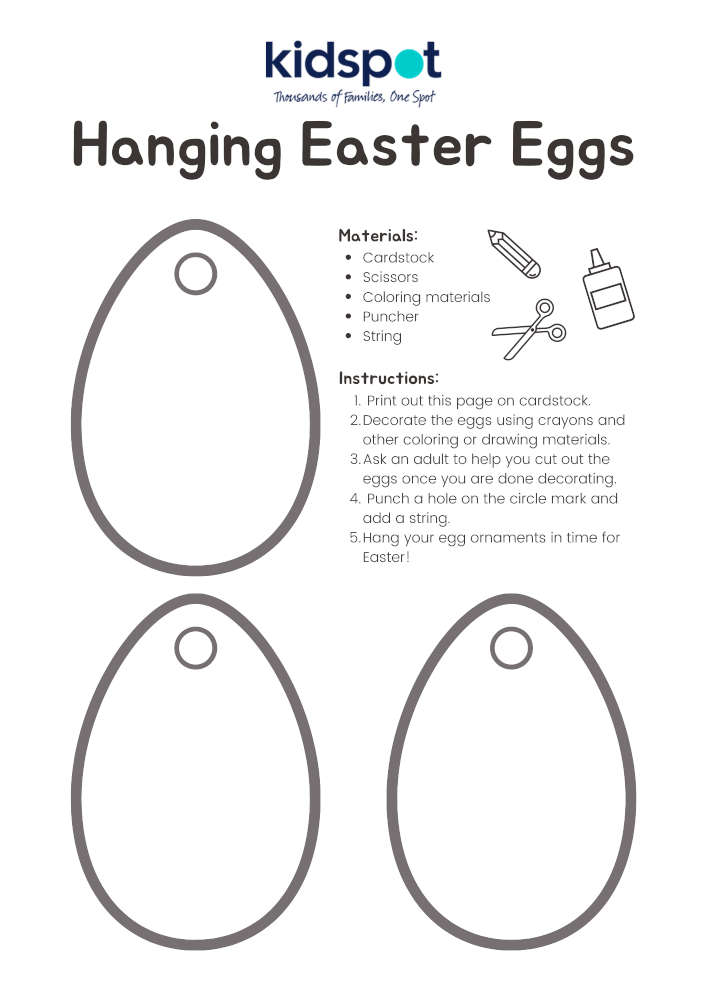
Hanging Easter eggs decoration

This decoration enables the kids to really get imaginative with colour and texture. Don’t just colour them in – add glitter, sequins, and other embellishments!

Click the image below to print this activity ⬇️

Hanging Easter Eggs Decoration

Ukraine: 5 Ways To Talk To Children About Conflict 

Content provided by Save The Children

As hostilities in Ukraine escalate, New Zealand media coverage and social media content will also increase. Children may already be seeing and hearing things about the crisis and experiencing feelings of uncertainty, anxiety and fear, which parents and caregivers will be seeking to address.

It’s important we talk with our children to help them understand the conflict and reassure them of their own safety.

Ane Lemche, a psychologist and child counsellor with Save the Children, provides advice on how we can support our children to cope with the exposure to distressing images, videos and reports about the conflict in Ukraine.

Open and honest conversations

Previous Save the Children research in conflicts such as Iraq and Syria has revealed heartbreaking accounts of children terrified by the shelling and airstrikes, anxious about the future, and distraught at not being able to go to school. The majority of children showed signs of severe emotional distress.

“What is happening in Ukraine can be frightening for both children and adults. Ignoring or avoiding the topic can lead to children feeling lost, alone and more scared, which can affect their health and wellbeing. It is essential to have open and honest conversations with children to help them process what is happening,” said Ms Lemche.

Talking to kids about conflict

Experts at Save the Children share five tools and tips that caregivers can use to approach the conversation with children:

1. Make time and listen when your child wants to talk

Give children the space to tell you what they know, how they feel and to ask you questions. They may have formed a completely different picture of the situation than you have. Take the time to listen to what they think, and what they have seen or heard.

2. Tailor the conversation to the child

Be mindful of the child’s age as you approach the conversation with them. Young children may not understand what conflict or war means and require an age-appropriate explanation. Be careful not to over-explain the situation or go into too much detail as this can make children unnecessarily anxious. Younger children may be satisfied just by understanding that sometimes countries fight. Older children are more likely to understand what war means but may still benefit from talking with you about the situation. In fact, older children will often be more concerned by talk of war because they tend to understand the dangers better than younger children do.

3. Validate their feelings

It is important that children feel supported in the conversation. They should not feel judged or have their concerns dismissed. When children have the chance to have an open and honest conversation about things upsetting them, it can create a sense of relief and safety.

4. Reassure them that adults all over the world are working hard to resolve this

Remind children that this is not their problem to solve. They should not feel guilty about playing, seeing their friends, and doing the things that make them happy. Stay calm when you approach the conversation. Children often copy the sentiments of their caregivers – if you are uneasy about the situation, chances are your child will be uneasy as well.

5. Give them a practical way to help

Support children who want to help. Children who have the opportunity to help those affected by the conflict can feel like they are part of the solution. Children can create fundraisers, send letters to local decision-makers or create drawings calling for peace.

Save the Children has been operating in Ukraine since 2014, delivering essential humanitarian aid to children and their families. This includes supporting access to education, distributing winter kits and hygiene kits, and providing cash grants to families. Their specialists support children to overcome the mental and psychological impacts of their experiences of conflict and violence and increase their ability to cope with stress in their daily lives.

To find out more about the work of Save The Children, visit their website.

See more on Kidspot:

Sparkle Birthday Party Theme

Who doesn’t love a bit of bling?! Perfect for everyone who loves everything sparkly, shiny, and shimmering – this sparkle party theme is fun and oh-so glittery.

Sparkle party theme invitations

Print out a plain invitation with a big blank space for the recipient’s name. Use a thin nozzled glue stick and write the name in glue then sprinkle with glitter before it sets. Shake off excess glitter into a glitter bowl. You could also use a glitter glue pen or metallic shimmery pen – anything with a little sparkle (you can even get ready-made glitter letter stickers from Spotlight)! Place in an envelope and sprinkle in a few small sequins and send off!

Sparkle party theme costume ideas

This is where those $2 shop costumes are gold: glitter hats, sequinned ties and bow ties, sequinned fedoras and gloves … but there are some other homemade ways to get a little glittery. Hot glue gun some sequins onto a plain T-shirt – randomly or in the shape of the birthday child’s new age. Pair with a glitter ribbon or string of sequins as a belt and some shimmery ballet flats. Too easy!

Sparkle party theme decorations

  • Grab some small mosaic mirror tiles from the local craft or $2 shop. Remove the sticky-back covers and stick the backs together, sandwiching a piece of fishing wire inbetween. Affix more tiles to the wire and hang vertically around the room for a light-reflecting sparkle. They also look great stuck on the wall with a little Blu-Tak (or removable 3M tape with the stick-back covers in place still so you can reuse).
  • With some thickish cardboard, cut out big block letters of the birthday girl’s name and then decorate each letter a different way: cover one in sequins, one in foil, one in glitter, one in small mirrored tiles, or metallic paint. Then stick on the wall or hang from the ceiling. Would also work with the words “Happy birthday”.
  • Make sparkly garlands out of glittery ribbon, strings of sequins or foil paper cut into a fringe.

Sparkle party activities and birthday party games

  • Cover tiny artist canvases in silver foil and arm the kids with metallic and pearl paints to make their own sparkly pictures.
  • Have a disco party complete with a mirror ball and fairy lights in a darkened room.
  • Make a sparkly pinata – make this very special piñata.
  • Make your own crowns or tiaras – grab some ready-made cardboard crowns (from craft shops) or make your own tiara-shaped ones from thin cardboard. In a muffin tray, place all things glittery – little jewels, beads, sequins, glitter, feathers etc – and have the guests get creative on their own crowns.
  • DIY star wand – cut some thin cardboard into star shapes, let the guests paint with glue then sprinkle glitter onto the glue (give them two stars each). Stick the wrong sides of the stars together with a piece of dowel or wooden skewer (point removed) in between. A messy job, so best done outside!

Sparkle party food ideas

Sparkle party take-home party bag ideas

The kids can take home their crafts and pair them with a homemade giant sparkle freckle. Melt some chocolate in a bowl over simmering water. Once melted, swirl into a circle on a piece of baking paper and sprinkle with silver balls. Set in the fridge.

Written by Kidspot Australia and adapted by Kidspot NZ

See more:

Robot Birthday Party Theme

Robots are a consistent favourite amongst little kids – especially in this technological age. Indulge their interest with a fun robot-themed birthday party with our tips and ideas.

Robot party theme invitations

On a narrow strip of black paper write the party details with a white or silver pen (preferably in a digital-looking font). Then use a hot-glue gun to stick the short side of the strip to the body of a bolt. Roll the bolt up in the paper so that it sits inside. Use a tiny silver spot sticker to hold the paper in place and deliver to your guests.

Robot party theme costume ideas

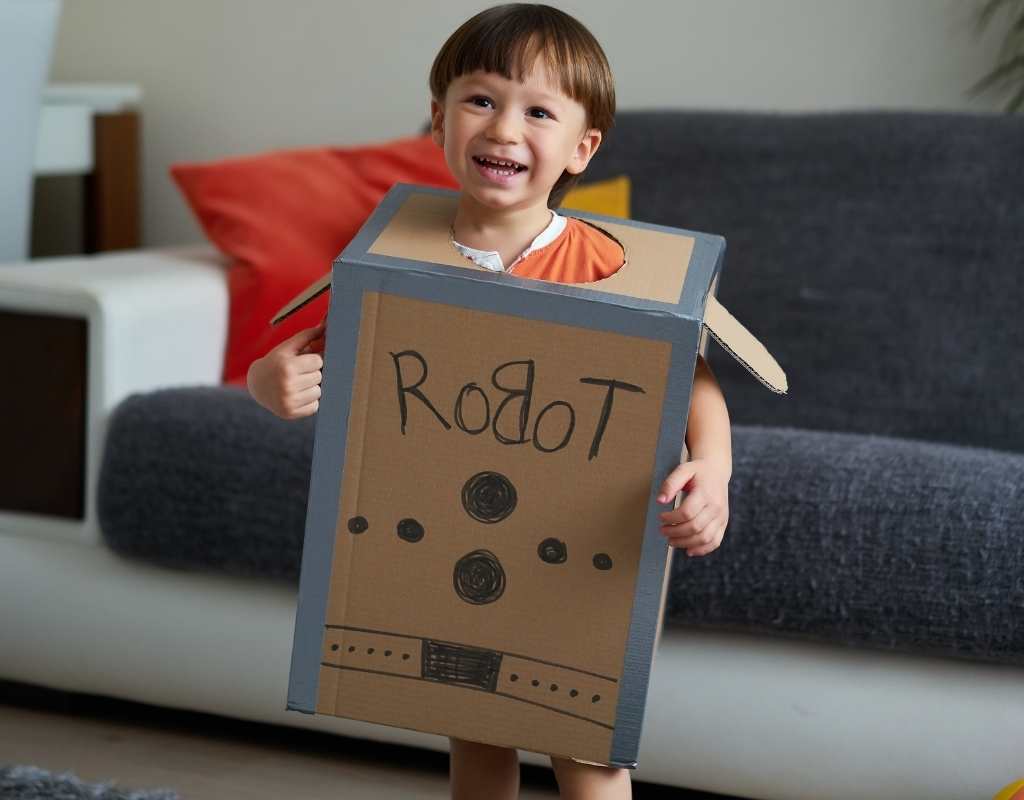
Something silvery and boxy! Try making this cute robot costume. For a quick costume idea, attach sparkly pipe cleaners on to a headband and shape into antenna.

Robot party theme decorations

  • Think metallics, silver, nuts and bolts.
  • Buy silver balloons and silver cellophane paper to create streamers.
  • Raid the toolbox and dig out all the old, never-to-be-used nuts and bolts and washers and string them together to make a garland. Thread the string through a nut, tie it on, then through another one, spacing a few centimetres apart.
  • Place the food trays and bowls on a paper tablecloth and use the plates and bowls as ‘body parts’ of a robot, drawing the other body parts around it on the paper.
  • Serve food on silver-coloured plates and drinks in metallic cups with twirly straws that resemble pipes.

Robot party activities and birthday party games

  • Tin-can robot station: using washed and cleaned tin cans (try sticking some thick duct or packaging tape around the rim to avoid cuts), make up a little table with an assortment of metal bits and bobs – screws, nuts, bolts, washers, as well as some wiggly plastic eyes and springs. Hot-glue small magnets onto each of the pieces and have the kids ‘create’ robots by sticking the magnetic pieces onto the cans.
  • Robot freeze dance: let the kids do robot dancing, then ‘freeze’ when the music stops.
  • Edible robot competition: lay out an assortment of foody things in various shapes – crescent apples, rectangle carrots, square bread slices, round sultanas and cucumbers etc and have the kids get creative and ‘play with their food’ to make robots.
  • Robot races: first to the finish line walking like a robot (straight legs out to the side; arms stiff but bent at the elbow and moving up and down) wins.

Robot party food ideas

Robot party take-home party bag ideas

Stick robot-style eyes and a mouth on silver-coloured noodle boxes then fill with treats like mini-figures, silver-coloured pencils/pens, stickers, or mini tools.

Written by Kidspot Australia and adapted by Kidspot NZ

See more:

Treasures Nappies & Nappy Pants

Star rating

Tried and tested by Kidspot parents

Kidspot parents gave Treasures Nappies and Nappy Pants an overall rating of 4.4 out of 5

Trust Treasures to keep your little one dry and snug – always

Treasures have been keeping New Zealand babies dry and snug since 1976. Now the iconic Treasures brand has been reimagined by a group of Kiwi parents – with 15 children between them! They seized the opportunity to join together, bought the Treasures brand in 2020 and have revitalised the range with improved quality.

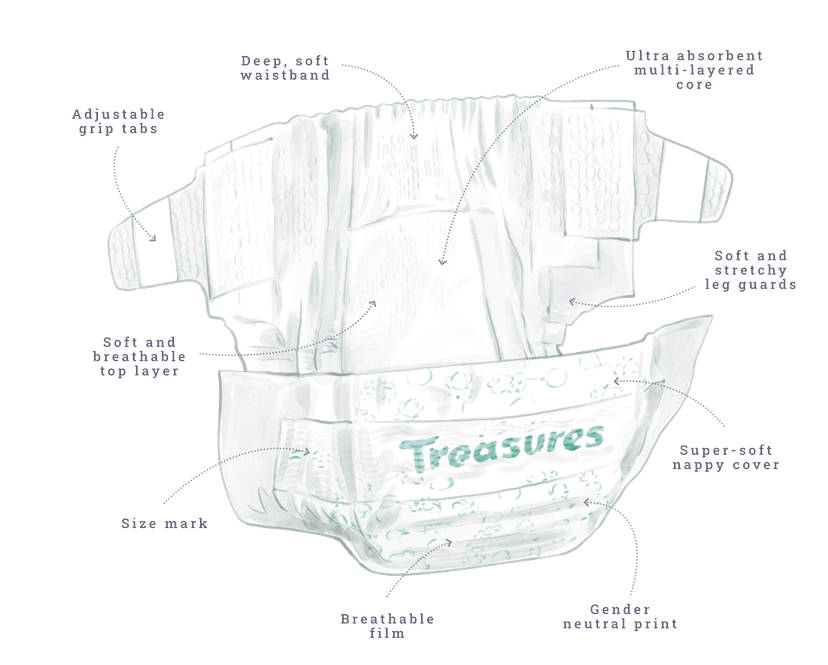
Treasures Comfort are their best nappies yet – the softest, snuggest and driest – with up to 12 hours leakage protection. That means your little treasure is covered, morning, noon, and night. Look out for the super cute bunny packs in stores now!

Treasures are available exclusively at Countdown stores.

Treasures Nappies

For further information, visit Treasures.co.nz

Treasures Nappies

Treasures Nappies are available in six sizes:

  • Newborn – Stage 1: Up to 5kg
  • Infant – Stage 2: 4-7kg
  • Crawler – Stage 3: 6-11kg
  • Toddler – Stage 4: 10-15kg
  • Walker – Stage 5: 13-18kg
  • Junior – Stage 6: 16kg+

Treasures Nappy Pants are available in three sizes:

  • Toddler – Stage 4: 10-15kg
  • Walker – Stage 5: 13-18kg
  • Junior – Stage 6: 16kg+

Read the reviews!

We gave 30 members the chance to trial and review Treasures Nappies or Nappy Pants. See their photos below and scroll down to read more reviews in the comments.

The nappies are a relaxed fit with secure tabs, super absorbent and feels dry from the above and inside for about 10-12 hours. (YES, these are the driest nappies I have tried yet). It can make life so easy while traveling or at night time by providing extra leak protection; hence extra sleep for the mums .The cute packaging is an added bonus.

Aisha

The nappies themselves felt very thin, lovely and soft. They opened out easily and spread out flat underneath baby without any bulky ridges getting in the way. The tabs were out and easy to find/peel open and then came in and securely attached to his front without too much effort from myself.

amandacam

They last all night keeping her feeling dry and there have been no leaks. We are just starting with toilet training and she can pull nappy pants down and when we are out it is so much easier to take her to a toilet and get nappy pants back on.

Laura N

A+++ product. Definitely will be permanently switching and purchasing treasures from here on in, into the future. Highly recommend to other parents and users, friends and family! We are now a Treasures proud fan and household. My washing saviours Treasures!

Dannilouise13

I tried these for the last two nights and have found them great, no leaks. I also like how they are nice and soft and fit well and are easy to put on. The grip tabs grip good and don’t come open when baby moves around and I like the nice stretchy waistband that’s high up on baby’s back.

GONZZE

Reviewer notes

  • If you have received the product for review, please scroll to the bottom of the page and add your feedback as a new comment.
  • Upload your review photos/videos to this Dropbox folder.
  • Each selected reviewer will receive 2 x packs of Treasures Nappies or Nappy Pants.
  • By registering for this product trial, you agree to the terms and conditions. Please note that comments, images, or videos provided by reviewers may be used by Treasures on their website and social media channels to promote the product.

Please note

  • If you are selected to trial, the product will be sent to the address on your profile.
  • Please check your address now to ensure that it is up to date.
  • Not a member yet? Then sign up now.
  • Kidspot Terms and Conditions apply, including: Open to Kidspot members 18+ only. Only available for NZ residents. If you are selected, you will be required to use the product as soon as possible and supply a review, as set out in our review instructions. Your name, email address, and contact phone number will be given to the supplier for the purpose of delivery.

Adventure Birthday Party Theme

A mysterious blank letter, a treasure hunt, survival skills … think Bear Grylls and Treasure Island mixed together for this adventure party theme that every little explorer will love.

Adventure party theme invitations

Invisible ink invites will most definitely set the scene. Write – or have your child write – the invite, then hand-deliver it in a bottle to party guests for a bit of mysterious fun. Attach a little tag to the bottle that reads “iron me and all will be revealed”.

Adventure party theme costume ideas

An all-weather vest, sturdy shoes, and hat should do the trick of an adventurer costume. If you really want to look the part, you can also add a compass, pretend pocket knife, and a backpack!

Adventure party theme decorations

  • Photocopy a range of world maps from atlases or print them off the internet – old and new ones – and cover a wall with the maps or make buntings out of them.
  • Hang plastic snakes in surprising places and spiders on strings through a doorway.
  • Make shelters from large branches and sheets or follow our step-by-step guide to make a teepee.

Adventure party activities and birthday party games

  • Brave the goo pit: Make up a bucket of slime (or even jelly!) and hide something in there. The child has to be blindfolded and sort through the goo to find the prize.
  • Go on a treasure hunt. Make a map of your yard, or nearby park, and bury some treasure where X marks the spot on the map. Hide some goodies in the spot and have some decoys to send the kids on a bit of a chase to find the real treasure – for example, leave a clue in a spot marked with X.
  • Shelter challenge: Divide the party guests into two groups and give them the challenge of creating a shelter out of various items – give them some branches, some string or rope, leaves, a tarp, and anything else you think they may be able to use. Give them a certain amount of time to build it in and watch their imaginations go to work.

  • Dig for buried treasure.
  • Write a mystery letter in a bottle: Just like the invisible ink invitations, have a table set up with a heap of paper, lemon juice, and cotton tips. Kids can draw a picture or write a note to their parents, who’ll have to earn the right to view the mystery image by ironing over it at home. The offerings can also be placed in a bottle (a juice or small soft-drink bottle) and hand-delivered to parents.
  • Adventure walk: Grab some magnifying glasses, a compass, binoculars, and an adult, then head off into the wild (even your backyard will do!). Get the kids to work out what direction you’re headed in, according to the compass, and ask them questions about the bugs they see in the garden and what patterns you can see on the leaves under a magnifying glass.

Adventure party food ideas

Adventure party take-home party bag ideas

Get some chest-shaped cake or noodle boxes (try Lincraft or Spotlight), decorate and fill these with gold coins as party favours. Kids will also have their mystery letters to take home.

Written by Kidspot Australia and adapted by Kidspot NZ

See more:

Ballet Birthday Party Theme

A ballet party theme will delight any little ballet dancer. Imagine a day filled with dancing, tutus, ribbons, and tulle!

Ballet party theme invitations

Create an invitation by sticking a small piece of tulle onto a card to make it look like a tiny tutu! Or use your computer to design an invite to look like it’s a ticket to the ballet. Google ‘ballet ticket’ for inspiration or use sites like Canva, Picmonkey or Adobe for a selection of free and customisable design options.

Ballet party theme costume ideas

It’s not hard to pick up a tutu from the dress-up shops, but it’s also pretty simple to make your own no-sew tutu with a few layers of tulle. Pair with a singlet, white or pale pink tights and some ballet flats. If they already do ballet, even easier! Those that don’t wish to wear a tutu can dress up in their best party gear ready for dancing!

Ballet party theme decorations

  • Tie a bunch of pale pink and white ribbons (or streamers) from tree branches, curtain rods or picture rails. You could also use 3M hooks on the ceiling and hang a piece of dowel with ribbons tied to it to spruce up the space!
  • If you have the space, clear out the living room and turn it into a dance studio complete with a standing mirror for them all to watch themselves dance in front of.
  • Make a garland of paper ballerinas with this craft idea.

Ballet party activities and birthday party games

  • Decorate ballet flats – Grab some simple ballet flats and set up a decorating station with glue, stick-on diamantes or pearls, some sequins and small beads and puff paints.
  • Make up a dance to teach the kids. Or show them basic ballet lessons.
  • Play ‘ballet freeze‘ – just like musical statues but with ballet poses.
  • Pin the tutu on the ballerina.
  • Make beaded hair rings to place over hair buns – have them string some beads together on a thin piece of ribbon then tie around their bun for extra razzle-dazzle.

Ballet party food ideas

Ballet party take-home party bag ideas

Ribbon wands – a little more rhythmic gymnast than ballerina, but the twirly ribbon on a stick is always a favourite.

Written by Kidspot Australia and adapted by Kidspot NZ

See more:

Flower Birthday Party Theme

If your little one loves the garden or just the sweetness of flowers, why not throw a flower themed birthday party?

Here are some ideas for floral fun.

Flower party theme invitations

Make cute little tissue-paper flowers taped onto a bit of cardboard for the party invitations. Cut out circles from colourful cardboard and attach a green stem and some crepe paper petals. Fill out the information for the party and send. Or try our flower pot card as an invitation.

If you’re creating an invite online, look for your child’s favourite flowers or colours. Sites like Canva, Picmonkey or Adobe offer a selection of free and customisable design options.

Flower birthday party theme costume ideas

Anything with flowers! A cute floral skirt, shirt, or dress is probably already part of the wardrobe. It doesn’t need to be costume-y at all, but a flower in the hair or a bright flower garland would be highly appropriate!

Flower birthday party theme decorations

  • Strings of flower garlands hanging around the house or pergola. A couple of leis from the budget stores restrung on a long piece of string will also do the trick. They’re simple to make and look sweet hanging from trees over the food table as a hanging centrepiece or just instead of balloons!
  • A bowl of floating flowers – snip off the stems and let them float on top of a bowl of water.
  • Hanging flowers – keep old jam jars, twist wire around the top so it creates a handle and hang around the yard with a single bloom in each one.
  • Fill balloons with helium and tie bunches of coloured balloons to chair backs – let some float to the ceiling. Twist assorted coloured streamers together and stretch them across the walls and windows.

  • Get creative and make a fruit flower centrepiece for the table.  For example: slide a single grape onto a skewer, then a piece of melon or a kiwifruit round onto the skewer and top with a single grape to make a daisy. Or start at the tip of a strawberry, cut most of the way down into quarters, leaving a centimetre or so uncut at the top. Invert the strawberry and slide it onto a skewer. Then open it up a bit to form a tulip and insert a blueberry – use sprigs of fresh mint on the lower portions of the flowers for leaves.
  • Try making green and purple streamers with tissue paper flowers attached along the lengths. You could also make paper flowers entwined around light fittings or even paper lanterns.
  • If your time is limited, don’t try to make everything for the party and simply buy what looks best or even get the children involved and see what they can create for the day.
  • Inexpensive flower garlands strung together to form a labyrinth flower maze can form a wonder either in the house or outside. Use gardening or camping stakes to keep them in place. If you have extra garlands, use them as you would streamers from the ceiling. Paper pinwheels and bug catching nets stuck in the ground in the backyard and front yard add the natural touch for a floral party theme.
  • Make a flower wall.

Flower party theme activities and birthday party games

  • Paste some crepe paper petals around some balloons to play balloon bop. You could even fill some small balloons with water, draw petals on them and tie them up. Pick several games to play – balloon toss between partners, balloon relay races or balloon stomp.
  • Pin the bug on the flower – use some felt (or cardboard) to create different little bugs – ladybugs, caterpillars, bees, dragonflies. Then use a big sheet of cardboard to draw an extra large flower with anatomically correct parts. The child who pins (or sticks!) their bug closest to the centre of the flower wins.
  • Have a flower seed-planting activity. You’ll need a big bowl with soil, a couple of little garden forks or spades, some seeds and a few decorated tin cans. Then the children can take home their flower pots and watch them grow!

  • Make daisy chains – if you’re able to pick a whole bunch of wildflowers, do that, otherwise, store-bought daisies are fine. Split the stems of your daisies a few centimetres from the top to create a little slit and thread the stem of another flower through it. Repeat with all the other flower stems until you have a chain long enough to wrap around the child’s head.
  • Make flower crowns or paper flowers.

Flower party food ideas

Flower theme take-home party bag ideas

  • Make a lollipop bouquet for the guests to take home with a mini pot plant. Create a small bunch of different colours and tie with a ribbon.
  • Make up a little bag of floral-themed hair accessories like clips and hair ties.
  • Make a button and flower magnet for each child.
  • Bake some flower-shaped biscuits and wrap them in cellophane bags with pretty ribbons.

Written by Kidspot Australia and adapted by Kidspot NZ

See more:

Superhero Birthday Party Theme

There’s something about a cape and the thought of magical superpowers that never goes out of style for a birthday party.

Regardless of which superhero the birthday child is currently admiring, indulge their inner “hero” and throw them a superhero party to show them how special they really are.

Superhero party theme invitations

To make your own invitations, you could ask your child to draw and colour in a symbol with the initial of each child they wish to invite to their party as the main image on the invitation. Try lightning bolts, stars, shields, geometric shapes, comic-book starbursts, etc. Comic-book speech bubbles are good for including written details.

If you’re creating an invite online, look for bright and bold colours and comic-book styling. Sites like Canva, Picmonkey or Adobe offer a selection of free and customisable design options.

Superhero birthday party theme costume ideas

You really can’t go past a cape and mask! Personalise the costume for your child and if you’re not handy with a sewing machine, we have a no-sew superhero cape activity for you.

Superhero birthday party theme decorations

  • Stick a large piece of paper on the wall and draw on a city skyline background – then have the kids pose against the wall and take photos. Voila! Your own digital photobooth party decoration.
  • Make a bunting from comic book pages and hang around the walls.
  • Create ‘wanted’ posters with photos of your superhero’s villains, such as The Riddler, Penguin, Catwoman, Kryptonite etc.
  • Make paper boats from comic book pages and use as containers to serve small lollies.

  • Cut out lightning bolts and word bubbles like you would see in comic books and stick on the wall with favourite quotes or sayings from superheroes.
  • Use your child’s superhero toys as the table centrepiece or for guests to play with.
  • Hang a sign on the front door that says, “Welcome to Metropolis” or “Welcome to Gotham City”, or wherever your favourite superhero lives.
  • Tie balloons to your mailbox, tree, or car antenna in your superhero’s colours to alert guests of your party location.
  • Take a picture of your child in their superhero costume and have a local bakery use digital technology to turn the picture into icing and lay it over your child’s favourite cake flavour.

Superhero party theme activities and birthday party games

  • Photobooth with a difference – Lay out props on the ground so the children can lie on the floor and look as though they’re flying, leaping over a building (drawn on cardboard or made from various boxes covered in paper with windows and doors) or throwing rocks. Snap a picture from above so they have a memento of the day they had superpowers at your child’s birthday party.
  • Superhero torch signaller – Save paper towel rolls to make these superhero signallers which kids can shine a torch through to cast their very own superhero symbol onto a wall or fence. A good one for sleepover parties.

  • Balloon bombs – Blow up a bunch of balloons to cover the floor and let them jump on them to burst them, or ‘detonate’. Loud, but fun. Another option is to tie each balloon to a child’s ankle with a piece of string and everyone tries to pop each other’s balloons – last one standing wins.
  • Superhero chasey – A variation on bullrush.

Superhero party food ideas

Superhero theme take-home party bag ideas

  • Make your own lolly bags by buying coloured paper bags or cups and place superhero stickers on them with each child’s name. Tie off each party bag with ribbons that match the colour of your favourite superhero’s outfit. Fill the party bags with superhero stickers, small figurines, superhero torch signallers (see above), etc.
  • Buy inexpensive capes, or make your own using rectangles of cloth. Hang a cape from the back of each guest’s chair before the party. If your guests wish, they can wear their capes during the party and take them home afterwards.

Written by Kidspot Australia and adapted by Kidspot NZ

See more:

Seasonal Planting Calendar of Easy To Grow Edibles

Gardening can be a really rewarding pastime. If you get it right, you can save money and get a huge sense of satisfaction from eating what you have grown. Get it wrong and it can be a frustrating waste of time! Use our guide for the best time to plant veges and top tips for growing healthy plants.

The climate in New Zealand varies widely so you may need to adjust to suit the climate where you are. How easy edibles are to grow also varies – some require special conditions, yield little for the effort, or are susceptible to bugs and diseases. We have picked out the best plants to grow if you are getting started on your growing journey, and when the best time is to plant them.

Spring / summer planting

Beans and peas – These guys don’t like frost and cold temperatures so in warmer areas you can start planting them out from late September or early October. If you are at risk of a later frost, wait until the danger has passed. Plant some again in December / January so you can harvest all summer and into autumn. If you love broad beans, they are happy in the colder temperatures, so you can plant them from around March to the end of July in most places but if you are in colder areas you can extend this by a month at either end.

Courgette / zucchini – They don’t like frost so you can plant them in most places from late September right though until late January / early February. One or two plants in a lovely sunny spot and well watered will keep producing right through into April in most areas.

Potatoes – If you want potatoes ready for Christmas, your best bet is to plant them in September. You can plant them any time from then right through until December.

Pumpkin – Enjoys the summer weather so plant in spring and harvest in autumn.

Tomatoes – Tomatoes are a summer plant so spring is the best time to plant, in fact they are traditionally planted by many at Labour Weekend. Make sure they are protected from any late frost, water and feed and they will reward you into autumn.

Mint, parsley, rosemary, thyme, oregano, chives, dill, and sage – These last all year round but will be quite dormant in the cold weather. Plant in spring for years of fresh herbs! Parsley needs to be in semi shade otherwise it will go to seed.

Coriander and basil – These should be planted in spring in semi-shaded areas to prevent them from going to seed in the hot summer sun.

Lemon – Lemons are such a great addition to your garden as their cheerful fruit are ready for you in late winter when not much else is producing. When young they are frost sensitive so be sure to cover them with frost cloth. Plant in spring and enjoy for years.

Autum / winter planting

Cabbage – Cabbages don’t like warm temperatures and if grown during summer will be prey to white butterfly and aphids. You can get in early and plant them in early spring to harvest before the warm temperatures hit, although the best bet really is to plant in autumn and even winter in warmer places. Along with their cousin brussel sprouts, they are one of the few reliable winter-harvesting veges.

Lettuce – There are many varieties of lettuce and with a bit of luck you will be able to grow some almost all year round. They tend to go to seed quickly in the hot summer so keep replanting and harvesting for best success.

Year-round planting

Spinach – You can pretty much plant and harvest spinach year round in many areas. It does like sun, but if you are in a really warm area you will find in the hot summer it will go to seed quickly.

Silverbeet – The most hardy of all plants! Plant any time in warmer places and avoid the peak of winter in colder places. Keep free from slugs and snails, harvest regularly to encourage new tender growth and you will be able to eat it all year round.

Rhubarb – Plant at any time, but it’s best to avoid planting in the peak of the summer. There are different varieties that will grow more vigorously earlier in the spring than others.

What is your favourite plant to grow in your garden?

Written by Kidspot NZ.

See more:

Starting High School With New Friends

Chances are, when your child starts high school they won’t be going along with all their peers from primary school. For those going to a completely new school and starting afresh, here are some ways to help them ease the transition and make new friends.

Making friends isn’t always easy – think about how you feel about walking up to a stranger and introducing yourself. Now cast your mind back to how shy and insecure you felt as a teen, and you start to understand how your child may feel about starting a new school without any old primary-school friends as backup. But you can help.

Tips for making friends

It’s probable that it’s been a long time since your child has had to make new friends, so they might need some guidance in how to do it. Sidling up next to some kid on the monkey bars isn’t going to cut it at high school/college. But here are some tips you can offer to help make it easier:

  • Remind your child that other kids will be in the same predicament, and that a friendly smile and a ‘hi’ will be welcome.
  • Practice conversational starters. Sit down and help your child practice some simple conversation topics that they can try when they sit next to a new friend, “Hey, what did you think of that scene in Glee last night?” or “Have you seen that new movie that’s showing? I love comedies.”
  • Encourage joining any school actives. Drama class, sports and art classes are a great way for your child to find like-minded kids who share the same interests.
  • Help them spot another friend who’s keen to find a friend. Chances are, if there’s another year seven sitting by themselves or hanging out at the library at lunchtime, they’re also new. Finding someone else who seems lonely to say ‘hi’ to can help.

At the bus stop

Catching the bus or train to school can also help your child find friends from school who live nearby – and who might be keen on hanging out after school. While it’s tempting to drive them to school every day, loosening those reins a little can help them find friends.

After school activities

Whether it’s team sports, music, drama or art classes encouraging your child to join in with after-school activities is an easy way to make new friends – after all, they’ve got at least one thing in common!

Hanging out

High school kids may think they’re too old for playdates – but they’re not. Encourage your child to invite friends home after school or on the weekend. Help out by having something fun for them to do together: playing on the Wii or the PlayStation, having a swim, or going bowling. If kids bond together over an activity it helps their friendship blossom.

Good friends will help make the high school years go much more smoothly. If you can do whatever it takes to help your child develop a strong group of friends, you’ll be helping them through their high school days with more ease.

This article was written by Linda Drummond for Kidspot.

Sunny Side Up – Paint Your Own Mosaic

Sponsored content provided by Resene

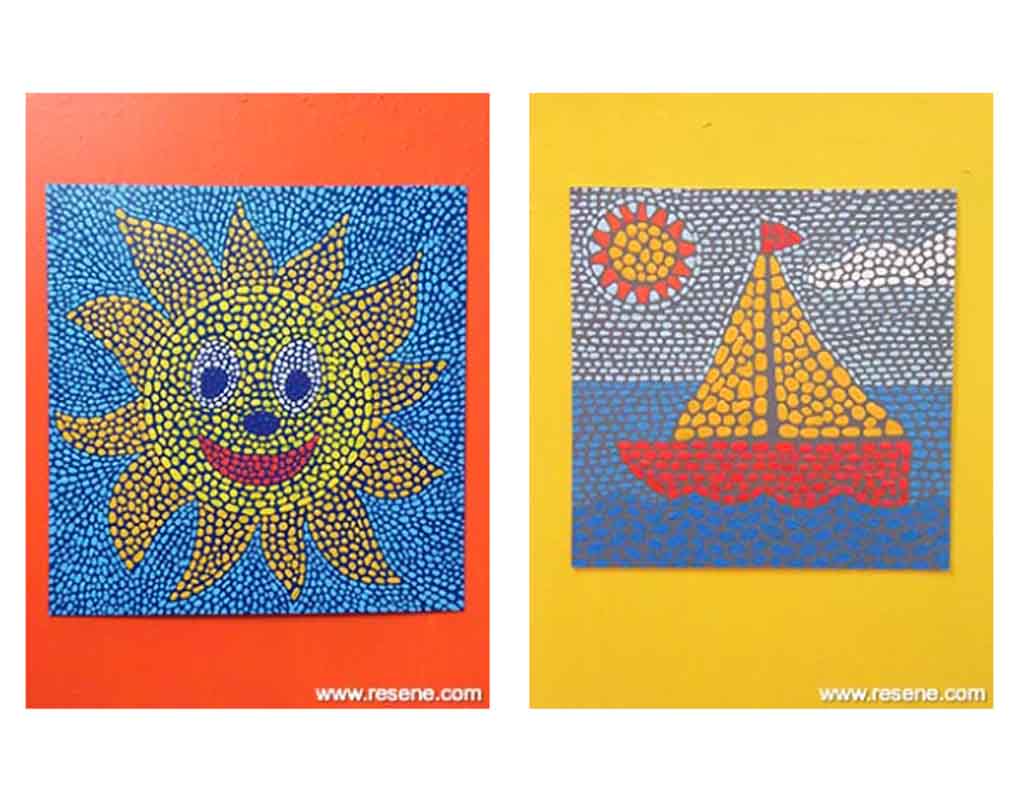
Create your own mosaic masterpiece with this fun project using Resene testpots.

A great project for all ages, you can copy these picture ideas or make your own!

To create the mosaic look, make sure you leave a gap between each blob of paint.

You will need:

Check out the step by step instructions for the sun below or try your hand at the boat picture too. It was made using

Sunny side up

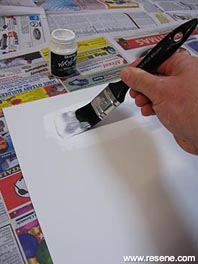
Step 1:

Apply one coat of Resene Art Action Quick Dry to the cardboard and allow two hours to dry.

Sunny side up

Step 2:

Apply two coats of Resene Splish Splash to the cardboard, allowing two hours for each coat to dry.

Sunny side up

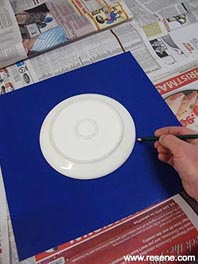
Step 3:

Draw a circle on the cardboard, tracing around the plate as shown. Draw in a face and sun rays around the edge of the circle.

Sunny side up

Step 4:

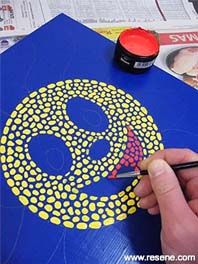
Fill in the face with small blobs of Resene Fizz, as shown, and paint in the mouth using blobs of Resene Get Reddy.

Sunny side up

Step 5:

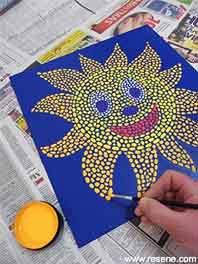
Using the same paint technique, paint the nose and eyes using Resene Alabaster and Resene Clowning Around. Paint in the sun rays using Resene Frenzee.

mosaic

Step 6:

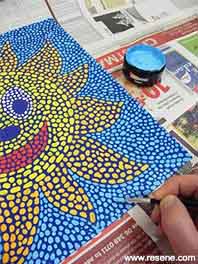
Fill in the background using blobs of Resene Snap. Allow 2 hours to dry. How neat is that?

For more projects and colour inspiration visit Resene.co.nz.

Article provided by Resene. Resene kids art with Mark Rayner – Project 84

Read more on Kidspot:

Review: New Ziploc Seal Top Bags

When you hear the word “Ziploc” you know that it’s referring to resealable bags. But what you may not realise is that Ziploc is actually a new product to New Zealand.

It’s like when people refer to Sellotape or Frisbees – those are actually brand names that have become so synonymous with the product that we commonly use them as the generic term. In the same way, Ziploc is a well-known name, even though these resealable bags are new to the New Zealand market.

To find out if the product lives up to its fame, I tried out a selection of products from the Ziploc range.

Ziploc Storage Bags

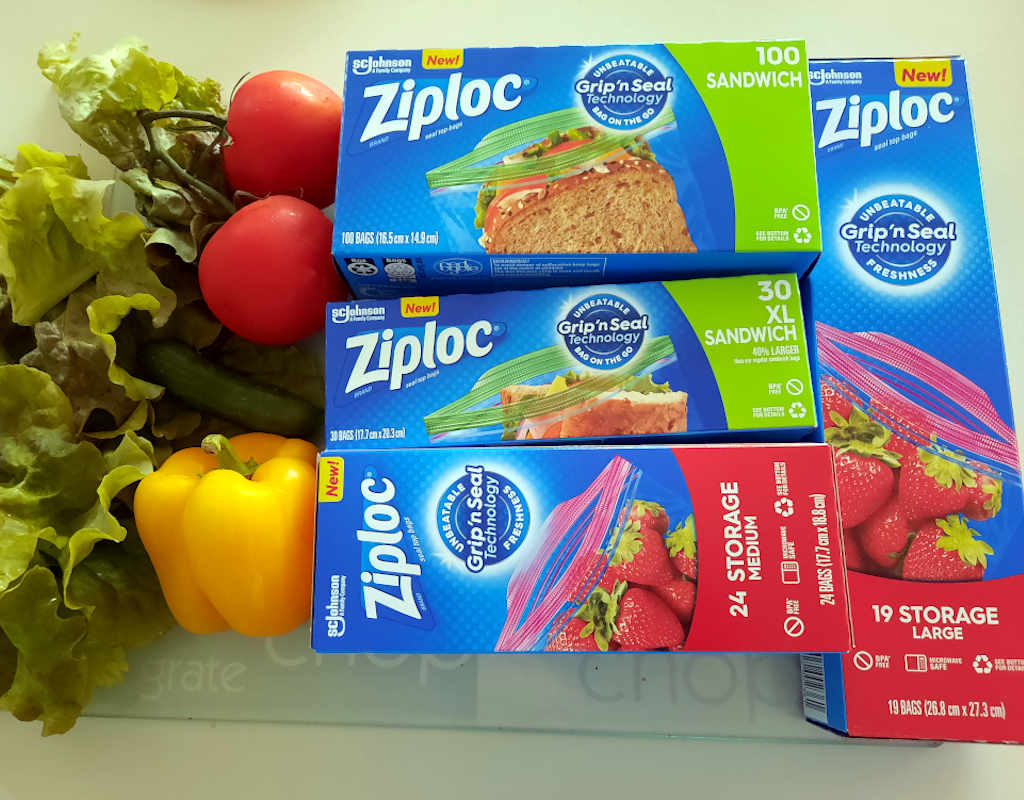
The Ziploc range for review

Ziploc Sandwich Bags

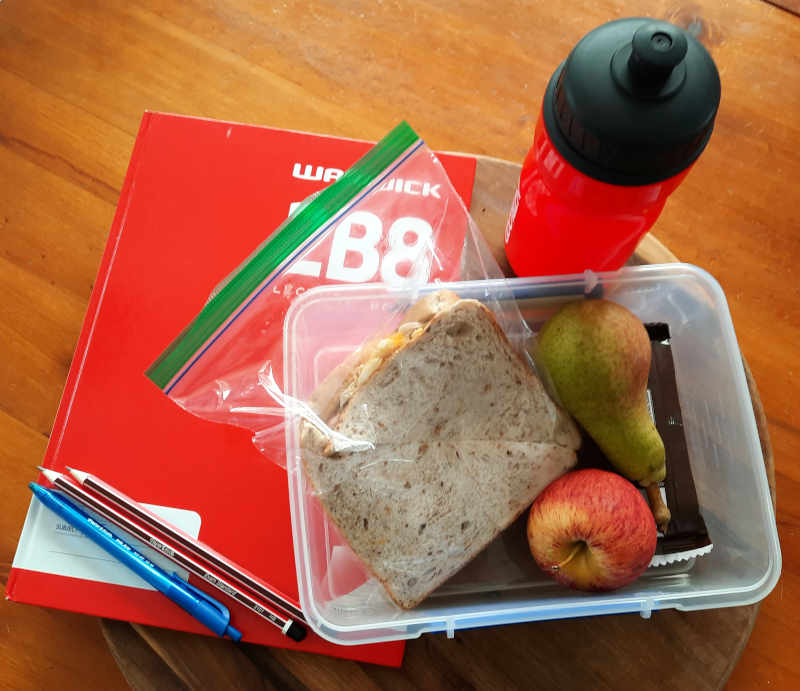
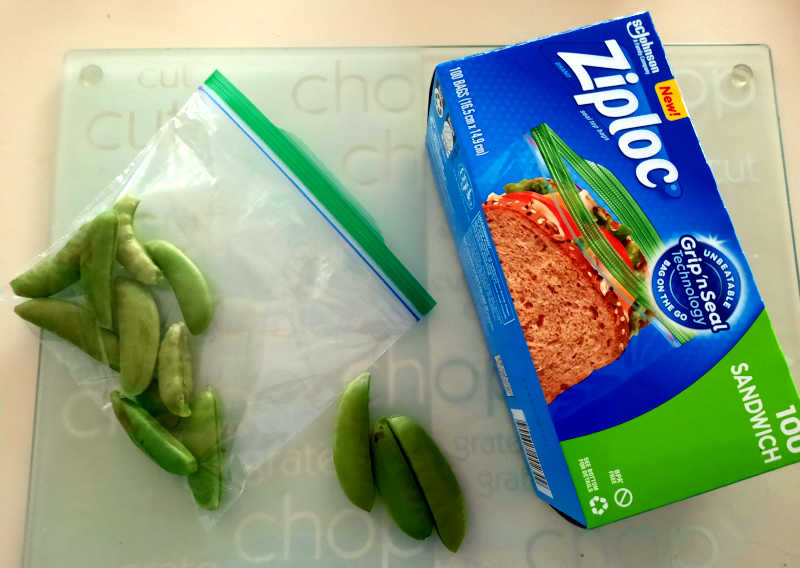
In a great-sized pack of 100, the Ziploc Sandwich Bags are not only the perfect size for standard sandwiches, but they’re also affordable. They’re not just for sandwiches though, they can also be used for a range of fresh and dried snacks and are ideal for portioning out from bulk buy bags and packets. I used them to keep veggies like strawberries, cherry tomatoes, and snow peas fresh and crisp in the fridge after being picked from the garden.

Ziploc Sandwich Bags Extra Large

Thank you, Ziploc – finally, a teen-sized sandwich bag! The Extra Large Sandwich Bags are 40% bigger, making them large enough to hold a variety of bread options. I found them ideal for wraps when they’ve been filled and cut in two. They’re also big enough for a well-stuffed bagel.

Ziploc Sandwich Bags XL

Ziploc Storage Bags Medium

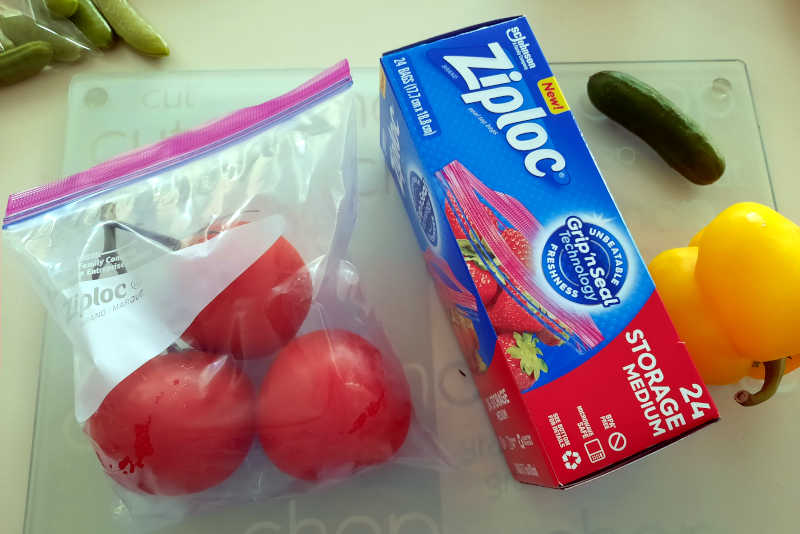
Ziploc bags aren’t just for lunch boxes and these storage bags have 101 uses for all those bits and bobs that kids, families, and homes accumulate. We used them for keeping board game pieces and play money from disappearing into the games cupboard. They’re also a good size for storing larger fruit and veg like capsicums and tomatoes in the fridge.

Ziploc Storage Bags Large

The Large Storage Bags are an awesome size – you will literally never want to be without them. They’re perfect for storing large vegetables like broccoli, cauliflower, celery and leafy greens in the fridge. We also used them for Christmas lights – cos you know you’re never getting them back in the box they came out of! They were also used for tinsel, and delicate decorations like baubles were stored with a couple of the Ziploc Sandwich Bags inflated and slid into the bag for easy air-filled protection.

Ziploc Snack Bags are also available.

Find Ziploc seal top bags in the food wrap/bags aisle at your local supermarket.

Ziploc Storage Bags Large

They’re not just made, they’re designed

Plastic bags are just single-use products, right? Not so. Ziploc seal top bags have been designed to be strong enough to be reused. Just wash, dry and they’re good to go again*. The bags are also made from the least amount of plastic possible to keep them sturdy, yet light.

Ziploc seal top bags are designed to seal in freshness, helping to keep food fresher for longer. Fruit, veggies, leafy greens – they’re all kept fresh and it’s easy to see what’s inside.

The Grip ‘n seal is easy for little fingers to open – and for this mum with arthritic hands – as it has a wide grip tab to get a really good hold, making it easier for wet hands too.

Ziploc seal top bags review

The verdict

The beauty of Ziploc bags is that they’re strong enough to use for a range of purposes: Puzzle pieces are kept together, stationery is sorted, library books are kept clean in the backpack, leafy greens from the garden are easy to keep fresh without taking up a heap of space in the fridge.

Being reusable means that they just keep on giving without the guilt of single-use plastic. For such a well-designed product they are also surprisingly affordable, especially when you factor in the reusability.

Since the Ziploc bags arrived at the house, our favourite saying is now, “I’ve got a bag for that!”

Ziploc Sandwich Bags

Tips for washing and drying reusable bags

Ziploc seal top bags are strong enough to be hand-washed, dried and used again*. To wash the bags, just turn them inside out and pop them in a sink of warm soapy water for a quick rub around and rinse.

Drying your bags can be done in a multitude of ways. The key is to pop them over something clean that enables the bag to remain open while they air dry. Mason jars and those cute little milk bottles are ideal, but I prefer to use a pair of decorative, empty wine bottles on my kitchen bench. You can also stand them up in the dish rack on your sink or a baby bottle drying rack works great too. Even just a chopstick or wooden spoon in a glass is enough to support a bag while it dries.

*Ziploc does not recommend reusing bags after storing raw meat, fish, eggs, or potentially allergy-triggering foods. When you can’t reuse a bag, give it a rinse out and pop it into a soft plastics recycling bin.

Created in partnership with Ziploc. The author was provided with a supply of Ziploc seal top bags for the purpose of this review. Views are those of the author.

See more:

her world julieWritten by Julie Scanlon
Julie is Editor for Kidspot NZ and our MVP. Her hobbies include laughing uncontrollably at her own jokes, annoying her family by asking questions about movie plots, and never taking anything too seriously. She speaks a little Spanish and a lot of Yorkshire. 

Favourite motto to live by: “It ain’t nothing but a thing”

2021’s Most Popular Baby Names In NZ

Some parents-to-be know the name they will call their child even way before they’re conceived. Others (me included) are trying out options in the delivery suite! To help you find the right name for your baby, or to learn how popular your child’s name is, here are the most popular names Kiwi parents choose for babies born during 2021.

According to statistics released by the Department of Internal Affairs’ Smart Start website in 2021 there were 56,013 births registered in New Zealand with 16,790 different first names.

She’s back!

After Amelia and Isla finally kept Charlotte from the top spot in the last two years, the ever-popular Charlotte has regained her crown as the top girl’s name in 2021.

For the boys, however, there is just no stopping the Olivers who I’m sure must occupy every other household in NZ by now, having been the top choice since 2013!

Nikau and Mia are also the most popular Māori names again for boys and girls respectively, while Manaia has become the most evenly split gender-neutral name for 2021, with an almost 50/50 split between boys and girls.

Most popular names in 2021

Rounding out the top five for the girls are Isla, Amelia, Olivia, and Ava. For the boys – Noah, Jack, Leo and George complete the top five. Matilda is a new entrant to the girls’ top 20 from the previous year. Meanwhile, Luca and Arthur make their way into the top 20 boys’ names and Theodore has moved into the top 10. The top 100 names are shown below.

Want to know what the most popular names were in the year your baby was born (or even yourself)? Pop over to the SmartStart website to go right back to 1954.

Let’s go right back!

Want to know what the most popular names are in New Zealand from the whole of the last 170+ years? Statistics are available for the most popular names for birth registrations from 1848 to the end of 2020. While not all names are included, there are the top 350 female and male first names, plus the top 350 surnames (see more here).

The top 10 names in NZ since 1848 are:

Girls

  1. Mary
  2. Margaret
  3. Elizabeth
  4. Sarah
  5. Patricia
  6. Catherine
  7. Susan
  8. Helen
  9. Emma
  10. Alice

Boys

  1. John
  2. William
  3. James
  4. David
  5. Robert
  6. Michael
  7. Peter
  8. Thomas
  9. George
  10. Richard

New Zealand’s 100 most popular baby names in 2021

RANK GIRLS NUMBER BOYS NUMBER
1 Charlotte 227 Oliver 308
2 Isla 214 Noah 265
3 Amelia 206 Jack 235
4 Olivia 185 Leo 234
5 Ava 184 George 222
6 Willow 180 Charlie 200
7 Lily 174 Lucas 190
8 Isabella 171 Theodore 187
9 Mila 170 William 181
10 Ella 165 Luca 172
11 Mia 164 Elijah 171
12 Sophie 163 Liam 167
13 Hazel 160 Mason 167
14 Harper 156 James 166
15 Emily 153 Thomas 166
16 Lucy 150 Hudson 160
17 Chloe 148 Arlo 155
18 Grace 144 Lachlan 152
19 Ruby 135 Archie 147
20 Matilda 125 Arthur 144
21 Zoe 125 Hunter 144
22 Freya 123 Oscar 140
23 Aria 120 Max 136
24 Ivy 114 Levi 133
25 Sophia 113 Finn 128
26 Evelyn 109 Hugo 127
27 Georgia 109 Ethan 124
28 Olive 109 Asher 122
29 Riley 104 Henry 118
30 Luna 103 Cooper 117
31 Ellie 99 Carter 114
32 Florence 98 Ezra 110
33 Millie 98 Lincoln 107
34 Maia 97 Felix 106
35 Sienna 96 Alexander 105
36 Evie 94 Archer 105
37 Frankie 94 Beau 105
38 Layla 92 Harrison 105
39 Ayla 90 Eli 104
40 Isabelle 87 Jackson 104
41 Poppy 87 Louis 97
42 Aurora 86 Theo 96
43 Emma 85 Benjamin 95
44 Madison 83 Nikau 93
45 Billie 79 Isaac 87
46 Mackenzie 78 Joseph 87
47 Alice 75 Joshua 86
48 Thea 75 Blake 85
49 Daisy 72 Daniel 82
50 Indie 72 Samuel 82
51 Abigail 71 Grayson 81
52 Maeve 70 Caleb 80
53 Penelope 70 Jasper 79
54 Quinn 70 Luka 79
55 Emilia 69 Braxton 78
56 Scarlett 68 Edward 78
57 Violet 68 Jacob 78
58 Addison 67 Harry 77
59 Sofia 67 Harvey 77
60 Eva 66 River 77
61 Elsie 64 Riley 76
62 Harriet 64 Roman 76
63 Amaia 63 Sebastian 74
64 Bella 63 Bodhi 73
65 Maddison 63 Luke 73
66 Sadie 63 Nico 73
67 Stella 63 Louie 72
68 Elizabeth 62 Quinn 72
69 Eleanor 61 Logan 70
70 Eden 60 Ryan 68
71 Margot 59 Oakley 66
72 Piper 59 Charles 65
73 Harlow 58 Jordan 64
74 Zara 58 Ari 62
75 Hannah 57 Connor 62
76 Amber 56 Nathan 62
77 Eliza 55 Aiden 61
78 Ada 54 Ryder 61
79 Phoebe 53 Toby 61
80 Kiara 52 Austin 58
81 Zoey 51 Freddie 58
82 Kaia 50 Michael 58
83 Nevaeh 50 Spencer 58
84 Leah 48 Zion 57
85 Summer 48 Jaxon 56
86 Eloise 47 John 56
87 Jasmine 47 Micah 56
88 Maya 47 Otis 56
89 Paige 47 Gabriel 55
90 Marley 46 Isaiah 55
91 Cleo 45 Miles 55
92 Maisie 45 Zachary 55
93 Pippa 45 Leon 54
94 Rosie 45 Ezekiel 53
95 Amara 44 Tyler 53
96 Kora 44 Adam 52
97 Lilly 44 Harley 52
98 Nina 44 Tobias 51
99 Anna 43 Beauden 50
100 Bonnie 43 Jayden 50

her world julieWritten by Julie Scanlon

Julie is Editor for Kidspot NZ and our MVP. Her hobbies include laughing uncontrollably at her own jokes, annoying her family by asking questions about movie plots, and never taking anything too seriously. She speaks a little Spanish and a lot of Yorkshire. 

Favourite motto to live by: “It ain’t nothing but a thing”

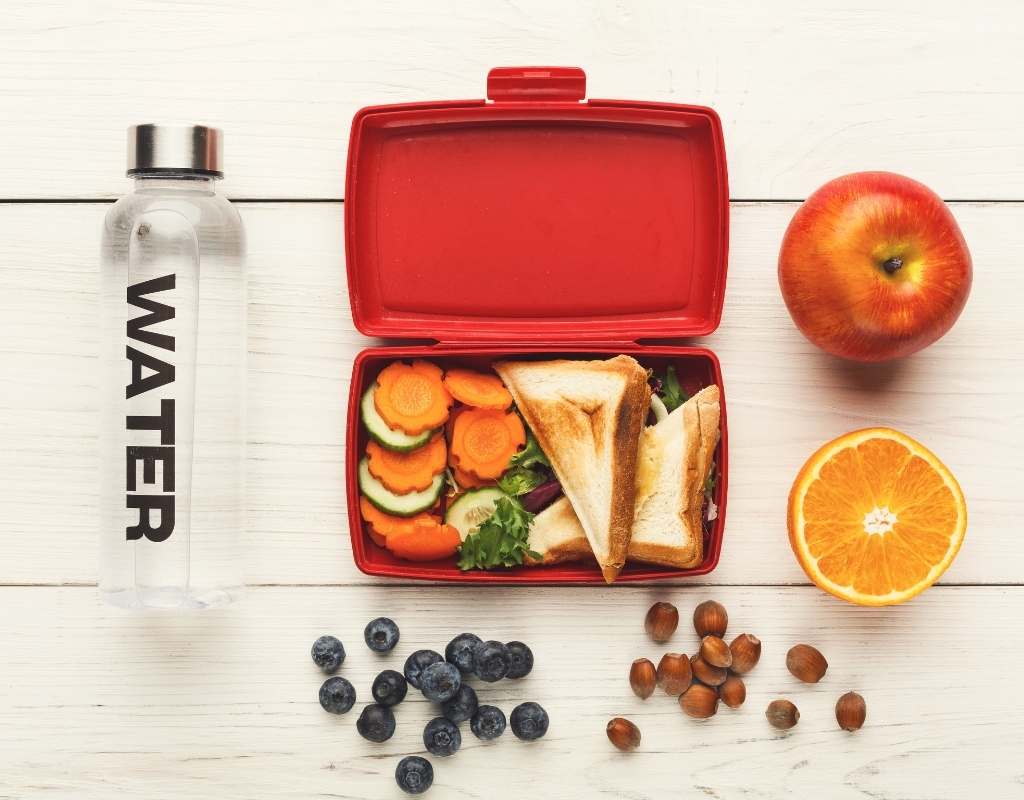
Fun & Easy Treats For School Lunches & Snacks

Looking for some easy inspiration for packing school lunches? When you’re filling the lunch boxes for the kids, don’t forget the occasional fun treat too.

Opt for one of our tastebud-tempting lunch box or after-school ideas and recipes for when you want to treat the kids.

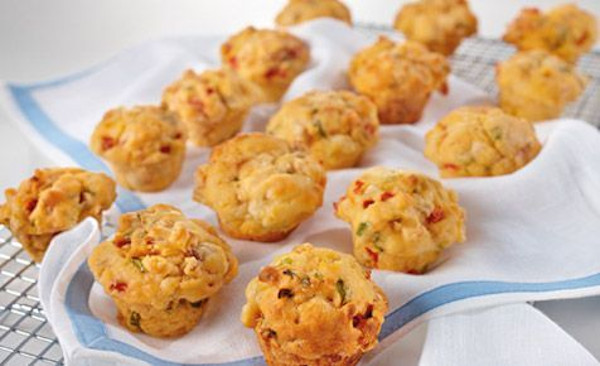
Mini baked bean muffins

Mini baked bean muffins

Savoury muffins are a great lunch box option. These mini muffins are ideal as a protein-packed snack for kids.

Recipe: Mini baked bean muffins

Homemade bliss balls

Homemade bliss balls

These easy homemade bliss balls require no baking. They’re great for lunchboxes or an after school snack. They may look like a treat but they’re actually healthy as well as super delicious.

Recipe: Homemade bliss balls

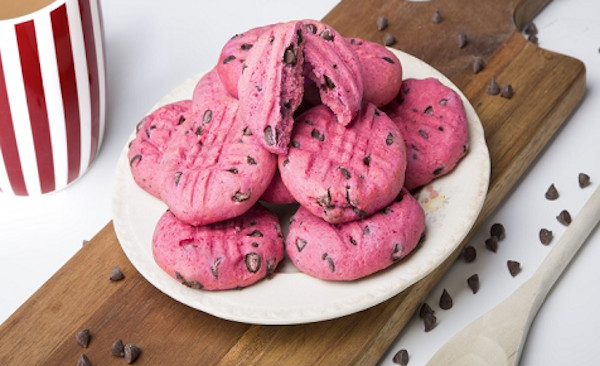
Beetroot cookies

Beetroot cookies

These biscuits will appeal to any little kiddies that love PINK! Just don’t tell them what’s in there and they’ll never know that they’re getting some great vitamins from the secret ingredient – beetroot!

Recipe: Beetroot cookies

Chocolate chip scones

Chocolate chip scones

Give traditional scones, a chocolate twist! Adding chocolate chips to these golden scones brings them to a whole new level of deliciousness.

Recipe: Chocolate chip scones

Cheese twists

Cheese twists

These crunchy cheese twists are fantastic with a pesto or chutney topping – as well as Marmite or Vegemite. The kids (and adults!) will love them.

Recipe: Cheese twists

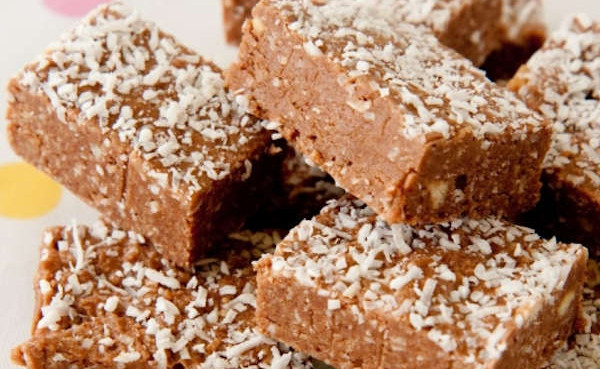
Crunchy chocolate slice

Crunchy chocolate slice

This chocolate slice is fun to make and the kids can get involved too. It’s quick and easy and a winner as an after school treat.

Recipe: Crunchy chocolate slice

her world julieWritten by Julie Scanlon
Julie is Editor for Kidspot NZ and our MVP. Her hobbies include laughing uncontrollably at her own jokes, annoying her family by asking questions about movie plots, and never taking anything too seriously. She speaks a little Spanish and a lot of Yorkshire. 

Favourite motto to live by: “It ain’t nothing but a thing”

9 Ways To Help Kids Stay Focused In School

It seems like from the moment our kids are able to walk and talk, we’re trying to get them to sit still and be quiet! Kids are naturally inquisitive and full of energy and imagination, so when they need to focus on schoolwork it can be hard to master the concentration levels needed.

When our kids are at school, we aren’t able to personally guide them to avoid distraction, concentrate on tasks, or listen to instructions. However, there are strategies that we can implement at home that can help kids to focus while at school.

Sleep and nutrition

Sleep is essential for recharging not only our bodies but our brains too. Think of sleep as a time for repair and maintenance. During sleep our brain also makes sense of our day, “filing” useful information and learnings, and ditching what’s no longer needed. Try to stick to a set bedtime routine so your child knows what is expected.

Good sleep is complemented by good nutrition. Nutrients needed for the body to build healthy brain cells include protein, essential fatty acids (like Omega 3), glucose and many vitamins and minerals. Foods like fatty fish (salmon, tuna, sardines), blueberries, cabbages, cauliflower, nuts, broccoli, oranges, capsicum, kiwifruit, and eggs are just some of the foods with brain benefits but a balanced diet will also aid your child’s learning.

A calm, organised morning routine is also ideal for setting them up for the day ahead – not forgetting a nutritious breakfast, of course.

Other strategies

Mindfulness

Practising mindfulness is a great way to provide kids with a tool that can help them concentrate as mindfulness is all about paying attention and focusing awareness on the present moment. At home, practise taking a break for a few minutes to sit quietly, think about their breathing (slowly, in and out), and take a moment for themself before refocusing on the task. When in class, closing their eyes and taking even a few deep breaths can help.

Talk to the teacher

Teachers are just as keen as parents for children to focus whilst in class. If your child is struggling with concentration, talk to your child about distractions and ask the teacher if they can move to a desk closer to the front of the class where they can hear and see the teacher better, or move away from talkative friends or a window. Your child’s teacher will no doubt have some ideas too.

Engage with your child’s learning

Chances are, if you’re not interested in what your child is learning, then they may lose interest too. When you ask your child about their day, ask them about what topics they’re learning about or projects they’re working on. If it’s something you don’t know about, grab a book about it, or just Google it and engage with them about the topic – learning together is awesome family time!

Games to build skills

Your child may hate math but do they love to play card games with you? Card games and board games are great for quality time with the kids and there are so many learning aspects, including concentration and patience. Practising these skills at home helps your child to transfer them to the classroom.

There are also active games like Simon Says, Freeze Tag, Follow the Leader, and Musical Statues that help kids learn self-control.

Role-play at home

Young kids learn more easily when engaged in play. So role-playing the skills needed for school is a great way to set your child up for school success. You can pretend to teach them some basic writing and math on a blackboard, play shop, sit on the floor for storytime and even reverse the roles and have them be the teacher so they can find ways to bring YOUR focus back to the classroom!

Organise the schoolbag

Turning up to school without what’s needed for the day’s learning can lead to frustration. Each day after school, clear out the backpack, check for school notices and homework, then repack for the next day with just the lunchbox and drink bottle to pop in the next morning.

Get up and move!

It may seem counter-intuitive to talk about movement when trying to get kids to focus but physical activity can improve your child’s mood and cognitive performance by triggering the release of dopamine and serotonin. Kids need plenty of time every day involved in active and unstructured play so provide them plenty of opportunities to just run around, kick a ball about, skip rope, swim, or whatever.

There’s actual science behind it too – kids need to develop proprioception and vestibular sense by experiencing physical challenges that help their brain understand their body and the way their body engages with their surroundings. This in turn helps them to focus and learn without distraction.

her world julieWritten by Julie Scanlon

Julie is Editor for Kidspot NZ and our MVP. Her hobbies include laughing uncontrollably at her own jokes, annoying her family by asking questions about movie plots, and never taking anything too seriously. She speaks a little Spanish and a lot of Yorkshire. 

Favourite motto to live by: “It ain’t nothing but a thing”

Choosing The Best School Lunch Box, Drink Bottle & Accessories

With a new school year comes the chance to fill your child’s lunch box with some delicious and nutritious bites to see them through their busy day. When it comes to choosing a good lunch box and drink bottle, there are several things to consider.

Choosing a lunch box and a drink bottle that works for your child can be a bit of trial and error. So to avoid the hassle, here are our tried-and-tested helpful tips on what to look out for.

Choosing the right lunch box

Choosing a lunch box that works for your child’s particular tastes and preferences can begin to feel like a harder decision than choosing their name! Lunch boxes come in a huge variety of sizes and styles. Here are the most popular ways for kids to transport their lunch to school (and, let’s face it, sometimes home again too!).

Bento-style

Bento-style lunch boxes are great for kids who like a range of foods without the need for plastic wrap to keep things from getting jumbled up together. They’re a popular option for schools that promote a litterless lunch and are great for those looking to be more eco-friendly. There’s a huge variety of bento boxes to choose from so consider how big your child’s appetite is and the type of foods they like to find an option that suits them. For instance, leak-proof styles will enable you to include yoghurt. Adjustable compartments are great for fitting in different sized rolls or wraps.

Bento lunch boxes also enable you to buy in bulk, therefore saving money and packaging waste, and you can portion out snacks to suit your child’s appetite.

Lunch bag

If your child changes lunch preferences as often as they change their socks (is that often?), then a lunch bag is a great option. These zip-up lunch options can accommodate a range of small, reusable containers. A variety of tubs will give you plenty of options for different snacks and sandwiches. To clean the bag you can wipe out the inside and the tubs can be washed easily.

Standard lunch box with clip-shut lid

This standard lunch box is no fuss, big enough for plenty of yummy sandwiches and easily opened, closed, and washed ready for the next day. But the contents will need to be wrapped or put into smaller tubs to keep it from all mixing together in a big mess.

Keeping it cool

If your child’s lunch bag or box can accommodate their drink bottle then freeze that the night before to keep everything cool and fresh. If not, a small freezer block is simple to pop in with the lunch.

Picking a drink bottle

Drink bottles are one of those items that kids tend to use a lot during the school year, for the school day as well as sports, travel and on the go on the weekends.

When choosing a drink bottle for your child, consider how much water they tend to consume. Keeping hydrated is important but all kids are different and the amount of water they will drink varies. Choose the size of drink bottle that will provide enough hydration without the need to refill continuously but also isn’t so huge that it weighs their bag down! If you have a particularly thirsty child, check how easy it is to refill water bottles from the school’s drinking fountains.

Aluminium or stainless steel bottles are a durable option, while double-walled bottles will keep their drink cool for longer. Plastic bottles are lighter and tend to be less expensive. When choosing a plastic bottle, opt for ones made from recycled plastic that are phthalate and BPA Free to avoid any nasties. A freezer-safe bottle gives you the option to freeze a bottle of water the night before for cool refreshment the next day. Avoid glass bottles for school use.

It’s also important to choose a drink bottle that has a good seal to avoid a backpack of soaked books! Look at the way that the bottle opens and closes. Does it close with a waterproof seal? Could it be easily knocked open? For young kids, also consider whether it is easy for them to open and close the bottle without assistance.

What is your best lunch box tip for school lunches?

See more:

her world julieWritten by Julie Scanlon
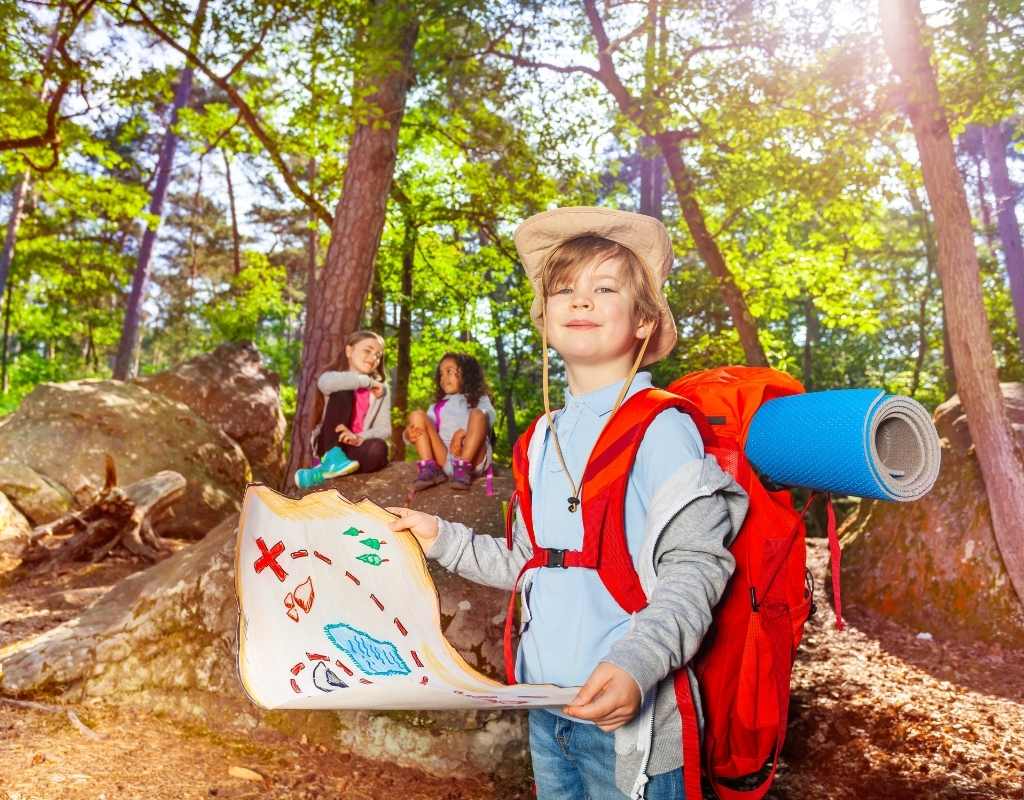
Julie is Editor for Kidspot NZ and our MVP. Her hobbies include laughing uncontrollably at her own jokes, annoying her family by asking questions about movie plots, and never taking anything too seriously. She speaks a little Spanish and a lot of Yorkshire. 

Favourite motto to live by: “It ain’t nothing but a thing”

A Parent’s Guide To BYOD & School Technology

Our world is full of technology that we use every day. And our children’s learning has moved into the digital age with most secondary schools requiring students to have access to a digital device, often referred to as BYOD (bring your own device).

If the technological world is moving along at a pace that you’re struggling to keep up with, the prospect of BYOD can seem daunting, especially when there are a million options to choose from and new technology is added frequently. To help you get your head around BYOD and school technology, here’s a quick guide.

Choosing a device

When your child needs to have a digital device for schoolwork your first port of call should be with the school. It pays to check with them before you purchase anything to ensure you are buying something with the minimum specifications needed, or it can be an expensive mistake. Your child’s school will also often have a recommended device list. As your child moves through high school if a device upgrade is needed and your child is taking a design or digital technology course, check with the teacher for recommendations. Technology stores can also offer advice on what’s suitable.

Laptops are powerful but often expensive and can be heavy. Chromebooks have smaller storage and less capability but cost less than a full laptop and will likely suffice for basic schoolwork. Tablets are usually the cheapest option but often are insufficient for high school classes.

What to consider

  • Screen size: Big screens are great for viewing but a bigger screen usually means a heavier and bulkier device. Go too small on the other hand and viewing is difficult. Screens are measured like TVs, diagonally from top to bottom. Between 11.5″ and 14″ is usually sufficient but check with the school’s minimum requirement. Check out a few options and see what suits your child best.
  • Weight: The lighter the device the better but this needs to be balanced out with a suitable screen size, etc.
  • Operating System: A device with a newer operating system (ie Windows 11) is often more expensive than one running an older version but will give a better user experience. Getting an end-of-line device can often be more affordable but regular software upgrades may not always be available.
  • RAM Memory: This is the memory that your device uses when performing tasks. A device will usually need at least 4GB of RAM memory to operate efficiently with today’s technology requirements but check with the school specifications.
  • Storage: SSD or “solid-state storage” tends to be quicker to respond but will usually be smaller in capacity than hard drive storage. Some devices offer both storage options. Again, check with your school’s specifications. 128GB SSD is often a minimum requirement.
  • Battery life: This is a biggie. You want to avoid the device running out of get up and go halfway through the day (or halfway through an exam!). Modern devices usually have a good battery life but check the specs.
  • WiFi and Bluetooth: The device will need to be able to connect to the school’s WiFi but this is built-in to modern devices. Bluetooth will enable the use of wireless headphones or a mouse though there are USB plugins that can also be used for this.
  • Webcam: This is often built into modern devices and is a requirement for at-home learning when video conferencing is needed.

Technology accessories

Modern learning often means that kids need additional tech to use with their digital devices. For instance, your child may require headphones and a USB flash drive for saving and sharing projects. Keep the expensive headphones for home use and choose a light and flexible pair for school use so they can be thrown in the backpack.

Using a backpack with a padded tech sleeve will help to keep the digital device safe. Sleeves are usually good for keeping devices scratch-free but if you want good impact protection then a hard-shell case is required.

her world julieWritten by Julie Scanlon
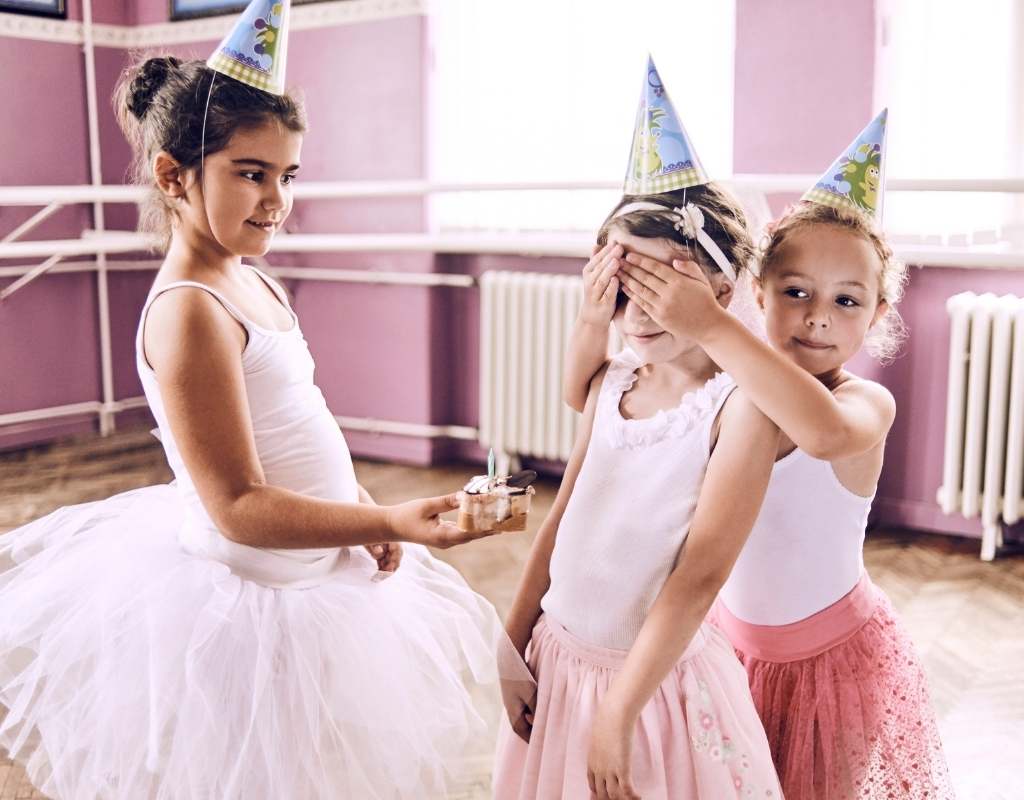
Julie is Editor for Kidspot NZ and our MVP. Her hobbies include laughing uncontrollably at her own jokes, annoying her family by asking questions about movie plots, and never taking anything too seriously. She speaks a little Spanish and a lot of Yorkshire. 

Favourite motto to live by: “It ain’t nothing but a thing”

Your Home Stock Of School Supplies

It’s 8am. You’re about to head out the door on the school run and one of the kids pipes up that they need a new exercise book for class that day. Or they need a dollar for the mufti fundraiser. Or it’s wacky hair day!

One of the things I’ve learned that is absolutely essential when you have school-age kids is that you have to keep a home supply of stationery and other useful items for school life.

Whether you use it for those last-minute supply needs, bring it out for homework and projects, or utilise the stationery for at-home learning, once you set up your supply, you will wonder how you ever did without one. And with the possibility of at-home learning being needed from time to time, your supply will enable learning to continue with as little interruption as possible.

To keep the stationery neat and tidy, choose a good-sized tub or container to hold all of the bits and bobs of your supply. Tubs with multiple compartments like tackle boxes work well and make it easier to find what you need. We love the Sistema Storage Organiser with an internal tray. Wheeled trollies are also a great option with room for exercise books, etc.

What to include in your supply

The contents of your secret supply will vary from child to child but here’s a few ideas to get you started.

  • Stationery – Keep a backup supply of pens, pencils, coloured pencils, and erasers. Having a spare ruler, glue stick, highlighters, whiteboard markers, pencil sharpener, pair of scissors, and protractor is also handy.

  • Exercise books – Keep a few of the most common exercise books, like 1B5 and notebooks, in your supply as well as refill pads.

  • A project book – Perfect for home learning, a large size activity book with blank pages will cater to a lot of topics and projects.

  • Drink bottle – As the number one school item most likely to disappear into oblivion, a spare drink bottle is essential.

  • Permanent marker – Keep a marker in your supply for that last-minute labelling of new shoes, drink bottles, etc, before they dash out the door.

  • Sunscreen – A small roll-on or tube of sunscreen is handy to keep in supply, just remember to rotate it out when you buy a new one.

  • Hair care – How often do you need a hair tie at the last minute before leaving the house? Pop a few in your supply and add some ribbons, hair chalk or coloured hair spray for that wacky hair day you forgot about!

  • Coins – Essential for mufti days, fundraisers, and public transport (… and tooth fairies!).

  • Craft items – Coloured paper or card, sellotape, googly eyes, paint, brushes, popsicle sticks, felt pens, crayons, sticky notes, etc.

  • Cards – A few generic birthday and thank you cards are priceless time-savers.

  • Tissues and masks – A few pocket packs of tissues and our new must-have accessory, a face mask or two.

  • Essential school info – Keep a copy of your child’s timetable or the school break and lunch times plus school contact numbers.

  • Sewing kit – For quick repairs, keep a small sewing kit handy including spare buttons.

  • Headphones – Great for online learning or zoom class meetings, stash a spare pair of in-ear headphones.

  • Other essentials – Keep your stapler, staples, hole punch, and spare batteries in your supply too.

her world julieWritten by Julie Scanlon
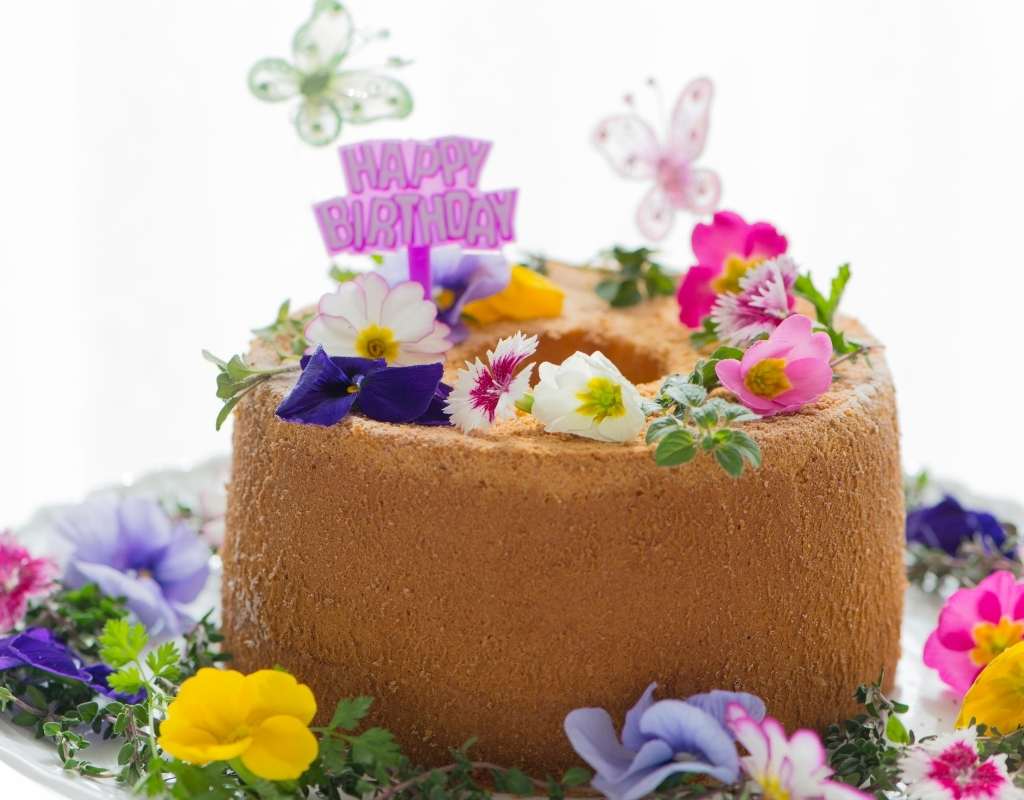
Julie is Editor for Kidspot NZ and our MVP. Her hobbies include laughing uncontrollably at her own jokes, annoying her family by asking questions about movie plots, and never taking anything too seriously. She speaks a little Spanish and a lot of Yorkshire. 

Favourite motto to live by: “It ain’t nothing but a thing”

12 Tips For a Better School Year

The new school year is just around the corner! Kids are getting excited about seeing old friends and making new ones. Teachers are getting ready to help children engage with their learning and discover new skills. Meanwhile, parents are tasked with keeping organised, creating solid routines, and supporting children to be their best.

To help, we’ve put together some tips on everything from morning strategies and homework helpers to lunch box solutions and easy organisation tips that will end up moving you to the head of the class.

1. Get all the gear

Find out as early as possible what the school requires the kids to have in terms of books, stationery, and uniform. It will make it easier for them to get a great start to the school year if they have everything they need ready for their first day.

2. Make mornings organised …

Trying to get out of the door on time when a school bell or work commitments beckon can make for a stressful start to the day. A morning routine is the key to calm! Take some time to create a morning routine for each member of your family. You might need to make one for each day so you can incorporate things like packing gear for after-school activities.

Find out more about why routines are so good.

3. … and afternoons

Embedding an afternoon routine can help take some of the pressure off the routine for the following morning. Include getting their lunchboxes out and into the kitchen as soon as they come in the door. Set aside time for homework, a snack, and some reading.

4. Keep time

The key to a successful routine is knowing the time – and this is where simple-to-read clocks are essential. Showing the children how to read the time for themselves will give your kids the power to stick to their routine and get themselves organised (without nagging from you).

5. Ready, set breakfast

A healthy nutritious breakfast puts kids in the right mood for learning and gives you peace of mind that they have the best start to their day. Kids as young as four or five years old can get a bowl of cold cereal for themselves and as they get older they can learn to safely use the toaster or microwave.

Try these breakfast ideas for quick, healthy starts to the school day.

6. Keep lunch boxes easy

While we all want to love and nurture our children by packing the best and most exciting lunch box possible, we also need to balance our aspirations against reality. Consider packing the lunch boxes the night before and pop them in the fridge – remembering that it takes some time to find the food the kids will actually eat and that you will find easy to prepare.

7. Share the load

A busy school year means less time for housework as you’re busy balancing other priorities such as homework help, after-school activities, or packing lunches. Share the housework load around everyone in the home with 36 easy chores that kids can tackle.

8. Problems are a learning experience

Term time at school isn’t always perfect and our children don’t always behave like angels or the genius we had hoped they would be. School rules, expectations and social pressures can be too much for our kids and it’s not uncommon for problems to rear their head once children settle into the school year. It can be anything from bullies to learning problems to physical problems that come up and unsettle us – be ready to embrace them!

Find out more about difficulties at school.

9. Teamwork

Even though your child is away at school every day you are still very much part of their learning team. As you already know, each child is different and the way they learn and interact throughout their school years will be too. Try to gain an understanding of the different ways that children learn, general milestones, and how you can support their learning.

Tips and techniques for better learning.

10. Labels, names, and ownership

Label all your child’s belongings including the library bag and especially the school hat. Encourage your child to dress themselves so they can manage things like taking jumpers or coats on and off at school. Explain the concept of “lost property” to your kids, so they know how to find lost items on their own. Then cross your fingers and hope they have listened to you!

11. Rules and behaviour

Schools have a range of approaches to reinforce the good behaviour measures taught by parents – so learn what they are and make sure you can back them up at home! For students in the early years, the focus will be on learning to work cooperatively with others and to follow instructions from the teacher. It’s a parent’s job to remind and reinforce the school rules at home so kids understand why certain actions are unacceptable.

Find out more about school-age children’s behaviour.

12. Sleep

You can be certain that the school year will go a lot more smoothly if your child is getting enough sleep.

Find out more about how to help your child get more rest.

Share your back-to-school tips in the comments below.

See more:

This article was written by Alex Brooks for Kidspot Australia and has been adapted for Kidspot NZ.

Annies Fruit Flats

Star rating

Tried and tested by Kidspot parents

Kidspot parents gave Annies Fruit Flats an overall rating of 4.3 out of 5

Annies – food you trust

Annies

For 33 years Annies has been making 100% fruit snacks loved by New Zealanders and the world over. Today Annies is owned by Kono, a values-led Māori owned business based in Te Tauihu (the top of the South Island). The principal values behind the Annies business are Pono, which is all about being truthful. Like the very first bar made 33 years ago, Annies fruit snacks still have only 2-3 fruit ingredients, made by people that care.

Annies airdried fruit snacks are a healthy and fun solution for kids lunch boxes, picnics, after school and sports snacks, and so much more!

Annies promise is to only ever make food you trust – this means they only use honest and wholesome ingredients. Their snacks are simple, healthy and portable, and provide inexpensive servings of some of New Zealand’s best fruit. A fun way to eat 100% fruit, children love the taste and texture.

The entire ingredients list for Annies Fruit Bars is in the name.

  • Gluten-free
  • Nut, dairy, and yeast free
  • No added preservatives
  • Vegan/vegetarian
  • No added sugar
  • GMO-free
  • Not from concentrates

Annies Fruit Flats

Fruit Flats are simply fruit flattened. Offering you single-serve, on-the-go convenience. Easy to pop in lunch boxes, handbags and sports bags, and sure to quell any hangry moment.

Available in two flavour ranges:

Summer Fruit Flats
– Apple and Apricot
– Apple and Mango Passion

Berry Fruit Flats
– Apple and Raspberry
– Apple and Strawberry

For further information, visit Annies.co.nz

Annies Fruit Flats reviews

Read the reviews below!

We’ve given 50 members with kids aged between 5 and 12 the chance to trial and review Annies Fruit Flats. Watch the video of our reviewers below and scroll down to read more reviews in the comments.

Thank you for the box we received today! We got straight into it and little miss two year old enjoyed eating hers while chilling in the couch watching paw patrol! I may have snuck one in too….. love them!! We have enjoyed trying these snacks out, perfect way to end our Friday 😍

Jennabeaumont

Loved being a part of the trial. My son and I loved these. Such a nice quick snack when we went for a bike ride. Love the flavours, couldn’t pick a favorite. Nice and convenient. My daughter wasn’t really a fan but we made up for it. These didn’t last long in the cupboard. Will definitely be trying to find these in the supermarket as my son will love them in his lunchbox.

Duky701

Loved both flavours, great for mid afternoon snack. Kids all loved them, would definitely purchase. Thanks so much.

bosco099

These fruit bars were a hit with my five and eight year old. They are a great and different way to add fruit to the lunchboxes when the kids are bored of the fresh fruit on offer. I like that they are only made of three ingredients and feel better offering this over dried fruit to my children. I personally liked the simple and easy to read packaging however my oldest said the packaging could be more fun, bright and kid friendly.

MelissaHawk

My 5yo son loved these! He would ask me in the morning when we were making his lunch if he could have ‘one of those special fruit things’ and it was guaranteed to be all gone when he got home. The 12yo boys grunt more than talk but I noticed they soon disappeared from their lunchboxes too!

Casss86

My family (adults and 8 and 6-year-old children) enjoyed these fruit bars. They definitely feel much healthier compared to other fruit string-type products. Handy to come in a box and the price seems reasonable for a quality product. I have seen them in the supermarket and will buy again. Thanks for the box to trial.

nessieok

Reviewer notes

  • If you have received the product for review, please scroll to the bottom of the page and add your feedback as a new comment.
  • Upload your review photos/videos to this Dropbox folder.
  • Each selected reviewer will receive: 1 x box of Annies Fruit Flats (8 bars per box) in either Berry Fruit or Summer Fruit flavours (chosen at random).
  • By registering for this product trial, you agree to the terms and conditions. Please note that comments, images, or videos provided by reviewers may be used by Annies on their website and social media channels to promote the product.

Please note

  • If you are selected to trial, the product will be sent to the address on your profile.
  • Please check your address now to ensure that it is up to date.
  • Not a member yet? Then sign up now.
  • Kidspot Terms and Conditions apply, including: Open to Kidspot members 18+ only. Only available for NZ residents. If you are selected, you will be required to use the product as soon as possible and supply a review, as set out in our review instructions. Your name, email address, and contact phone number will be given to the supplier for the purpose of delivery.

An Easy Recycling Guide To Help Kids Learn About Sustainability

Recycling is a great way to help the sustainability of our planet. But when there’s different numbers, confusing rules, and jargon flying around, it can make it hard to keep up.

By collecting materials for recycling that would otherwise go to landfill, we can make a difference to the health of our environment. To help kids learn what they can recycle, we’ve teamed up with Glad® to provide some tips and games to help get everything sorted.

Because it’s easy to forget what is and isn’t recyclable, we recommend popping up a “cheat sheet” of what your household usually uses that can be recycled, either on the family noticeboard, attached to the fridge or above the recycle bin.

Plastic

Most plastics in New Zealand that are recyclable will have a triangle symbol with a number inside (usually located on the bottom of the item). Each number indicates a different type of plastic.

Some plastics are easier to recycle than others and the collection of recycling varies between countries and even councils, depending on what they can process. Check with your local council to confirm which numbers are recyclable. Including the numbers on your recycling cheat sheet is a handy way for the whole family to remember which they can recycle.

Plastics for recycling should be empty and rinsed. Your local council will be able to advise whether lids should be kept on or removed and if plastics should be squashed or not.

Here is a quick guide for each type of plastic:

recycling

Plastic #1 (PET)

Found in: drink bottles, food containers, food trays
Recyclability: Curbside recyclable

recycling

Plastic #2 (HDPE)

Found in: milk bottles, food containers
Recyclability: Curbside recyclable

recycling

Plastic #3 (PVC)

Found in: Shampoo bottles, plumbing pipes, packaging wraps/bags
Recyclability: Check with your local council

recycling

Plastic #4 (LDPE)

Found in: Squeezable bottles, film and stretch wrap
Recyclability: Check with your local council

recycling

Plastic #5 (PP)

Found in: Sauce bottles, medicine bottles, takeaway containers, food containers
Recyclability: Check with your local council

recycling

Plastic #6 (PS or EPS)

Found in: Disposable plates, cups, food containers, toys – #6 polystyrene (PS) or styrofoam cups, food trays – #6 EPS (expanded polystyrene)
Recyclability: Check with your local council

recycling

Plastic #7 (Composite)

Found in: Milk/fruit juice cartons, oven bags
Recyclability: Check with your local council

Paper and cardboard

Paper products come in many different variations – and most of them are recyclable. Cardboard boxes and tubes, newspapers, magazines, egg cartons, office paper and envelopes, junk mail, toilet paper rolls, and books are just some of the items that can be recycled. Always check with your local council for what they can and can’t accept. Some councils will even recycle pizza boxes if they are clean enough!

Make sure the paper is clean and dry. Usually waxy or plastic covering on paper is not recyclable. Small pieces of paper (smaller than say, a credit card) and dirty paper (ie tissues) can not be recycled. Large boxes should be flattened down for collection.

Add what your household usually uses to your recycling cheat sheet for easy reference.

Glass

Nearly all the glass jars and bottles that we buy at the supermarket are recyclable! Check with your local council around any rules for sorting glass for recycling. Remember to clean the jars or bottles before putting them out for recycling and check with your local council for any rules regarding sorting colours or removing lids.

Glass from other sources, ie windows, electronics, etc, are not usually recyclable.

Tins and cans

Both aluminium and tin can be recycled. This includes drink cans and food tins. They should be cleaned out before recycling. Check with your local council to find out if items should be squashed or not.

Get the kids involved with a recycling game

The responsibility can be shared by the whole family, encouraging children to carry on those habits as they grow older. To help get the kids involved, there are ways to make it more fun. Try a recycle challenge to see if the kids can remember what is recyclable and what’s not. Or give them the task of sorting the recycling for a sticker on their chore chart.

Written by Kidspot NZ with information provided by Glad®

How Your Family Can Do Their Part To Protect The Planet

Protecting our planet may sound like something that requires a huge global effort. But if we all do our part, even changes at a family level can make a difference.

To help you find ways that your family can do their utmost to control their carbon footprint, reduce pollution and waste, conserve water, and leave a healthier planet for the next generation, we’ve got some tips that you can start on today.

Reduce, reuse, and reycle

The three R’s of reduce, reuse, and recycle are some of the most important for the health of our planet. They can also help to save us money! More and more people are conscious of recycling rubbish to lessen the impact on landfill and to make the most of resources we already have, but don’t forget about reducing and reusing which come before the need to recycle.

Reduce

  • Shop smarter by using a meal plan and shopping list to only buy what you need and reduce food waste
  • Choose products with minimal or recyclable packaging or bulk buy using your own containers
  • Choose locally grown or made products to reduce mileage
  • Buy products made from recycled materials
  • If you can, buy second-hand rather than new
  • Look to shop with businesses with transparent supply chains and sustainable practices, who are producing ethical reports

Reuse

  • Fix broken items rather than throwing them away – local communities often have workshops to help fix household items
  • If an item is still usable, consider donating or selling it
  • Upcycle furniture to give it a new use
  • Refill a drink bottle rather than buying bottled water
  • Use reusable shopping bags, containers, and straws rather than single-use plastics
  • Use washable cloths to clean rather than wipes.

Recycle

  • Utilise local council recycling collection to recycle paper, cardboard, glass, tins, cans, and plastics (check with your council regarding what they accept)
  • There are also specific collection schemes for soft plastics, old mobile phones, printer cartridges, batteries, e-waste, and more which can be found with a quick Google search
  • Several brands also provide free recycling – visit the Terracycle website to find out more.
  • Compost fruit and vegetable scraps

Drive less

Kiwis love getting about in their cars, but vehicles contribute to pollution and the use of non-renewable resources.

  • Plan ahead to use your vehicle as little as possible by taking just one trip to the supermarket each week or carpooling with your workmates or friends
  • Create a walking bus for school kids
  • Utilise public transport, walk, or cycle
  • If you can, choose an electric vehicle for your next family car

Reduce energy consumption

Reducing the amount of energy that your home uses not only helps the environment, it also helps reduce your bills.

  • Turn off lights and electronics when not in use
  • Choose low energy lightbulbs
  • When purchasing new appliances, always look for the energy star rating
  • Wash your laundry in cold water and line-dry
  • Only run the dishwasher or washing machine when you have a full load
  • Once you’ve finished cooking the dinner, pop the baking in the already warm oven and save on having to pre-heat the oven

Grow your own

Growing your own fruit and veggies is a rewarding and fun way to get the whole family involved in being eco-conscious. What could be better than fresh veggies that go straight from garden to plate? Get tips for starting your own garden here https://kidspot.co.nz/family-time/setting-up-your-first-family-veggie-garden/

Eating more plant-based meals is great for the environment, the budget, and your health! Try a couple of meat-free dinners each week.

Planting native trees is also a great way to help the planet breathe a little easier. Plant on your own property or get involved in a community project.

Conserve our water resources

Water is a precious resource for our country and planet.

  • Take showers instead of baths and set a timer for those who linger a little too long!
  • Don’t leave the tap running when brushing your teeth
  • Collect rainwater for watering the garden
  • Only flush the three Ps. Pee, poo and paper (toilet)
  • Don’t pour grease or oil down the drain
  • Dispose of paint and chemicals responsibly
  • Use eco-friendly household detergents
  • Wash your car on the grass to help filter the runoff

For more ways to protect the environment, visit https://environment.govt.nz/what-you-can-do/take-action/

her world julieWritten by Julie Scanlon

Julie is Editor for Kidspot NZ and our MVP. Her hobbies include laughing uncontrollably at her own jokes, annoying her family by asking questions about movie plots, and never taking anything too seriously. She speaks a little Spanish and a lot of Yorkshire. 

Favourite motto to live by: “It ain’t nothing but a thing”

The appearance of external hyperlinks does not constitute endorsement by Kidspot NZ of the website, information, products or services contained therein.

What is your family doing to reduce your carbon footprint?
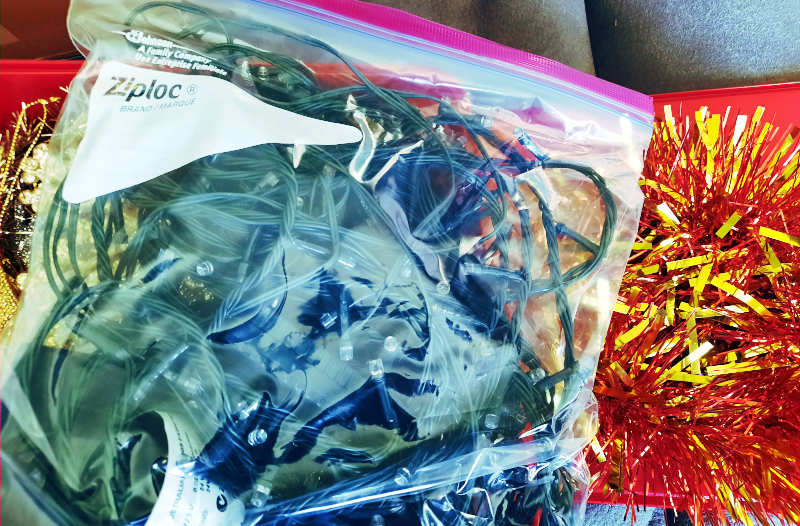
See more:

Review: SMA Toddler

Star rating

Tried and tested by Kidspot parents

3.9 out of 5: Kidspot parents were pleased with SMA Toddler.

Help support their nutrition with SMA® Toddler
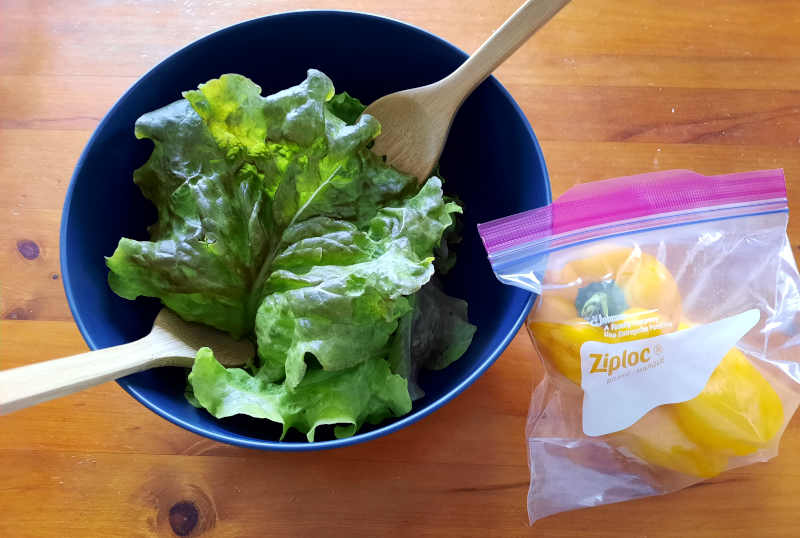
SMA® Toddler is a nutritious milk drink for children from 1 year of age. Developed to help ensure a good nutritional foundation, it’s enriched with Iron to support normal cognitive development, plus Calcium and Vitamin D for the normal growth and development of bones and Zinc for the normal function of their immune system.

SMA® Toddler is designed to be enjoyed supplementary to a varied diet, when energy and nutrient intakes may not be adequate. In a time when family budgets are under pressure, this is a high quality and yet affordable option for parents, offering you confidence and reassurance that you are supporting your child’s nutritional needs.

For further information, visit meandmychild.co.nz

Read the reviews

We gave 30 members with toddlers the chance to trial and review SMA Toddler. See their photos below and scroll down to read more reviews in the comments.

My boy is almost 3 years old and a very picky eater. We always worry about him not getting enough nutrition. We gave him a bottle of sma toddler formula and he finished off in one go. We will definitely buy in future and let our friends know about this amazing formula. The formula dissolves very easily and our boy loves it and we are happy that he is getting all the nutritions needed for his development.

Cathy

We were lucky enough to trial those product with my almost 2 year old son. He’s been on the same brand of formula since he was born and is still loving his milks throughout the day. This product was well received by my son. It has a pleasant sweet smell but doesn’t taste sweet (yes I tried some too). It seems creamer in colouring and taste then our previous brand. He enjoyed the taste and happily took it regularly throughout the day. Kept him full throughout the night too.

Meggles

My son has just turned 12 months so we are grateful to have been apart of this trail as we were looking in to our options for follow on formula. I was honestly shocked with how well he switched from his previous formula, he approved of the taste & texture there was no fuss made from him. He can be a rather spilly boy but we have not any issues with this formula

Maggie123

Thank you so much for the opportunity to try SMA. This is the first formula that my son drinks till THE LAST DROP so I highly recommend this product to fussy eaters. SMA has creamy taste and a hint of vanilla. And the fact it’s enriched with iron, vitamin D and zinc, just brilliant for children, especially the ones who were born prematurely like my son.

Linh91

Reviewer notes

If you have received product for review*, please scroll to the bottom of the page and add your feedback as a new comment. Upload your review photos to this Dropbox folder.

Each selected reviewer will receive:1 x 900g tin of SMA Toddler.

*By registering for this product trial, you agree to the terms and conditions.

Please note

  • If you are selected to trial, the product will be sent to the address on your profile.
  • Please check your address now to ensure that it is up to date.
  • Not a member yet? Then sign up now.
  • Kidspot Terms and Conditions apply, including: Open to Kidspot members 18+ only. Only available for NZ residents. If you are selected, you will be required to use the product as soon as possible and supply a review, as set out in our review instructions. Your name, email address, and contact phone number will be given to the supplier for the purpose of delivery.

Establishing Habits Of Practising Gratitude

Promotion for Save the Children

Save the Children, with some help from Peppa Pig, is helping tamariki and whānau learn about mindfulness in children throughout October. An important part of mindfulness is practising gratitude. We’re grateful that mum-of-one, Elisabeth, has shared her tips for encouraging kids to show gratitude.

It wasn’t that long ago that I felt slightly squeamish at the thought of “practising gratitude,” says Save the Children’s Elisabeth Fraser. But now, I see the benefits of establishing these habits early for my preschooler and me.

While I’ve always been an optimistic and positive person, my science-wired brain felt the idea of “practising gratitude” swayed too much towards alternative therapies, and I resisted. However, it wasn’t until I stumbled across a Ted-Talk about the hard-science of gratitude, that I began to rethink how this practise can be woven into daily life, both to support my well-being as a mum, and to establish these habits early in life for my young daughter.

What is gratitude?

Gratitude is an appreciation for what we have in our lives, both tangible and intangible, big and small. When we practise gratitude, we consciously acknowledge and recognise these things. A growing amount of research is showing that gratitude is associated with improved wellbeing, increased resilience and improved social relationships. When controlling for lifestyle factors, people vary in how grateful they are on a daily basis, and those that are more grateful are happier. Research shows that taking only a few minutes a day to simply think about, or write down, three to five small things we’re grateful for can have profound effects.

Practising gratitude

Encouraging kids to voice their gratitude

Children today are facing unprecedented challenges in daily life. Along with the day-to-day trials and tribulations of childhood, children are now also facing increasing levels of anxiety around issues such as climate change, housing insecurity and the COVID-19 pandemic. If practising gratitude can build resilience and improve wellbeing, then that’s a strategy I want my daughter to have in her tool-belt.

About six months ago I set about trying to make this a habit in my two-person household. Sometimes around the dinner table, sometimes while tucking her into bed at night, I ask my 4-year-old daughter, “What are you grateful for today?” Initially, her answers were focused around the things that we had done, “Going to the playground!” Of course, a perfectly legitimate answer. However, I love how over time her answers have become more thoughtful and diverse. “Fish and chips, grandma, flowers, our warm house, worms (because they provide food so we have birds to listen to), our cat Gingerbread, my friends.” Now, most evenings, it’s not me who drives the conversation, but my daughter. “Mama, what are you grateful for today?” Or when we have guests around the dinner table, “Bibi, what are you grateful for today?”

Practising gratitude

Getting creative during lockdown

As with most in Tāmaki Makaurau, I have had to get creative at home to keep my daughter happy and learning. Lucky for me, in my work as education coordinator for Save the Children NZ, we have been working with Peppa Pig and Twinkl to promote ‘Peppa Practices Mindfulness’ – a month of activities to encourage mindfulness in kids. Twinkl have created a host of beautiful resources which can be found here. One of my favourites has been the 30 days of gratitude photography project. Every day, my daughter knows she can ask for Mama’s phone to take a photo of something that she is grateful for. Highlights have included ants, our lettuce seedlings finally starting to grow, ice cream, clouds … I have created an album on Google Photos for her where the photos are kept together and we will look at them at the end of the month to reflect. This has been such a great project, easy and engaging with rich learning. It suits all ages, and all learning environments – home or school.

Mindfulness practises

What I love about consciously practising gratitude is that it has shifted my mind to a more positive state, instead of going to sleep thinking about the negative, I fall asleep thinking about the good. It is so easy and takes very little effort or brain power at the end of a long day, it improves the well-being of our whole family, and it is something we can do together. Mindful practises such as gratitude are a state of mind, and a way of thinking. Habits that start young are more likely to last a lifetime and it’s never too early (or too late) to start.

Practising gratitude

Written by Elisabeth Fraser for Kidspot NZ. Elisabeth is Save the Children’s Child Youth and Schools Engagement Co-ordinator, teacher and mother to Sophie. 

Join the Catch Up

Join our community of parents and let the Kidspot Catchup be your guide to creating unforgetable family moments.